 Database Tutorials MSSQL, Oracle, PostgreSQL, MySQL, MariaDB, DB2, Sybase, Teradata, Big Data, NOSQL, MongoDB, Couchbase, Cassandra, Windows, Linux
In today’s article, I will explain how the Clients are Automatically Connected to the New Primary in Role Changes(SINGLE NODE).
In case of Switchover or Failover, it is very important that the clients try to connect to the correct database.
Clients connected to the Primary database should no longer try to connect to the Primary after Role Reversal operations, and try to connect to the old Physical Standby new Primary database.
This is provided by database services managed by the DBMS_SERVICE package in Single Node and by SRVCTL in RAC structure.
Database services act as abstraction layer between Clients and Database instance. They register to the Listener.
Since the database services are registered to the Listener, the clients continue to perform their duties over the other instance defined in Failover or Switchover states, by enabling the clients to connect to the database services instead of the database instances.
AFTER STARTUP ON DATABASE Trigger is used so that clients can automatically connect to the new Primary database as a result of the role change process.
Trigger is created in the Primary database and automatically replicated to the entire Standby database.
There are database services defined in Default. They do not need to be recreated. They only need to be started after a role change.
DG_PROD: Primary Database
DG_RTQ: Active Data Guard
DG_SNAP: Snapshot Standby Database
DG_LSBY: Logical Standby Database
The created services must be saved in the TNSNAMES.ORA file.
Let’s Test
1. After the role change, the service name to be created is added to the TNSNAMES.ORA file so that the clients can connect to the physical standby database. The creation will be done from NETMGR as recommended by Oracle.
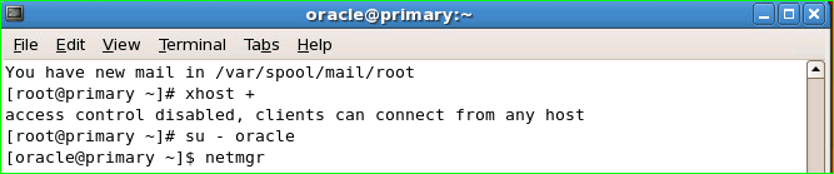
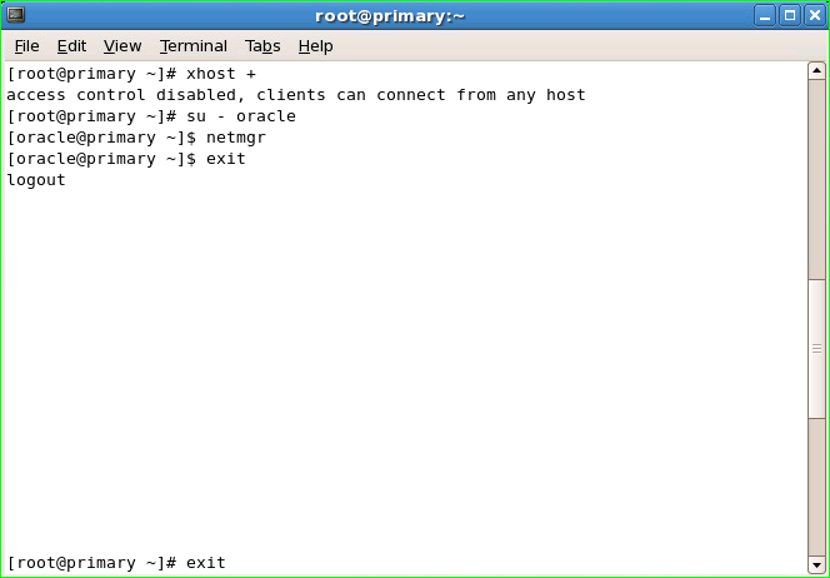
a. By connecting to the server from terminal, switch to Oracle user and run netmgr.
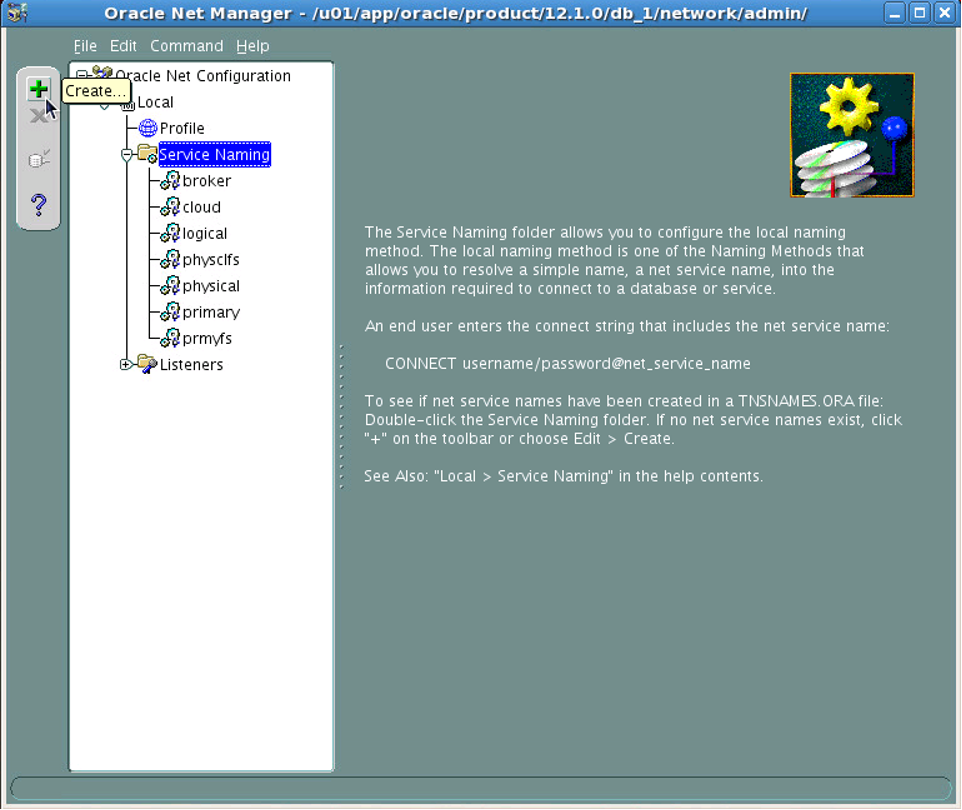
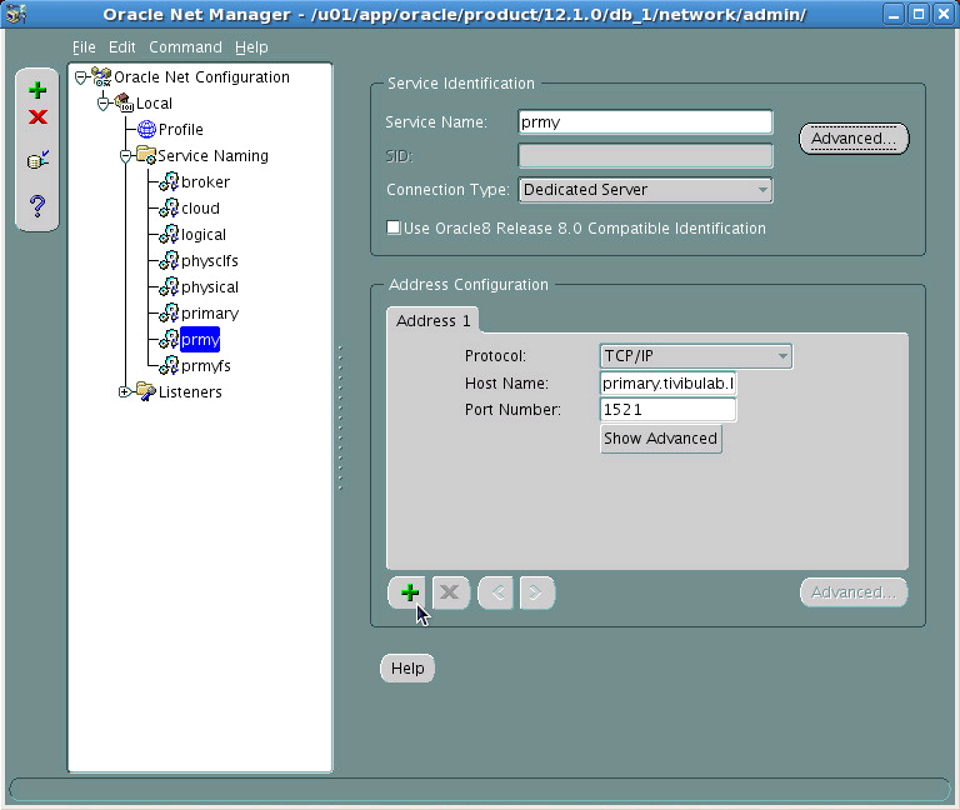
b. In the window that opens, while the Service Naming tab is active, click the Create button with + sign.
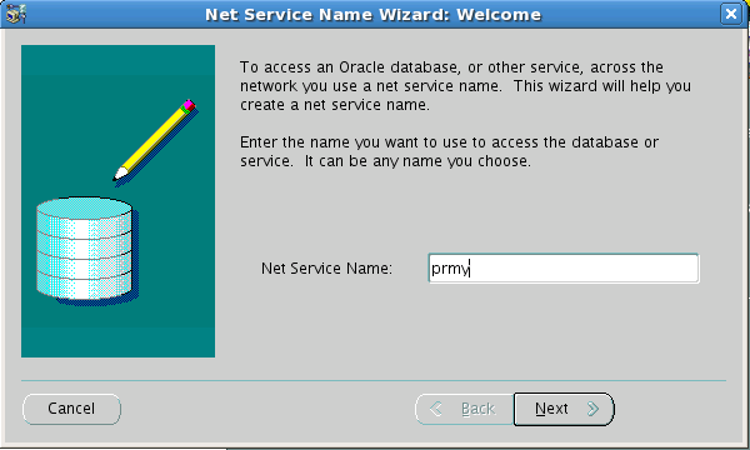
c. We write “prmy” in the Net Service Naming field.
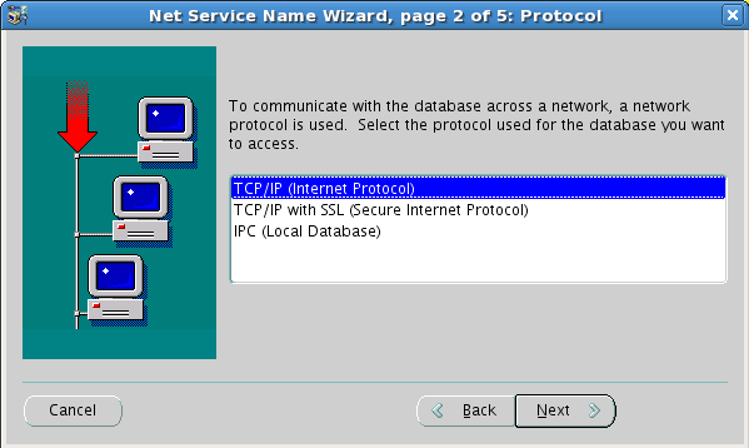
d. We choose “TCP/IP” as the network protocol.
e. We write “primary.tivibulab.local”, which is the Hostname of the primary database, as the Hostname, and “1521” as the Port.

f. We choose “prmy” as Service Name and “Dedicated Server” as Connection Type.
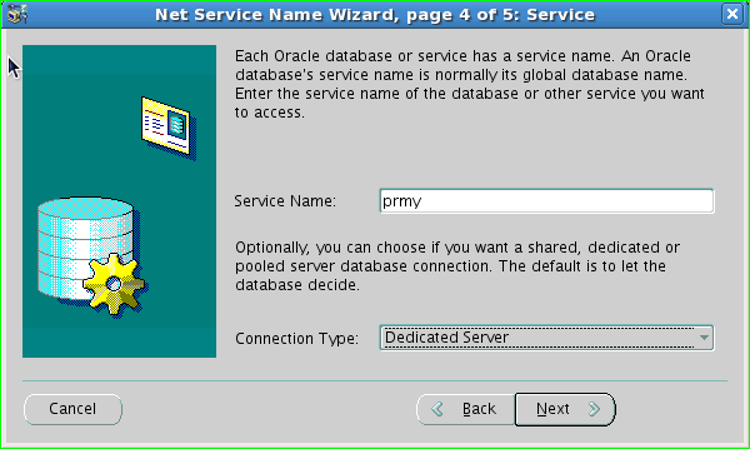
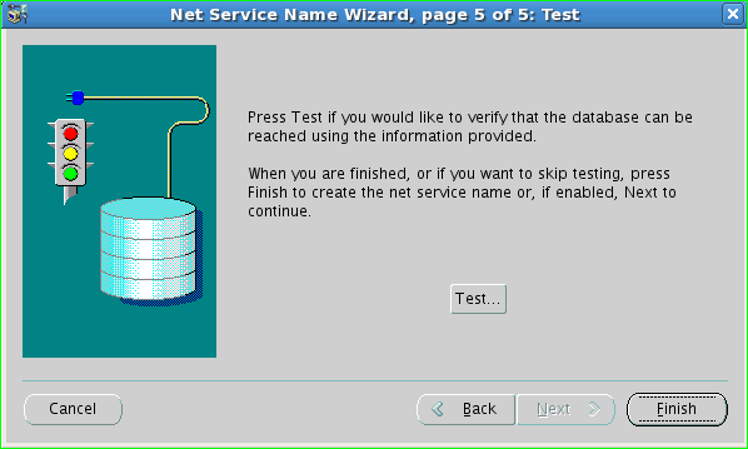
g With Finish, the service creation process is completed.
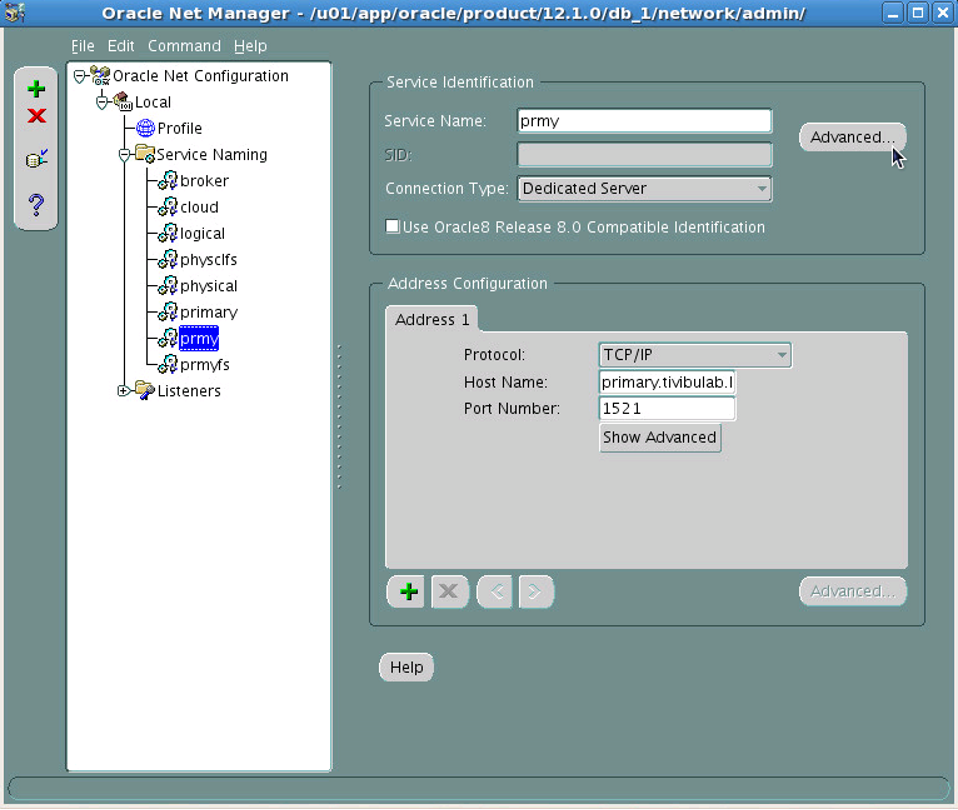
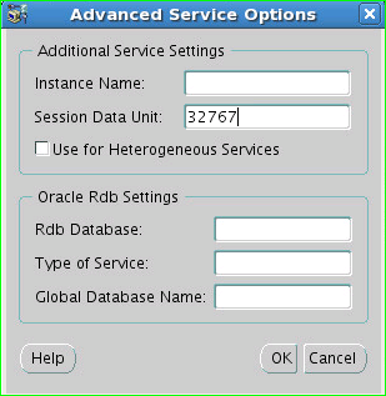
h. The service is configured. Click the Advanced button.
ı. Enter “32767” in the Session Data Unit field. This value increases the network throughput. Normally, this value is 64KB for 12cR1, but 32767 is entered because NETMGR does not support this value. It will then be edited manually.
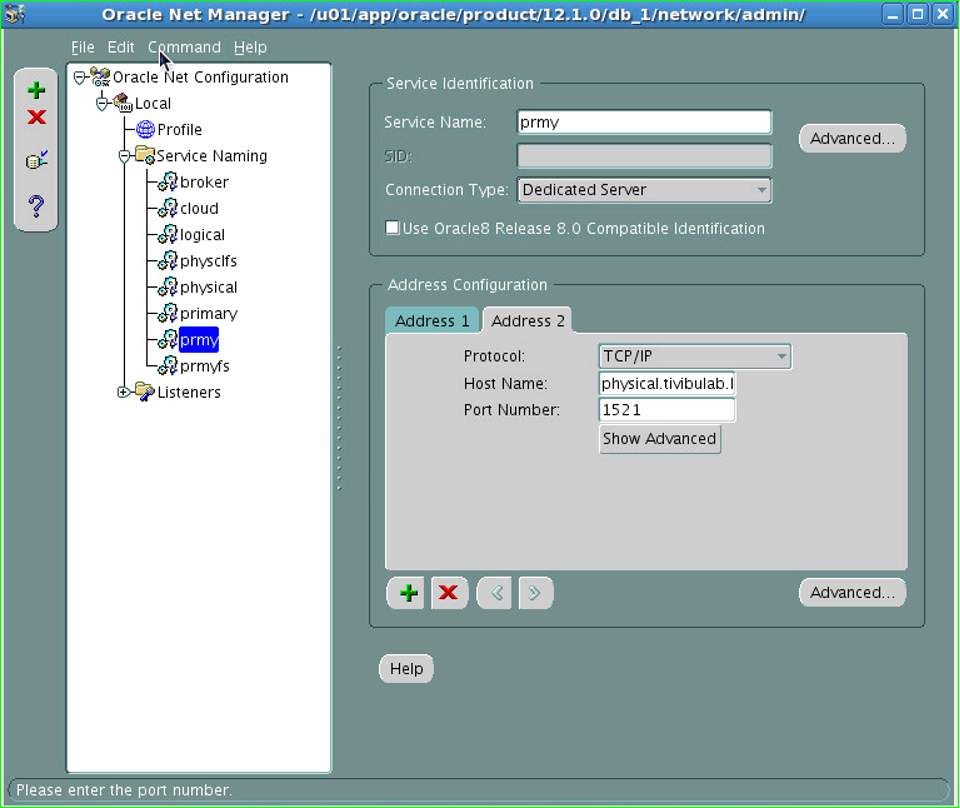
j. The database that will be primary in the role change is added to the Address Configuration field. This is done with the + sign.
k. Switchover and Failover’s Target Standby database information is written as hostname. We write “physical.tivibulab.local” as the Hostname and “1521” as the Port.
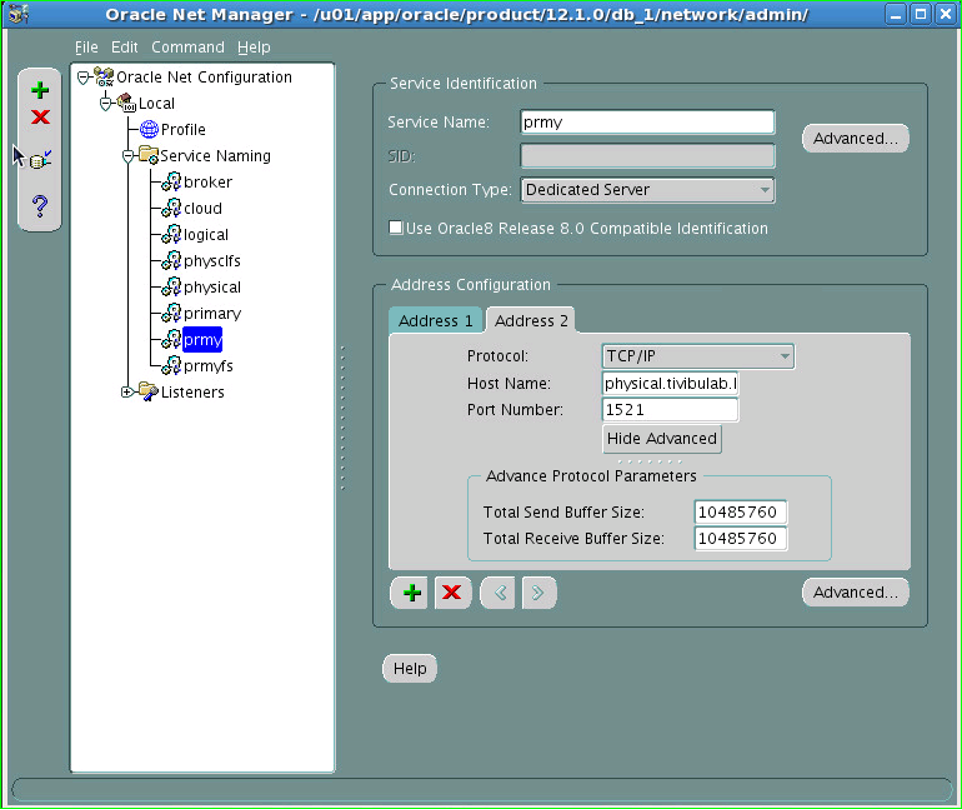
m. We set Send and Receive Buffer Sizes for network throughput. This adjustment is made accordingly.
1 | TCP Socket Buffer size=BDP*3=network bandwidth*latency*3 |
This value is compared to 10MB. Whichever is greater is entered.
Let’s calculate.
1 2 | Network Bandwidth= 1 Gbit/s Latency=0,288 ms |
[This value can be seen by pinging the Primary Far SYNC instance where it sends the Redos from the Primary]
1 2 3 4 5 6 7 8 9 10 11 12 | [root@primary ~]# ping 172.20.42.62 PING 172.20.42.62 (172.20.42.62) 56(84) bytes of data. 64 bytes from 172.20.42.62: icmp_seq=1 ttl=64 time=0.339 ms 64 bytes from 172.20.42.62: icmp_seq=2 ttl=64 time=0.285 ms 64 bytes from 172.20.42.62: icmp_seq=3 ttl=64 time=0.301 ms 64 bytes from 172.20.42.62: icmp_seq=4 ttl=64 time=0.297 ms 64 bytes from 172.20.42.62: icmp_seq=5 ttl=64 time=0.294 ms 64 bytes from 172.20.42.62: icmp_seq=6 ttl=64 time=0.217 ms --- 172.20.42.62 ping statistics --- 6 packets transmitted, 6 received, 0% packet loss, time 5001ms rtt min/avg/max/mdev = 0.217/0.288/0.339/0.042 ms |
1 | TCP Socket Buffer size= 1.000.000* (1/8) * 0,288*(1/1000)s * 3 = 108 bytes |
Therefore, the value of 10MB=10*1024*1024=10485760 bytes is written to the “Show Advanced” section of each 2 Adress Configuration section.
n. Settings are saved by clicking “Save” in the “File” section.
o. The TNSNAMES.ORA file is checked to see if the changes have been made.
1 2 3 4 5 6 7 8 9 10 11 12 13 14 15 16 17 18 19 20 21 22 23 24 25 26 27 28 29 30 31 32 33 34 35 36 37 38 39 40 41 42 43 44 45 46 47 48 49 50 51 52 53 54 55 56 57 58 59 60 61 62 63 64 65 66 67 68 69 70 71 72 73 74 75 76 77 78 79 80 81 82 83 84 85 86 87 88 89 90 91 92 93 94 95 96 97 98 99 100 101 102 | [root@primary ~]# su - oracle [oracle@primary ~]$ cd /u01/app/oracle/product/12.1.0/db_1/network/admin/ [oracle@primary admin]$ cat tnsnames.ora # tnsnames.ora Network Configuration File: /u01/app/oracle/product/12.1.0/db_1/network/admin/tnsnames.ora # Generated by Oracle configuration tools. PRMYFS = (DESCRIPTION = (ADDRESS_LIST = (ADDRESS = (PROTOCOL = TCP)(HOST = prmyFS.tivibulab.local)(PORT = 1521)(SEND_BUF_SIZE = 10485760)(RECV_BUF_SIZE = 10485760)) ) (SDU = 65535) (CONNECT_DATA = (SERVER = DEDICATED) (SERVICE_NAME = prmyFS) ) ) LOGICAL = (DESCRIPTION = (ADDRESS_LIST = (ADDRESS = (PROTOCOL = TCP)(HOST = logical.tivibulab.local)(PORT = 1521)(SEND_BUF_SIZE = 10485760)(RECV_BUF_SIZE = 10485760)) ) (SDU = 65535) (CONNECT_DATA = (SERVER = DEDICATED) (SERVICE_NAME = logical) ) ) PRIMARY = (DESCRIPTION = (ADDRESS_LIST = (ADDRESS = (PROTOCOL = TCP)(HOST = primary)(PORT = 1521)(SEND_BUF_SIZE = 10485760)(RECV_BUF_SIZE = 10485760)) ) (SDU = 65535) (CONNECT_DATA = (SERVER = DEDICATED) (SERVICE_NAME = primary) ) ) BROKER = (DESCRIPTION = (ADDRESS_LIST = (ADDRESS = (PROTOCOL = TCP)(HOST = broker.tivibulab.local)(PORT = 1521)(SEND_BUF_SIZE = 10485760)(RECV_BUF_SIZE = 10485760)) ) (SDU = 65535) (CONNECT_DATA = (SERVER = DEDICATED) (SERVICE_NAME = broker) ) ) PHYSICAL = (DESCRIPTION = (ADDRESS_LIST = (ADDRESS = (PROTOCOL = TCP)(HOST = physical.tivibulab.local)(PORT = 1521)(SEND_BUF_SIZE = 10485760)(RECV_BUF_SIZE = 10485760)) ) (SDU = 65535) (CONNECT_DATA = (SERVER = DEDICATED) (SERVICE_NAME = physical) ) ) PRMY = (DESCRIPTION = (ADDRESS_LIST = (ADDRESS = (PROTOCOL = TCP)(HOST = primary.tivibulab.local)(PORT = 1521)(SEND_BUF_SIZE = 10485760)(RECV_BUF_SIZE = 10485760)) (ADDRESS = (PROTOCOL = TCP)(HOST = physical.tivibulab.local)(PORT = 1521)(SEND_BUF_SIZE = 10485760)(RECV_BUF_SIZE = 10485760)) ) (SDU = 32767) (CONNECT_DATA = (SERVER = DEDICATED) (SERVICE_NAME = prmy) ) ) CLOUD = (DESCRIPTION = (ADDRESS_LIST = (ADDRESS = (PROTOCOL = TCP)(HOST = cloud.tivibulab.local)(PORT = 1521)(SEND_BUF_SIZE = 10485760)(RECV_BUF_SIZE = 10485760)) ) (SDU = 65535) (CONNECT_DATA = (SERVER = DEDICATED) (SERVICE_NAME = cloud) ) ) PHYSCLFS = (DESCRIPTION = (ADDRESS_LIST = (ADDRESS = (PROTOCOL = TCP)(HOST = physclFS.tivibulab.local)(PORT = 1521)(SEND_BUF_SIZE = 10485760)(RECV_BUF_SIZE = 10485760)) ) (SDU = 65535) (CONNECT_DATA = (SERVER = DEDICATED) (SERVICE_NAME = physclFS) ) ) |
p. The SDU value is changed to “65535”. For this, the TNSNAMES.ORA file is opened with the vi text editor and the following command is run.
1 | :%s/SDU = 32767/SDU = 65535/g |
q. File wq! Save with and check if the change has occurred.
1 2 3 4 5 6 7 8 9 10 11 12 13 14 15 16 17 18 19 20 21 22 23 24 25 26 27 28 29 30 31 32 33 34 35 36 37 38 39 40 41 42 43 44 45 46 47 48 49 50 51 52 53 54 55 56 57 58 59 60 61 62 63 64 65 66 67 68 69 70 71 72 73 74 75 76 77 78 79 80 81 82 83 84 85 86 87 88 89 90 91 92 93 94 95 96 97 98 99 100 | [oracle@primary ~]$ cat /u01/app/oracle/product/12.1.0/db_1/network/admin/tnsnames.ora # tnsnames.ora Network Configuration File: /u01/app/oracle/product/12.1.0/db_1/network/admin/tnsnames.ora # Generated by Oracle configuration tools. PRMYFS = (DESCRIPTION = (ADDRESS_LIST = (ADDRESS = (PROTOCOL = TCP)(HOST = prmyFS.tivibulab.local)(PORT = 1521)(SEND_BUF_SIZE = 10485760)(RECV_BUF_SIZE = 10485760)) ) (SDU = 65535) (CONNECT_DATA = (SERVER = DEDICATED) (SERVICE_NAME = prmyFS) ) ) LOGICAL = (DESCRIPTION = (ADDRESS_LIST = (ADDRESS = (PROTOCOL = TCP)(HOST = logical.tivibulab.local)(PORT = 1521)(SEND_BUF_SIZE = 10485760)(RECV_BUF_SIZE = 10485760)) ) (SDU = 65535) (CONNECT_DATA = (SERVER = DEDICATED) (SERVICE_NAME = logical) ) ) PRIMARY = (DESCRIPTION = (ADDRESS_LIST = (ADDRESS = (PROTOCOL = TCP)(HOST = primary)(PORT = 1521)(SEND_BUF_SIZE = 10485760)(RECV_BUF_SIZE = 10485760)) ) (SDU = 65535) (CONNECT_DATA = (SERVER = DEDICATED) (SERVICE_NAME = primary) ) ) BROKER = (DESCRIPTION = (ADDRESS_LIST = (ADDRESS = (PROTOCOL = TCP)(HOST = broker.tivibulab.local)(PORT = 1521)(SEND_BUF_SIZE = 10485760)(RECV_BUF_SIZE = 10485760)) ) (SDU = 65535) (CONNECT_DATA = (SERVER = DEDICATED) (SERVICE_NAME = broker) ) ) PHYSICAL = (DESCRIPTION = (ADDRESS_LIST = (ADDRESS = (PROTOCOL = TCP)(HOST = physical.tivibulab.local)(PORT = 1521)(SEND_BUF_SIZE = 10485760)(RECV_BUF_SIZE = 10485760)) ) (SDU = 65535) (CONNECT_DATA = (SERVER = DEDICATED) (SERVICE_NAME = physical) ) ) PRMY = (DESCRIPTION = (ADDRESS_LIST = (ADDRESS = (PROTOCOL = TCP)(HOST = primary.tivibulab.local)(PORT = 1521)(SEND_BUF_SIZE = 10485760)(RECV_BUF_SIZE = 10485760)) (ADDRESS = (PROTOCOL = TCP)(HOST = physical.tivibulab.local)(PORT = 1521)(SEND_BUF_SIZE = 10485760)(RECV_BUF_SIZE = 10485760)) ) (SDU = 65535) (CONNECT_DATA = (SERVER = DEDICATED) (SERVICE_NAME = prmy) ) ) CLOUD = (DESCRIPTION = (ADDRESS_LIST = (ADDRESS = (PROTOCOL = TCP)(HOST = cloud.tivibulab.local)(PORT = 1521)(SEND_BUF_SIZE = 10485760)(RECV_BUF_SIZE = 10485760)) ) (SDU = 65535) (CONNECT_DATA = (SERVER = DEDICATED) (SERVICE_NAME = cloud) ) ) PHYSCLFS = (DESCRIPTION = (ADDRESS_LIST = (ADDRESS = (PROTOCOL = TCP)(HOST = physclFS.tivibulab.local)(PORT = 1521)(SEND_BUF_SIZE = 10485760)(RECV_BUF_SIZE = 10485760)) ) (SDU = 65535) (CONNECT_DATA = (SERVER = DEDICATED) (SERVICE_NAME = physclFS) ) ) |
e. The session opened from NETMGR and Terminal is exited.
2. The service is created in the primary database.
1 2 3 | [Primary] SQL> exec DBMS_SERVICE.CREATE_SERVICE('PRMY','PRMY'); PL/SQL procedure successfully completed. |
3. The service is started.
1 2 3 | [Primary] SQL> exec DBMS_SERVICE.START_SERVICE('PRMY'); PL/SQL procedure successfully completed. |
4. In Listener, we check whether the service has started.
1 2 3 4 5 6 7 8 9 10 11 12 13 14 15 16 17 18 19 20 21 22 23 24 25 26 27 28 29 30 31 32 33 34 35 | [Primary] SQL> !lsnrctl status LSNRCTL for Linux: Version 12.1.0.2.0 - Production on 15-FEB-2017 14:47:43 Copyright (c) 1991, 2014, Oracle. All rights reserved. Connecting to (DESCRIPTION=(ADDRESS=(PROTOCOL=TCP)(HOST=primary)(PORT=1521)(SEND_BUF_SIZE=10485760)(RECV_BUF_SIZE=10485760))) STATUS of the LISTENER ------------------------ Alias LISTENER Version TNSLSNR for Linux: Version 12.1.0.2.0 - Production Start Date 08-FEB-2017 09:32:45 Uptime 7 days 5 hr. 14 min. 57 sec Trace Level off Security ON: Local OS Authentication SNMP OFF Listener Parameter File /u01/app/oracle/product/12.1.0/db_1/network/admin/listener.ora Listener Log File /u01/app/oracle/diag/tnslsnr/primary/listener/alert/log.xml Listening Endpoints Summary... (DESCRIPTION=(ADDRESS=(PROTOCOL=tcp)(HOST=primary.tivibulab.local)(PORT=1521))) (DESCRIPTION=(ADDRESS=(PROTOCOL=ipc)(KEY=EXTPROC1521))) (DESCRIPTION=(ADDRESS=(PROTOCOL=tcps)(HOST=primary.tivibulab.local)(PORT=5500))(Security=(my_wallet_directory=/u01/app/oracle/admin/primary/xdb_wallet))(Presentation=HTTP)(Session=RAW)) Services Summary... Service "PRMY" has 1 instance(s). Instance "primary", status READY, has 1 handler(s) for this service... Service "primary" has 2 instance(s). Instance "primary", status UNKNOWN, has 1 handler(s) for this service... Instance "primary", status READY, has 1 handler(s) for this service... Service "primaryXDB" has 1 instance(s). Instance "primary", status READY, has 1 handler(s) for this service... Service "primary_DGB" has 1 instance(s). Instance "primary", status READY, has 1 handler(s) for this service... Service "primary_DGMGRL" has 1 instance(s). Instance "primary", status UNKNOWN, has 1 handler(s) for this service... The command completed successfully |
While in SQLPLUS ! The flag enables operating system commands to be run.
5. The functionality of the service is tested by trying to connect with the created service.
1 2 3 4 5 6 7 8 9 10 | [oracle@prmyFS ~]$ sqlplus system/Passw0rd4@prmy SQL*Plus: Release 12.1.0.2.0 Production on Wed Feb 15 14:49:58 2017 Copyright (c) 1982, 2014, Oracle. All rights reserved. Connected to: Oracle Database 12c Enterprise Edition Release 12.1.0.2.0 - 64bit Production With the Partitioning, OLAP, Advanced Analytics and Real Application Testing options |
1 2 3 4 5 6 7 8 9 10 11 12 13 14 15 | [PrimaryFS] SQL> show parameter name NAME TYPE VALUE ------------------------------------ ----------- ------------------------------ cell_offloadgroup_name string db_file_name_convert string db_name string primary db_unique_name string primary global_names boolean FALSE instance_name string primary lock_name_space string log_file_name_convert string pdb_file_name_convert string processor_group_name string service_names string primary |
1 2 3 4 5 | [PrimaryFS] SQL> select instance_name from v$instance; INSTANCE_NAME ---------------- primary |
6. AFTER STARTUP ON DATABASE Trigger is created to start the service automatically as a result of the role change operations.
1 2 3 4 5 6 7 8 9 10 11 12 13 14 15 | [Primary] SQL> CREATE OR REPLACE TRIGGER primary_services after startup on database 2 3 DECLARE 4 role VARCHAR(30); 5 BEGIN 6 SELECT DATABASE_ROLE INTO role FROM V$DATABASE; 7 IF role = 'PRIMARY' THEN 8 DBMS_SERVICE.START_SERVICE('prmy'); 9 ELSE 10 DBMS_SERVICE.STOP_SERVICE('prmy'); 11 END IF; 12 END; 13 / Trigger created. |
7. We are checking whether the trigger occurs automatically in the Physical Standby database.
1 2 3 4 5 6 | [Physical] SQL> select TRIGGER_NAME from dba_triggers where lower(trigger_name) like '%services%'; TRIGGER_NAME -------------------------------------------------------------------------------- WWV_FLOW_WEB_SERVICES_T1 PRIMARY_SERVICES |
8. After the role change, the switchover process is performed to see if the service starts automatically and the clients can go to the new Primary.
For this, first of all, the compatibility of the databases with Switchover is checked.
1 2 3 4 5 6 7 8 9 | [oracle@primary admin]$ dgmgrl DGMGRL for Linux: Version 12.1.0.2.0 - 64bit Production Copyright (c) 2000, 2013, Oracle. All rights reserved. Welcome to DGMGRL, type "help" for information. DGMGRL> connect sysdg Password: Connected as SYSDG. |
1 2 3 4 5 6 7 8 9 10 11 12 13 14 15 16 17 | DGMGRL> show configuration Configuration - DG_Solution Protection Mode: MaxAvailability Members: primary - Primary database prmyFS - Far sync instance physical - Physical standby database Members Not Receiving Redo: physclFS - Far sync instance Fast-Start Failover: DISABLED Configuration Status: SUCCESS (status updated 7 seconds ago) |
1 2 3 4 5 | DGMGRL> validate database primary Database Role: Primary database Ready for Switchover: Yes |
1 2 3 4 5 6 7 8 9 10 11 12 13 14 15 16 17 18 19 20 21 | DGMGRL> validate database physical Database Role: Physical standby database Primary Database: primary Ready for Switchover: Yes Ready for Failover: Yes (Primary Running) Current Log File Groups Configuration: Thread # Online Redo Log Groups Standby Redo Log Groups Status (primary) (physical) 1 3 2 Insufficient SRLs Future Log File Groups Configuration: Thread # Online Redo Log Groups Standby Redo Log Groups Status (physical) (primary) 1 3 2 Insufficient SRLs Transport-Related Property Settings: Property primary Value physical Value RedoRoutes (primary:prmyFS SYNC) (physical:physclFS SYNC) |
9. Switchover operation is performed.
1 2 3 4 5 6 7 8 9 10 11 12 | DGMGRL> switchover to physical Performing switchover NOW, please wait... Operation requires a connection to instance "physical" on database "physical" Connecting to instance "physical"... Connected as SYSDG. New primary database "physical" is opening... Operation requires start up of instance "primary" on database "primary" Starting instance "primary"... ORACLE instance started. Database mounted. Database opened. Switchover succeeded, new primary is "physical" |
10. It is checked whether the switchover process is successful or not.
1 2 3 4 5 6 7 8 9 10 11 12 13 14 15 16 17 | DGMGRL> show configuration Configuration - DG_Solution Protection Mode: MaxAvailability Members: physical - Primary database physclFS - Far sync instance primary - Physical standby database Members Not Receiving Redo: prmyFS - Far sync instance Fast-Start Failover: DISABLED Configuration Status: SUCCESS (status updated 25 seconds ago) |
11. By trying to connect with the service, we check whether it connects to the old Physical Standby (New Primary) database.
1 2 3 4 5 6 7 8 9 10 11 | [oracle@prmyFS ~]$ sqlplus system/Passw0rd4@prmy SQL*Plus: Release 12.1.0.2.0 Production on Wed Feb 15 15:29:45 2017 Copyright (c) 1982, 2014, Oracle. All rights reserved. Last Successful login time: Wed Feb 15 2017 14:49:58 +02:00 Connected to: Oracle Database 12c Enterprise Edition Release 12.1.0.2.0 - 64bit Production With the Partitioning, OLAP, Advanced Analytics and Real Application Testing options |
1 2 3 4 5 6 7 8 9 10 11 12 13 14 15 | [PrimaryFS] SQL> show parameter name NAME TYPE VALUE ------------------------------------ ----------- ------------------------------ cell_offloadgroup_name string db_file_name_convert string primary, physical db_name string primary db_unique_name string physical global_names boolean FALSE instance_name string physical lock_name_space string log_file_name_convert string primary, physical pdb_file_name_convert string processor_group_name string service_names string physical |
1 2 3 4 5 | [PrimaryFS] SQL> select instance_name from v$instance; INSTANCE_NAME ---------------- physical |
12. We check that the service is running by querying the Listener in the Physical Standby database.
1 2 3 4 5 6 7 8 9 10 11 12 13 14 15 16 17 18 19 20 21 22 23 24 25 26 27 28 29 30 31 32 33 34 | [oracle@physical admin]$ lsnrctl status LSNRCTL for Linux: Version 12.1.0.2.0 - Production on 15-FEB-2017 16:01:34 Copyright (c) 1991, 2014, Oracle. All rights reserved. Connecting to (DESCRIPTION=(ADDRESS=(PROTOCOL=TCP)(HOST=physical.tivibulab.local)(PORT=1521)(SEND_BUF_SIZE=10485760)(RECV_BUF_SIZE=10485760))) STATUS of the LISTENER ------------------------ Alias LISTENER Version TNSLSNR for Linux: Version 12.1.0.2.0 - Production Start Date 08-FEB-2017 12:43:12 Uptime 7 days 3 hr. 18 min. 22 sec Trace Level off Security ON: Local OS Authentication SNMP OFF Listener Parameter File /u01/app/oracle/product/12.1.0/db_1/network/admin/listener.ora Listener Log File /u01/app/oracle/diag/tnslsnr/physical/listener/alert/log.xml Listening Endpoints Summary... (DESCRIPTION=(ADDRESS=(PROTOCOL=tcp)(HOST=physical.tivibulab.local)(PORT=1521))) (DESCRIPTION=(ADDRESS=(PROTOCOL=tcps)(HOST=physical.tivibulab.local)(PORT=5500))(Security=(my_wallet_directory=/u01/app/oracle/admin/physical/xdb_wallet))(Presentation=HTTP)(Session=RAW)) Services Summary... Service "PRMY" has 1 instance(s). Instance "physical", status READY, has 1 handler(s) for this service... Service "physical" has 2 instance(s). Instance "physical", status UNKNOWN, has 1 handler(s) for this service... Instance "physical", status READY, has 1 handler(s) for this service... Service "physicalXDB" has 1 instance(s). Instance "physical", status READY, has 0 handler(s) for this service... Service "physical_DGB" has 1 instance(s). Instance "physical", status READY, has 1 handler(s) for this service... Service "physical_DGMGRL" has 1 instance(s). Instance "physical", status UNKNOWN, has 1 handler(s) for this service... The command completed successfully |
13. It is checked that the service is no longer running in the primary database.
1 2 3 4 5 6 7 8 9 10 11 12 13 14 15 16 17 18 19 20 21 22 23 24 25 26 27 28 29 30 31 32 33 | [oracle@primary ~]$ lsnrctl status LSNRCTL for Linux: Version 12.1.0.2.0 - Production on 15-FEB-2017 16:04:09 Copyright (c) 1991, 2014, Oracle. All rights reserved. Connecting to (DESCRIPTION=(ADDRESS=(PROTOCOL=TCP)(HOST=primary)(PORT=1521)(SEND_BUF_SIZE=10485760)(RECV_BUF_SIZE=10485760))) STATUS of the LISTENER ------------------------ Alias LISTENER Version TNSLSNR for Linux: Version 12.1.0.2.0 - Production Start Date 08-FEB-2017 09:32:45 Uptime 7 days 6 hr. 31 min. 23 sec Trace Level off Security ON: Local OS Authentication SNMP OFF Listener Parameter File /u01/app/oracle/product/12.1.0/db_1/network/admin/listener.ora Listener Log File /u01/app/oracle/diag/tnslsnr/primary/listener/alert/log.xml Listening Endpoints Summary... (DESCRIPTION=(ADDRESS=(PROTOCOL=tcp)(HOST=primary.tivibulab.local)(PORT=1521))) (DESCRIPTION=(ADDRESS=(PROTOCOL=ipc)(KEY=EXTPROC1521))) (DESCRIPTION=(ADDRESS=(PROTOCOL=tcps)(HOST=primary.tivibulab.local)(PORT=5500))(Security=(my_wallet_directory=/u01/app/oracle/admin/primary/xdb_wallet))(Presentation=HTTP)(Session=RAW)) Services Summary... Service "primary" has 2 instance(s). Instance "primary", status UNKNOWN, has 1 handler(s) for this service... Instance "primary", status READY, has 1 handler(s) for this service... Service "primaryXDB" has 1 instance(s). Instance "primary", status READY, has 1 handler(s) for this service... Service "primary_DGB" has 1 instance(s). Instance "primary", status READY, has 1 handler(s) for this service... Service "primary_DGMGRL" has 1 instance(s). Instance "primary", status UNKNOWN, has 1 handler(s) for this service... The command completed successfully |
Notice that the “prmy” service is not running in the primary database.
14. When there is no trigger, the service will not start in both databases after switchover. Trigger is DROP to see it.
1 2 3 | [Physical] SQL> drop trigger primary_services; Trigger dropped. |
15. We check the compatibility of databases for Switchover.
1 2 3 4 5 6 7 8 9 10 11 12 13 14 15 16 17 18 19 20 21 | DGMGRL> validate database primary Database Role: Physical standby database Primary Database: physical Ready for Switchover: Yes Ready for Failover: Yes (Primary Running) Current Log File Groups Configuration: Thread # Online Redo Log Groups Standby Redo Log Groups Status (physical) (primary) 1 3 2 Insufficient SRLs Future Log File Groups Configuration: Thread # Online Redo Log Groups Standby Redo Log Groups Status (primary) (physical) 1 3 3 Insufficient SRLs Transport-Related Property Settings: Property physical Value primary Value RedoRoutes (physical:physclFS SYNC) (primary:prmyFS SYNC) |
1 2 3 4 5 | DGMGRL> validate database physical Database Role: Primary database Ready for Switchover: Yes |
16. Switchover operation is performed.
1 2 3 4 5 6 7 8 9 10 11 12 | DGMGRL> switchover to primary Performing switchover NOW, please wait... Operation requires a connection to instance "primary" on database "primary" Connecting to instance "primary"... Connected as SYSDG. New primary database "primary" is opening... Operation requires start up of instance "physical" on database "physical" Starting instance "physical"... ORACLE instance started. Database mounted. Database opened. Switchover succeeded, new primary is "primary" |
17. We check if the switchover was successful.
1 2 3 4 5 6 7 8 9 10 11 12 13 14 15 16 17 | DGMGRL> show configuration Configuration - DG_Solution Protection Mode: MaxAvailability Members: primary - Primary database prmyFS - Far sync instance physical - Physical standby database Members Not Receiving Redo: physclFS - Far sync instance Fast-Start Failover: DISABLED Configuration Status: SUCCESS (status updated 57 seconds ago) |
18. It is checked whether the services are started in Listener.
1 2 3 4 5 6 7 8 9 10 11 12 13 14 15 16 17 18 19 20 21 22 23 24 25 26 27 28 29 30 31 32 | [oracle@physical admin]$ lsnrctl status LSNRCTL for Linux: Version 12.1.0.2.0 - Production on 15-FEB-2017 16:09:29 Copyright (c) 1991, 2014, Oracle. All rights reserved. Connecting to (DESCRIPTION=(ADDRESS=(PROTOCOL=TCP)(HOST=physical.tivibulab.local)(PORT=1521)(SEND_BUF_SIZE=10485760)(RECV_BUF_SIZE=10485760))) STATUS of the LISTENER ------------------------ Alias LISTENER Version TNSLSNR for Linux: Version 12.1.0.2.0 - Production Start Date 08-FEB-2017 12:43:12 Uptime 7 days 3 hr. 26 min. 17 sec Trace Level off Security ON: Local OS Authentication SNMP OFF Listener Parameter File /u01/app/oracle/product/12.1.0/db_1/network/admin/listener.ora Listener Log File /u01/app/oracle/diag/tnslsnr/physical/listener/alert/log.xml Listening Endpoints Summary... (DESCRIPTION=(ADDRESS=(PROTOCOL=tcp)(HOST=physical.tivibulab.local)(PORT=1521))) (DESCRIPTION=(ADDRESS=(PROTOCOL=tcps)(HOST=physical.tivibulab.local)(PORT=5500))(Security=(my_wallet_directory=/u01/app/oracle/admin/physical/xdb_wallet))(Presentation=HTTP)(Session=RAW)) Services Summary... Service "physical" has 2 instance(s). Instance "physical", status UNKNOWN, has 1 handler(s) for this service... Instance "physical", status READY, has 1 handler(s) for this service... Service "physicalXDB" has 1 instance(s). Instance "physical", status READY, has 1 handler(s) for this service... Service "physical_DGB" has 1 instance(s). Instance "physical", status READY, has 1 handler(s) for this service... Service "physical_DGMGRL" has 1 instance(s). Instance "physical", status UNKNOWN, has 1 handler(s) for this service... The command completed successfully |
1 2 3 4 5 6 7 8 9 10 11 12 13 14 15 16 17 18 19 20 21 22 23 24 25 26 27 28 29 30 31 32 33 | [oracle@primary ~]$ lsnrctl status LSNRCTL for Linux: Version 12.1.0.2.0 - Production on 15-FEB-2017 16:10:27 Copyright (c) 1991, 2014, Oracle. All rights reserved. Connecting to (DESCRIPTION=(ADDRESS=(PROTOCOL=TCP)(HOST=primary)(PORT=1521)(SEND_BUF_SIZE=10485760)(RECV_BUF_SIZE=10485760))) STATUS of the LISTENER ------------------------ Alias LISTENER Version TNSLSNR for Linux: Version 12.1.0.2.0 - Production Start Date 08-FEB-2017 09:32:45 Uptime 7 days 6 hr. 37 min. 41 sec Trace Level off Security ON: Local OS Authentication SNMP OFF Listener Parameter File /u01/app/oracle/product/12.1.0/db_1/network/admin/listener.ora Listener Log File /u01/app/oracle/diag/tnslsnr/primary/listener/alert/log.xml Listening Endpoints Summary... (DESCRIPTION=(ADDRESS=(PROTOCOL=tcp)(HOST=primary.tivibulab.local)(PORT=1521))) (DESCRIPTION=(ADDRESS=(PROTOCOL=ipc)(KEY=EXTPROC1521))) (DESCRIPTION=(ADDRESS=(PROTOCOL=tcps)(HOST=primary.tivibulab.local)(PORT=5500))(Security=(my_wallet_directory=/u01/app/oracle/admin/primary/xdb_wallet))(Presentation=HTTP)(Session=RAW)) Services Summary... Service "primary" has 2 instance(s). Instance "primary", status UNKNOWN, has 1 handler(s) for this service... Instance "primary", status READY, has 1 handler(s) for this service... Service "primaryXDB" has 1 instance(s). Instance "primary", status READY, has 1 handler(s) for this service... Service "primary_DGB" has 1 instance(s). Instance "primary", status READY, has 1 handler(s) for this service... Service "primary_DGMGRL" has 1 instance(s). Instance "primary", status UNKNOWN, has 1 handler(s) for this service... The command completed successfully |
Notice that the “prmy” service is not running in both instances.
![]()