


In today’s article, we will learn how to Create a Linked Server from SQL Server to MySQL.
We can use the linked server feature to connect to multiple databases in MSSQL.
First, we install the ODBC driver suitable for your operating system, which can be found in the link below.
|
1 |
https://dev.mysql.com/downloads/connector/odbc/ |
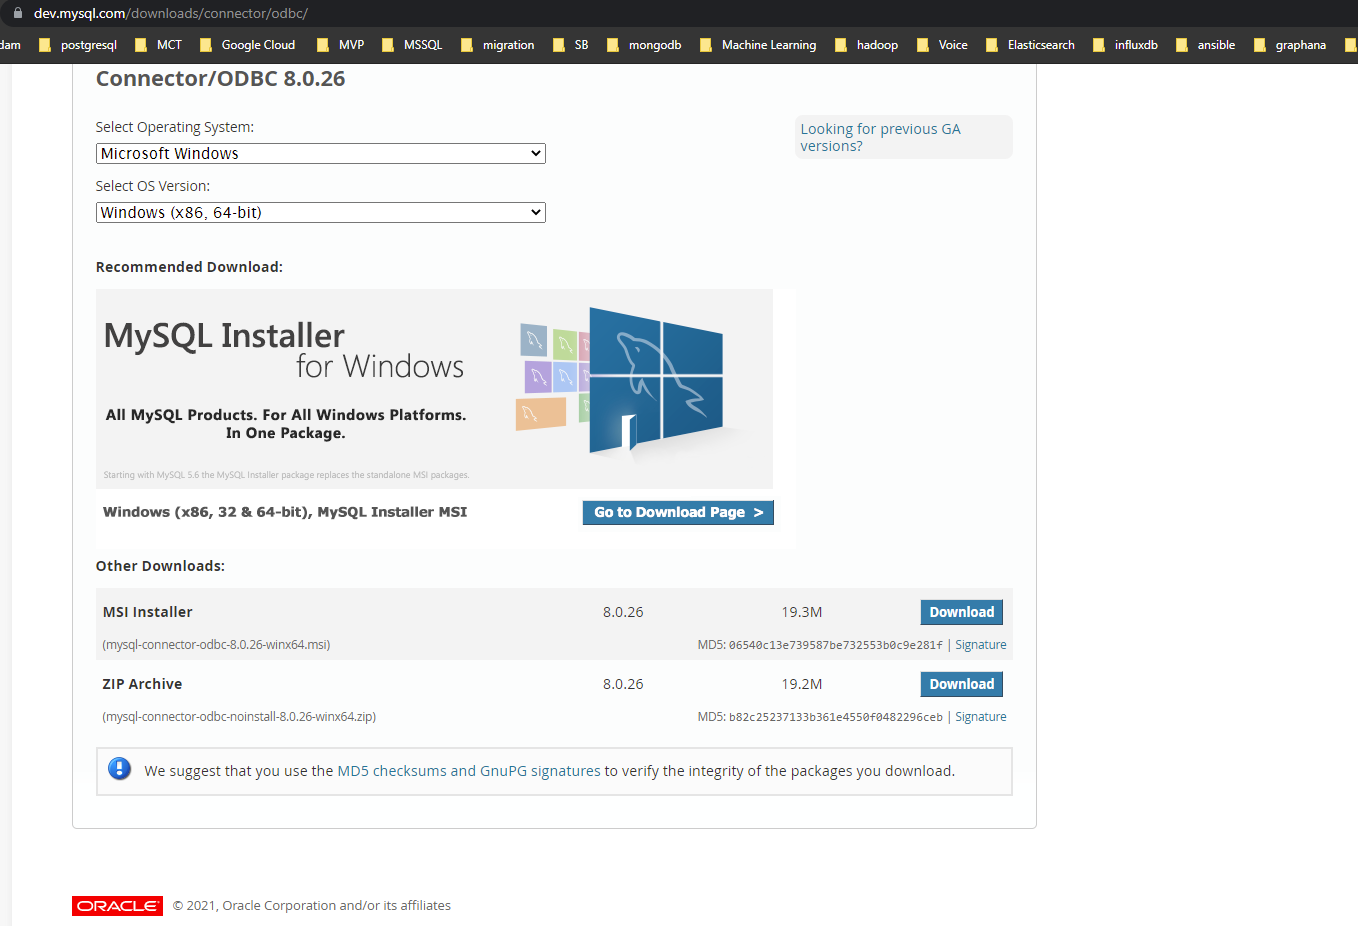

We select the OS version (64-bit (x64) for me) and click on Download to go to the next screen.
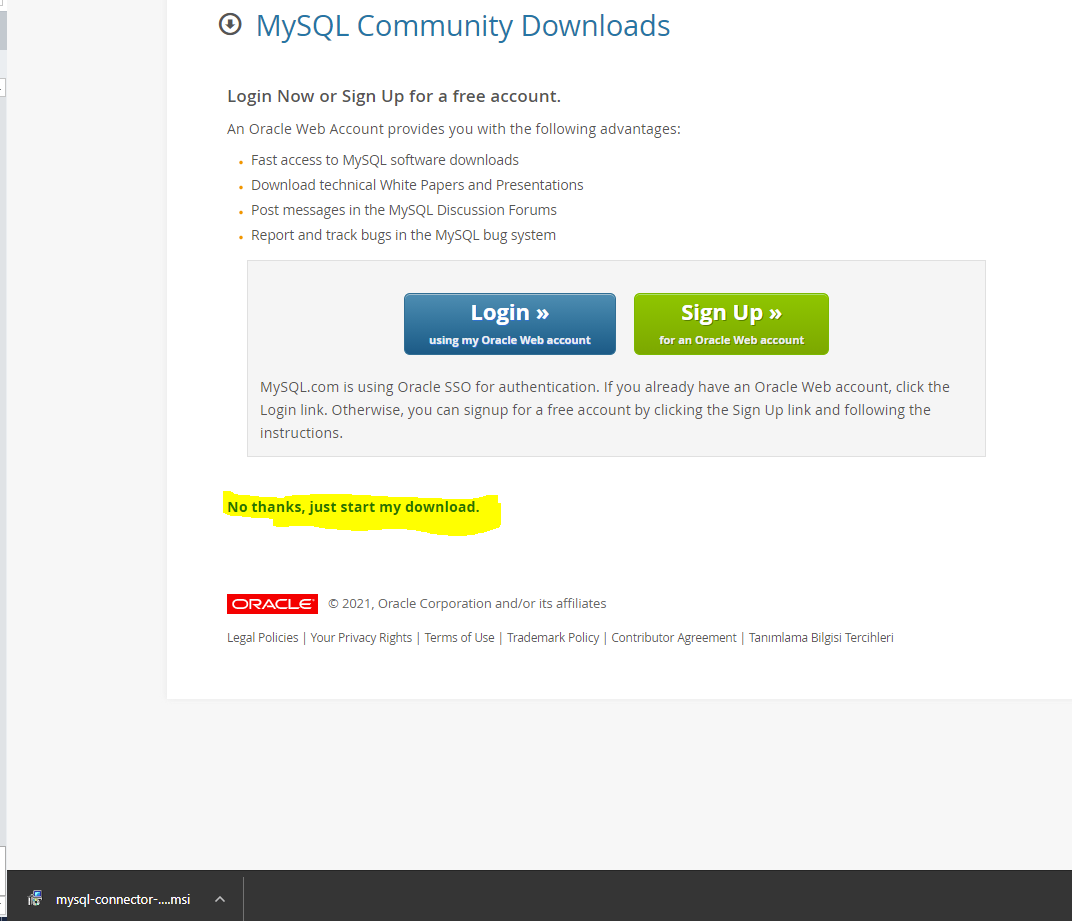

We download it without signing up by clicking on the yellow marked area on the next screen.
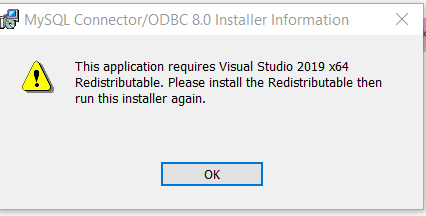

If you receive an error like the one above while installing the file we downloaded, you can download it by clicking the link below and continue the installation.
|
1 |
https://support.microsoft.com/en-us/topic/the-latest-supported-visual-c-downloads-2647da03-1eea-4433-9aff-95f26a218cc0 |

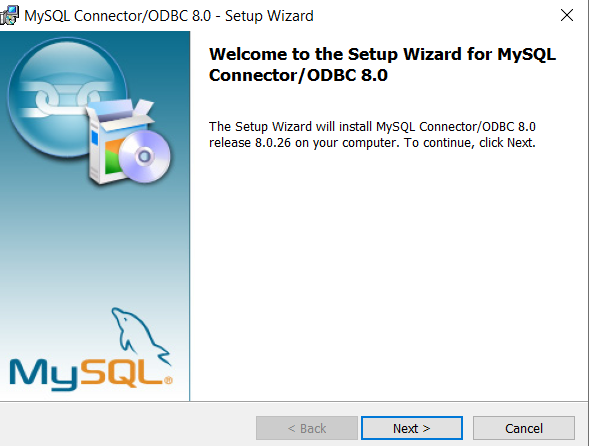
We continue by saying “Next”.
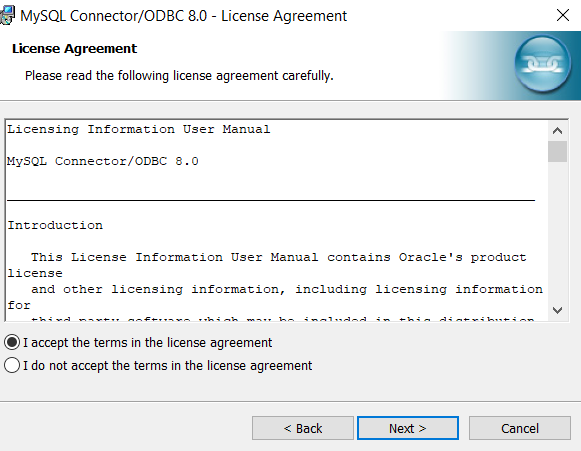

We continue by selecting “I accept the terms in the license agreement”.
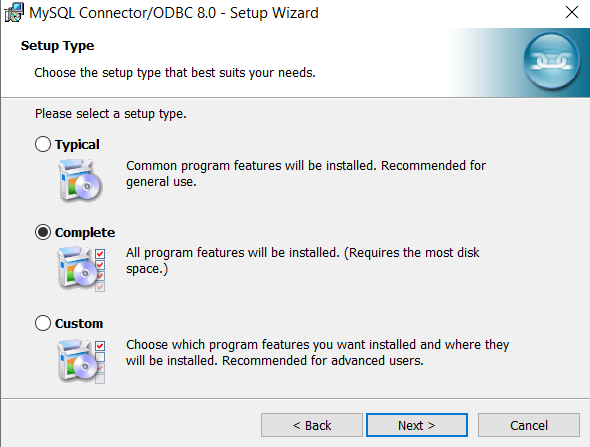

We continue by selecting “Complete”.


We start the installation by saying Install.


After clicking Finish, our ODBC Connector that we will use for MYSQL is installed.
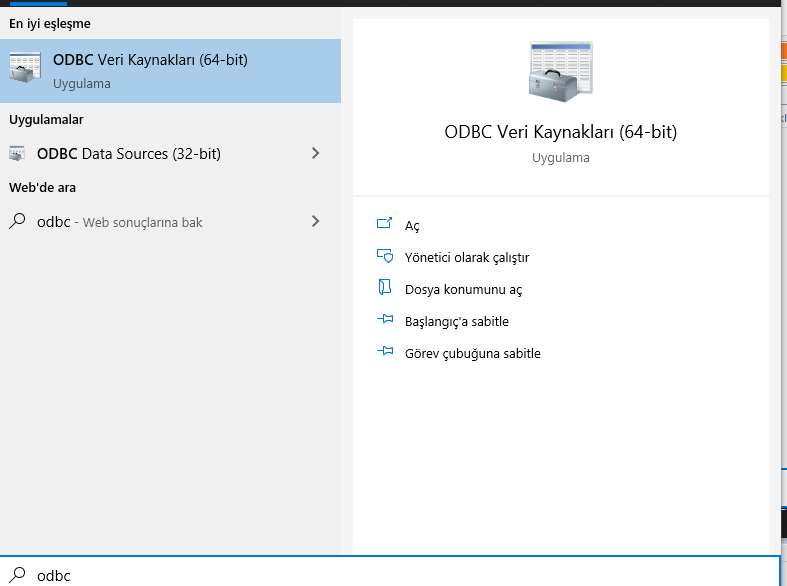
After installing, we need to add it to the system dsn to use it in SQL Server. To do this, we type “ODBC” in the search field and select “ODBC Data Sources (64-bit)”. (If your operating system is 32-bit, you can select 32-bit)

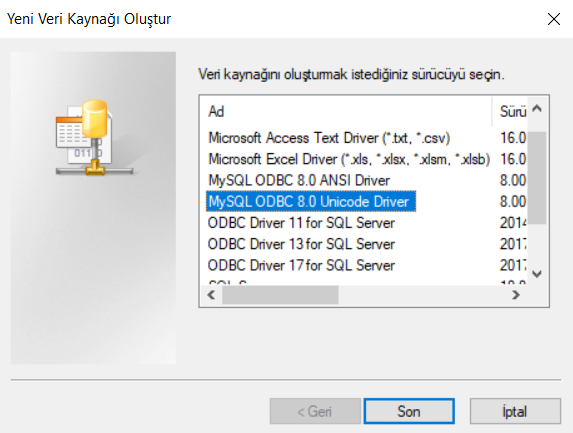
After opening the ODBC data sources, we go to the System DSN section as below and click the “Add” button.


We continue by selecting MYSQL ODBC 8.0 Unicode Driver.

We fill in the relevant fields in the window that opens as in the picture below.
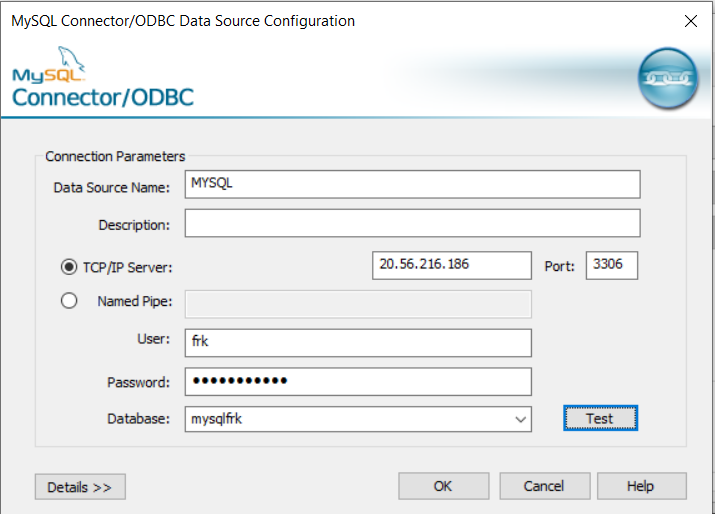

DataSource: You can give the desired name, we will give the value written here later in the Linked Server Setup.
Database: Database name on the MYSQL side
Server: MYSQL ip
Port: MYSQL port
Username: MYSQL user
Password: MYSQL password
Description: You can leave it blank or write a description.
After filling in the above information, we click on the “Test” button and verify that it has been successfully connected.
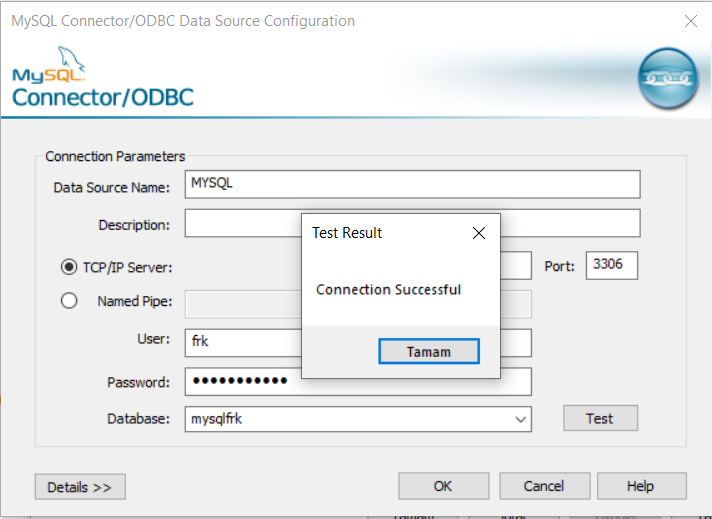

After verification, we are finished with the “ODBC Data Source Manager (64-bit)” window by clicking the OK buttons.
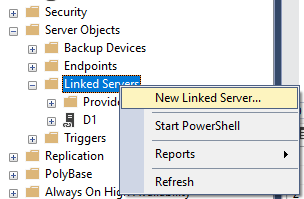
We continue by selecting “New Linked Server” on SQL.

After saying New Linked Server, we fill in the fields below.
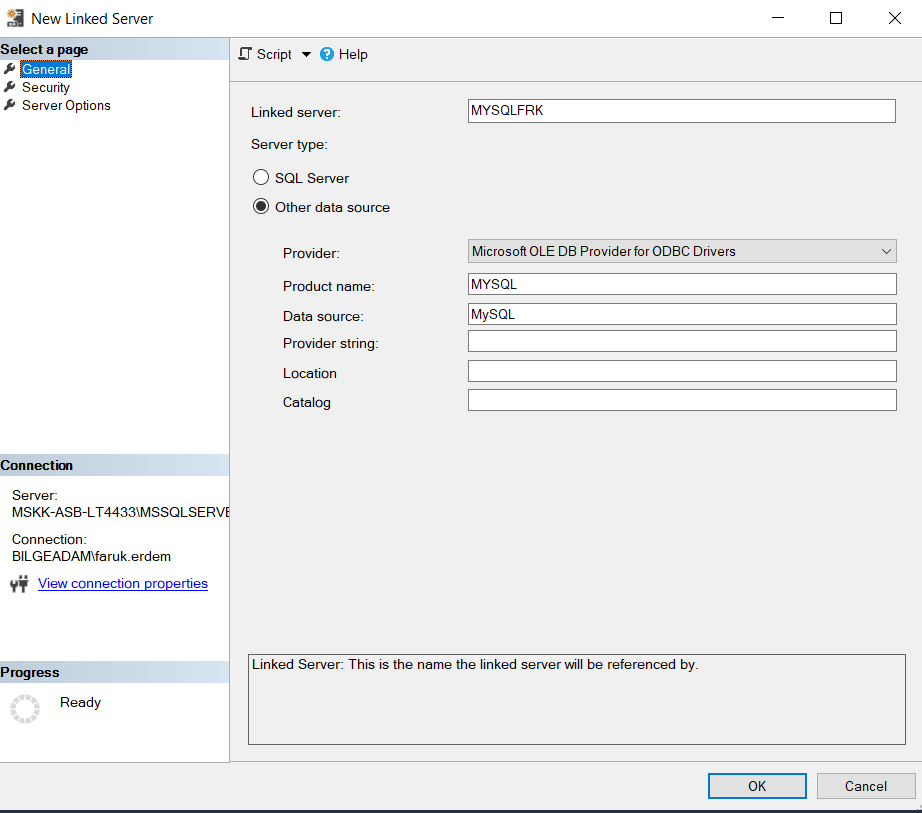

We fill in the window that opens according to the information below.
Linked Server: You can give any name.
Provider: We select “Microsoft OLE DB Provider for ODBC Drivers”.
Product Name: We write MySQL.
Data Source: We enter the name we wrote in the Data Source section in “ODBC Data Sources (64-bit)”.
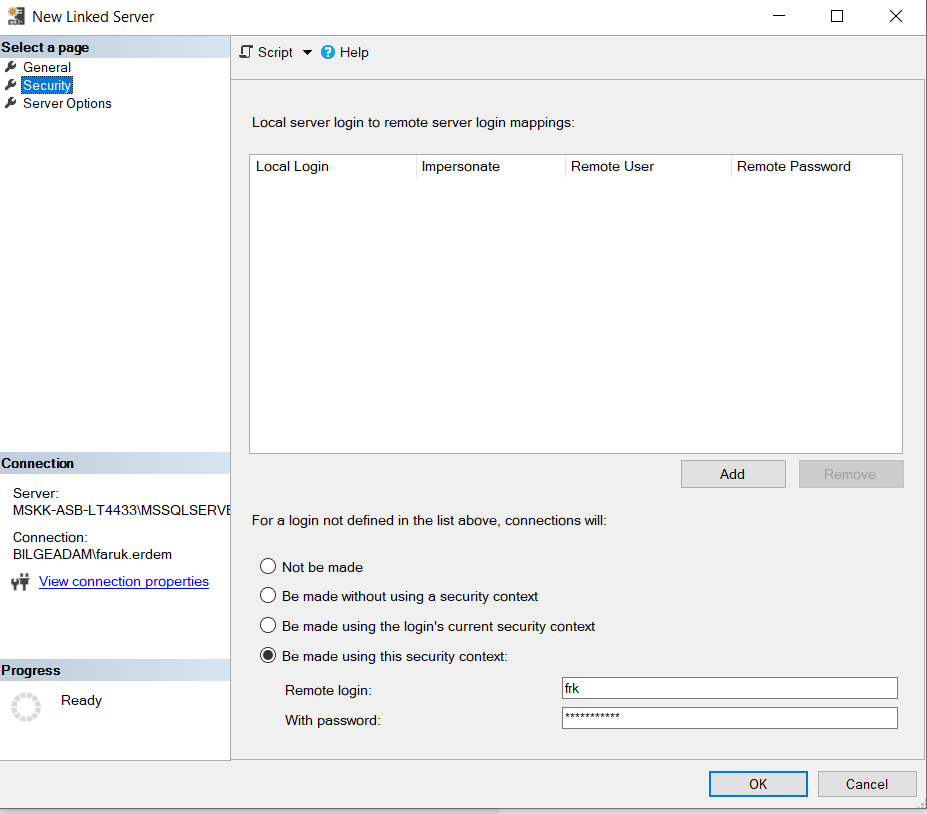
We enter our postgresql username and password in the “Security” section.

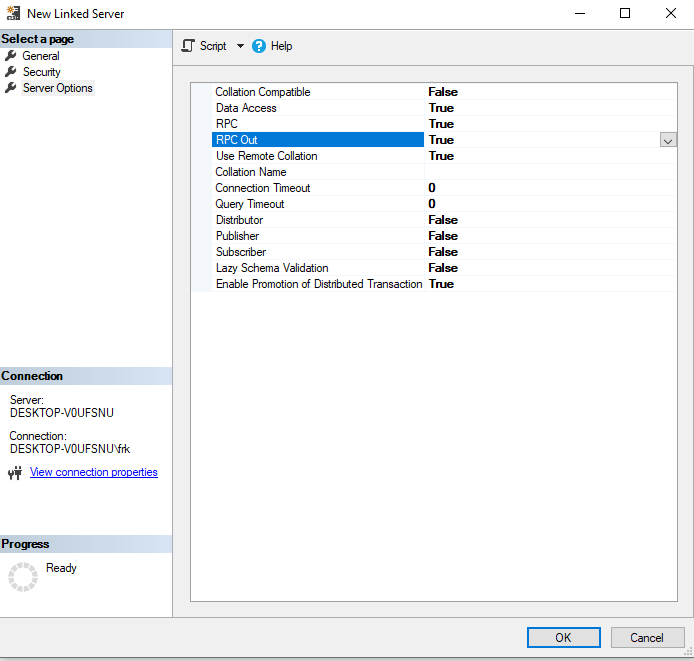
We go to the “Server Options” section and change the parameters as follows.

After completing the above process, by clicking the “OK” button, our linked server definition process from MSSQL to MYSQL is completed.
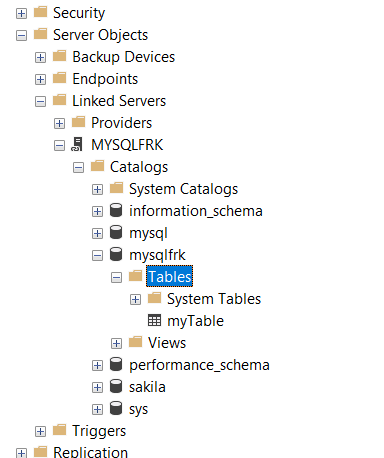

As seen above, we have listed the table in the database named “mysqlfrk” in postgresql.
You can query as follows.


![]()
