In this article, we will install Oracle Grid infrastructure 19c on Linux. Before Oracle Grid installation you need to have OS at first. You may want to read the below article to install Oracle Linux.
Also after grid installation you may want to read the below article to install Oracle RAC 19C on Linux.
How To Install Oracle RAC 19c on Linux
First, we will configure the Disks.
Since I am running a test setup, I will use four disks. Two of these disks will be used for + DATA, the other two for + FRA.
I examine my disks. In the hypervisor environment I am working in, my disks start with SD. It may not start with SD * in your environment. You can fix it according to the situation.
SDB, SDC, SDD and SDE are the disks I added as shared. ASM will work here.
1 2 3 4 5 6 7 8 | [root@node1 ~]# ll /dev/sd* brw-rw----. 1 root disk 8, 0 Sep 13 13:04 /dev/sda brw-rw----. 1 root disk 8, 1 Sep 13 13:04 /dev/sda1 brw-rw----. 1 root disk 8, 2 Sep 13 13:04 /dev/sda2 brw-rw----. 1 root disk 8, 16 Sep 13 13:04 /dev/sdb brw-rw----. 1 root disk 8, 32 Sep 13 13:04 /dev/sdc brw-rw----. 1 root disk 8, 48 Sep 13 13:04 /dev/sdd brw-rw----. 1 root disk 8, 64 Sep 13 13:04 /dev/sde |
I will prepare the disks. Then we will continue with Oracle ASM.
I am doing the following operation on NODE1. (No action should be taken on NODE2)
1 2 3 4 5 6 7 8 9 10 11 12 13 14 15 16 17 18 19 20 21 22 23 24 | [root@node1 ~]# fdisk /dev/sdb Welcome to fdisk (util-linux 2.32.1). Changes will remain in memory only, until you decide to write them. Be careful before using the write command. Device does not contain a recognized partition table. Created a new DOS disklabel with disk identifier 0xf2177cca. Command (m for help): n Partition type p primary (0 primary, 0 extended, 4 free) e extended (container for logical partitions) Select (default p): p Partition number (1-4, default 1): 1 First sector (2048-20971519, default 2048): Last sector, +sectors or +size{K,M,G,T,P} (2048-20971519, default 20971519): Created a new partition 1 of type 'Linux' and of size 10 GiB. Command (m for help): w The partition table has been altered. Calling ioctl() to re-read partition table. Syncing disks. |
We perform these operations for our other disks (sdc, sdd, sde). After our works are finished, there will be an output as follows.
1 2 3 4 5 6 7 8 9 10 11 12 | [root@node1 ~]# ll /dev/sd* brw-rw----. 1 root disk 8, 0 Sep 13 13:04 /dev/sda brw-rw----. 1 root disk 8, 1 Sep 13 13:04 /dev/sda1 brw-rw----. 1 root disk 8, 2 Sep 13 13:04 /dev/sda2 brw-rw----. 1 root disk 8, 16 Sep 13 13:07 /dev/sdb brw-rw----. 1 root disk 8, 17 Sep 13 13:07 /dev/sdb1 brw-rw----. 1 root disk 8, 32 Sep 13 13:07 /dev/sdc brw-rw----. 1 root disk 8, 33 Sep 13 13:07 /dev/sdc1 brw-rw----. 1 root disk 8, 48 Sep 13 13:07 /dev/sdd brw-rw----. 1 root disk 8, 49 Sep 13 13:07 /dev/sdd1 brw-rw----. 1 root disk 8, 64 Sep 13 13:07 /dev/sde brw-rw----. 1 root disk 8, 65 Sep 13 13:07 /dev/sde1 |
We are restarting the NODE1 and NODE2 servers. In the next step, we will prepare our disks for ASM.
We do the following for NODE1 and NODE2.
1 2 3 4 | [root@node1 ~]# oracleasm update-driver Kernel: 5.4.17-2011.5.3.el8uek.x86_64 x86_64 Driver name: oracleasm-5.4.17-2011.5.3.el8uek.x86_64 Driver for kernel 5.4.17-2011.5.3.el8uek.x86_64 does not exist |
1 2 3 4 5 6 7 8 9 10 11 12 13 14 15 16 17 18 19 20 21 22 23 24 | [root@node1 ~]# oracleasm configure -I Configuring the Oracle ASM library driver. This will configure the on-boot properties of the Oracle ASM library driver. The following questions will determine whether the driver is loaded on boot and what permissions it will have. The current values will be shown in brackets ('[]'). Hitting <ENTER> without typing an answer will keep that current value. Ctrl-C will abort. Default user to own the driver interface []: grid Default group to own the driver interface []: asmadmin Start Oracle ASM library driver on boot (y/n) [n]: y Scan for Oracle ASM disks on boot (y/n) [y]: y The next two configuration options take substrings to match device names. The substring "sd" (without the quotes), for example, matches "sda", "sdb", etc. You may enter more than one substring pattern, separated by spaces. The special string "none" (again, without the quotes) will clear the value. Device order to scan for ASM disks []: Devices to exclude from scanning []: Directories to scan []: Use device logical block size for ASM (y/n) [n]: y Writing Oracle ASM library driver configuration: done |
1 2 3 4 5 6 7 8 9 10 11 12 13 14 15 16 17 18 19 20 21 22 23 24 | [root@node2 ~]# oracleasm configure -I Configuring the Oracle ASM library driver. This will configure the on-boot properties of the Oracle ASM library driver. The following questions will determine whether the driver is loaded on boot and what permissions it will have. The current values will be shown in brackets ('[]'). Hitting <ENTER> without typing an answer will keep that current value. Ctrl-C will abort. Default user to own the driver interface []: grid Default group to own the driver interface []: asmadmin Start Oracle ASM library driver on boot (y/n) [n]: y Scan for Oracle ASM disks on boot (y/n) [y]: y The next two configuration options take substrings to match device names. The substring "sd" (without the quotes), for example, matches "sda", "sdb", etc. You may enter more than one substring pattern, separated by spaces. The special string "none" (again, without the quotes) will clear the value. Device order to scan for ASM disks []: Devices to exclude from scanning []: Directories to scan []: Use device logical block size for ASM (y/n) [n]: y Writing Oracle ASM library driver configuration: done |
Our disks are almost prepared. With oracleasm init, we will enable the kernel and do the stamping process.
We enable the kernel on NODE1 and NODE2 servers.
1 2 3 4 5 | [root@node1 ~]# oracleasm init Creating /dev/oracleasm mount point: /dev/oracleasm Loading module "oracleasm": oracleasm Configuring "oracleasm" to use device logical block size Mounting ASMlib driver filesystem: /dev/oracleasm |
1 2 3 4 5 | [root@node2 ~]# oracleasm init Creating /dev/oracleasm mount point: /dev/oracleasm Loading module "oracleasm": oracleasm Configuring "oracleasm" to use device logical block size Mounting ASMlib driver filesystem: /dev/oracleasm |
We will stamp the disks. We only do this on NODE1.
1 2 3 4 5 6 7 8 9 10 11 12 | [root@node1 ~]# oracleasm createdisk data1 /dev/sdb1 Writing disk header: done Instantiating disk: done [root@node1 ~]# oracleasm createdisk data2 /dev/sdc11 Writing disk header: done Instantiating disk: done [root@node1 ~]# oracleasm createdisk fra1 /dev/sdd1 Writing disk header: done Instantiating disk: done [root@node1 ~]# oracleasm createdisk fra2 /dev/sde1 Writing disk header: done Instantiating disk: done |
We are checking our disks.
1 2 3 4 5 6 | [root@node1 ~]# ll /dev/oracleasm/disks/ total 0 brw-rw---- 1 oracle dba 259, 5 Sep 13 02:38 DATA1 brw-rw---- 1 oracle dba 259, 7 Sep 13 02:38 DATA2 brw-rw---- 1 oracle dba 259, 11 Sep 13 02:39 FRA1 brw-rw---- 1 oracle dba 259, 9 Sep 13 02:38 FRA2 |
In order for the process that we are doing to appear from node2, we run the following command.
1 2 3 4 5 6 7 8 | [root@node2 ~]# oracleasm scandisks Reloading disk partitions: done Cleaning any stale ASM disks... Scanning system for ASM disks... Instantiating disk "DATA1" Instantiating disk "DATA2" Instantiating disk "FRA1" Instantiating disk "FRA2" |
Our disks are ready now. Now we can start the installation. First of all, we will install Grid.
1 2 3 4 5 6 | # cp V982068-01.zip /u01/app/grid/19.3.0/gridhome_1 # cd /u01/app/grid/19.3.0/gridhome_1 # chown grid:oinstall V982068-01.zip # su – grid # cd /u01/app/grid/19.3.0/gridhome_1 $ unzip V982068-01.zip |
Our files have been copied. Now the setup starts.
Important note: If you are installing on OEL 8.2, Oracle Database 19C currently does not officially support this version. You will need to set the parameter below.
1 2 3 4 | # su - grid $ export CV_ASSUME_DISTID=OEL8.1 $ cd /$GRID_HOME/ $ ./grid_Setup.sh |
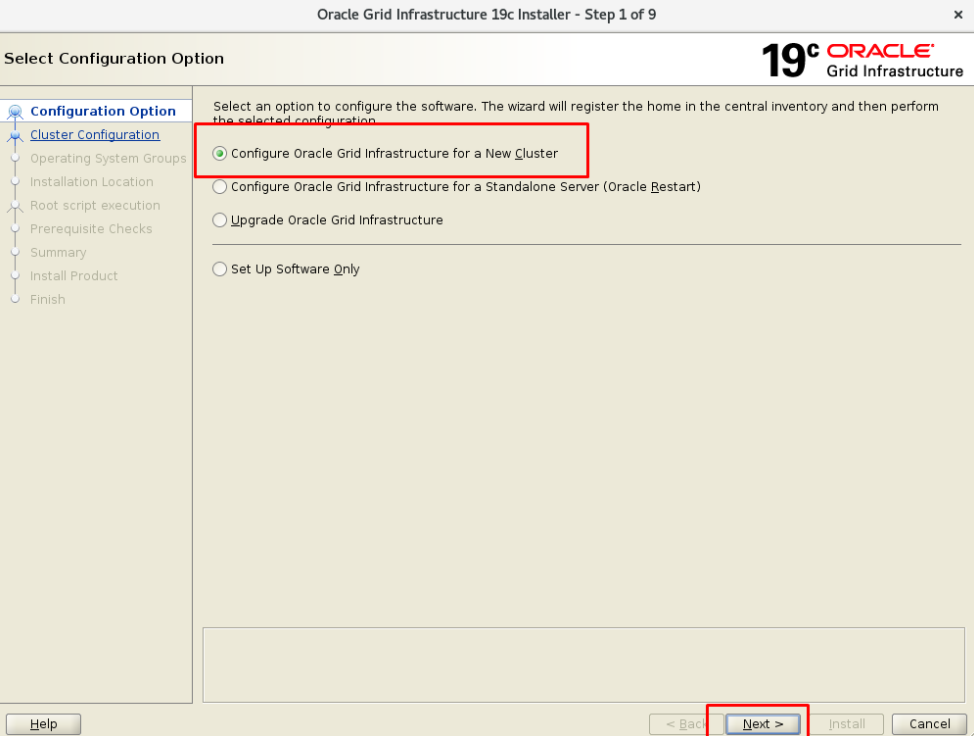
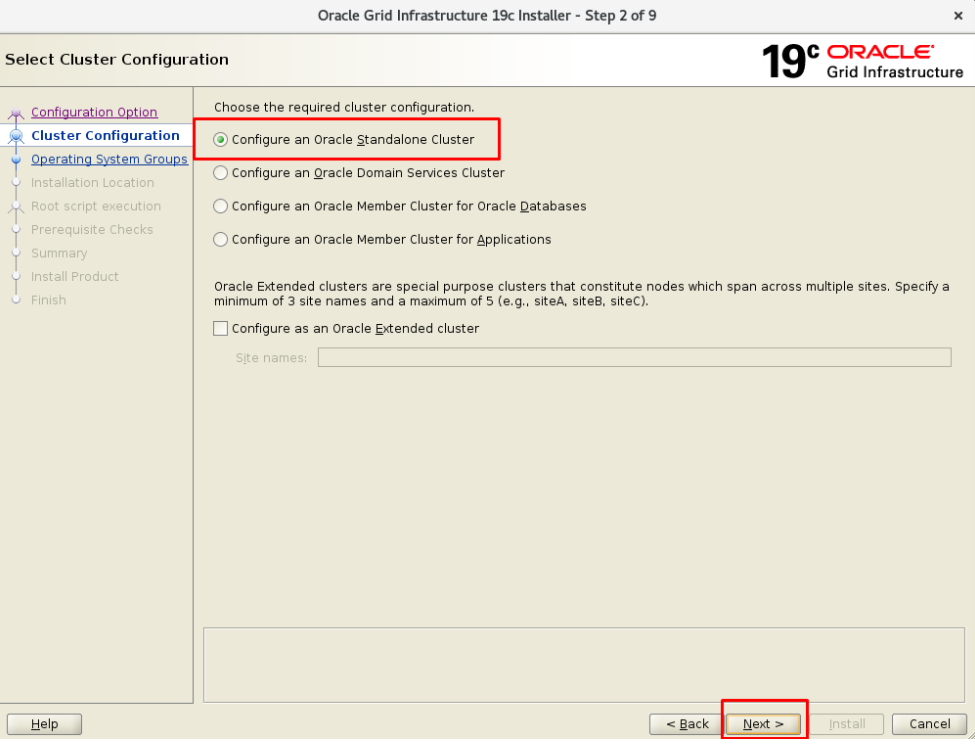
We click on “Configure an Oracle Standalone Cluster” since we will create a new Cluster.
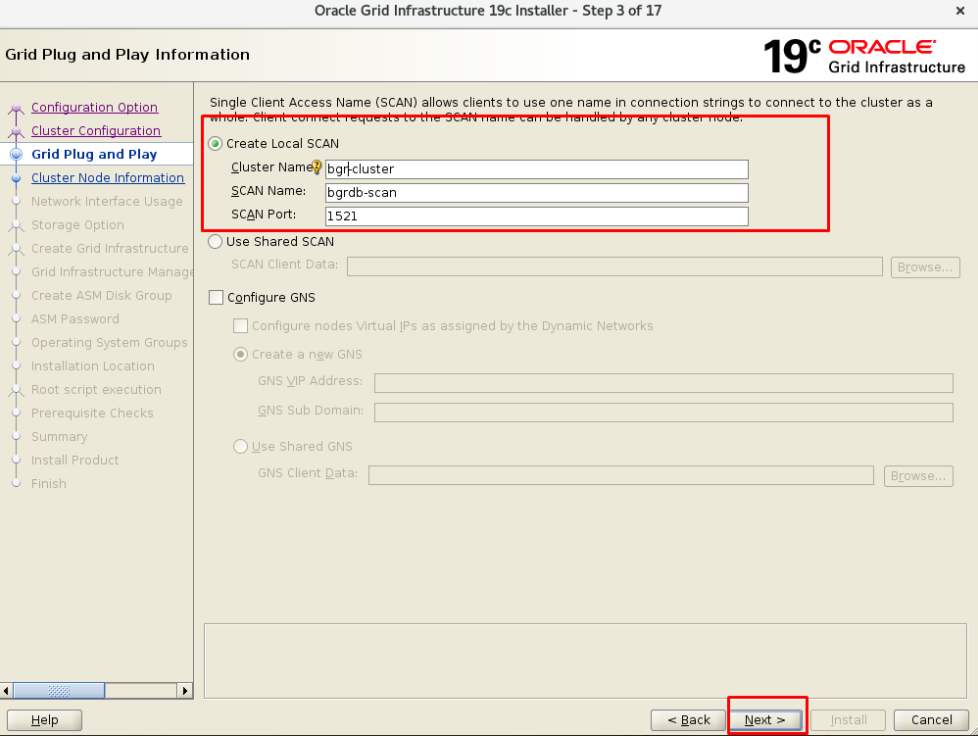
We write our Cluster Name and Scan Name information.
We are adding our second server.
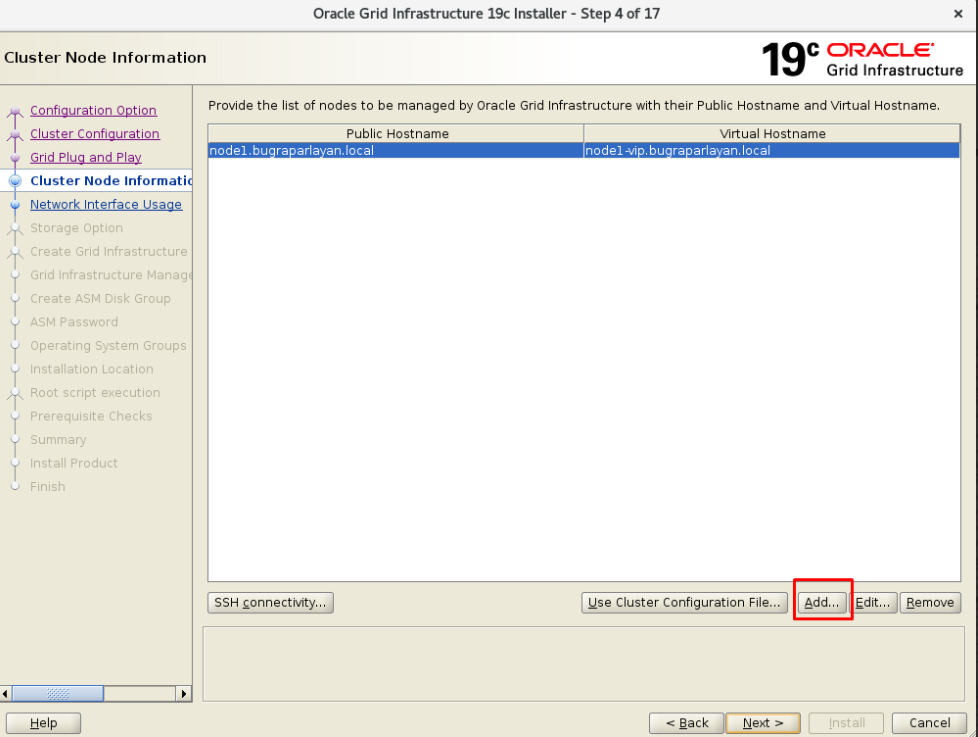
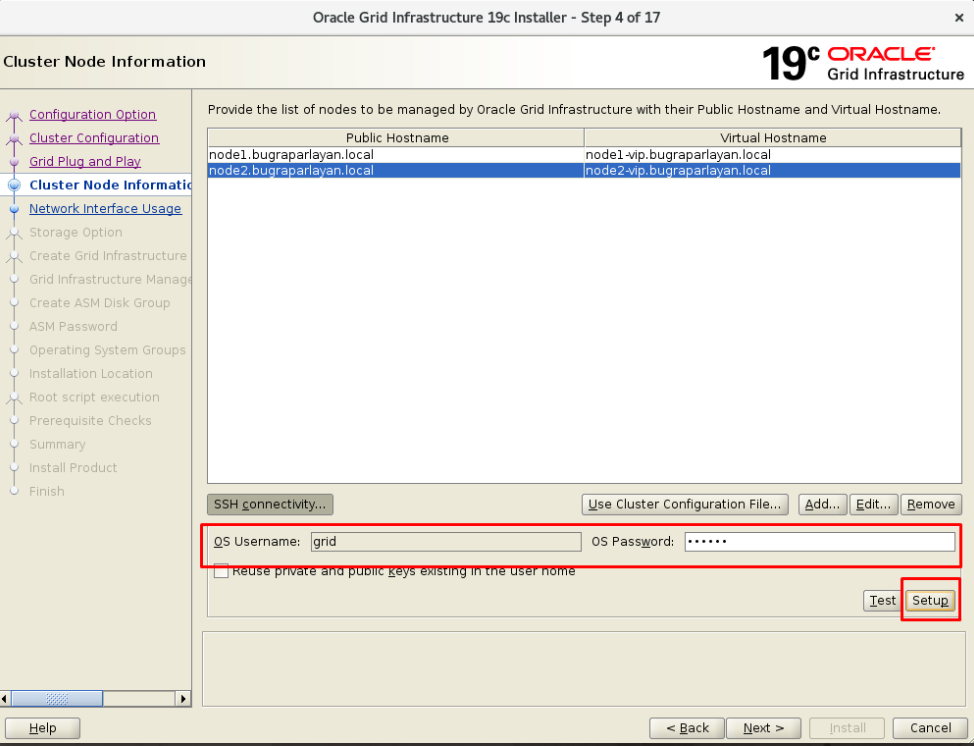
After adding, the two servers need to talk to each other. We will use SSH for this.
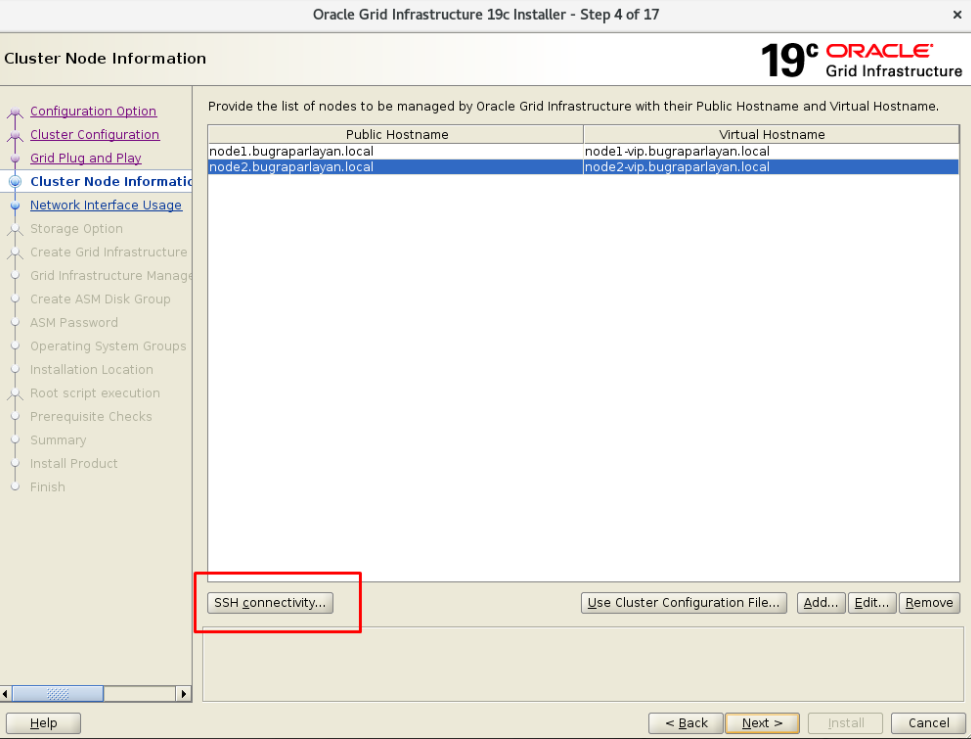
At this stage, the system will talk to each other with the user “GRID”. We write the password of our Grid user.
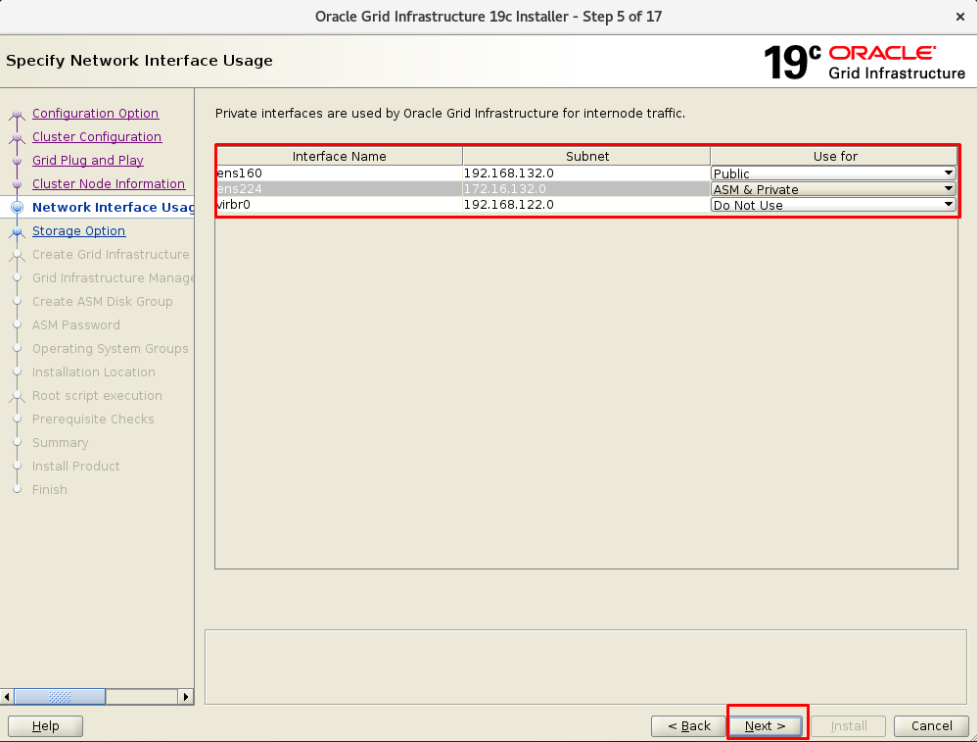
We need to write the network information. We arrange it as follows.
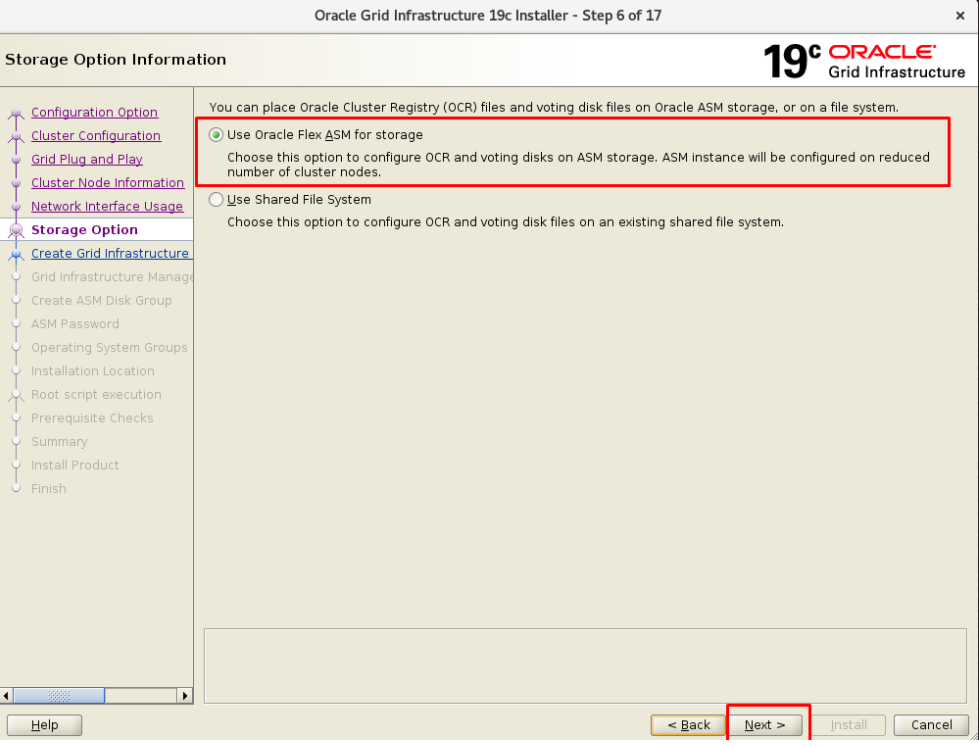
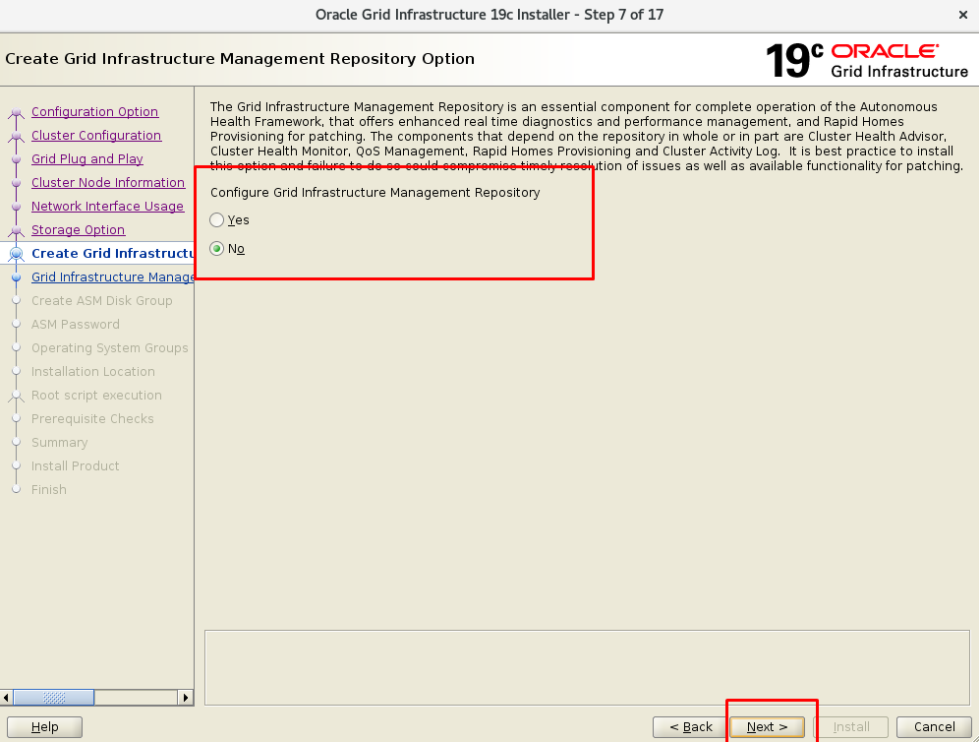
The installation will be on the 4 ASM disks we added. We click on “Use Oracle Flex ASM for storage”.
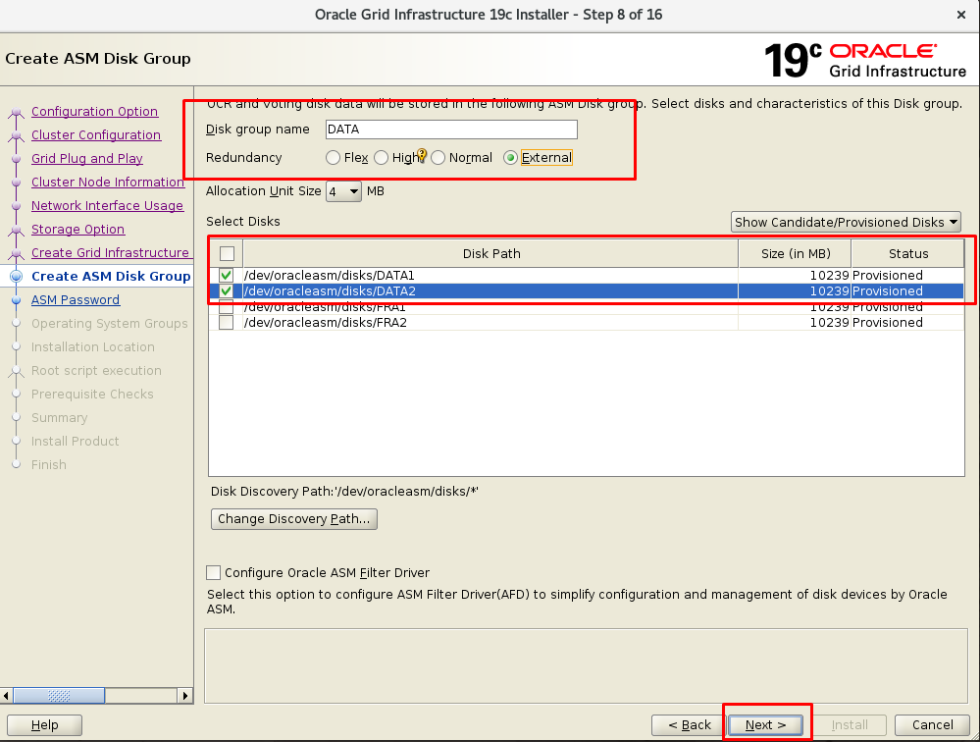
Now we will add our disks. Since I made the test installation, I will choose “EXTERNAL”.
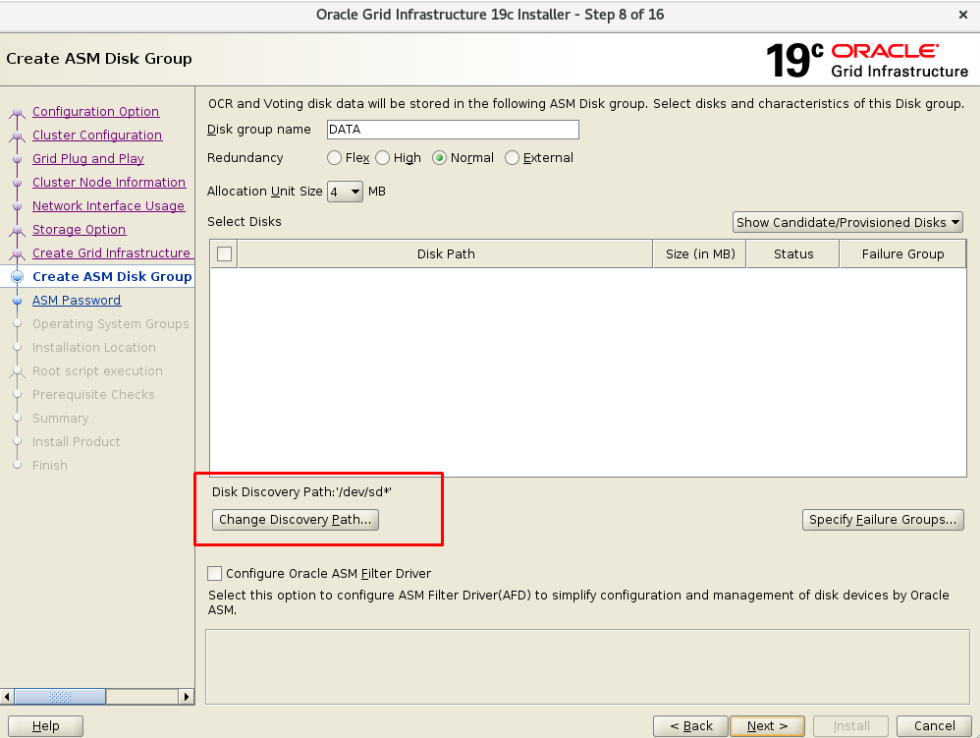
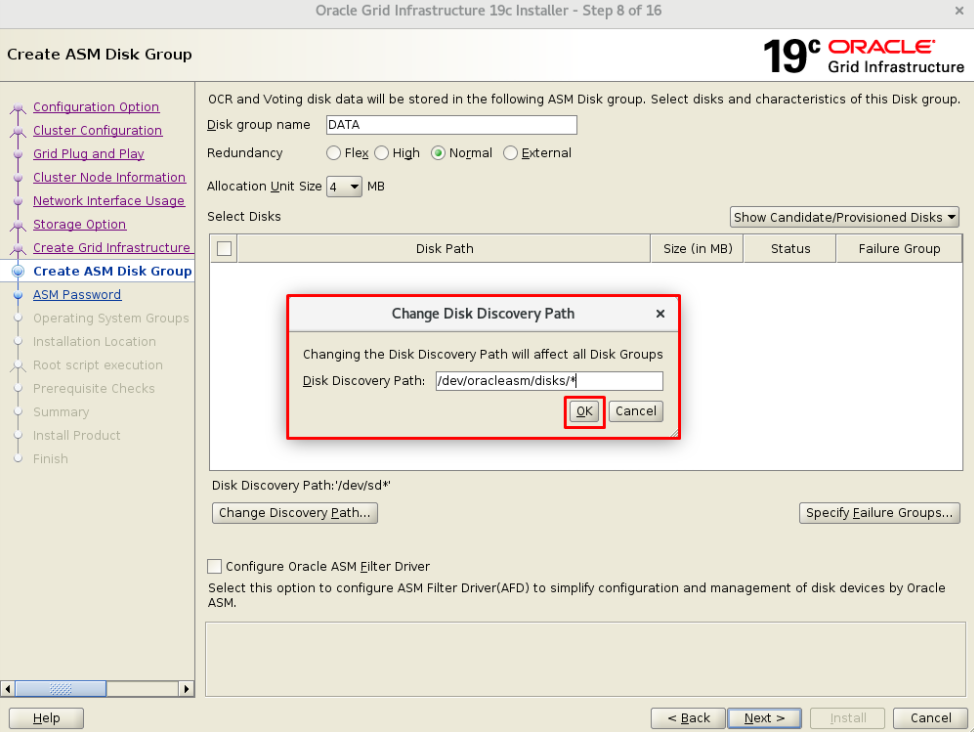
I will add my DATA1 and DATA2 disks that I prepared for the +DATA.
I set a password for SYS and ASMSNMP users to be used on the grid.
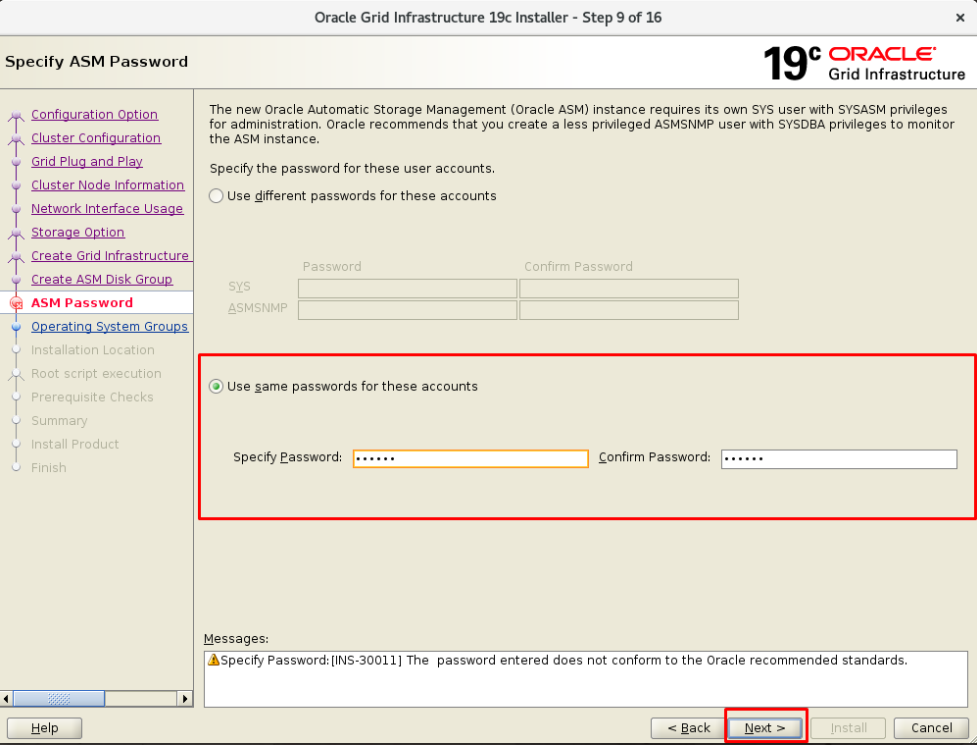
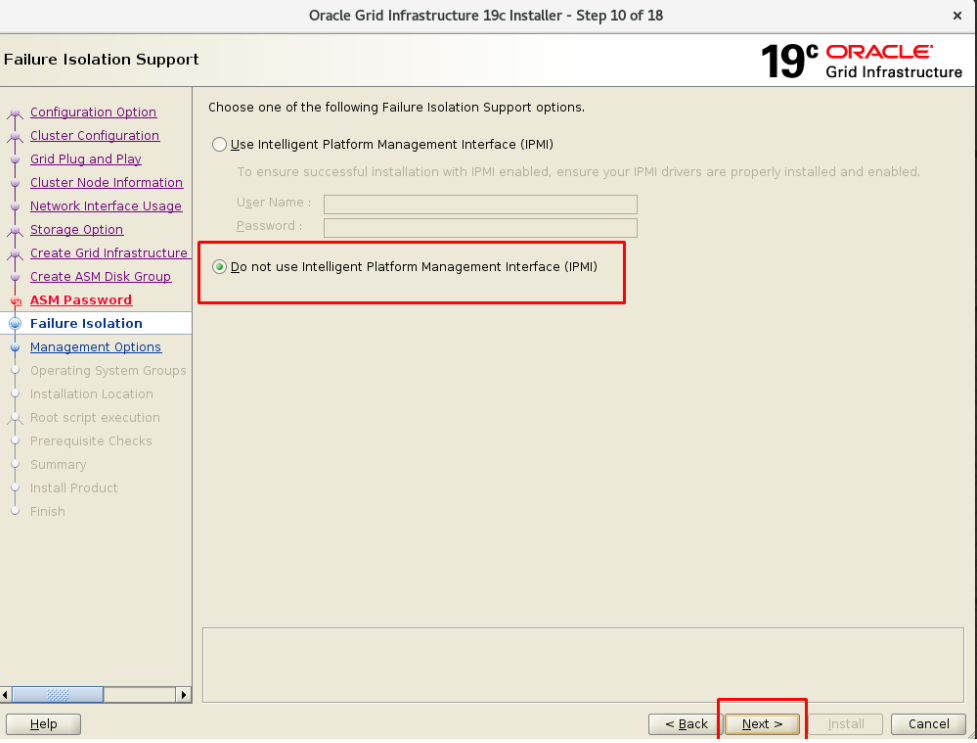
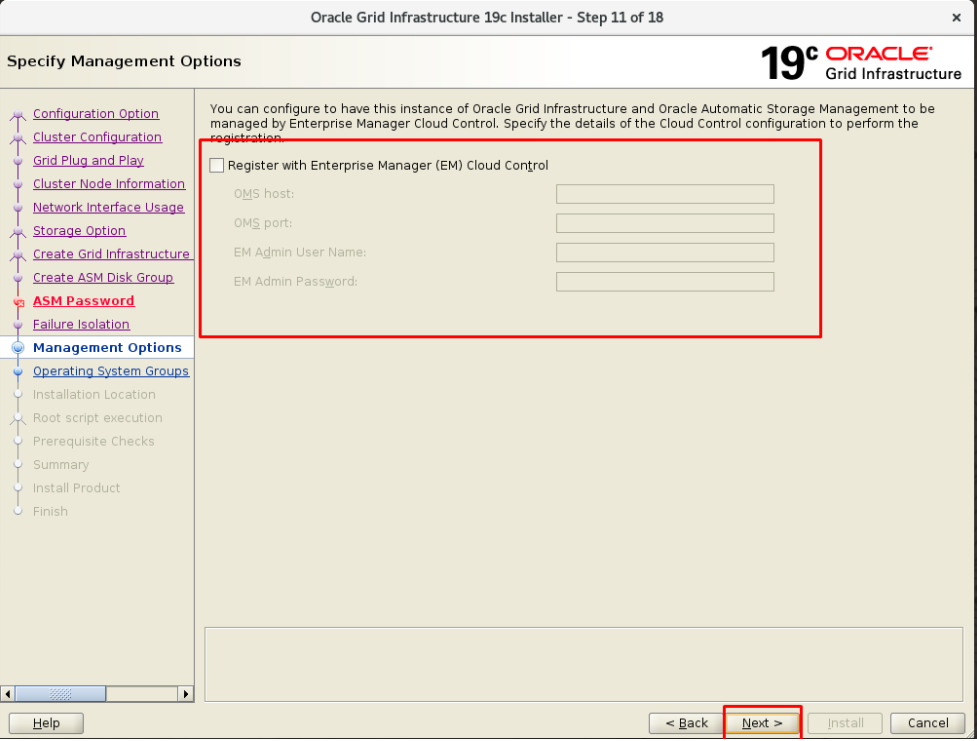
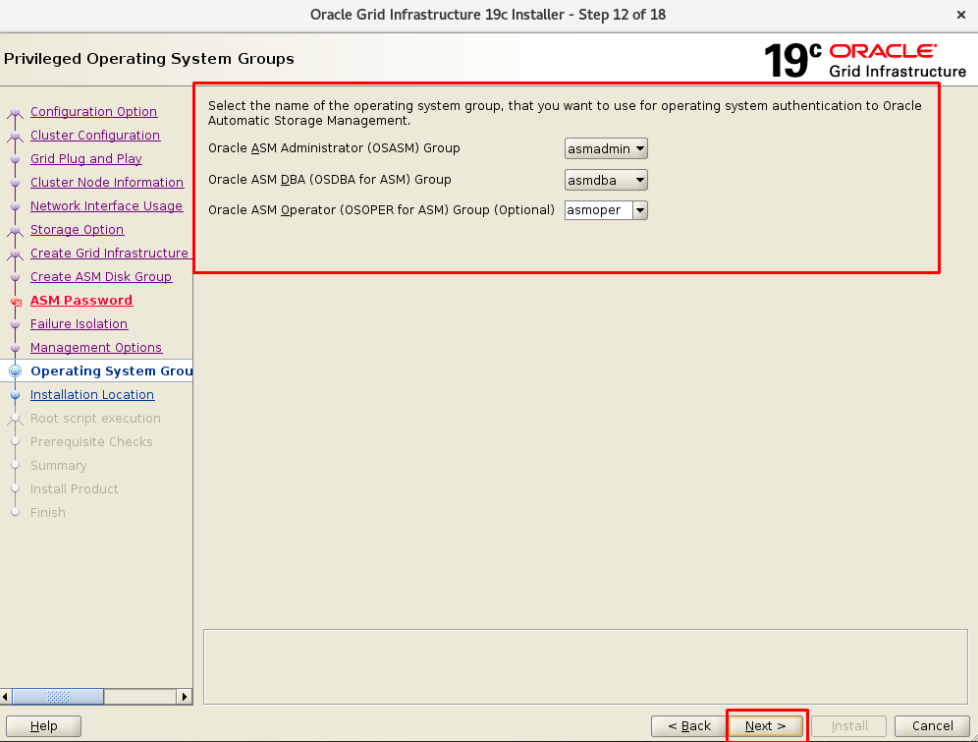
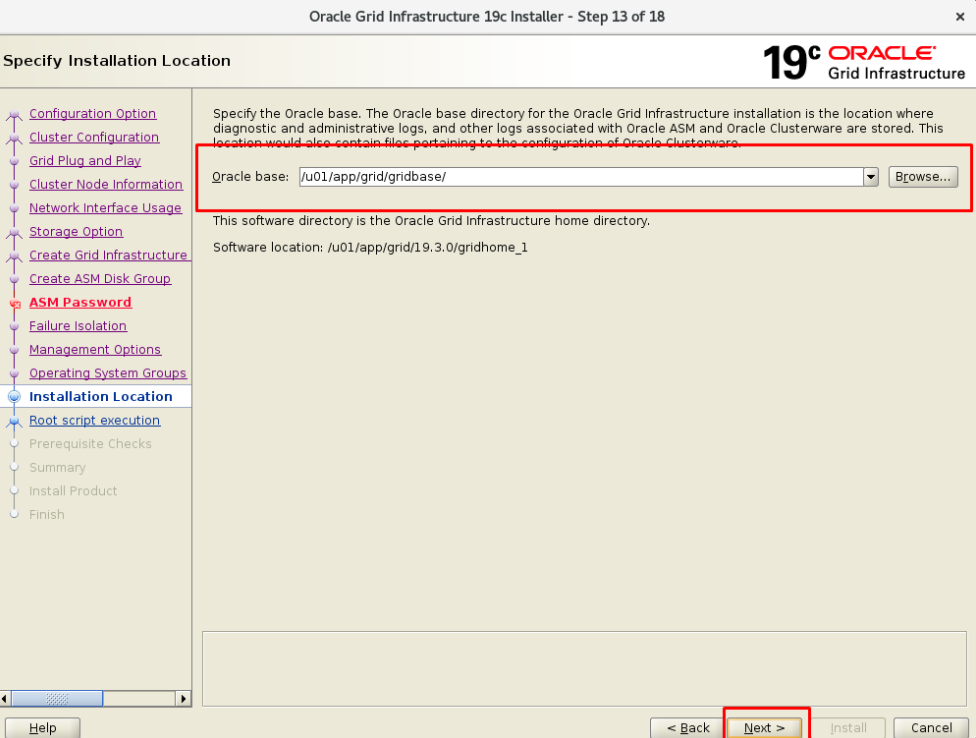
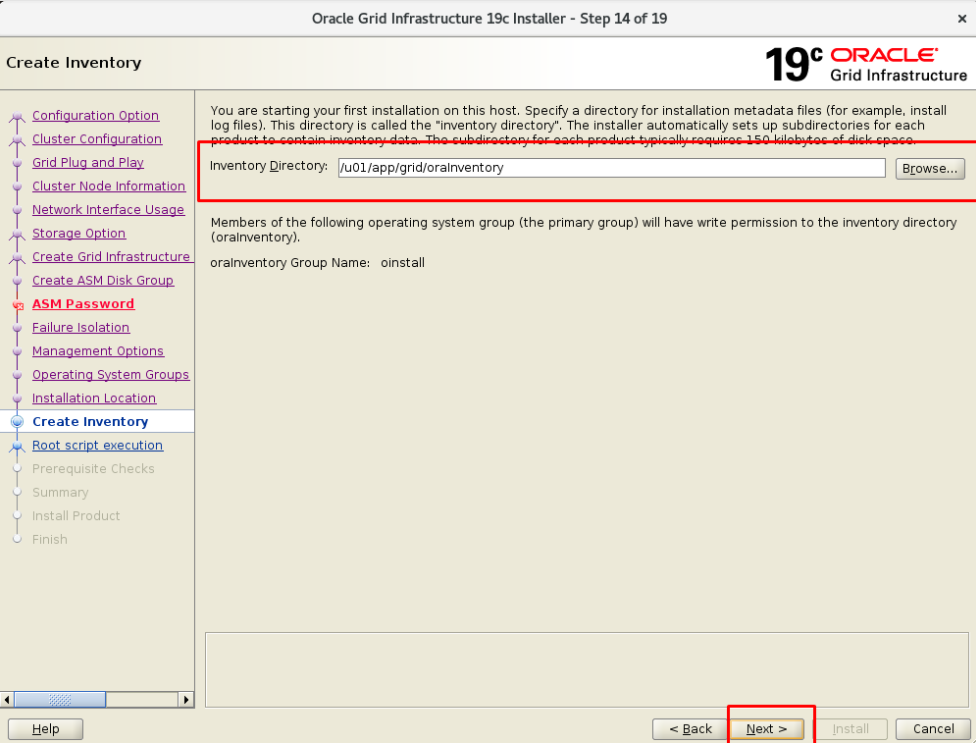
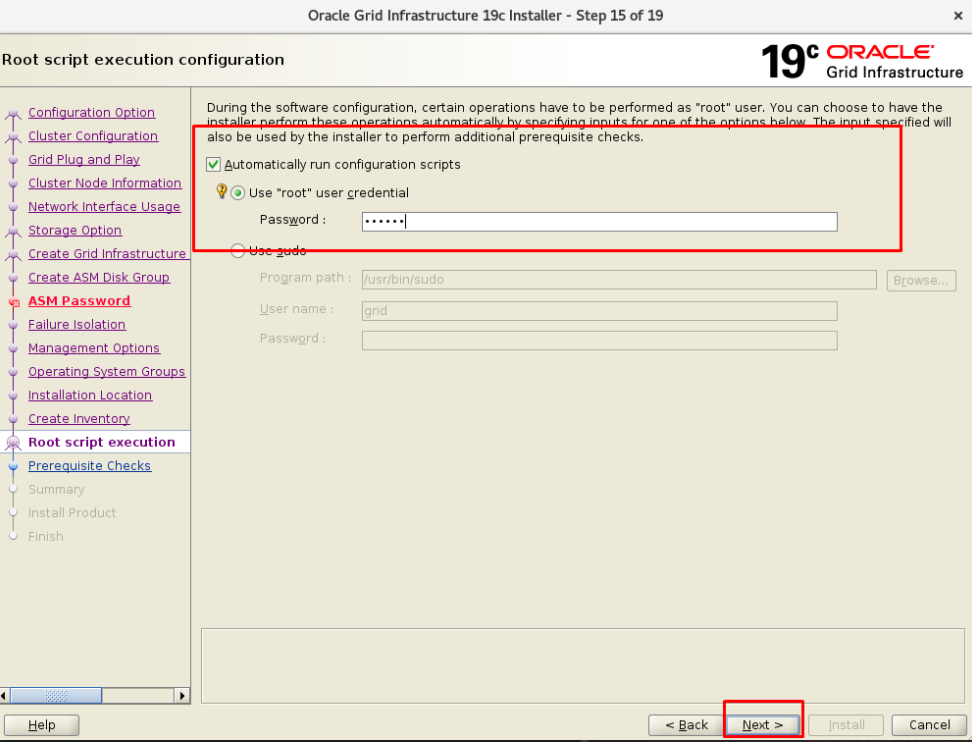
Oracle traditionally runs a script with the root user in the last step of the installation. If we want it to do this process automatically, we can fill in this field. In this way, if a script will be run with the root user during installation, it will be done automatically.
If the cvuqdisk package is seen as missing at this step, you need to do the following actions.
1 2 3 | # cd $GRID_HOME/cv/rpm # CVUQDISK_GRP=oinstall; export CVUQDISK_GRP # rpm -iv cvuqdisk-1.0.10-1.rpm |
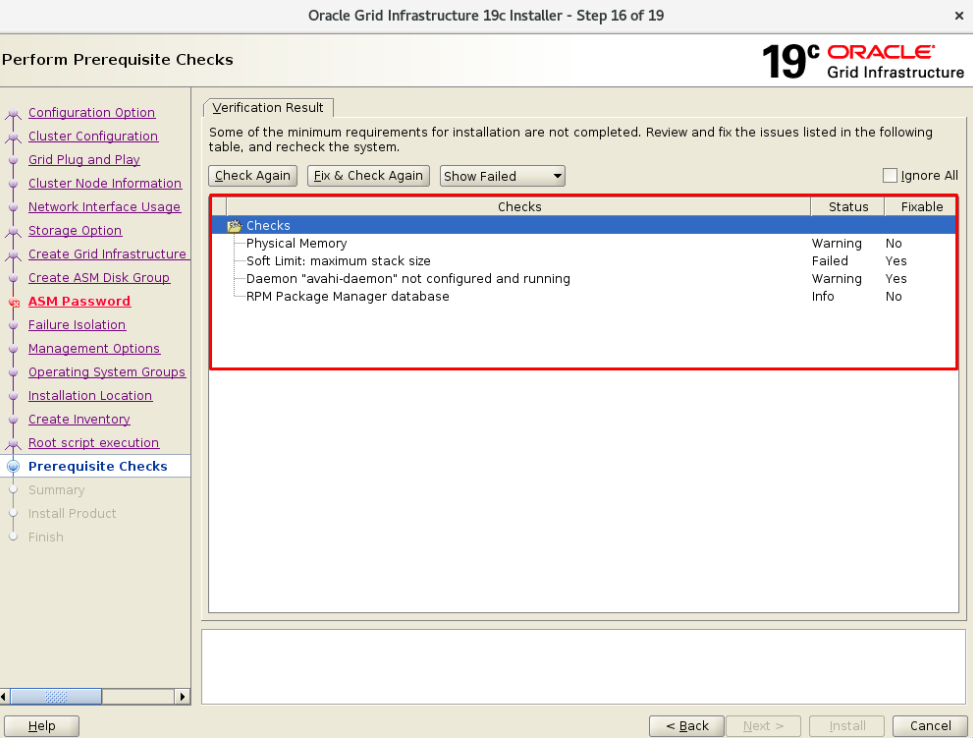
The system status is being checked. Some warnings appeared in my installation. For example, RAM is not enough because a minimum of 12GB ram is recommended. I’m going to click on “IGNORE ALL”.
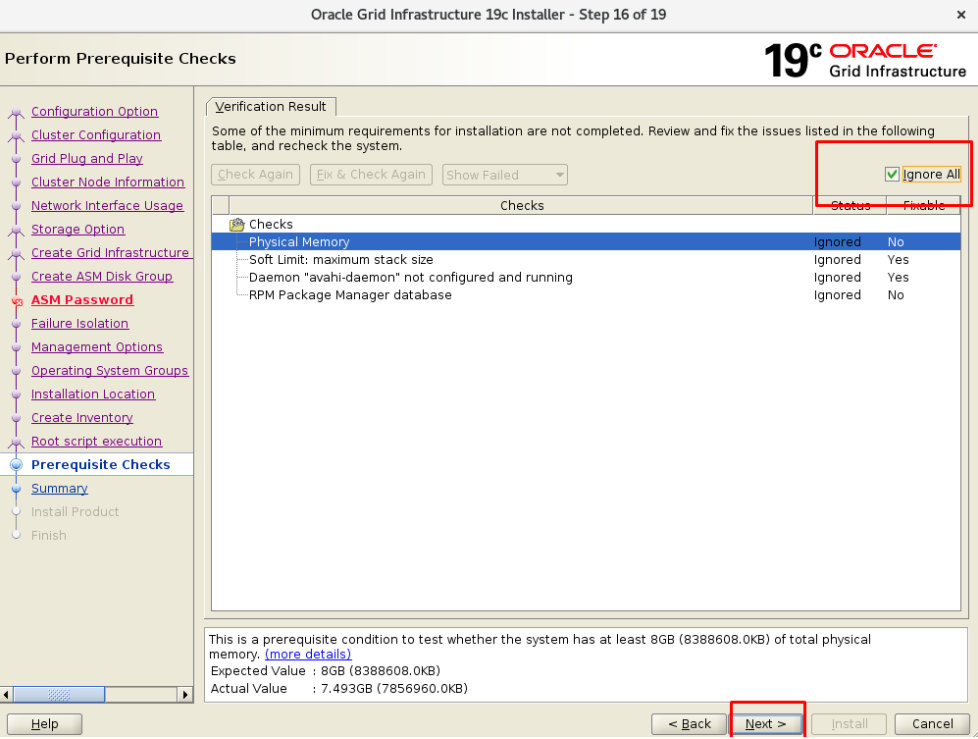
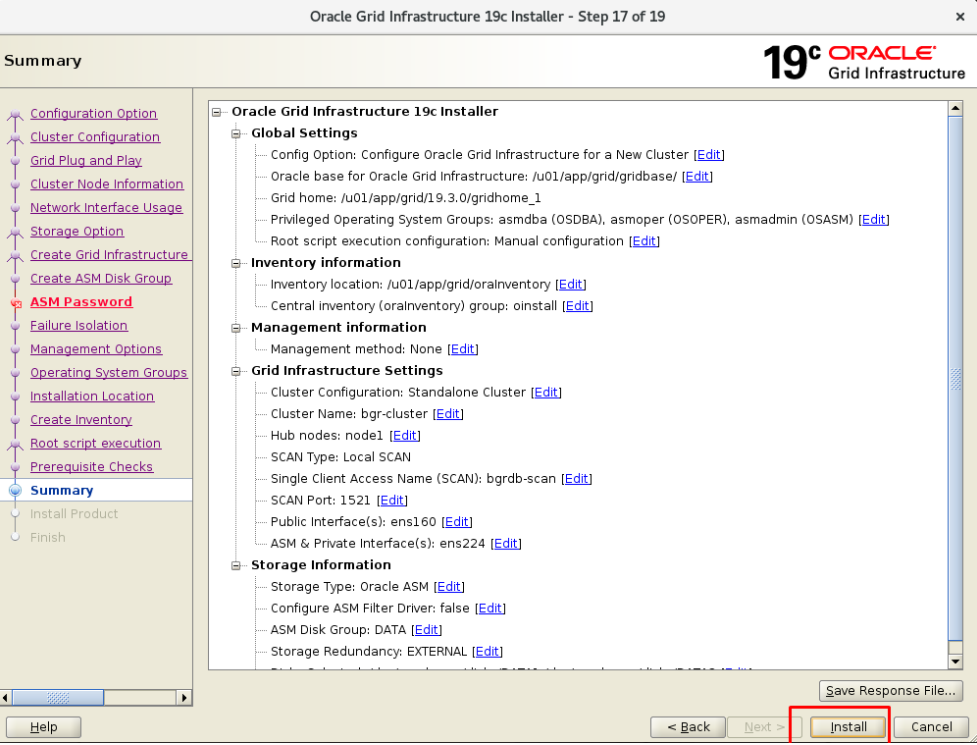
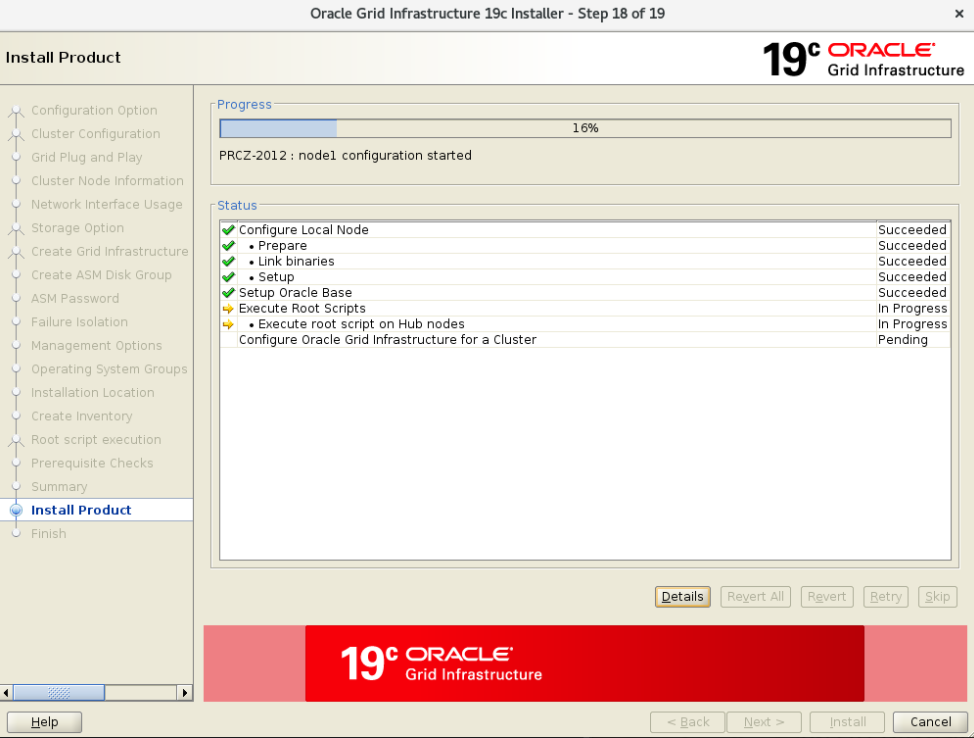
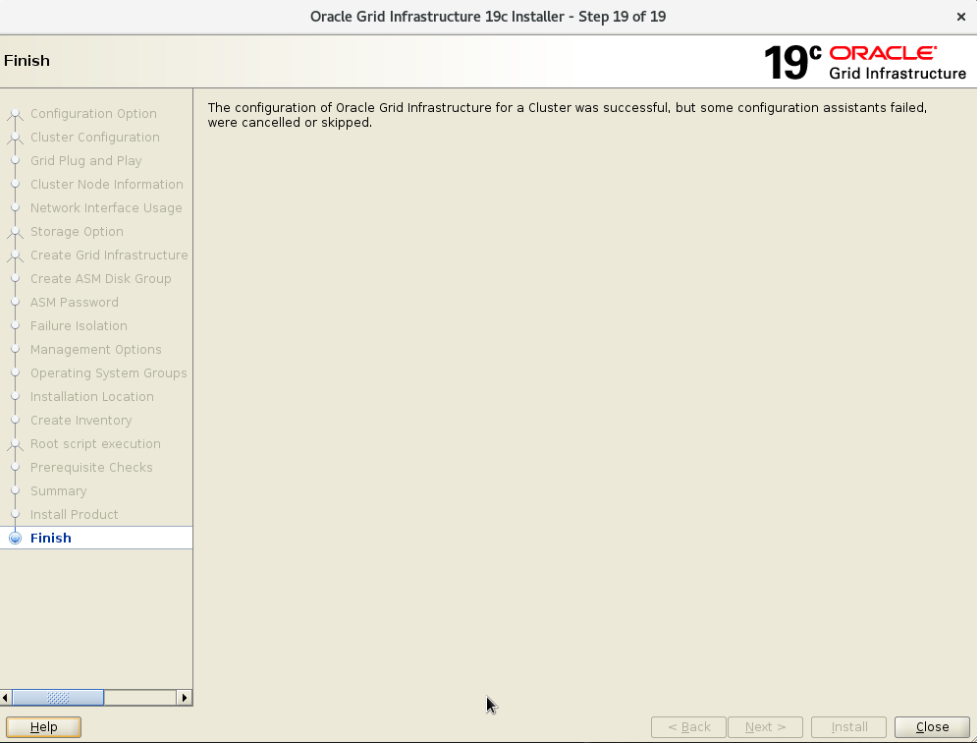
GRID installation for Oracle Database RAC is complete. In fact, the longest and most challenging is the GRID setup. GRID installation has very sensitive points. For example, if NTP is wrong, there is a problem. Due to the cluster, the clock of both servers must be equal. For this reason, a clean GRID installation is essential.
The next chapter is installing Oracle Database on RAC. Then we will do our tests.
How To Install Oracle RAC 19c on Linux
Hope to see you again.
![]()
 Database Tutorials MSSQL, Oracle, PostgreSQL, MySQL, MariaDB, DB2, Sybase, Teradata, Big Data, NOSQL, MongoDB, Couchbase, Cassandra, Windows, Linux
Great article but please can you explain how you created the
shared disks in VMware. Some screenshots and explanations would be
very useful. Thanks.
I second your thoughts. A brief writ-up on the creation of shared Disks will be helpful.