In today’s article, I will tell you how to do SQL Backup With Powershell.
We will examine how to take a SQL Database Backup using the power of Powershell and the open source DBATools module.
Every organization should develop a Disaster Recovery plan to prevent business loss against unexpected downtime.
Power outage, data center problems, cyber attacks, natural disaster, etc. it could be.
To prepare for such events, we should conduct a regular disaster drill. Database administrators also play a vital role in these processes.
In case of any data loss, you need to make sure that your database backup structure is valid and your recovery scenarios are ready.
For this reason, this scenario should be revived by checking the backup and recovery processes at different times.
But repeating this process with a certain frequency will start to get boring after a while.
In addition, after these fallback scenarios, you need to perform an additional consistency check by doing DBCC CHECKDB.
If we summarize this process;
Taking regular backups of databases and restoring these backups periodically.
Performing DBCC CHECKDB operations to detect database consistency after restores.
In order to perform the above operations on SQL Server, we can write T-SQL code, create a Maintenance Plan or prepare an SSIS package.
However, we may need additional information to perform these operations.
Without needing this information, we can use DBATools for database backup and restore operations.
I have already told you about DBATool.
You can use Azure Data Studio to use DBATools, but we will be performing our operations through Powershell.
We are running Powershell. Using the Get-Help command, we check the structures that pass the Backup.

It has a simple use like Get-Help *Backup* as in the picture above. If you haven’t used it before, Get-Help asks for your approval to perform powershell installations in order to update itself.
You can continue the process by giving consent like me. After completing the installation, a long list will come.
We need the modules with dbatools information, that is, the section you will see in Picture-2.
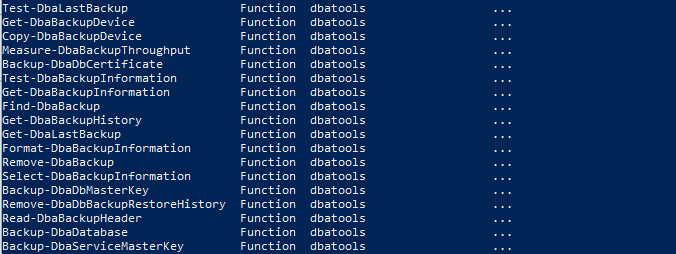
As you can see, there is a function that will perform many operations with Backup using DBATools.
First, let’s check the latest database backups using the Get-DbaLastBackup command.
Of course, let’s run the Get-Help Get-DbaLastBackup command again and find out how the function works.
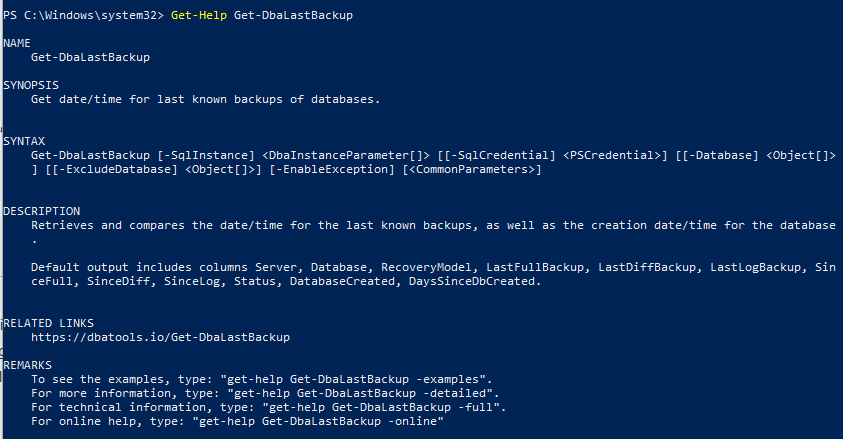
As an example, I will run this command on my own server.
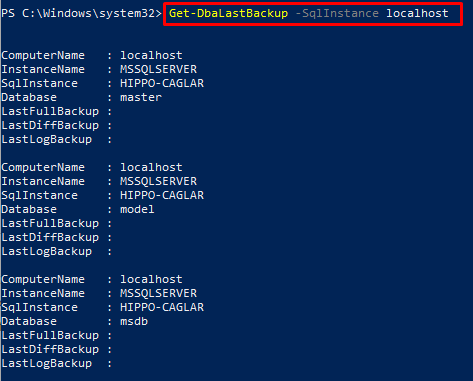
With an output like the picture above, I see that I have never taken a backup of the database before.
But since I don’t like the screen output, I add |Out-Gridview to the Get-DbaLastBackup -SqlInstance localhost command I use.
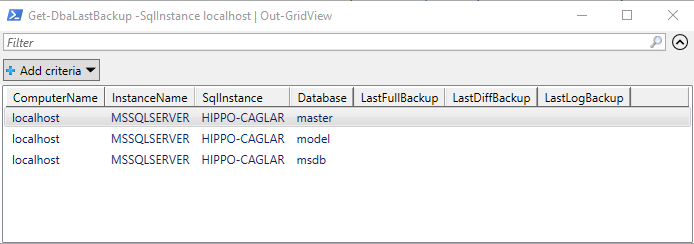
At least the picture above is clearer. Now let’s take a quick backup. To get a backup, we will use the Backup-DBaDatabase that we see in those returning from *Backup*.
Let’s take a look at the help file for this command.
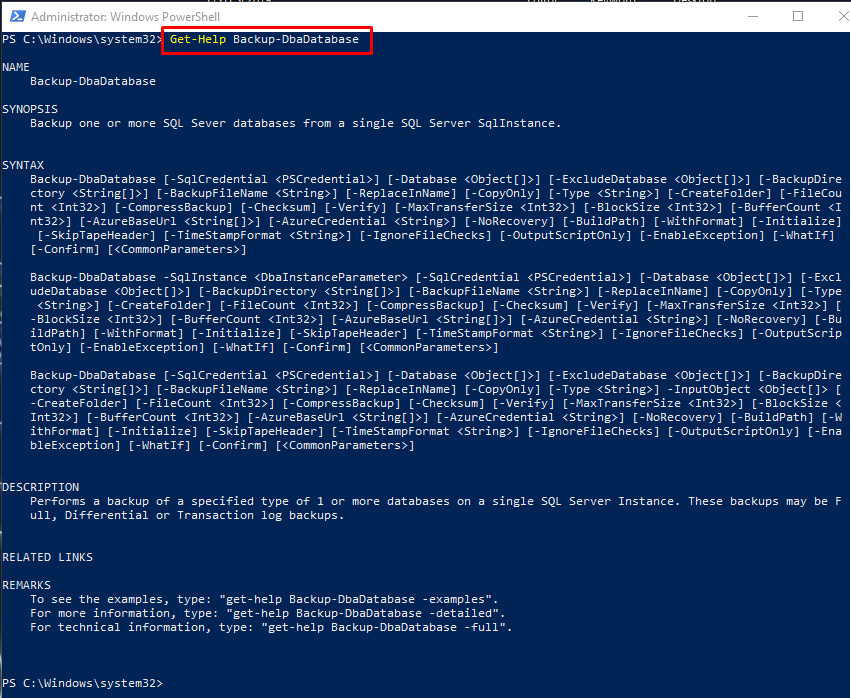
In fact, the content of the help file contains everything we may need for the use of the command, the form of Syntax, examples of ready-made command usages, etc.
Based on this information, I am writing the following command to back up the existing databases on my localhost.
1 | Backup-DbaDatabase -SqlInstance localhost |

As you can see in the picture, I take a backup of the databases with a very simple command.
The most important part here is how can I specify where to get the database or databases that I have determined? Actually, the answer to this question is also available in the syntax in the help file.
First of all, let me share the command you will need to take a database backup you want.
With the following command, you can only backup the master database on localhost.
1 | Backup-DbaDatabase -SqlInstance localhost -Database master |
If you want to backup more than one database, you can use the following piece of code. (takes backup for master and model databases.)
1 | Backup-DbaDatabase -SqlInstance localhost -Database master, model |
Well we set the databases but we didn’t inform where to get them. By default, SQL Server takes a backup to the area you specify in Database Settings.
But if you want to change, how will you do it?
With the command below, you can back up the master database on localhost to the D:\SQLBackup file directory.
1 | Backup-DbaDatabase -SqlInstance localhost -Database master -BackupDirectory D:\SQLbackup |

We use the Get-DbaLastBackup command again to check the accuracy of the backups we have taken.

As a difference in command usage, we enabled the result set to be displayed in the grid structure with Out-GridView.

When I check the data, I only see that I have received a Full Backup, if I want to take a differantial or log backup, how will I get it? For database administrators, being able to take diff and log backups is just as important as taking full backups and should be included in the database backup architecture.
By using the DbaTools module, we can take a full backup, as well as a diff and log backup.
For this, we need to use the Type parameter in the Backup-DbaDatabase command.
Let’s make an example immediately and take a diff backup for the MSHOWTO database on localhost.
(Of course, in order to perform this operation, it is necessary to make a full backup of the MSHOWTO database. Remember!)
1 | Backup-DbaDatabase -SqlInstance localhost -Database master -BackupDirectory D:\SQLBackup -Type Differential |

You immediately thought of how you can get a backup with information such as the time stamp of the backup, the database name, the type of database backup we took, right? Let’s answer this question right away.
How can you take a Time Stamped, Differently named database backup?
1 | Backup-DbaDatabase -SqlInstance localhost -Database MSHOWTO -BackupDirectory D:\SqlBackup -BackupFilename servername-instancename-dbname-timestamp.bak -ReplaceInName |

As you can see above, we have successfully performed the operation with the command we wrote, but here is the -ReplaceInName usage that we have just seen. Let me explain right away.
ReplaceInName ; To replace the strings in backupfilename with actual values, we must specify this command in the backup command.
We were able to give the dbname and timestamp information we wanted to use ReplaceInName to the backup we took.
If you want, you can also add backuptype information here. ( -BackupFileName instancename-dbname-backuptype-timestamp.bak )

Finally, let me show you how to run a command if you want to back up each database to a folder with its own name.
If you run the following command, you will see that a folder named MSHOWTO has been created in the D:\SQLBackup file path of the MSHOWTO database on localhost and has taken the backup into it.
1 | Backup-DbaDatabase -SqlInstance localhost -Database MSHOWTO -BackupDirectory D:\SqlBackup -BackupFilename servername-instancename-dbname-timestamp.bak -ReplaceInName -CreateFolder |

We see that it has successfully backed up, but let’s check it out now.

As you can see, it created a folder named MSHOWTO at D:\SQLBackup and took a successful backup with the backup name we wanted.
If there is a file with a similar name in the file path, it does not create a new folder and only performs the backup process.
As a database administrator, we can take a compress backup according to the SQL Server version information we use while performing the backup process, and of course, we also checksum and verify the backup we receive for accuracy.
How can we do these operations, and the code blocks we will need to do them are as follows.
To get Compress Backup;
1 | Backup-DbaDatabase -SqlInstance localhost -Database MSHOWTO -BackupDirectory D:\SqlBackup -BackupFilename servername-instancename-dbname-timestamp.bak -ReplaceInName -CreateFolder -CompressBackup |
To check the accuracy of the backup we received;
1 | Backup-DbaDatabase -SqlInstance localhost -Database MSHOWTO -BackupDirectory D:\SqlBackup -BackupFilename servername-instancename-dbname-timestamp.bak -ReplaceInName -CreateFolder –CompressBackup -Checksum -Verify |
To get CopyOnly backup without breaking the backup structure;
1 | Backup-DbaDatabase -SqlInstance localhost -Database MSHOWTO -BackupDirectory D:\SqlBackup -BackupFilename servername-instancename-dbname-timestamp.bak -ReplaceInName -CreateFolder –CompressBackup -Checksum -Verify -CopyOnly |
You can use any of the above commands and specify the backup method for your needs. The issues of backing up and restoring from the backup you have taken are of great importance for your organization.
We explained how we can solve your backup need in SQL Server using Powershell, and in my next article, I will be explaining how we can get back from this backup we have taken. Have days when you don’t need a spare!
![]()
 Database Tutorials MSSQL, Oracle, PostgreSQL, MySQL, MariaDB, DB2, Sybase, Teradata, Big Data, NOSQL, MongoDB, Couchbase, Cassandra, Windows, Linux