The following article is about the installation of MySQL Server on Linux Machine(RHEL) using RPM Packages.
1) Login to the OS using the root credentials for smoother installation
![]()
![]()
The above screenshots shows the OS details i.e. the current machine is RHEL 6.4 version and is of 64 bits.
2) Download the RPM packages from the MySQL official website :
1 | https://dev.mysql.com/downloads/ |
You can download the RPM packages on the Linux box directly or download it on your local machine and then transfer the packages to the target machine(On which you want to install the MySQL server) using any tools like FileZilla or WinSCP. In this installation, I am using the WinSCP tool to transfer the packages.
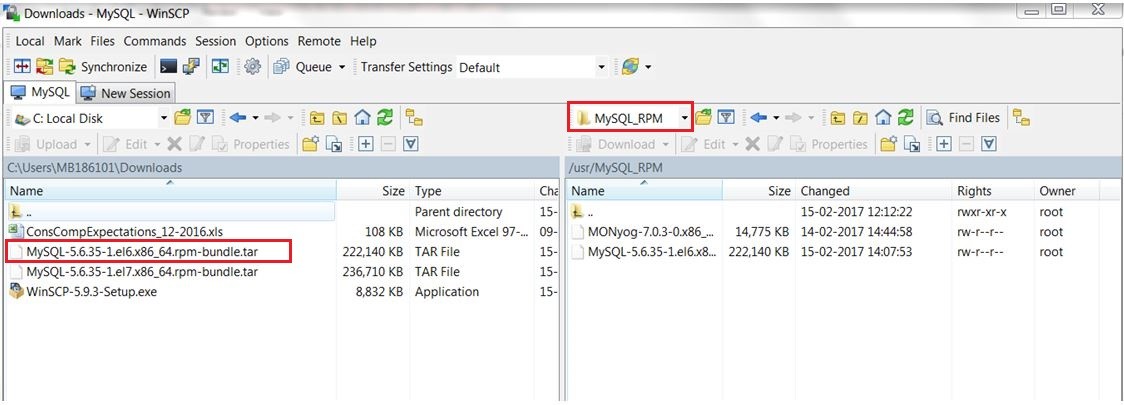
Location of the RPM package on the Linux box:

3) Extract(untar) the RPM package using the following command:
1 | tar -xvf filename.rpm |
Sample :

4) Install the MySQL RPM packages one by one using the following command:
1 | rpm -ivh RPMFileName.rpm |
Below is the screenshot of installation progress for your reference
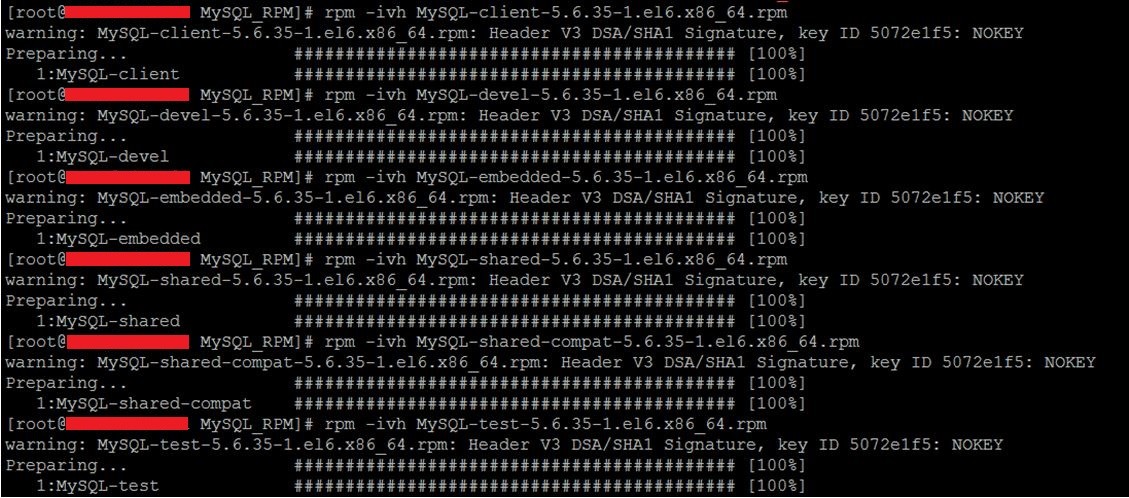

Kindly note the password that is present in the file(/root/.mysql_secret) that we will use later.
5) Start the MySQL service:
1 | service mysql start |

6) Login to the MySQL using the password present in the .mysql_secret file in step 4:
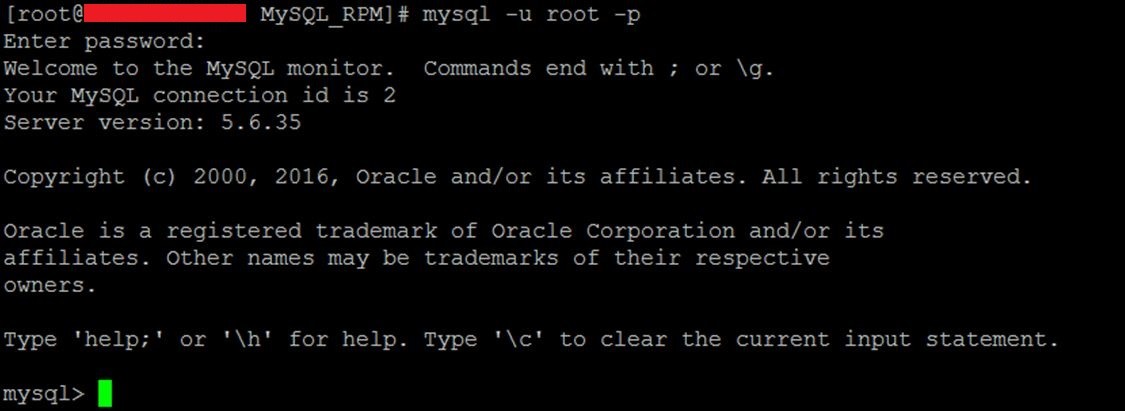
You can see the MySQL server version above(5.6.35).
7) Change the password for the MySQL DB login as per your choice.

You can login with the new password the next time you login to MySQL.
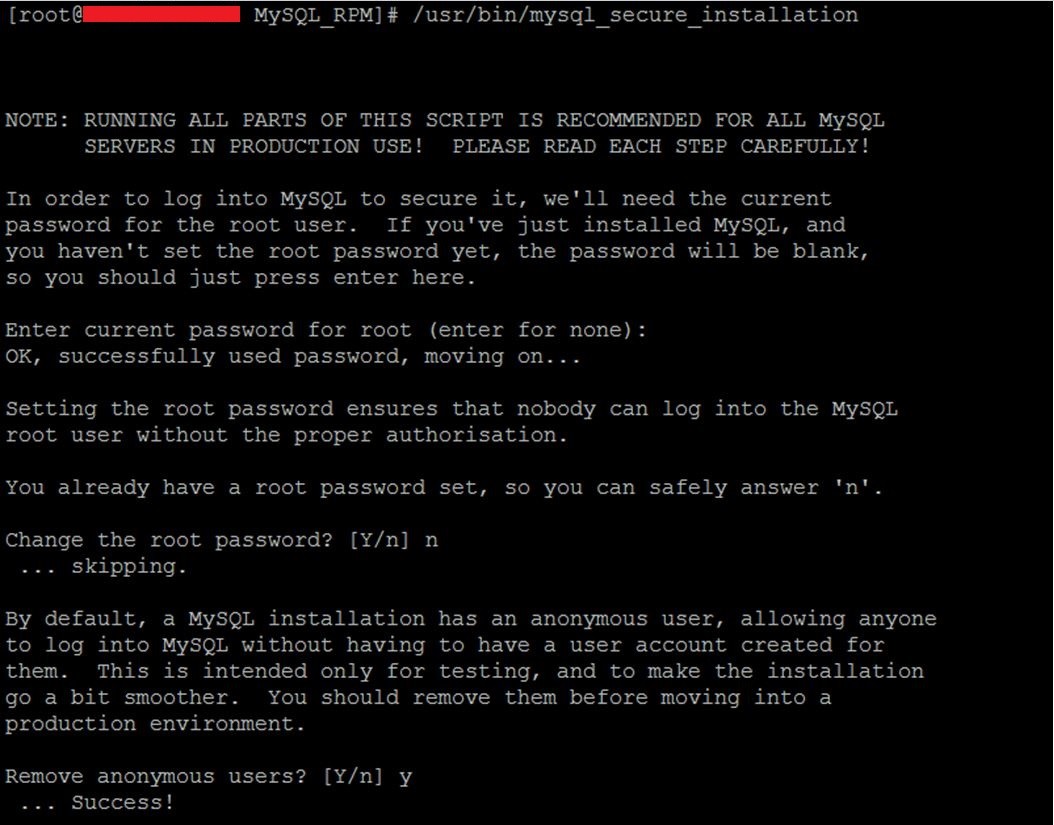
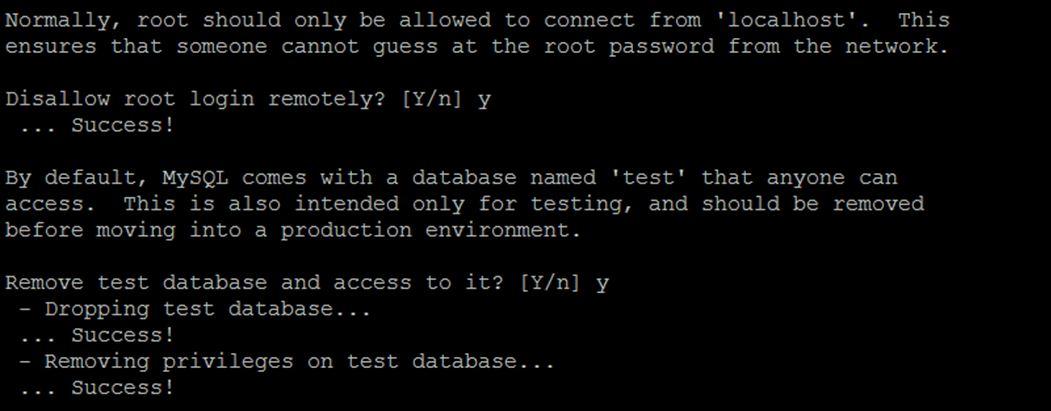
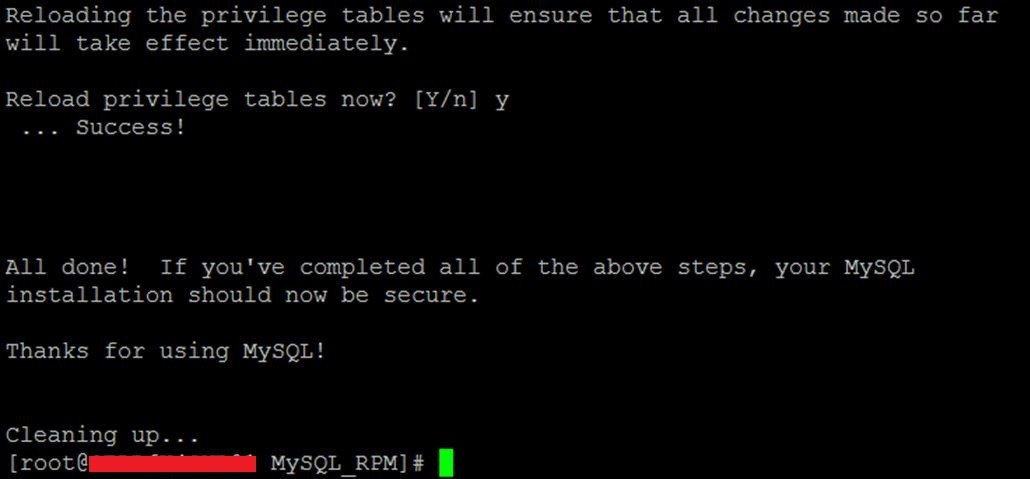
The MySQL server has been successfully installed now on your machine. If you are installing the MySQL server on the production environment then run the following steps for secure installation.
Run the secure installation file from /usr/bin/mysql_secure_installation and make the necessary changes
![]()
 Database Tutorials MSSQL, Oracle, PostgreSQL, MySQL, MariaDB, DB2, Sybase, Teradata, Big Data, NOSQL, MongoDB, Couchbase, Cassandra, Windows, Linux
Perfect. Step by step explaination and easy to understand 🙂 keep it up