 Database Tutorials MSSQL, Oracle, PostgreSQL, MySQL, MariaDB, DB2, Sybase, Teradata, Big Data, NOSQL, MongoDB, Couchbase, Cassandra, Windows, Linux
In today’s article, I will explain how to install Oracle 12c Client on Centos 7.
We do the following package installations.
1 2 3 | sudo yum install wget -y wget http://mirror.centos.org/centos/7/os/x86_64/Packages/libaio-devel-0.3.109-13.el7.x86_64.rpm yum install libaio-devel-0.3.109–13.el7.x86_64.rpm -y |
We create the Oracle user.
1 | passwd oracle |
We check the “/etc/selinux/config” file and check if SELINUX is as follows.
1 | SELINUX=permissive |
After completing the above process, we reboot the machine and run the following command.
1 | setenforce Permissive |
We disable the firewall.
1 2 | systemctl stop firewalld systemctl disable firewalld |
We create the directories where the oracle client will be installed and grant the oracle user the necessary privileges.
1 2 3 | mkdir -p /u01/app/oracle/product/12.1.0/client_1 chown -R oracle:oinstall /u01 chmod -R 775 /u01 |
We log in as root and enter the following command.
1 | xhost +<machine-name> |
We set the following information into the .bash_profile.
1 2 3 4 5 6 | # Oracle Settings export ORACLE_BASE=/u01/app/oracle export ORACLE_HOME=$ORACLE_BASE/product/client/11.2.0/client_1 export PATH=/usr/sbin:/usr/local/bin:$PATH export PATH=$ORACLE_HOME/bin:$PATH export LD_LIBRARY_PATH=$ORACLE_HOME/lib:/lib:/usr/lib |
After changing the content of the .bash_profile, we run the following command.
1 | . .bash_profile |
We login to the Oracle user and set the DISPLAY variable.
1 | DISPLAY=<machine-name>:0.0; export DISPLAY |
We go to the $ORACLE_HOME directory and unzip the downloaded Oracle client software. After the unzip process is finished, we run the ./runInstaller command and start the software.
1 2 3 | cd $ORACLE_HOME unzip -oq /path/to/software/V46097–01.zip ./runInstaller |
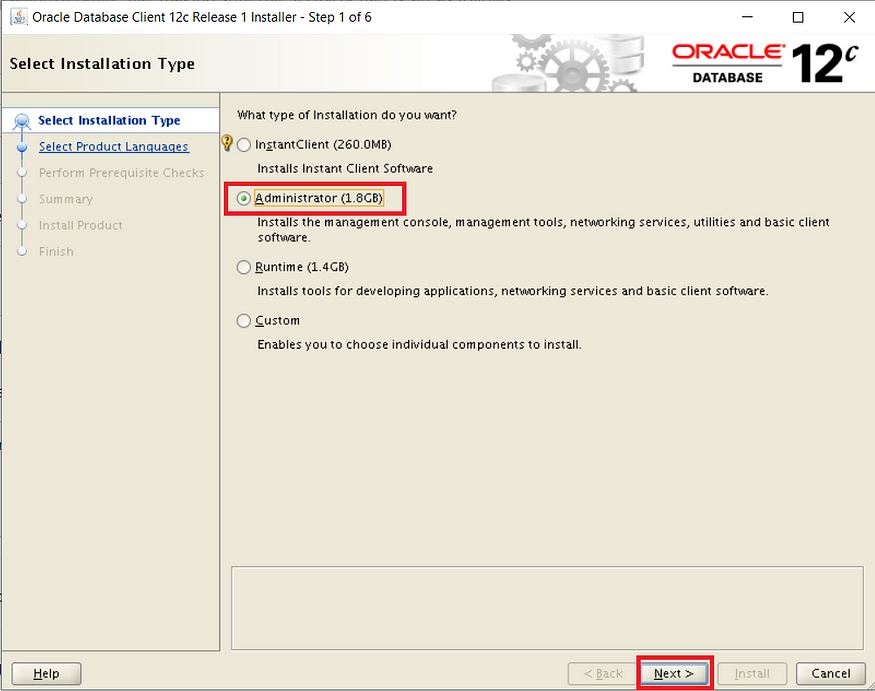
After the installation starts, we will see the following screen. We select the Administrator option and continue.
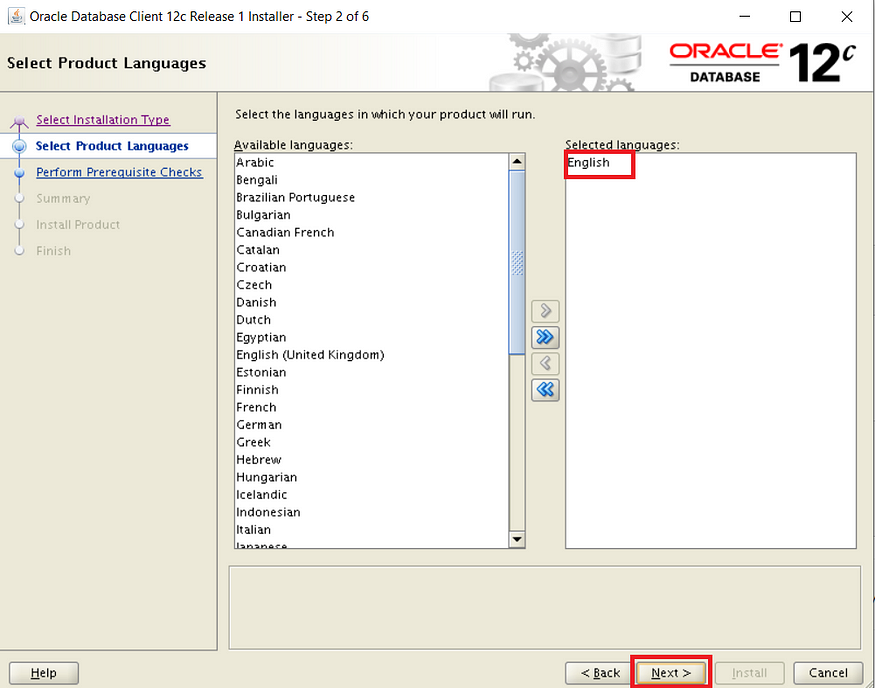
We choose the language and continue.
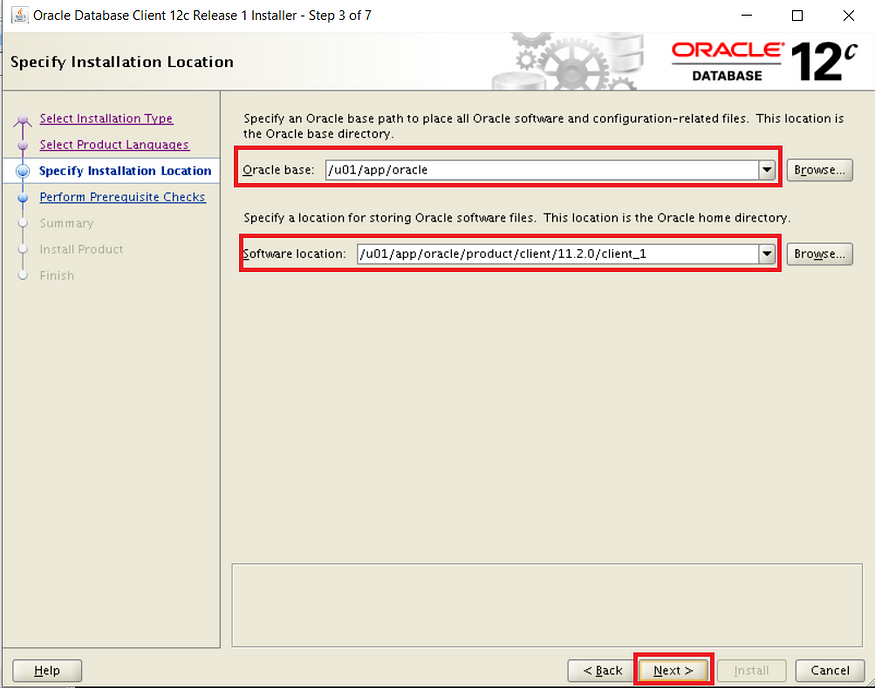
Since we defined .bash_profile directories before, directories come by default. We continue unaltered.
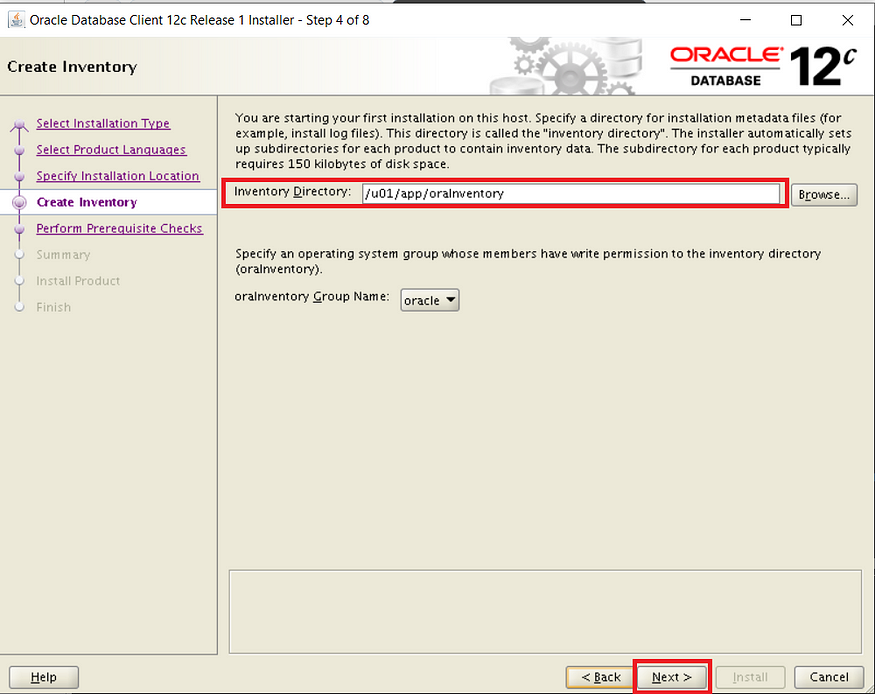
The directory will come by default. We continue unaltered.
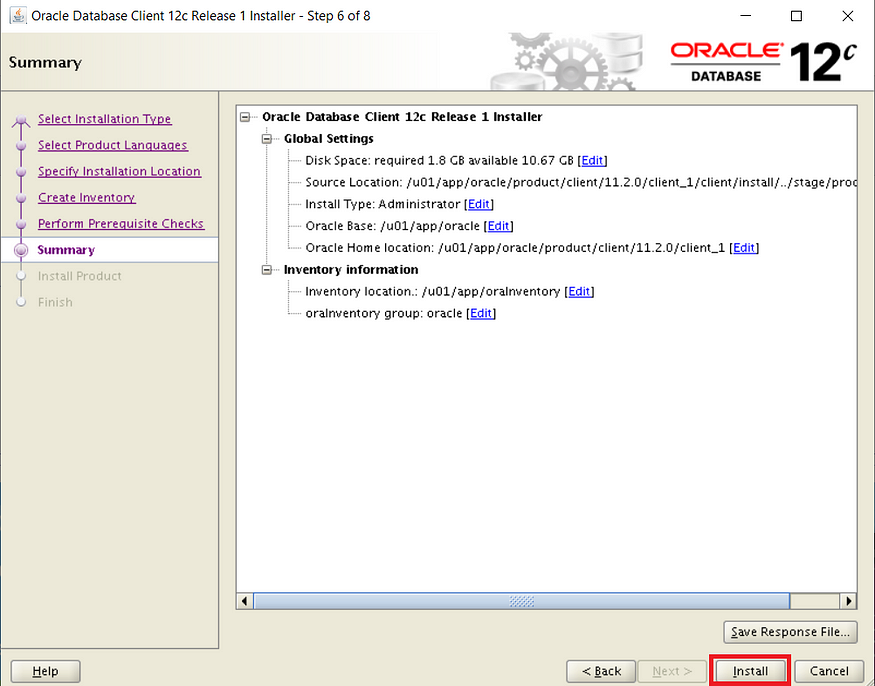
The summary section contains information about the client. We start the installation by clicking Install.
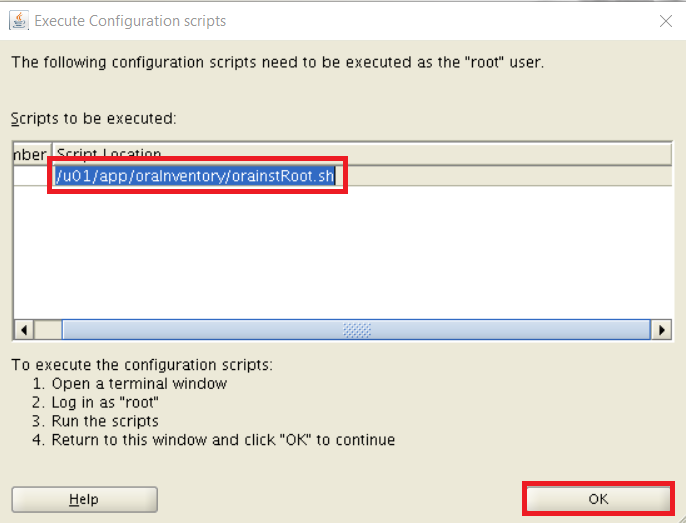
While the installation is in progress, when the following screen comes up, we copy the command and run it in the root user.
1 | /u01/app/oraInventory/orainstRoot.sh |
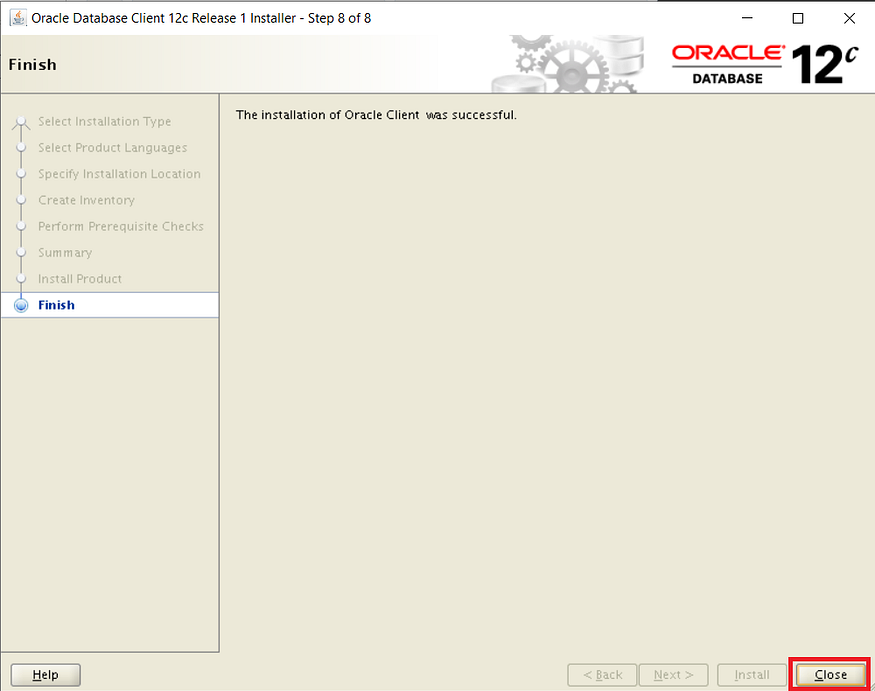
After successfully completing the Oracle Client installation, we click the Close button and close it.
After the installation is finished, we create the tnsnames.ora file. Its content should be as follows.
1 | $ORACLE_HOME/network/admin/tnsnames.ora |
1 2 3 4 5 6 7 | orcl = (DESCRIPTION = (ADDRESS = (PROTOCOL = TCP)(HOST = 192.168.56.2)(PORT = 1521)) (CONNECT_DATA = (SERVER = DEDICATED) (SERVICE_NAME = orcl) ) ) |
After completing all the operations, we connect to the database with the following sqlplus command.
1 | sqlplus <user>/<password>@<SID> |
![]()