 Database Tutorials MSSQL, Oracle, PostgreSQL, MySQL, MariaDB, DB2, Sybase, Teradata, Big Data, NOSQL, MongoDB, Couchbase, Cassandra, Windows, Linux
In today’s article, We will answer the question How to Install Linux VM in Azure?
1) We login to our Windows Azure account from portal.azure.com.
2)We click on the Virtual Machines section from the left side and press the Add button on the screen that comes up.
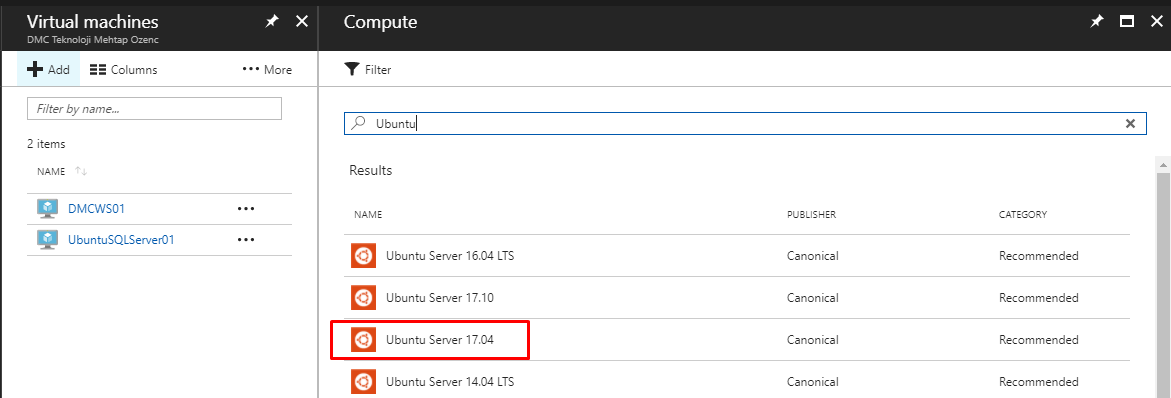
3) After clicking the Add button, we will be greeted with a screen like the one below. We write Ubuntu 17.04 in the search section on this screen.
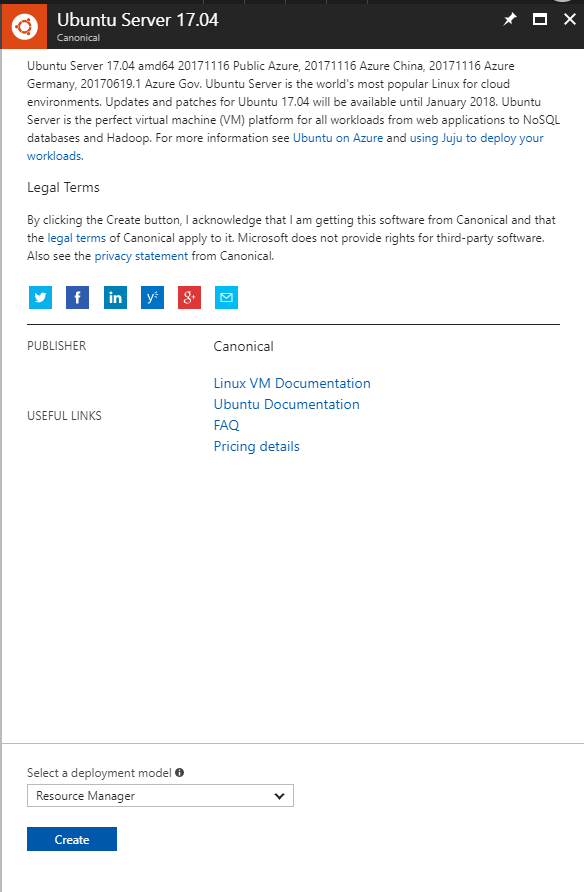
After selecting Ubuntu Server 17.04, an information screen will appear on the right and you will be asked to choose whether it will work with Classic or a Resource Manager about the Deployment Model structure in the lower section of this information screen.
In this section, it would be appropriate to select Resource Manager in order to manage the server’s resource. After selecting Resource Manager, we continue with Create.
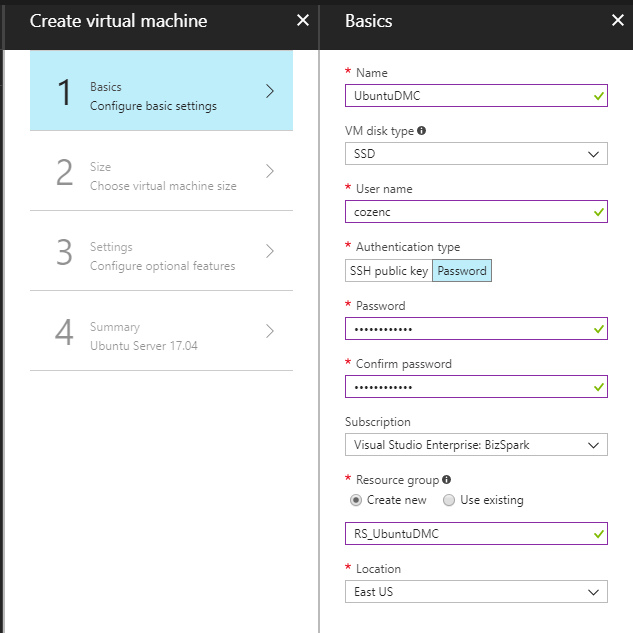
4) We are faced with a new screen where we can enter basic information about the server. I entered this screen with the following information. You have to fill in your own information and continue the process.
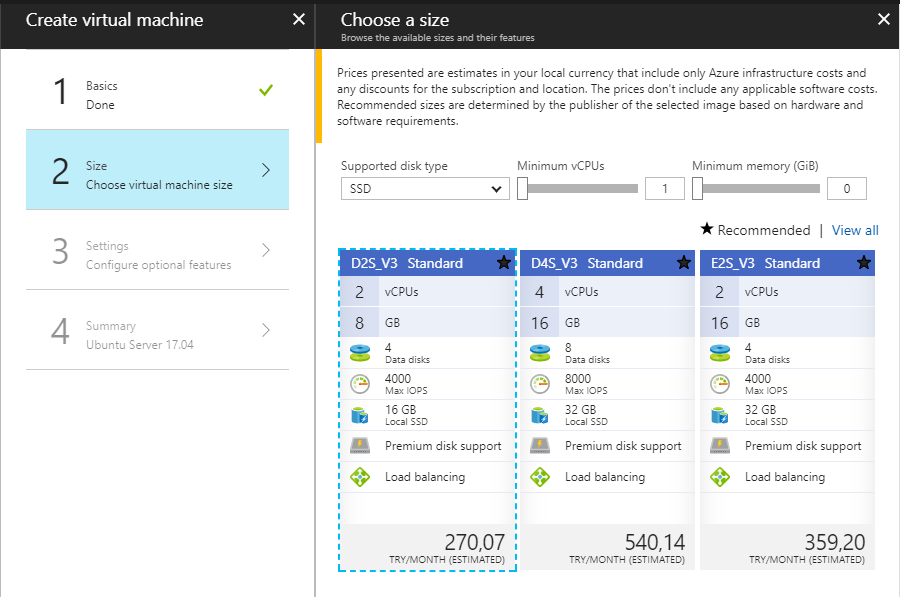
5) On the screen below, details about the server’s information about you are requested. Here I will be choosing the lowest. You can choose the one that suits your configuration. After making our selection, we continue the process.
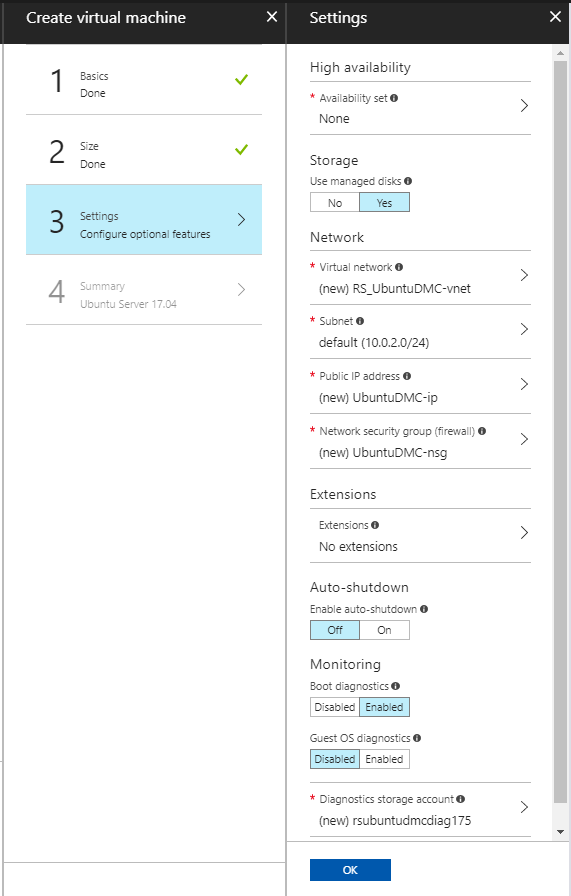
6) The screen below is the screen where you can make the settings on the server. Here you can make a definition for HA (High Availability), make changes about Network groups, or automatically shutdown the server at the desired time. After making the settings according to yourself or as in the picture, we continue our process.
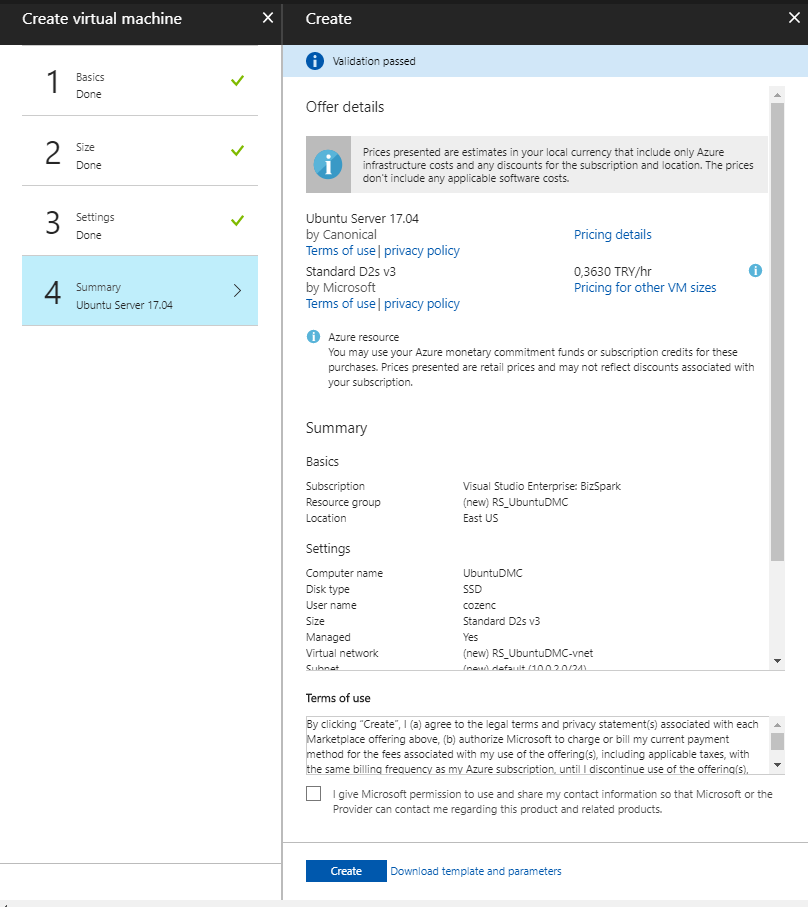
7) The following screen is the information page with the summary information of the definitions. Here you can see all the detailed information about your server. At the same time, Microsoft offers you a “use agreement” and asks for approval.
After you say create, you can see that your server is deployed. After a few minutes, you can see that an Azure Linux VM has been created with the features you have defined.
Sample ready Linux VM server details are as follows.
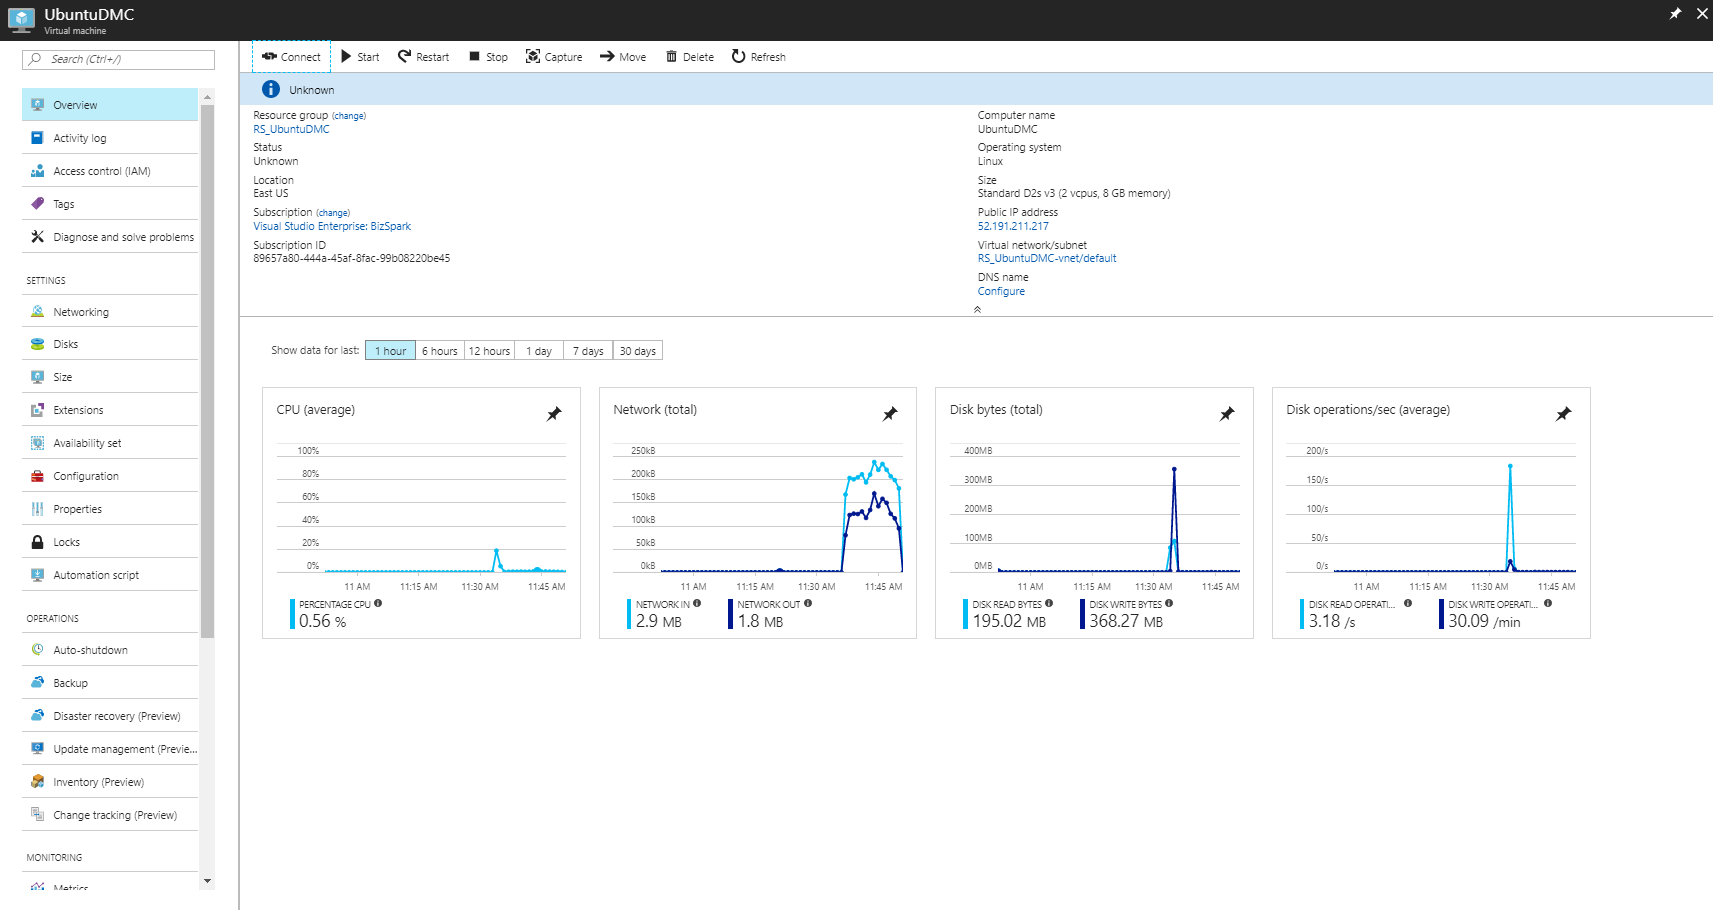
In the light of the information above, we first start the installed server. After the start process is completed, we connect to our server via Putty with the IP information on the screen above.
In Putty, we just write the IP information and open it.
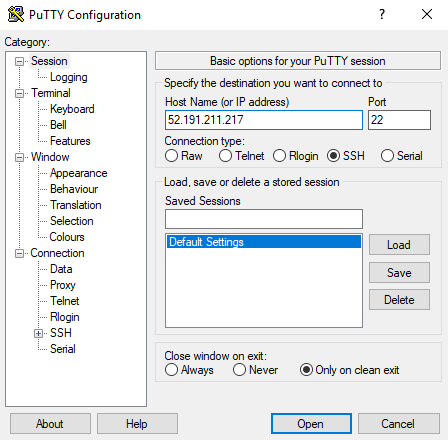
The login screen is;

and the transaction is successful, our Azure Linux VM server is ready.

![]()