 Database Tutorials MSSQL, Oracle, PostgreSQL, MySQL, MariaDB, DB2, Sybase, Teradata, Big Data, NOSQL, MongoDB, Couchbase, Cassandra, Windows, Linux
In today’s article, I will cover the topic of Prevent Deletion Of Azure Resources.
Azure Role-Based Access Control (RBAC) allows us to restrict access to resources and resource operations.
RBAC should be used as the first line of defense against unwanted resource access.
However, RBAC alone may not be sufficient in all environments.
For example, consider the case where a user or other access ID is requested to have full access to all resources (superuser).
While these identities have sufficient access to delete and modify resources,
we may want to provide an additional layer of defense to prevent accidental access.
We can use Azure Resource lock as an additional layer of access control.
Azure resource locks can be applied to individual resources or resource groups.
When applied to a resource group, all resources in that group are locked,
including those created after the lock was placed.
We can create a resource lock with one of the following lock levels:
CanNotDelete – we can change the source but not delete it.
ReadOnly – we cannot delete or modify a resource.
Once a resource is locked, we must unlock it before the resource is modified or deleted.
How is Azure Resource Lock implemented?
We first apply lock operations from top to bottom as inherint.
The lock operation is an authorization above all authorizations and ensures that even the action that the owner of the subscription will perform is not done.
In order to continue the process, it must continue the deletion process after removing the current lock.
We will be implementing our example, which we will explain below, on a resource group named “example-lock-rg”.
Select the resource group you want to apply the operation from Resource group in Azure Portal.
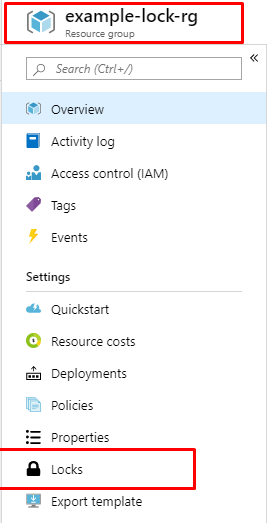
After selecting the resource group you will operate, select “Locks” as you can see in Picture-1.
After the Lock selection, you will see a screen where you can see the previously defined locks and create a new lock as follows.

As we can see in the picture above, we have not made any lock definitions in our resource group before.
Now, to define a new lock, we click the Add button you see in Picture-2, and on a small screen like the one below, it asks you to enter details for the Lock.
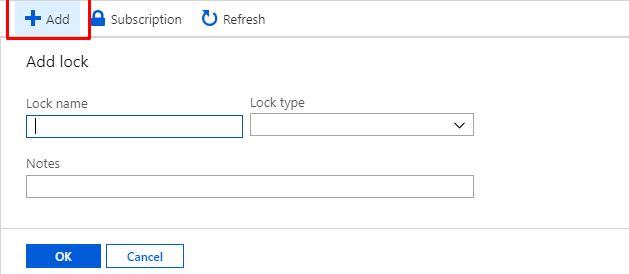
During the definition, it asks us to choose one of the two lock types that we define in the introduction part of our name and text.
After entering this information and saying “ok”, we now have the lock definition.

Now it’s time for our last operation and we try to delete the resource group named “example-lock-rg”.
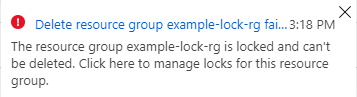
As seen in the picture, when we want to delete it, we encounter a warning as in Picture 5 and we cannot continue our process.
If we are performing a deliberate deletion, we must first remove the lock that we have defined for that resource group.
In addition, thanks to this lock, we ensure that other resources that we define in that resource group are not deleted.
We should consider the Azure lock issue as a priority that should be considered in different role managements in resource group usage.
See you in our next article..
![]()