 Database Tutorials MSSQL, Oracle, PostgreSQL, MySQL, MariaDB, DB2, Sybase, Teradata, Big Data, NOSQL, MongoDB, Couchbase, Cassandra, Windows, Linux
In today’s article, I will tell you how to Installing SQL Server 2019 With Powershell.
Using the power of Powershell, I am preparing content about SQL Server management with the DBaTools module,
which was developed as open source, and in this direction, we perform the most basic SQL Server installation using Powershell.
Since I will be using SQL Server 2019 Developer edition during the installation phase, I need to download the iso file from the internet.
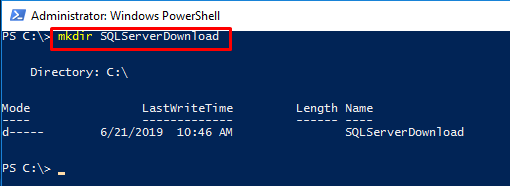
Before proceeding with the download, I need to determine the download location,
I run a powershell command line as an administrator for all my processes and come to the C directory.
(You can find all the files of the project on my GitHub(https://github.com/cozenc/sqlserver-install-with-powershell)!)

I create the folder named SQLServerDownload with mkdir in the C directory.
After creating the SQLServerDownload folder, I download the SQL Server 2019 ISO file into the folder we created using powershell with the following code pieces.
1 2 3 4 5 6 7 8 9 10 | $folder = “C:\SQLServerDownload” $url= https://download.microsoft.com/download/D/0/C/D0CCEE78-05BE-4A5E-AE9C-2FDE69F6600D/SQLServerVnextCTP2-x64-ENU.iso $req = [System.Net.HttpWebRequest]::Create($url) $req.Method = “HEAD” $response = $req.GetResponse() $fUri = $response.ResponseUri $filename = [System.IO.Path]::GetFileName($fUri.LocalPath); $response.Close() $target = join-path $folder $filename Invoke-WebRequest -Uri $url -OutFile $target |
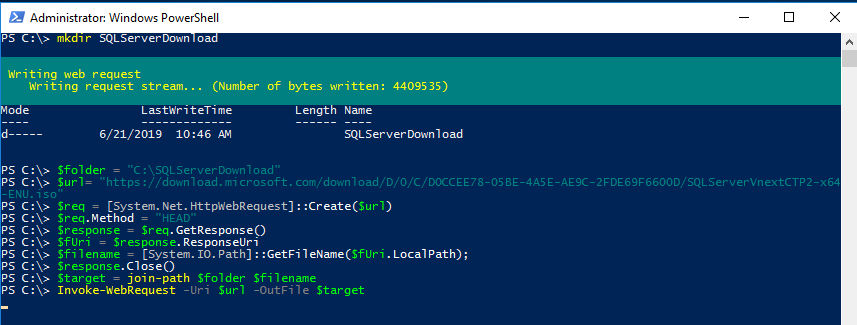
As you can see in the picture, we started to download the ISO file.
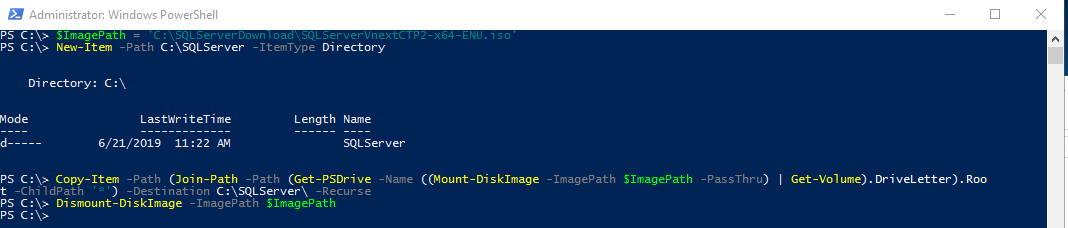
After the download is complete we need to open the ISO file that we need to do.
We use the following piece of code to perform this operation.
1 2 3 4 | $ImagePath = ‘C:\SQLServerDownload\SQLServerVnextCTP2-x64-ENU.iso’ New-Item -Path C:\SQLServer -ItemType Directory Copy-Item -Path (Join-Path -Path (Get-PSDrive -Name ((Mount-DiskImage -ImagePath $ImagePath -PassThru) | Get-Volume).DriveLetter).Root -ChildPath ‘*’) -Destination C:\SQLServer\ -Recurse Dismount-DiskImage -ImagePath $ImagePath |
We check the C:\SQL Server file path that we specified in the code snippet and check the operation we have performed.
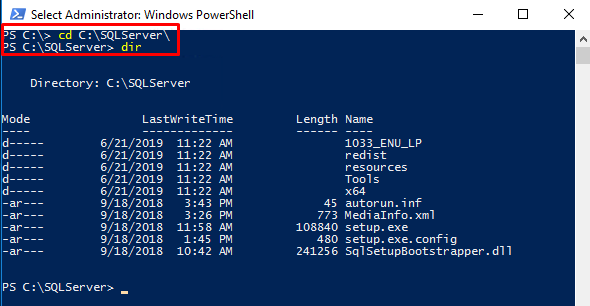
As you can see in the picture above, we have successfully completed the SQL Server download and extraction processes.
Now, we need to install nuget and sqlserverdsc with the dsc configuration manager that comes with powershell 4.0.
We run the following commands to install them.
For Nuget;
1 | Get-PackageProvider -Name NuGet –ForceBootstrap |

For SqlServerDsc;
1 | Install-Module -Name SqlServerDsc -Force |

Next, I came to run the configuration file I prepared for SQL Server Installation.
If you want to examine the details of the SQLSetup part you see in the codes below, you can use the help page of sqlserverdsc.
1 2 3 4 5 6 7 8 9 10 11 12 13 14 15 16 17 18 19 20 21 | Configuration SQLServerConfiguration { Import-DscResource -ModuleName PSDesiredStateConfiguration Import-DscResource -ModuleName SqlServerDsc node localhost { WindowsFeature ‘NetFramework45’ { Name = ‘NET-Framework-45-Core’ Ensure = ‘Present’ } SqlSetup ‘InstallDefaultInstance’ { InstanceName = ‘MSSQLSERVER’ Features = ‘SQLENGINE’ SourcePath = ‘C:\SQLServer’ SQLSysAdminAccounts = @(‘Administrators’) DependsOn = ‘[WindowsFeature]NetFramework45’ } } } SQLServerConfiguration |
We save the above code block as a powershell file under the C:\ directory.
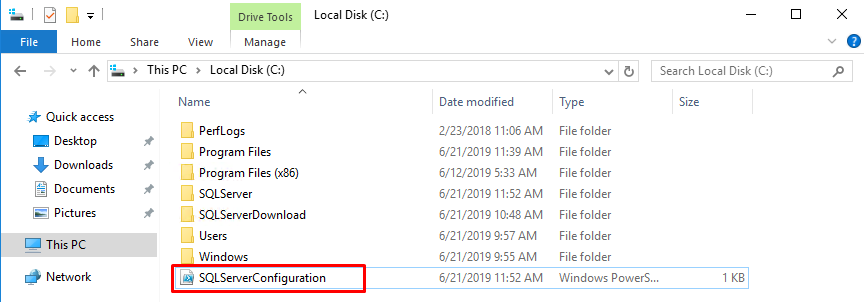
We run the powershell file that we saved as SQLServerConfiguration in the powershell command line that we opened as an administrator.
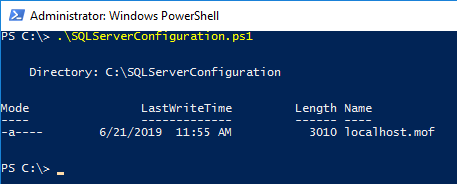
After the query runs, a folder named SQLServerConfiguration will be created under the C:\ directory, and a file named localhost.mof will be created in that folder.
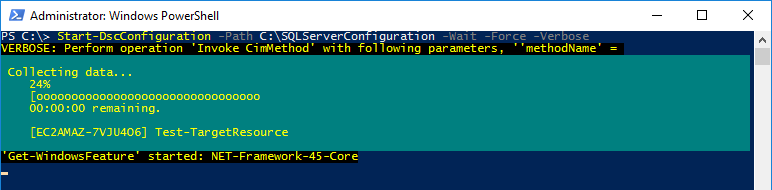
Plus, now that our configuration file for the installation is ready, we can start the installation with the following command.
After waiting for a while, the process will be completed. We can check whether the operation is successful with the Get-Service *SQL* command.
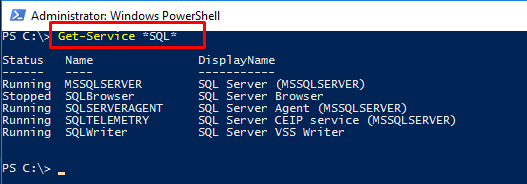
As you can see, we have successfully installed sql server with powershell and the service is now running.
![]()