 Database Tutorials MSSQL, Oracle, PostgreSQL, MySQL, MariaDB, DB2, Sybase, Teradata, Big Data, NOSQL, MongoDB, Couchbase, Cassandra, Windows, Linux
Azure SQL Database’s firewall lets you decide which IP addresses can or should not have access to your Azure SQL Server or Azure SQL database.
Azure SQL Database firewall comes unconfigured when creating Azure SQL Database.
You can configure the firewall in two ways on Azure SQL Database.
1. At the server level
2. At the database level
In fact, if you don’t do the first method, you won’t be able to use the second method.
Here we understand that, while the person who created the Azure SQL Database server can access all the privileges on the server and all databases, you may be giving an IP Limitation on access to the databases later on.
Firewall configuration at server level
We have previously installed an Azure SQL Database server and Azure SQL Database with Azure SQL Database installation with Powershell.
I continue to narrate the subject using our resources here.
After logging in to the Azure Portal, we come to the Azure SQL Database server in the resource group and select Firewall and virtual networks under Security in the left menu. – The “show firewall settings” section on the right brings us to the same place-

On the screen you will see in the picture below, we click on Add Client IP and add our client IP address information to the Rule section and save it from above.

Or we can connect via SSMS with the servername information of the Azure SQL Database Server that we have without logging into the Azure portal.
ServerName information is also seen under “Show Firewall settings” in the first picture.

In the login information, we will be logging in with the Server Admin user that we defined in the setup for the Azure SQL Database server.
Password information is the password of the account you defined while installing the Azure SQL Database server.
When you connect with the correct information, it will ask us to login to the Azure Portal.

After completing the login process, the Client will write the IP information itself and will only ask you to confirm.

We have completed the configuration of the Azure SQL Firewall and defined an IP at the Azure SQL database server level.
We will now be able to access all databases on the basis of this defined IP.
 Before proceeding to the second method, the Database level Firewall configuration, I would like you to know that we can also perform the operations that we configure at the Server level with TSQL, Powershell or Rest API.
If we are going to define an IP to the server-level firewall using TSQL, we can use the following command.
1 | EXECUTE sp_set_firewall_rule N'dmcdemo-sqlserver-security-wall-config','168.0.0.2','168.0.0.2'; |
We can use the following query to display the definition we have made.
1 | select * from sys.firewall_rules |
We can use the following command to remove the firewall rule we defined at the server level.
1 | EXECUTE sp_delete_database_firewall_rule N'dmc demo-sql-server-firewall-config'; |
Firewall configuration at database level
Unlike server level rules, database level rules are stored in the corresponding database.
While configuring the Firewall at server level with Azure Portal, Powershell or Rest API, you can configure database level using TSQL only.
Performing a database-level firewall configuration increases security by ensuring that clients cannot access the database they do not need, and also facilitates the migration of databases since the configuration is included in the database.
You can use the following query to check if there is a database level security configuration available.
Don’t forget to select the database you want to process before running the query!
1 | select * from sys.database_firewall_rules |
You can use the following query to define a database level firewall.
1 2 3 4 | EXEC sp_set_database_firewall_rule @name = N’dmcdemo_db_firewall_1′, @start_ip_address = ‘3.236.5.227’, @end_ip_address = ‘3.236.5.227’ |
It may take up to 5 minutes for the rule you defined to take effect.
You can use the following command to delete a firewall rule that you have defined at the database level.
1 | EXECUTE sp_delete_database_firewall_rule N’dmcdemo_db_firewall_1′; |
Allowing access from Azure
To allow connections from Azure to Azure SQL Server, the Allow access to Azure services option must be set.
But you should remember that this process will make a different Azure subscriber can access your resource!
So it is very important to configure the permissions on your SQL Server.

How does Azure SQL Database Security configuration work?
Any connection attempts from Azure or the Internet will be covered by the firewall.
1. Database level rules will be executed. If there is a security rule defined at the database level, the connection will be successful.
Otherwise, the connection will fail.
2. Server level rules will be executed. It will kick in if step one fails.
If the connection request exists within the defined rules, the connection will be successful, otherwise the connection will be rejected.
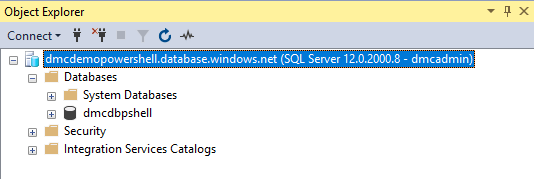
Let’s do an example on this subject. I cleared the security rules defined at the server level.

As you can see in the picture above, no IP information is defined, but we defined the security rule in the way we described in the article, thanks to the database.
Let’s make a connection at the database level with SQL Server Management Studio.
For this, we click on Options on the “Connect to Server” screen and write the database name “dmcdbpshell” in the Connect To database section in the “Connection Properties” section.

After typing our login information, we connect.
![]()