 Database Tutorials MSSQL, Oracle, PostgreSQL, MySQL, MariaDB, DB2, Sybase, Teradata, Big Data, NOSQL, MongoDB, Couchbase, Cassandra, Windows, Linux
In today’s article, we will cover about the standard installation of Redhat 8 Enterprise, which is the best server operating system in its class in terms of both security and stable operation.
I will install the Redhat 8 Enterprise operating system on a virtual server with the following features.
Download address for installation:
1 | https://developers.redhat.com/rhel8 |
Server Features
4vcpu
8GB Ram
100GB Hard Disk
I start the installation by mounting my ISO file.
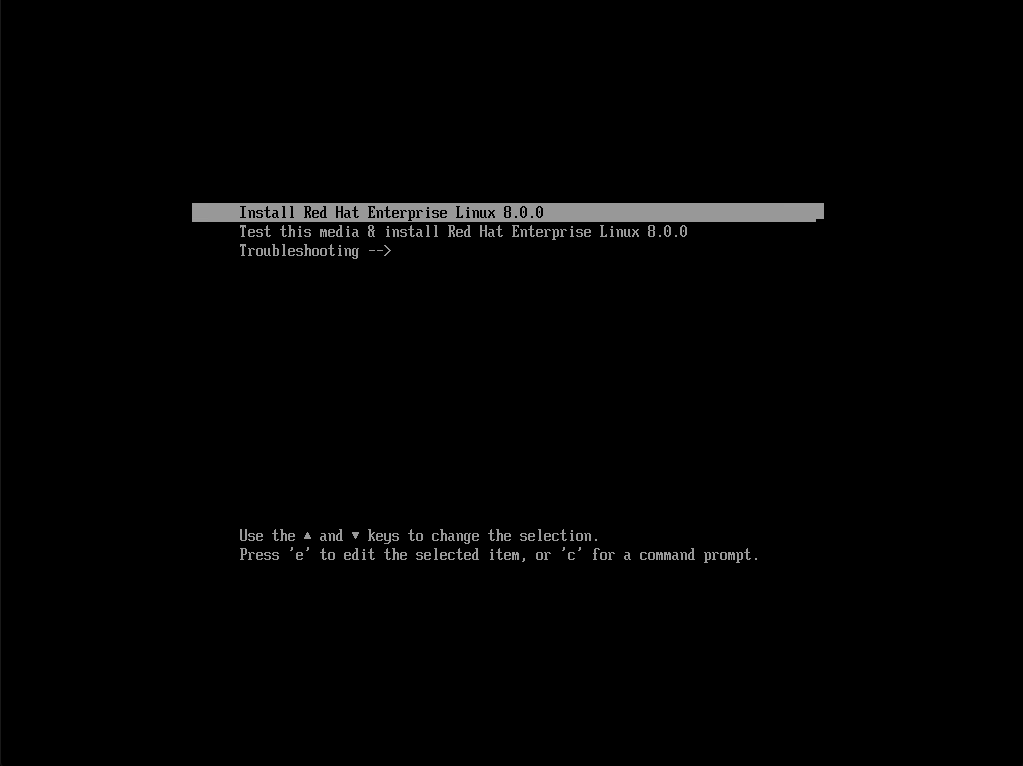
First, the boot screen welcomes us. On this screen, I continue by choosing “Install Red Hat Enterprise Linux 8”.
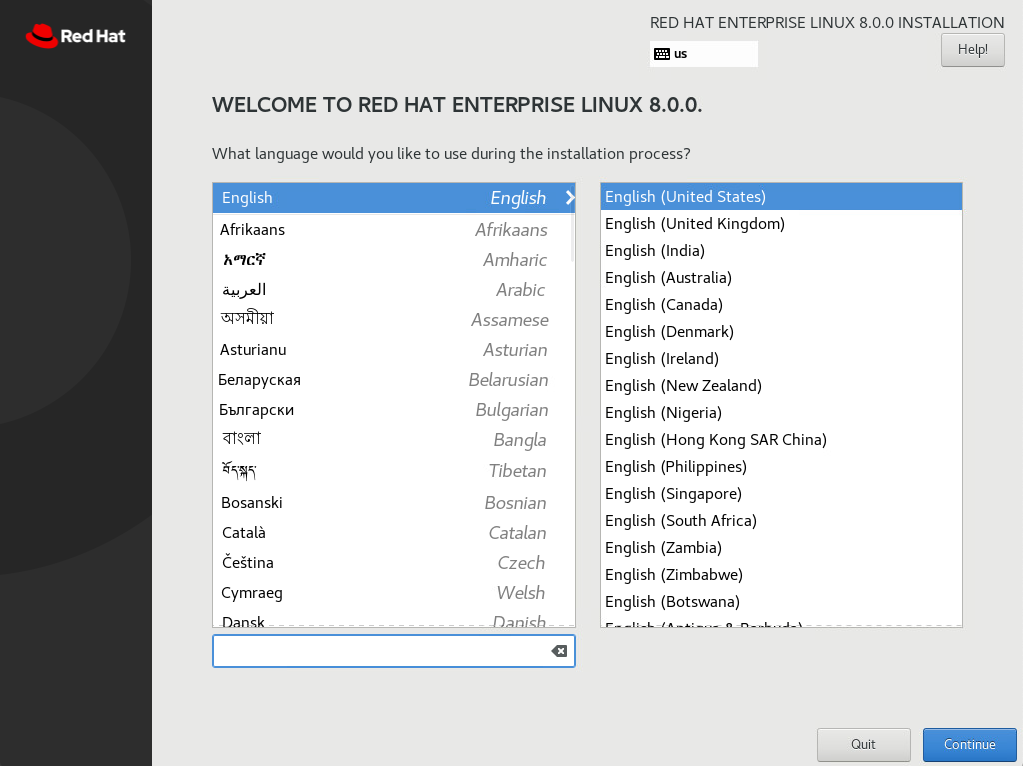
On this screen, it asks us to choose the language for the operating system. We will continue with English so that there is no problem in the settings we will make on our server in the future. We do “Continue”.
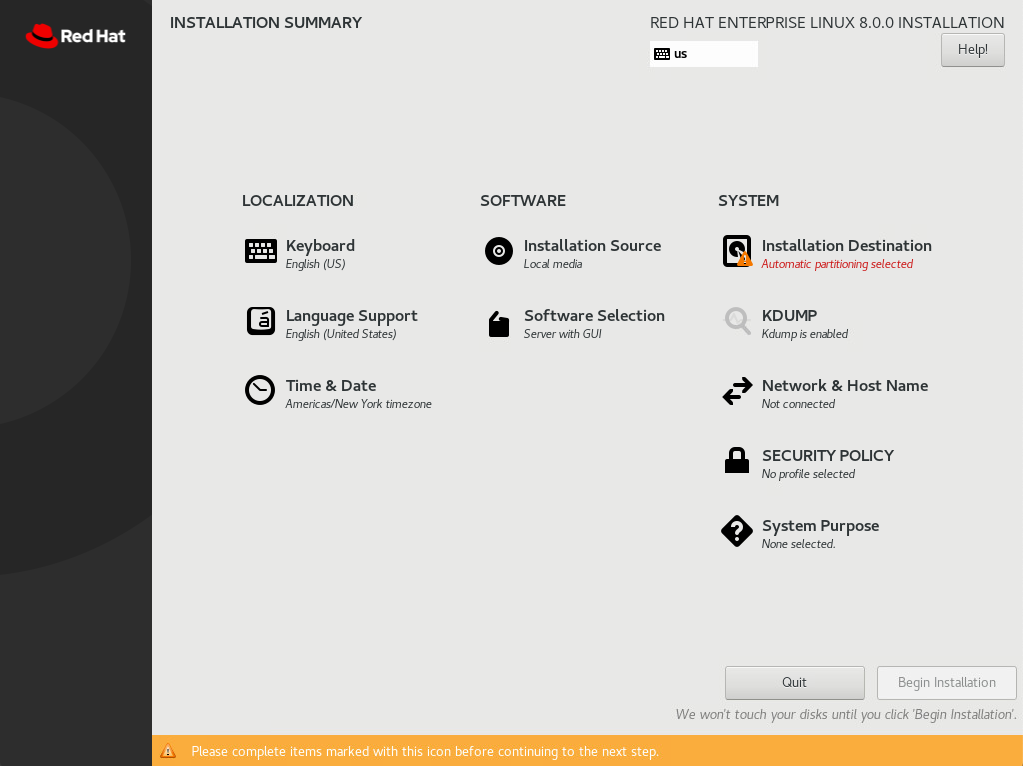
RHEL series from version 7 now allows us to make all settings on a single screen. On the screen below, we make our Keyboard, Time and Network settings, respectively.
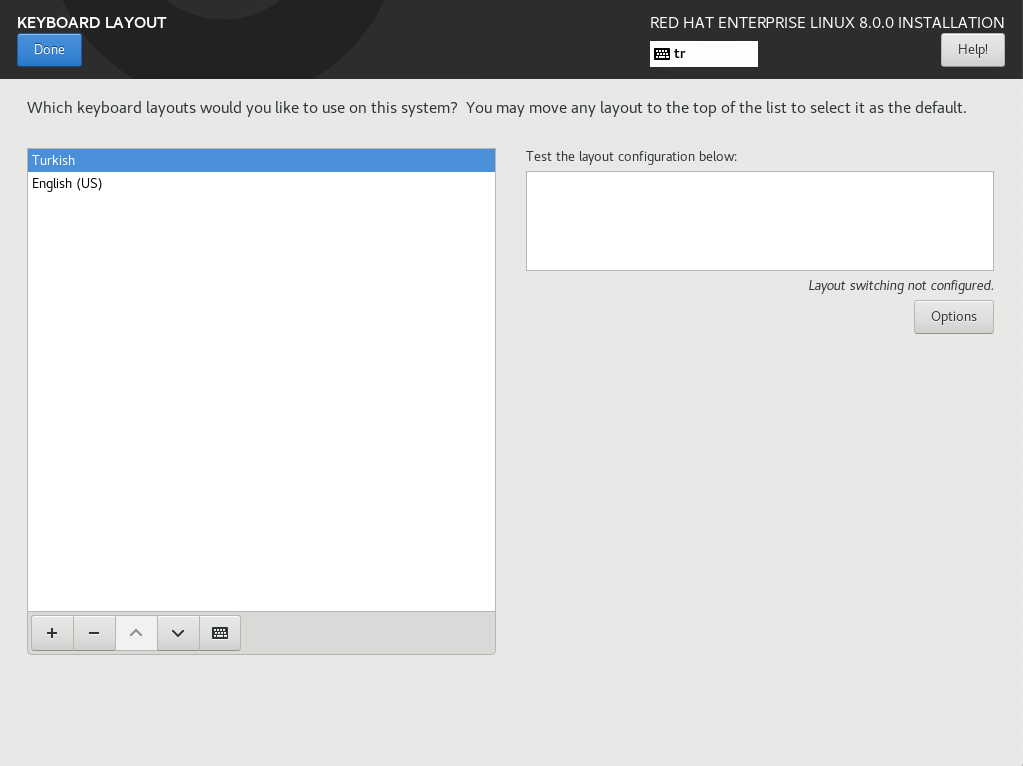
We enter the “Keyboard” menu.
I set my keyboard to Turkish. I choose my keyboard by typing “Turkish” in the search field and add it by clicking the “Add” button.
Keyboard added. I specify the order of priority with the up / down button on the bottom left and I come back to the previous page with the “Done” button.
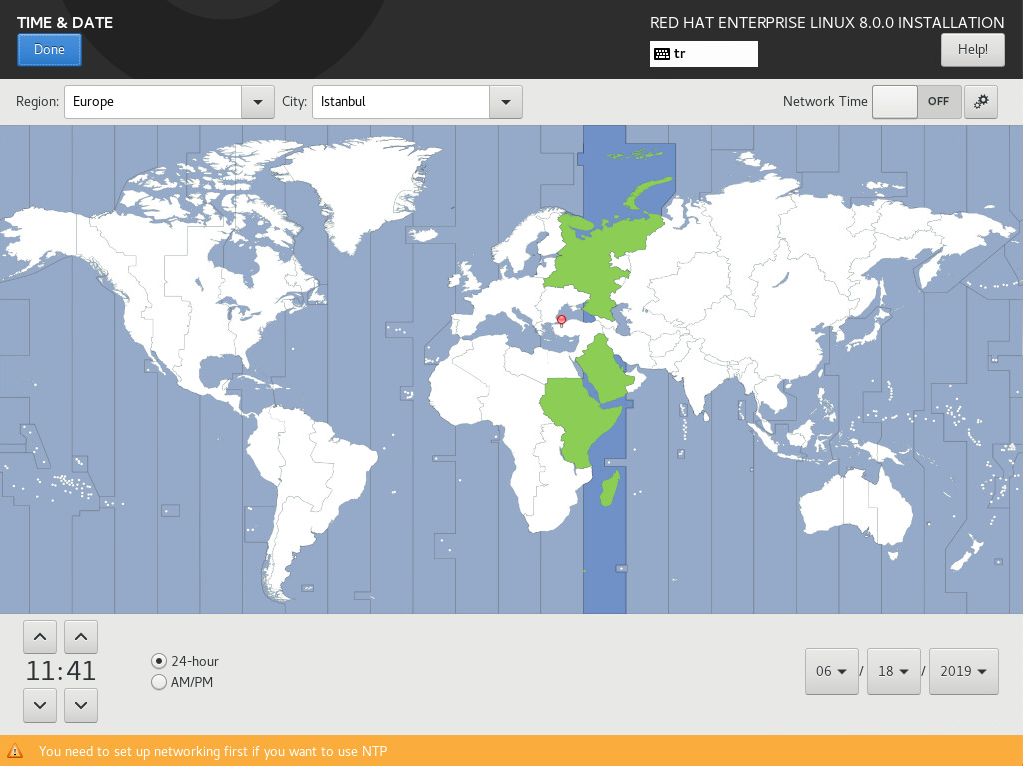
Now we are setting the Date / time. We enter the “Time & Date” menu.

We check my settings and select the city I am in and press the “Done” button.
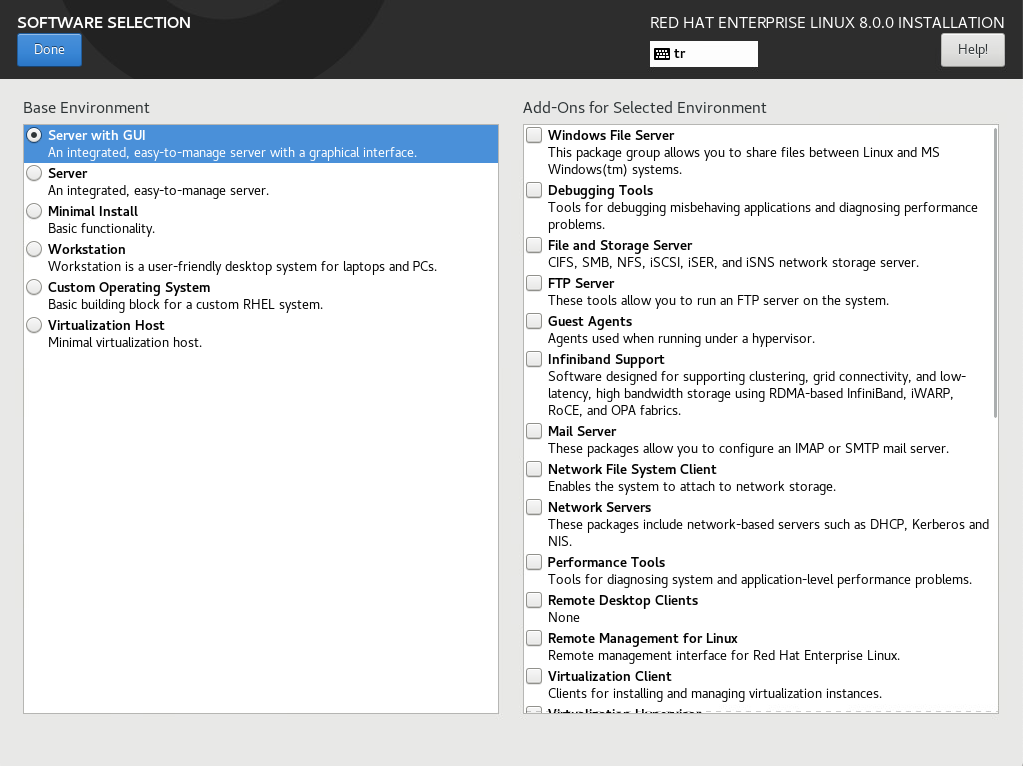
If the next action is required by the operating system, determine the roles. We enter the “Software Selection” menu.

I leave it as it is because I made the installation standard. I exit with the “Done” button with “Server with GUI” selected.
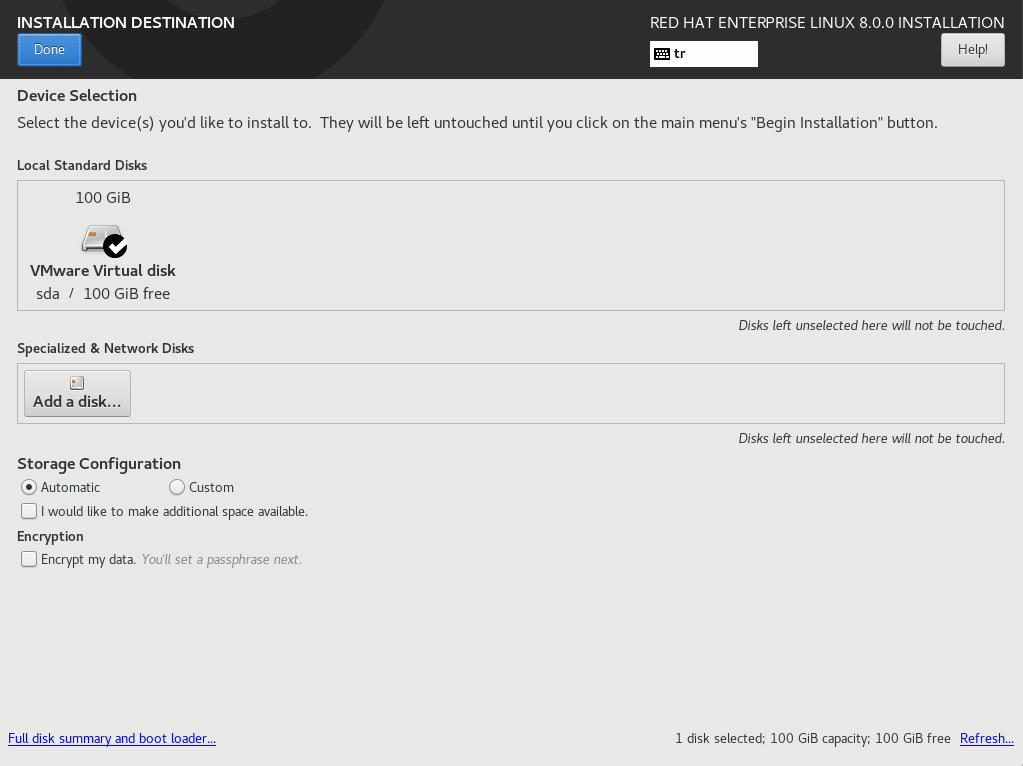
Next Step Disk settings. The disk issue will be the topic of a separate article. Normally, the disk configuration is formed separately for each scenario. I will leave the configuration to the Redhat part in the test setup.

I take any action to auto-configure this place. I click the “Done” button.
Note: If we wanted to configure the disk manually, we would have chosen the “Custom” option.
The next step is Network settings. For this, we enter the “Network & Host Name” menu.

The RHEL series comes with the network settings turned off at first installation. First of all, you must activate your Ethernet card from the upper right corner. Optionally, you can enter the host name from the bottom left.
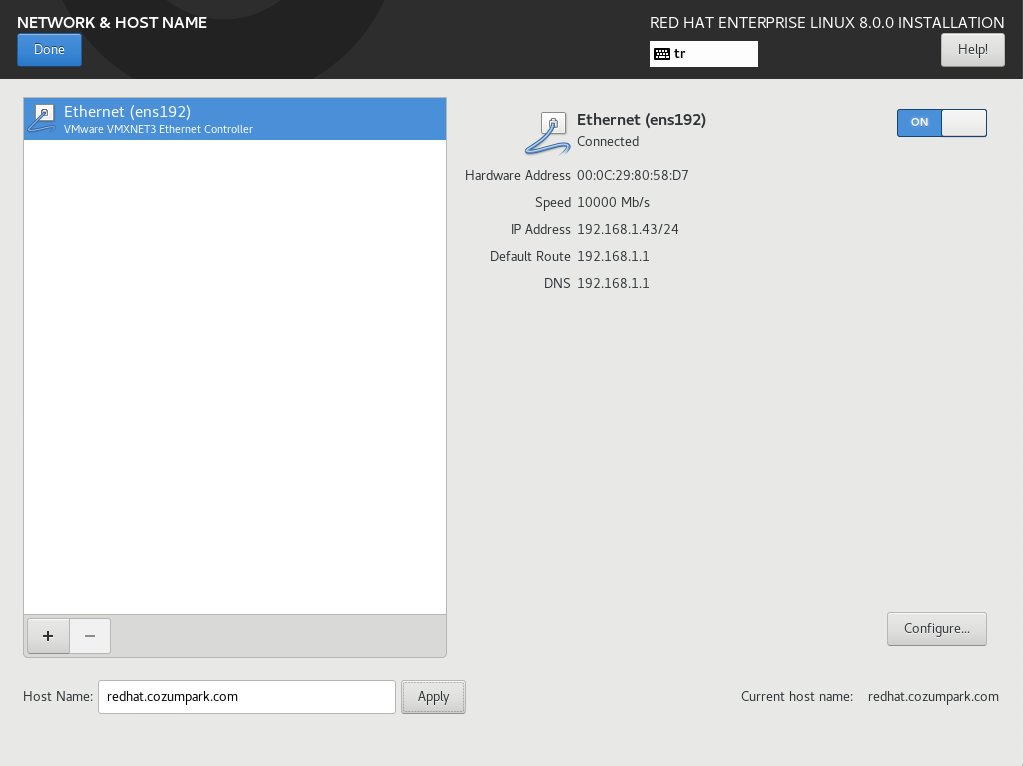
While making our network setting, we also need to make a small adjustment so that our ethernet card is active at every boot. Click the “Configure” button and select the “Automatically connect to this network hen it is aviable” option from the “General” tab. Finally, we click on the “Save” bot and save our settings.

Now that all the settings are ready, we go to the last step of the installation by saying “Begin Installation”.

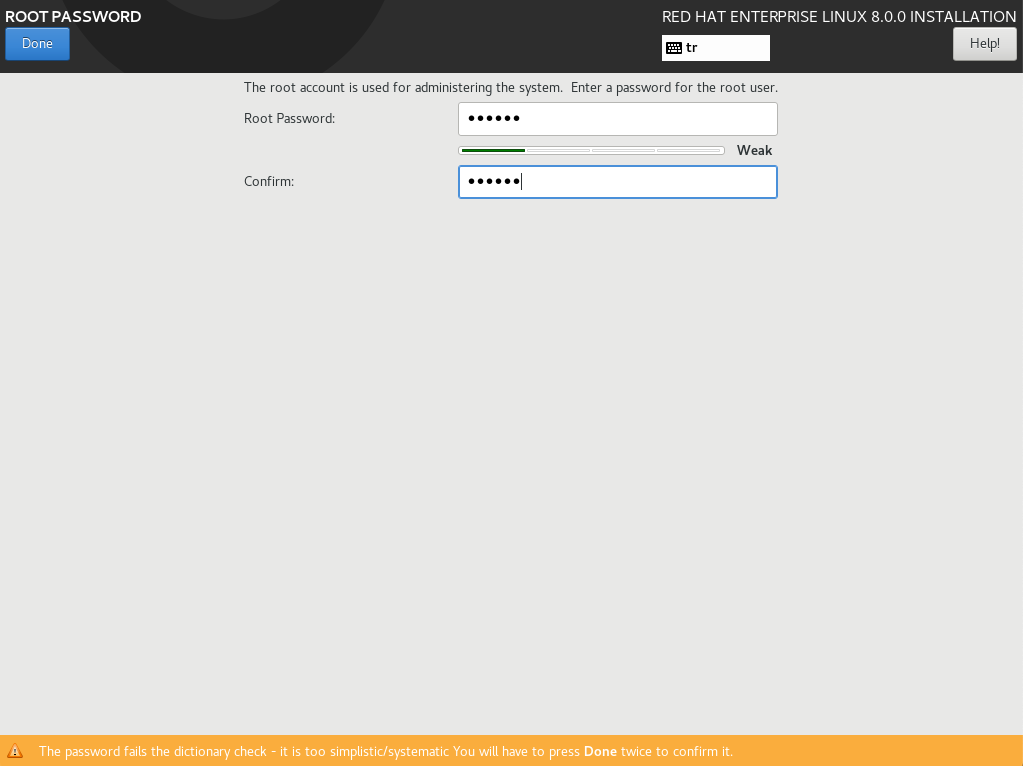
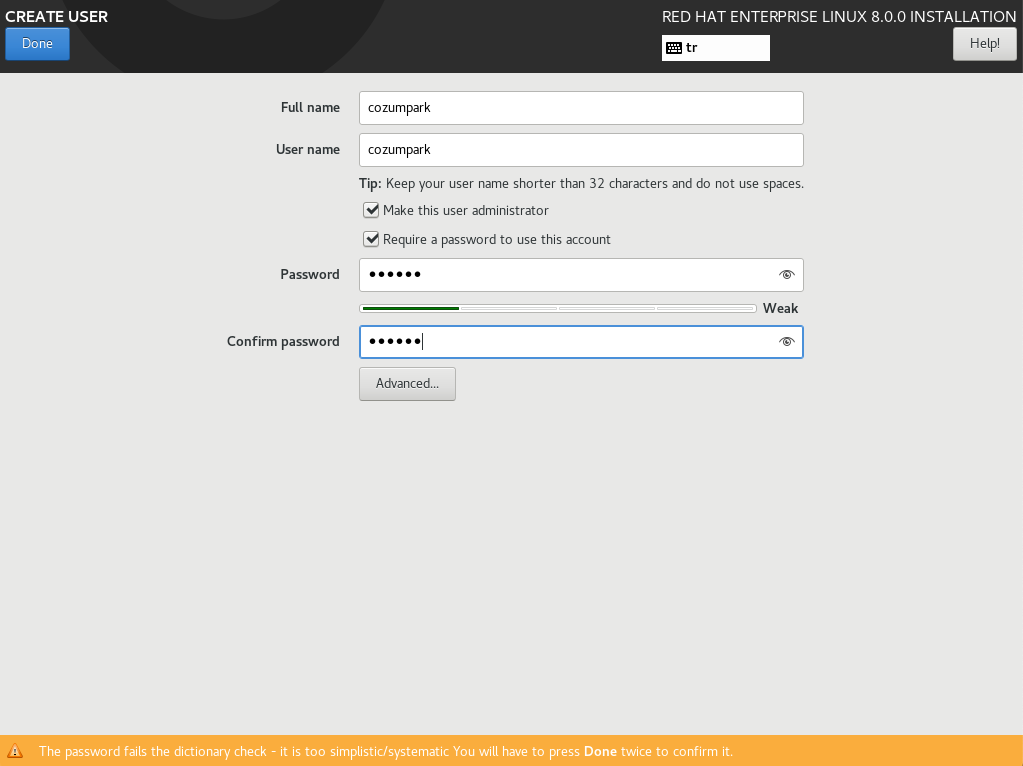
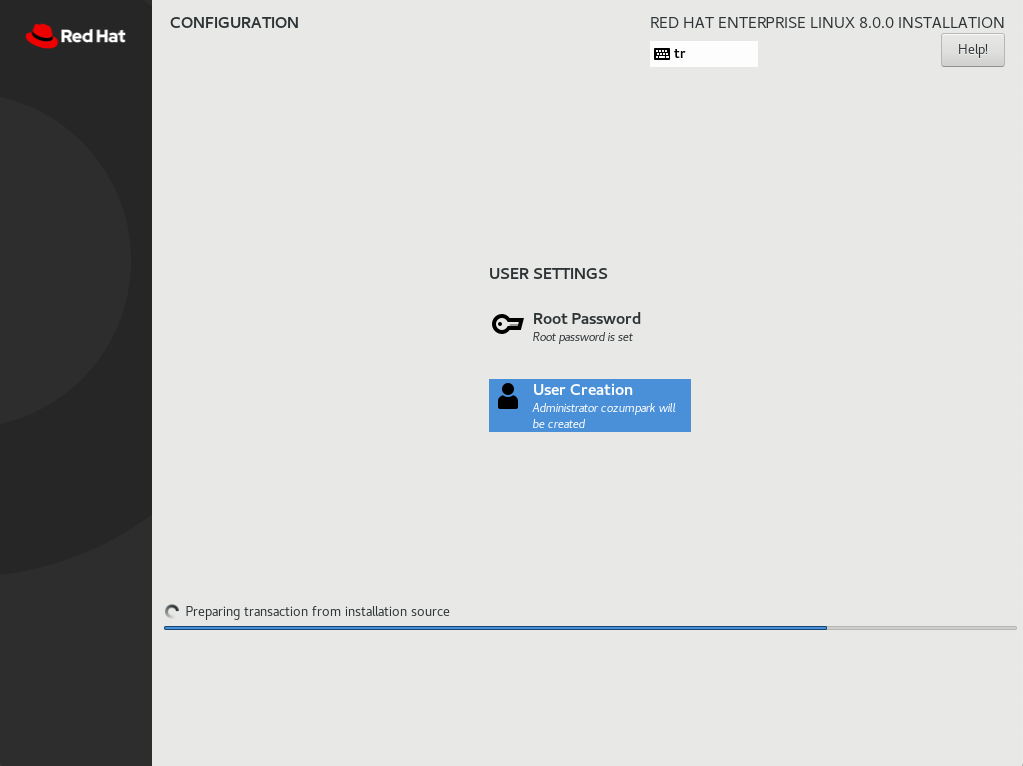
While installing, Redhat asks us to add a root password and a user.
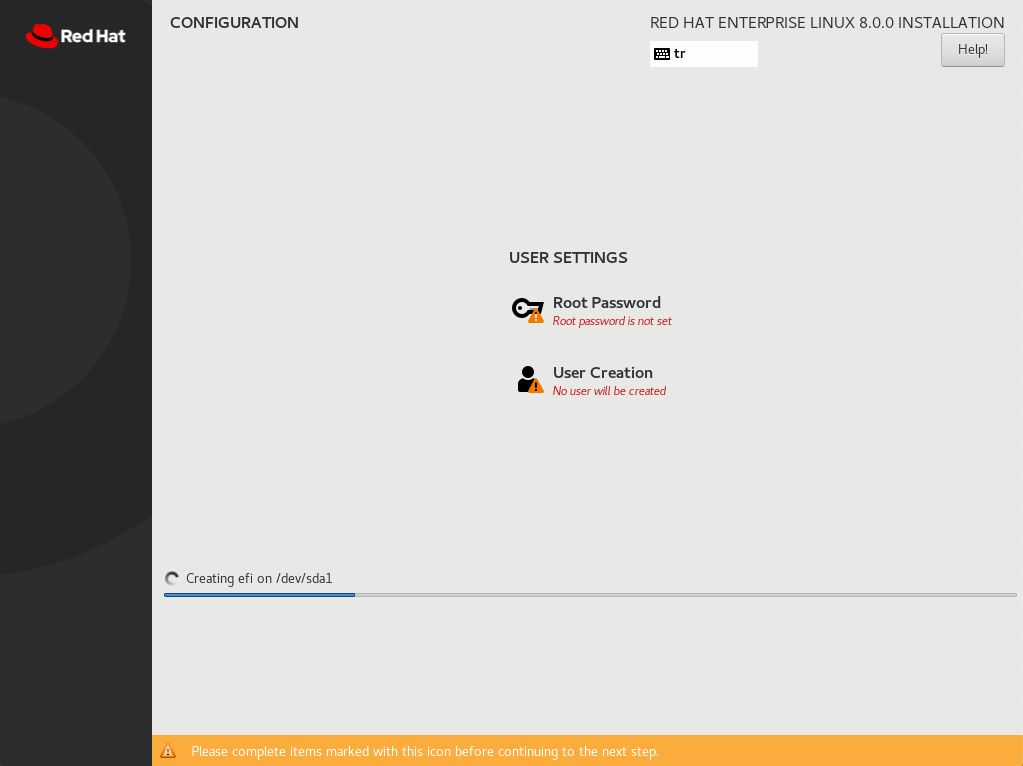
We do the steps one by one.
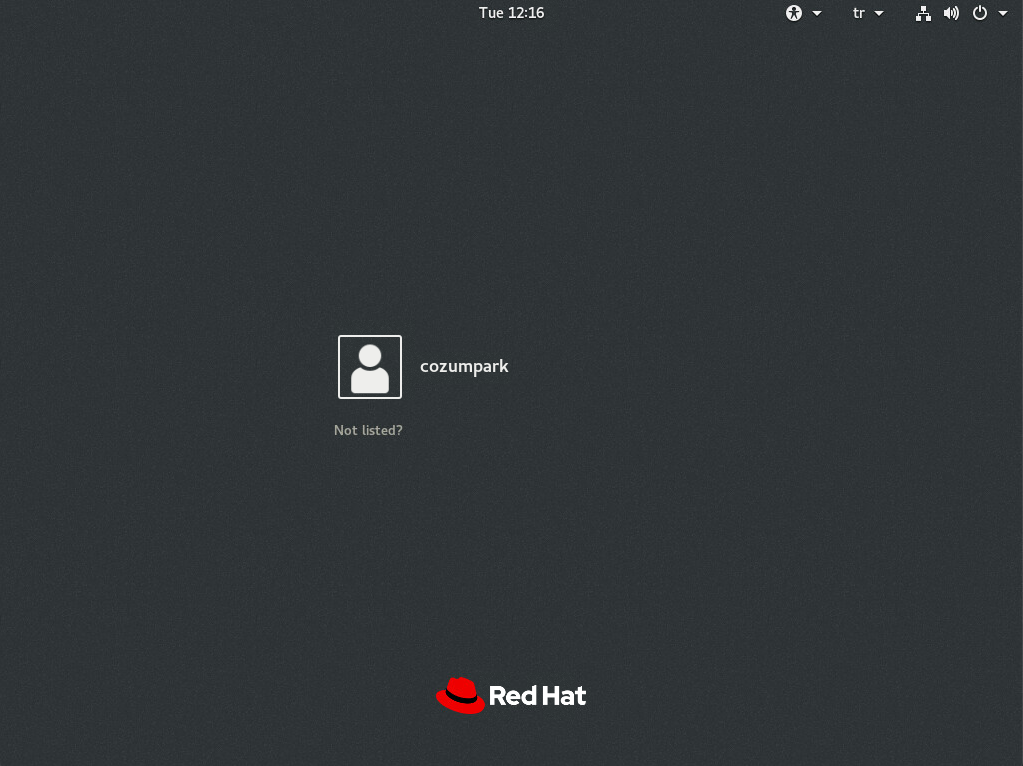
I open an additional user. It’s called “cozumpark”
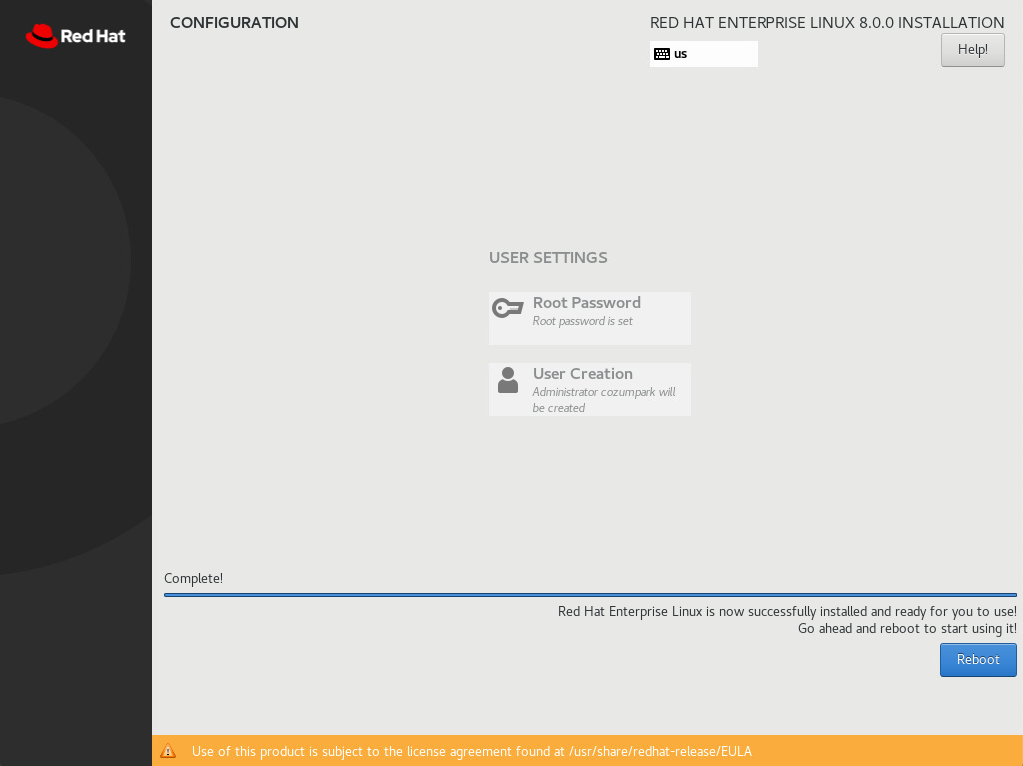
We created our passwords. Now we will wait for the installation to finish.
Installation is complete. We reboot the system by saying “Reboot”.
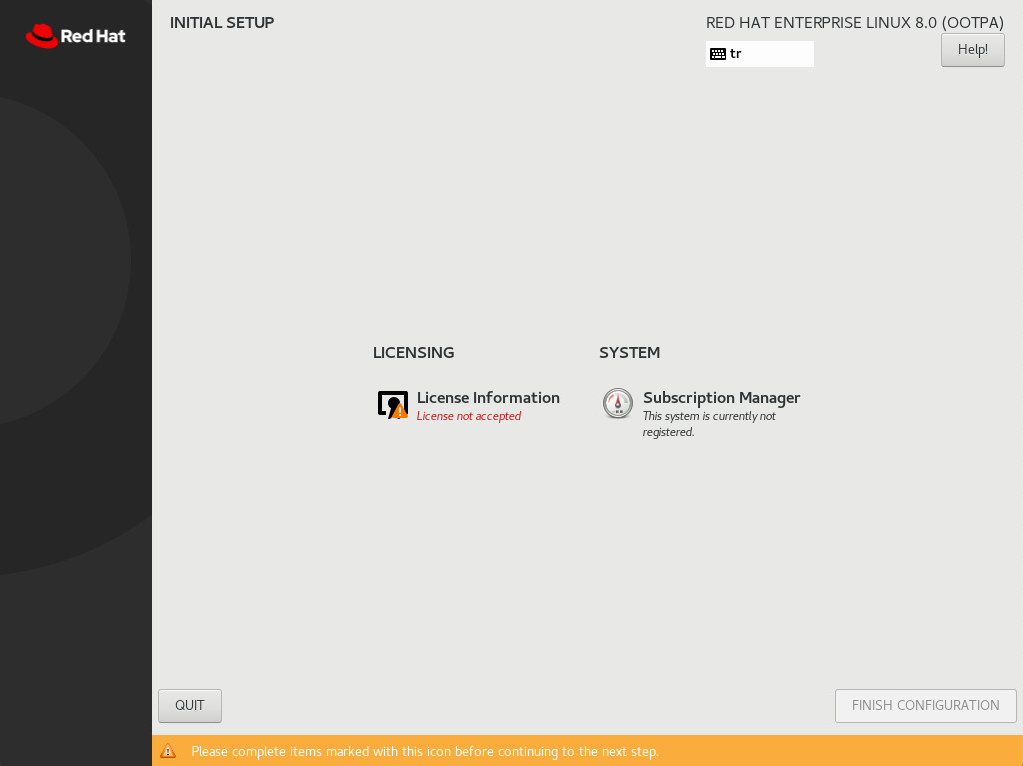
We encounter the license agreement screen.
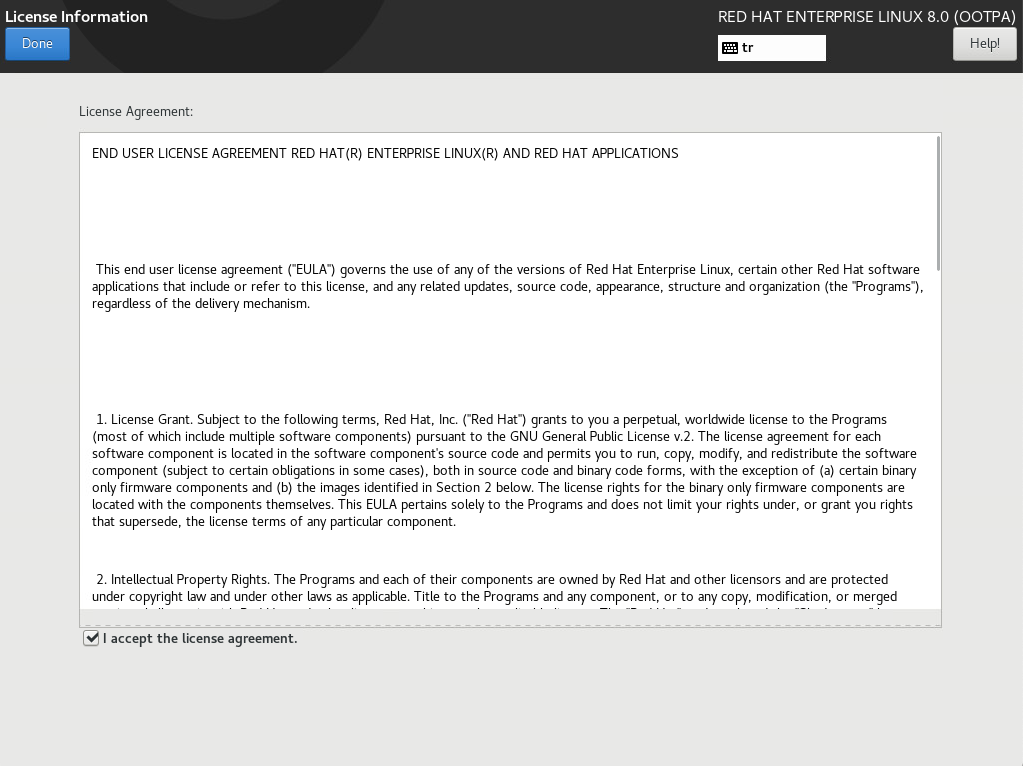
We accept the license agreement.
The installation is complete and the login screen appears.
![]()