In this part of our article series, we will install Oracle Database 19C, which is the last step of the Single Instance (Standalone) 19C Database system with Oracle Grid Infrastructure.
You can download Oracle Database 19C installation files from the link below with a free membership.
1
https://edelivery.oracle.com/
We can start the installation by connecting to our operating system and opening a new terminal.
1
2
3
4
5
6
7
# su - oracle
$cd/home/oracle
$..setEnv
$..db
$cd$ORACLE_HOME
$unzip V98206301.zip
./runInstaller
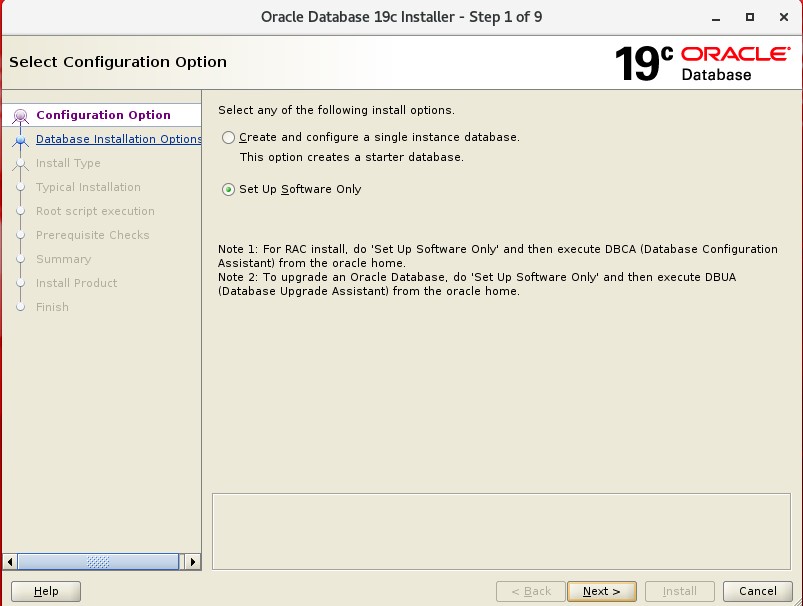
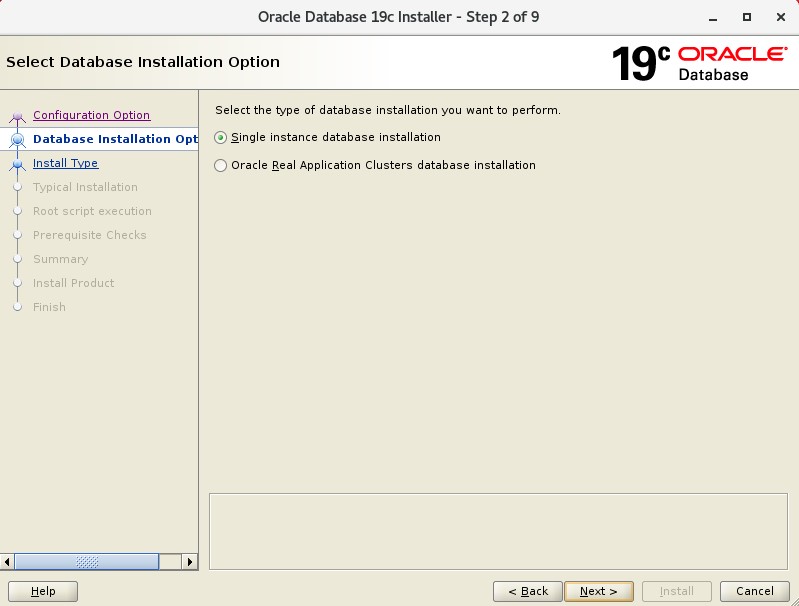
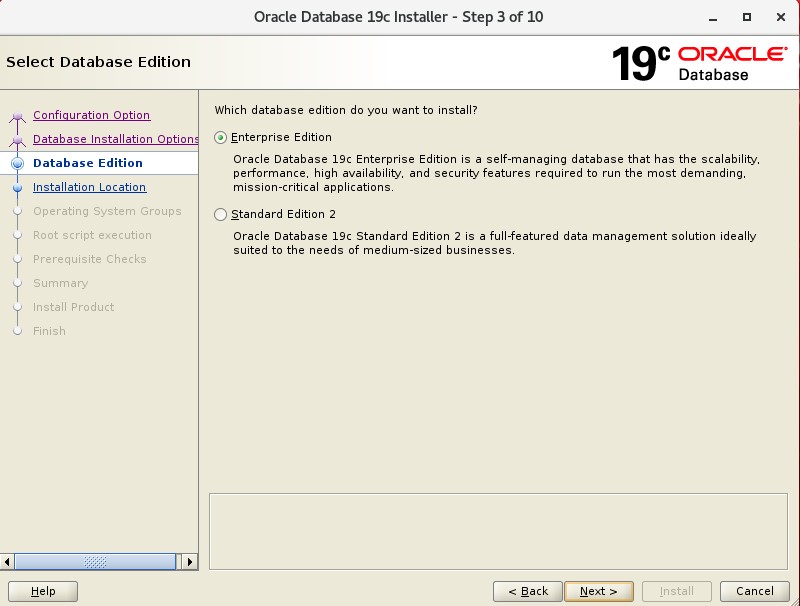
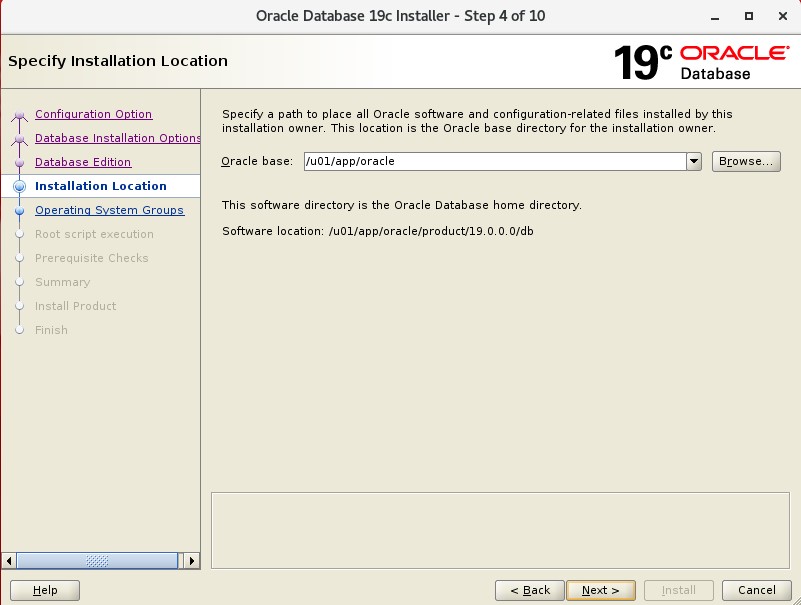
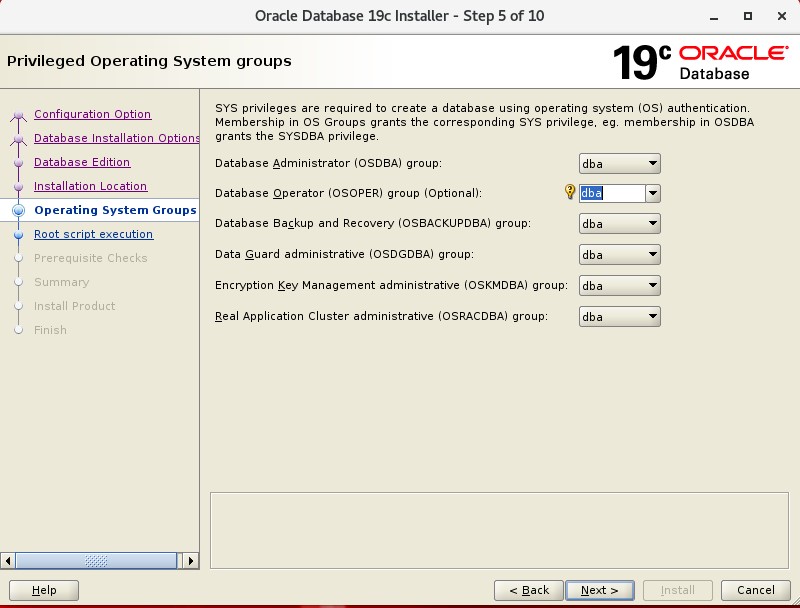
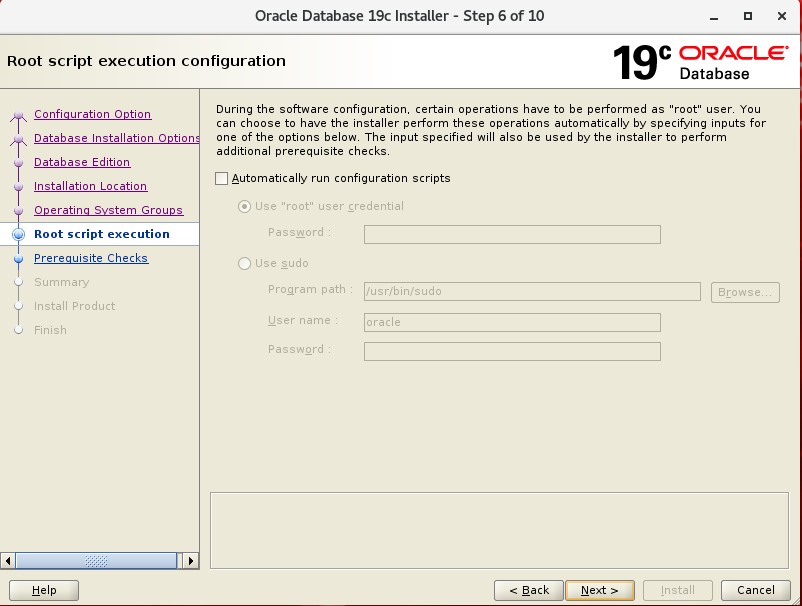
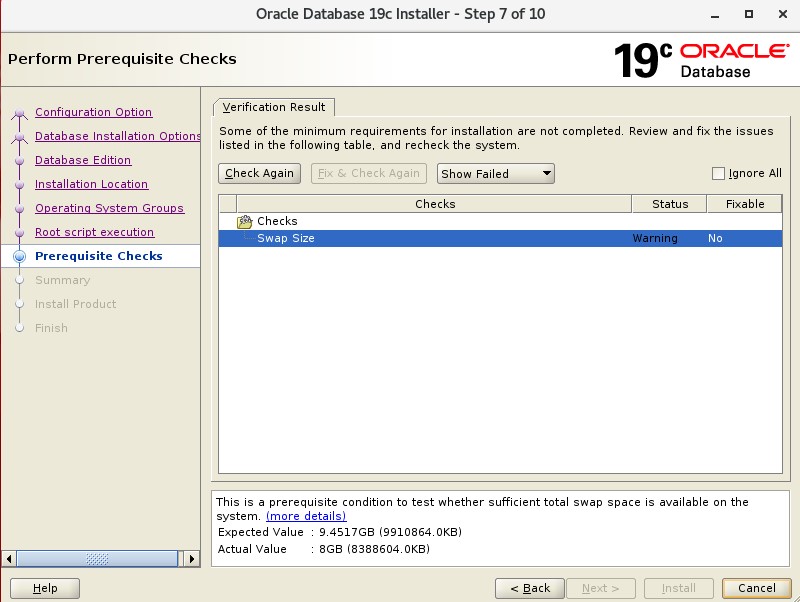
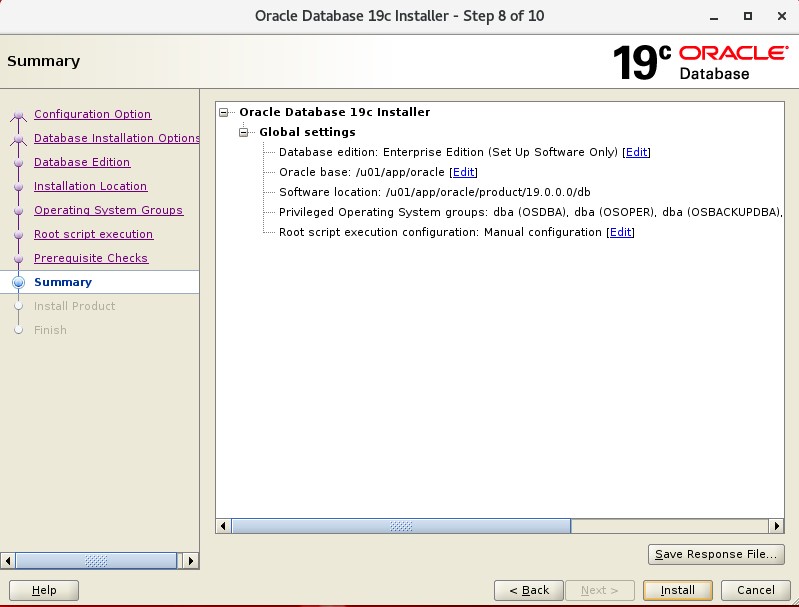
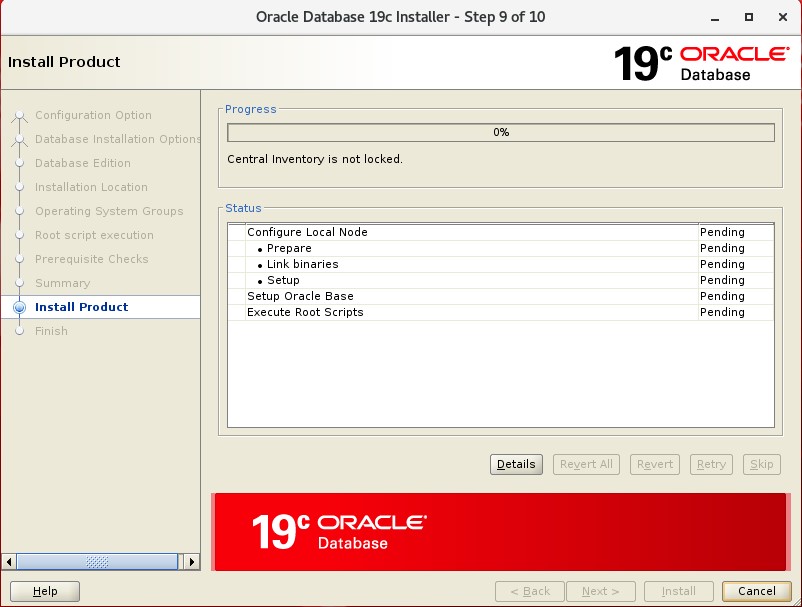
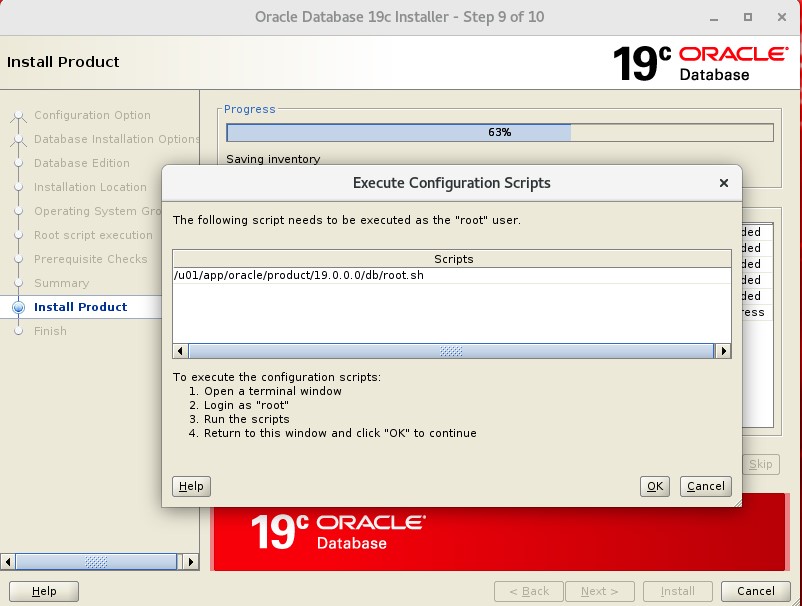
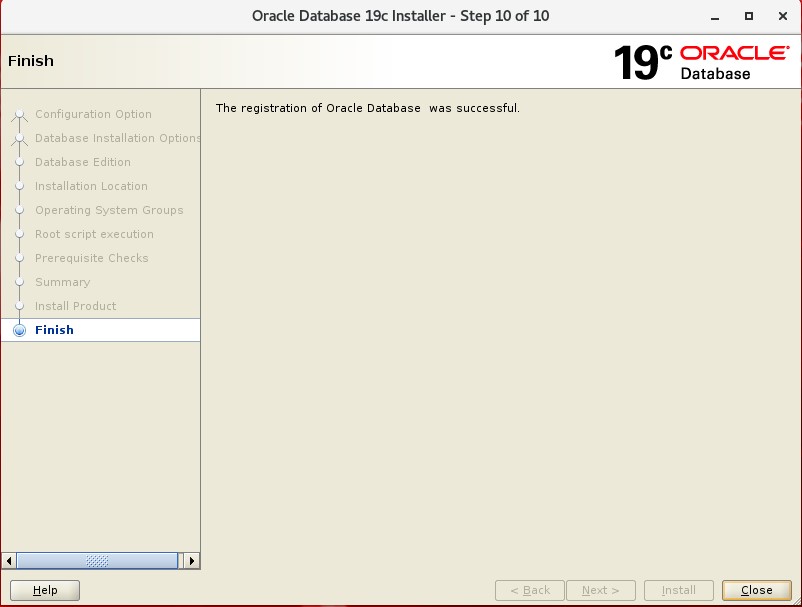
First, we will install the software. Next we will create the database. We continue by selecting NEXT, with “Set Up Software Only” selected.We continue by clicking NEXT, with the subject of our article, “Single instance database installation” selected.We continue our installation process by clicking NEXT with “Enterprise Edition” selected.It asks us for the Oracle Base directory. This came automatically from the variables we set. We continue by saying NEXT.We select all groups as “DBA”. This part may vary depending on your management policy. We are currently preparing the test environment and continue by clicking NEXT with all sections selected as dba.We will not run a script during installation. For this reason, we continue by saying NEXT.We had previously received a warning about SWAP during the Grid installation.. Likewise, we continue by clicking NEXT, with “Ignore All” selected in the upper right corner.We accept the warning.A final breakdown is given. We start the installation by clicking INSTALL.It is just software, the installation will be completed quickly.We run the .sh file that appears on the screen with our root user and after running it, we press the “OK” button.
1
2
# cd /u01/app/oracle/product/19.0.0.0/db
# ./root.sh
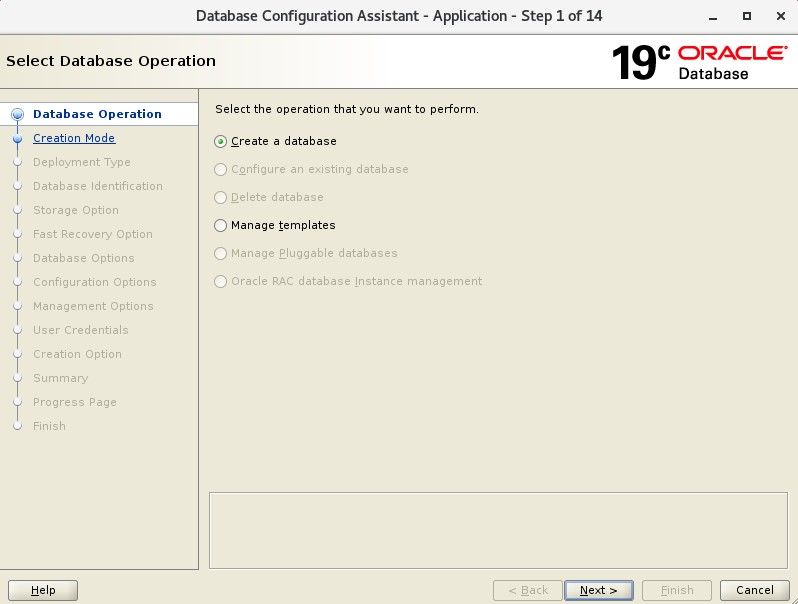
Software installation is completed. Now we will create our database. This process will be done with the DBCA assistant.
1
2
3
4
5
# su - oracle
$cd/home/oracle
$..setEnv
$..db
$dbca
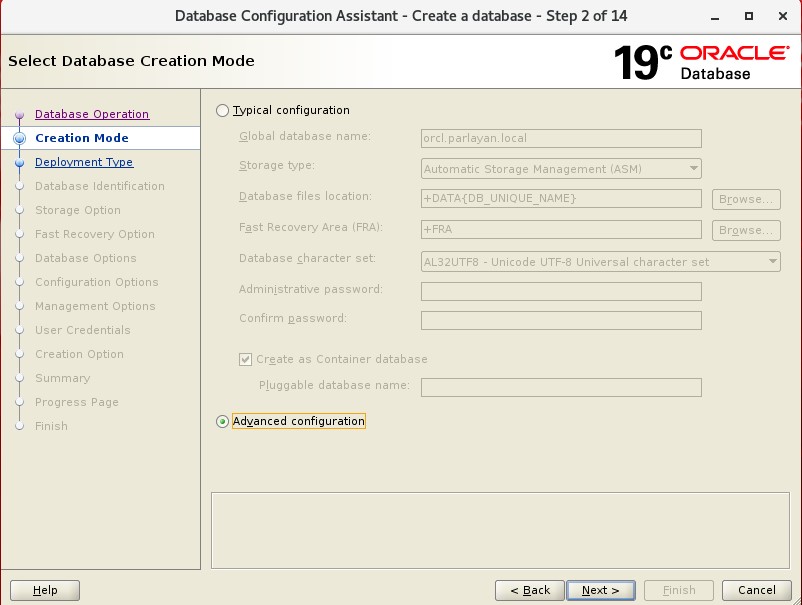
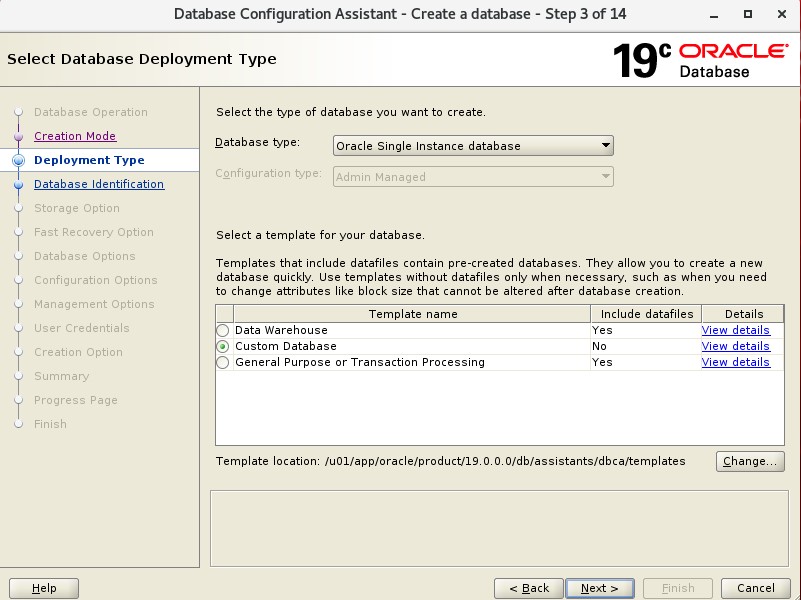
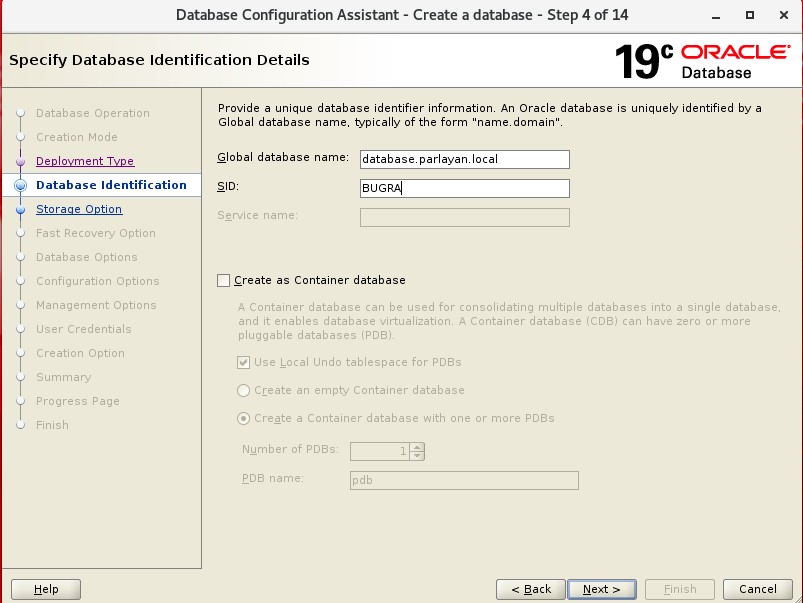
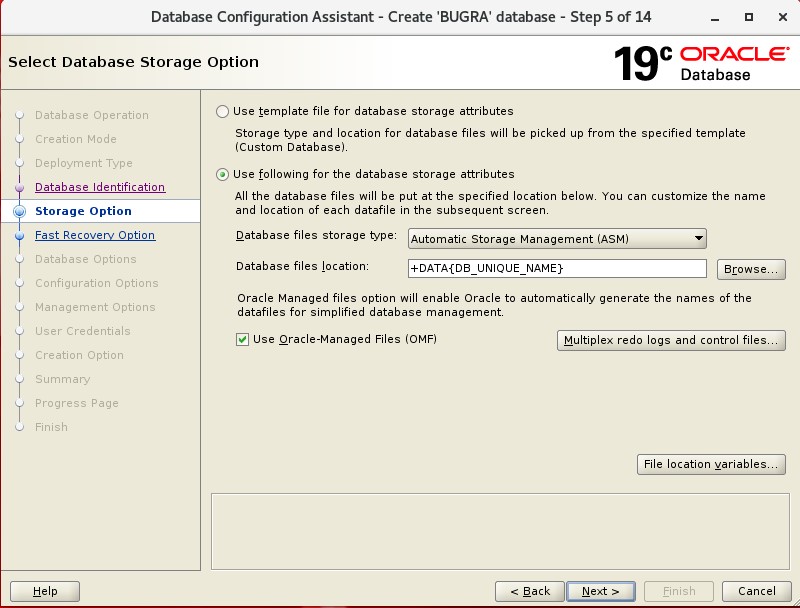
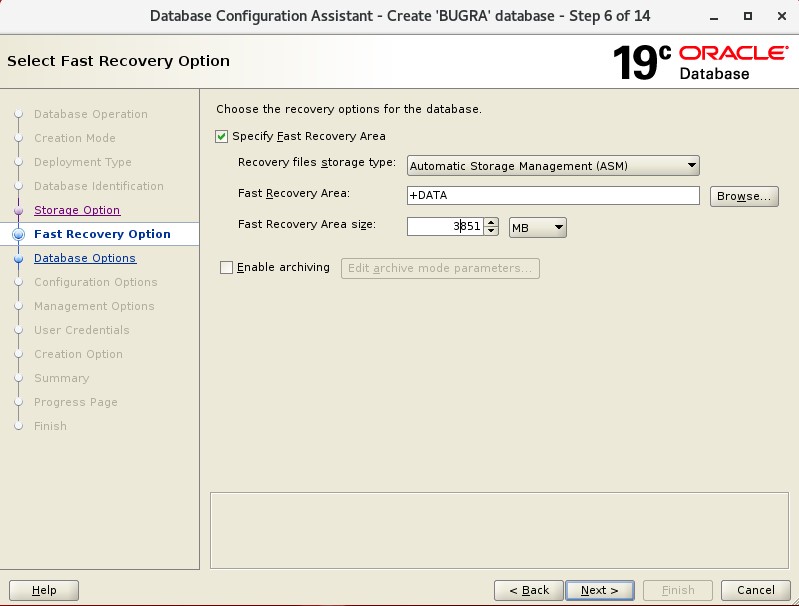
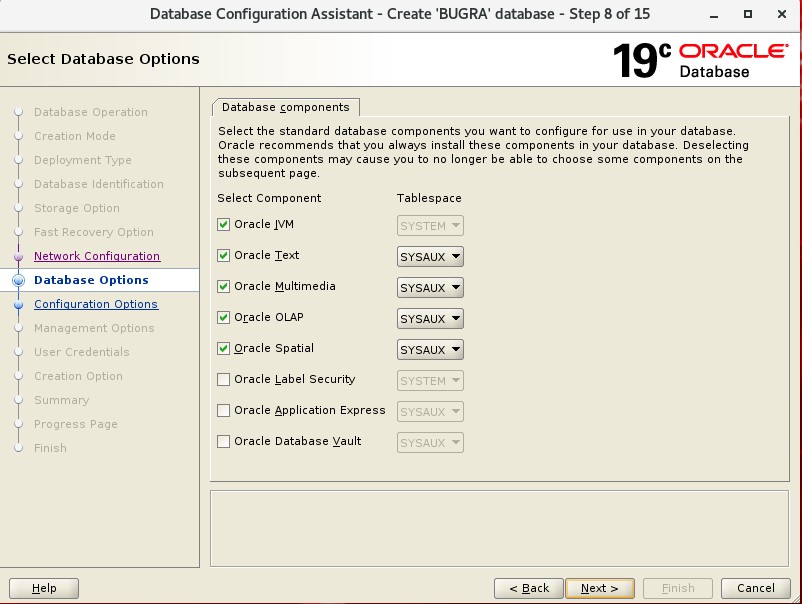
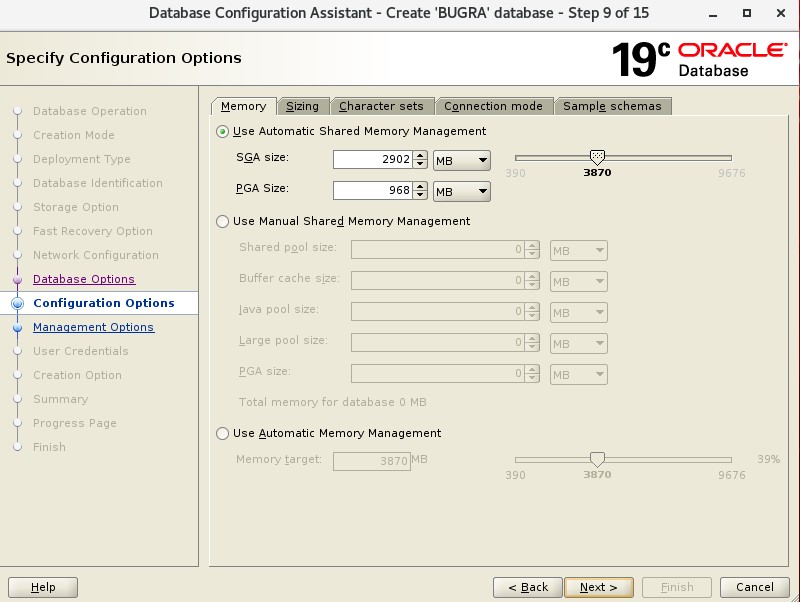
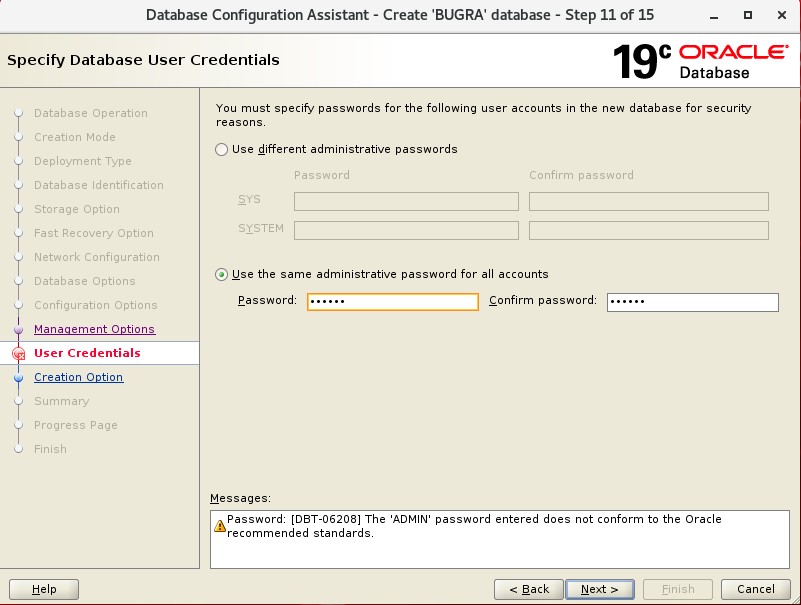
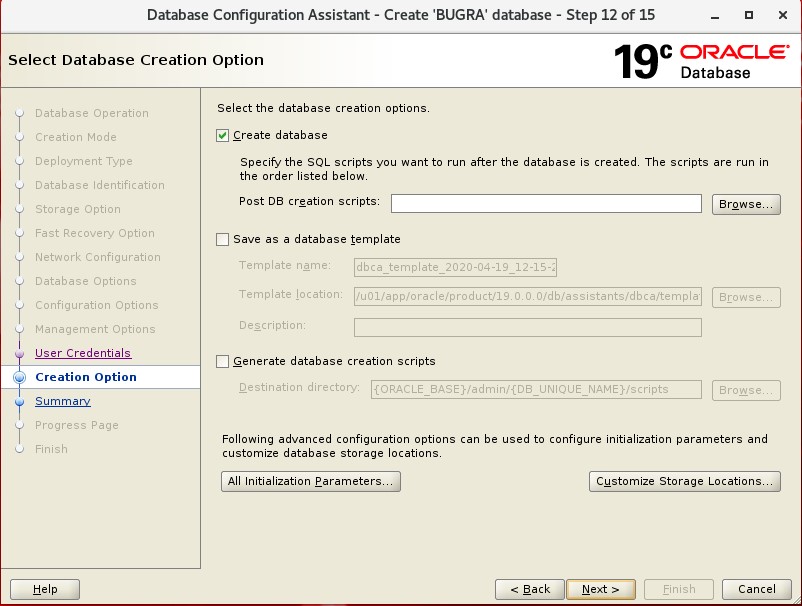
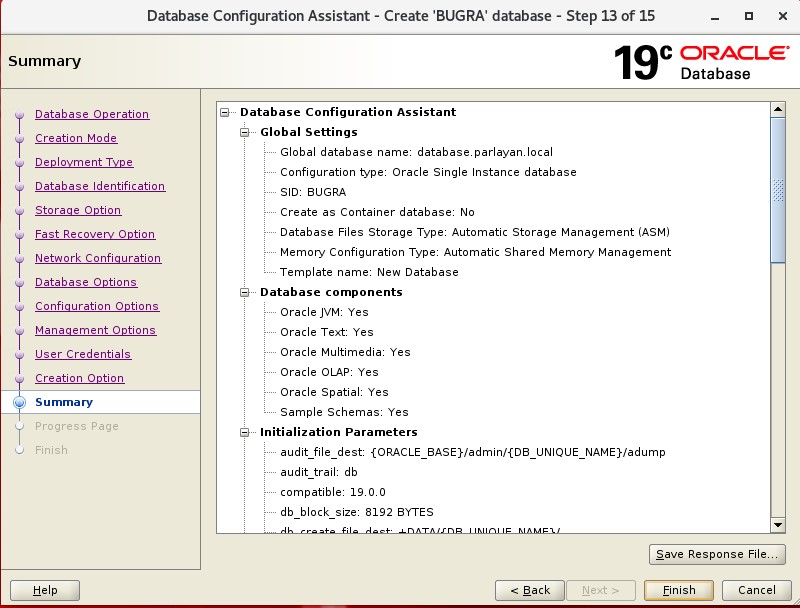
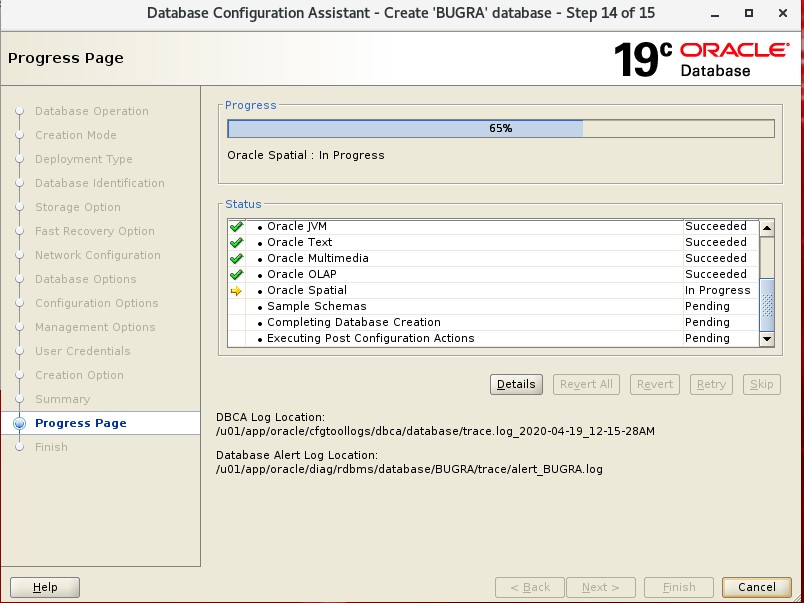
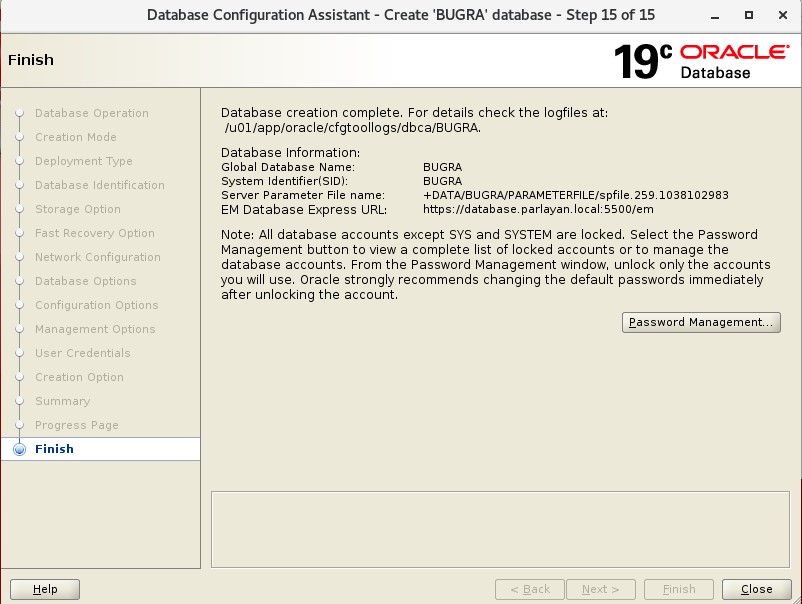
We continue by clicking NEXT, with Create Database selected.We continue by clicking NEXT, with Advanced Configuration selected.We continue by clicking NEXT, with Custom Database selected.We determine the database name and SID name and continue by clicking NEXT.Since the installation will be on the grid, we select the “Use following for the database attiributes” option and continue by clicking NEXT with +DATA selected in the “Database file location” field.It wants space from us for FRA. I marked this field as +DATA in the photo, but it will be +FRA. Please let’s be careful.We continue by saying NEXT without changing this part.We continue by saying NEXT without changing this part.We continue by saying NEXT without changing this part.We may need to use Enterprise Manager Express later. We continue by saying NEXT without changing this part.We set a password for SYS and SYSTEM and continue by clicking NEXT.Now the last step is, we continue by saying NEXT without changing this part.It gives one final document. We start the installation by clicking Finish.This process may take some time.installation is finished. We can connect it to our database.
1
2
3
4
5
# sqlplus / as sysdba
SQL*Plus:Release19.0.0.0.0-Production on Tue April0120:08:562020
Burgra Parlayan is an experienced Database and Weblogic Administrator. After completing his technical / relevant training he has got involved with a serious amount of projects. He successfully managed database upgrade, database migration, database performance tuning projects for various public institutions.Currently he has been employed by one of the leading financial institutions called Turkiye Hayat & Emeklilik as responsible administrator for Oracle Database and Oracle Middleware. He has been sharing his experience and knowledge by face to face training, personal blog and various social networking accounts to support the Oracle ecosystem continuously since 2010.
 Database Tutorials MSSQL, Oracle, PostgreSQL, MySQL, MariaDB, DB2, Sybase, Teradata, Big Data, NOSQL, MongoDB, Couchbase, Cassandra, Windows, Linux