 Database Tutorials MSSQL, Oracle, PostgreSQL, MySQL, MariaDB, DB2, Sybase, Teradata, Big Data, NOSQL, MongoDB, Couchbase, Cassandra, Windows, Linux
In this article We create a share on a server and then we map this share on a server.
I selected MSSQL as Category. Because generally I am using shares for SQL Server. Maybe you will use for another reason.
And after the map process will completed we can access this share as a disk on the server.
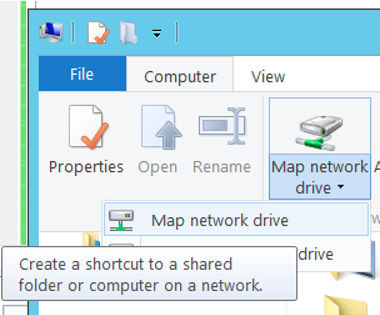
Open any folder as follows and select “Map a network drive” from Computer.
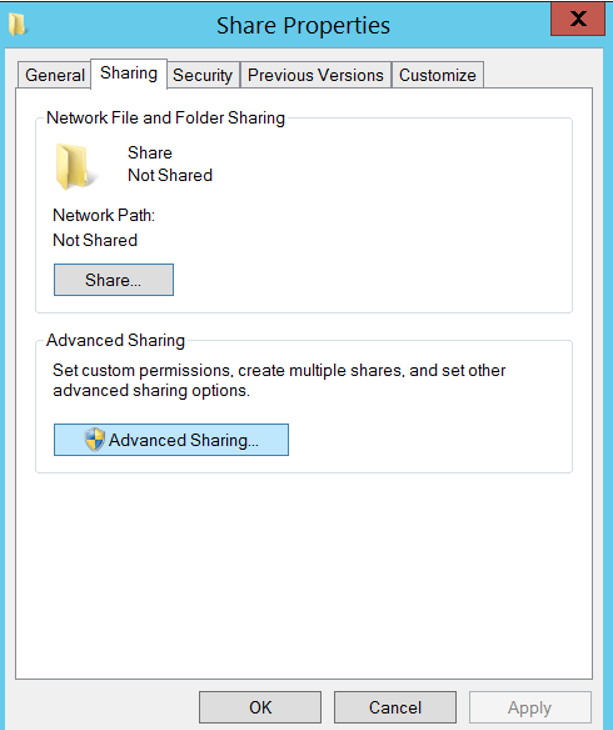
We go to the server where we will create a Shared Folder and create a folder called Share, and right-click on the folder and click on the properties. We choose Advanced Sharing from the Sharing tab.
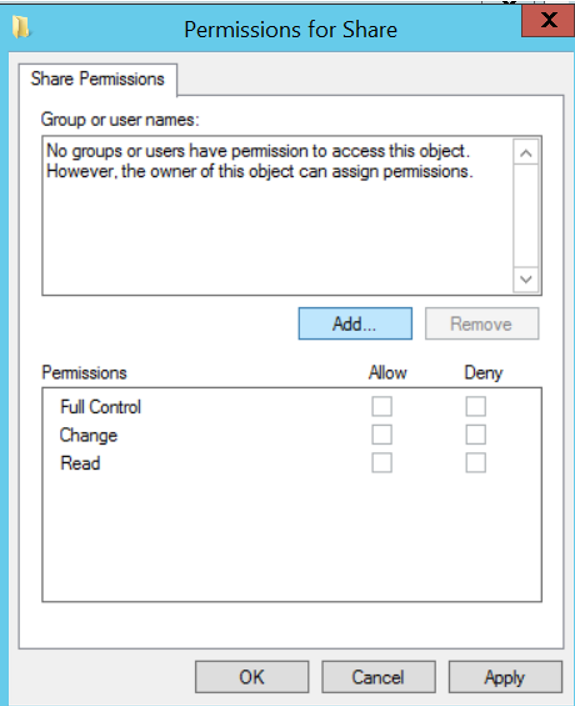
We choose Share this folder and give our share a name. Click on the Permission tab and remove Everyone by removing it.
We give Full Control authorization to users who will use this share.
We specify the Drive name as follows. We chose Z for our example.
In the Folder section, we write the path of Share similar to the following.
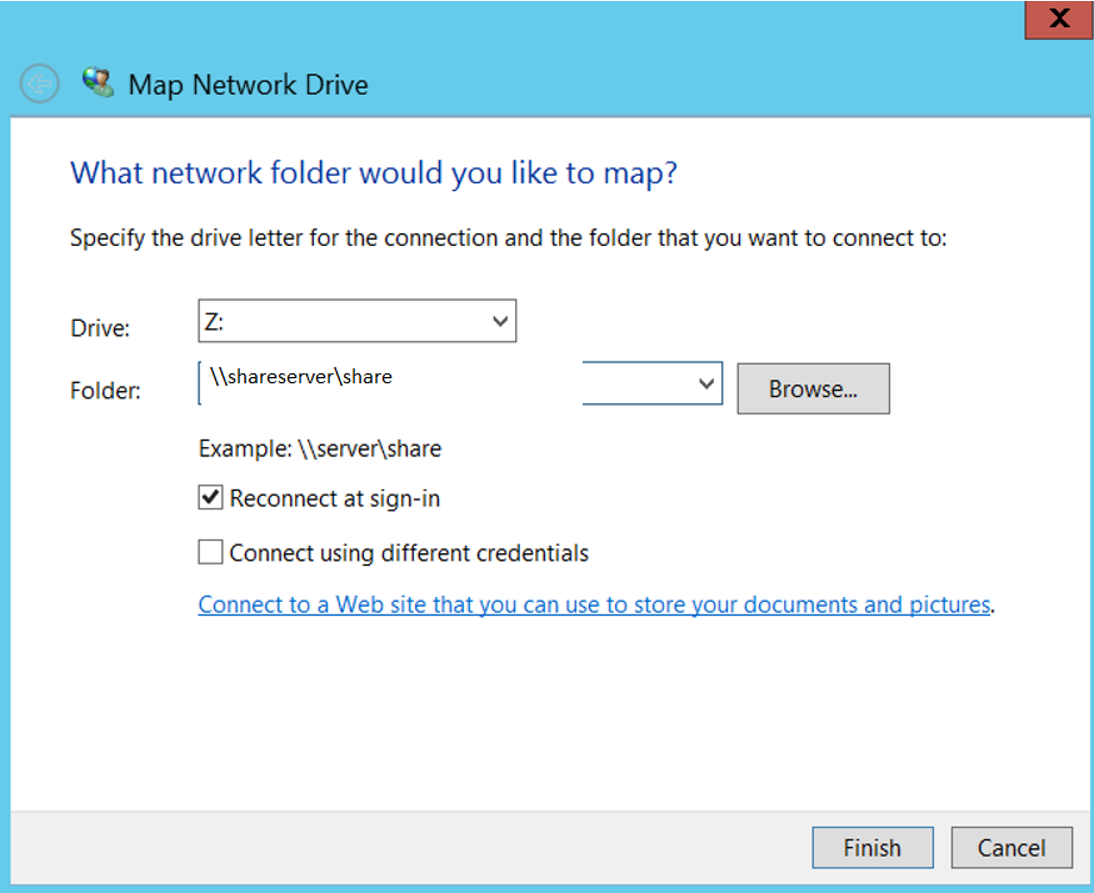
Click Finish and complete the process.
![]()