 Database Tutorials MSSQL, Oracle, PostgreSQL, MySQL, MariaDB, DB2, Sybase, Teradata, Big Data, NOSQL, MongoDB, Couchbase, Cassandra, Windows, Linux
In some cases, there may not be enough space on the disks where the database files are located.
For this reason, you may need to transfer some or all of the database files to other disks.
There are several ways to do this.
We will talk about the two most commonly used ways in this article.
First Method:
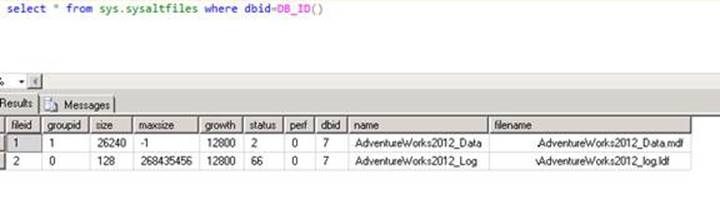
To save where the database files are located before detaching, you must save the result of the following script.
1 | select * from sys.sysaltfiles where dbid=DB_ID() |
or
1 | select * from sys.master_files where database_id=DB_ID() |
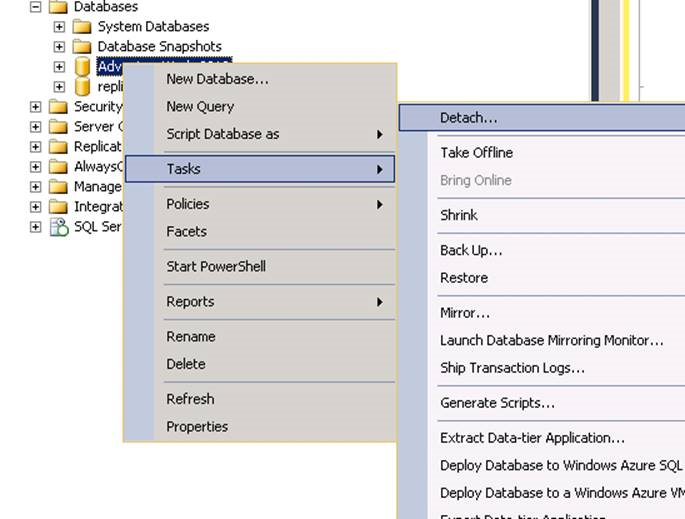
As shown in the following figure, we must first detach the database from the sql server by right-clicking on the database and selecting detach from the task tab.
If we click on the detach tab and there is a connection on the database, we need to select Drop Connections as below so that these connections are terminated before detach.
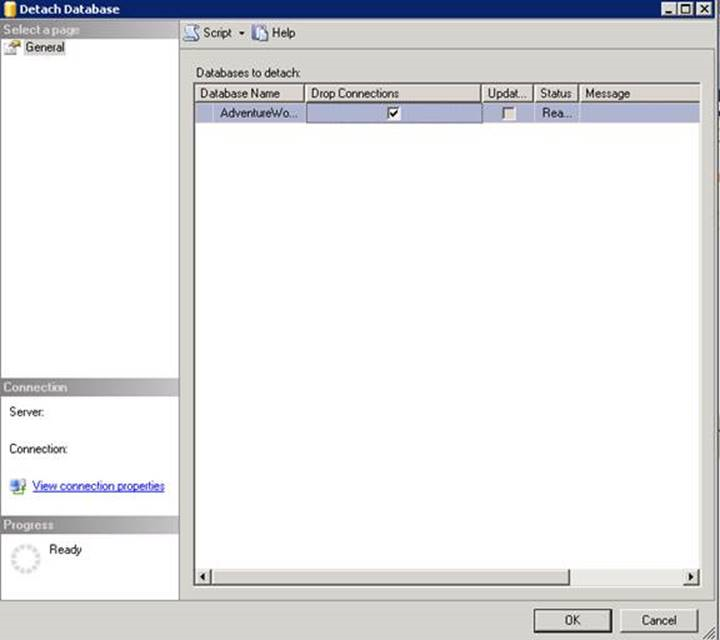
If detach operation is not performed again, you should click on the Script in the above picture.
You should add the following script to the top of the resulting script and run it.
1 | ALTER DATABASE [AdventureWorks2012] SET SINGLE_USER WITH ROLLBACK IMMEDIATE |
Before detach, you need to make sure that there are no requests on the application.
The best way to be sure of this is to contact the application developers and ask them to stop application and then disable Login.
Through SQL Server Management Studio, we come to Security-> Logins tab respectively.
Right click on login and select properties.
Then we select Disabled from the Status tab and press OK as shown below.

After the detach process is finished, you need to move the database files from the windows to the desired disk using copy paste method.
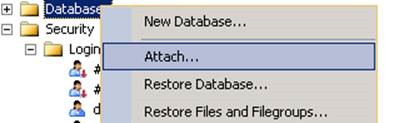
After copying is finished, we select Attach by right clicking on Databases via SSMS as shown below.
We click on Add and find the path where the mdf file is located and double-click the mdf file.
After selecting the Mdf file, SQL Server will automatically list the other files to display the old path.
From the CurrentFilePath tab, we select the new path to which we copied the files and click OK.
And then, by enabling login, we’re done.
Although this method seems simple, it is not preferable because it will increase the downtime in large databases.
Second Method:
In this method, the downtime time is very small.
First, we get a full backup of the database to a disk with enough space as below.
Right-click on the database and click Tasks-> backup.
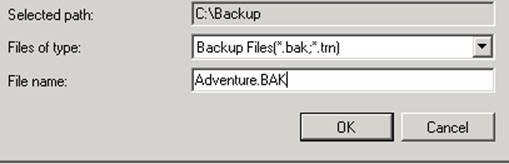
In the Destination section, we will click the add button and specify the path and the backup name.
If you click Verify when backup finished in the Media options, Backup will perform a backup restoreability test after the backup is complete.
Also, if you select Compress Backup in Backup Options, Compress Backup will compress your backup and reduce the backup size.
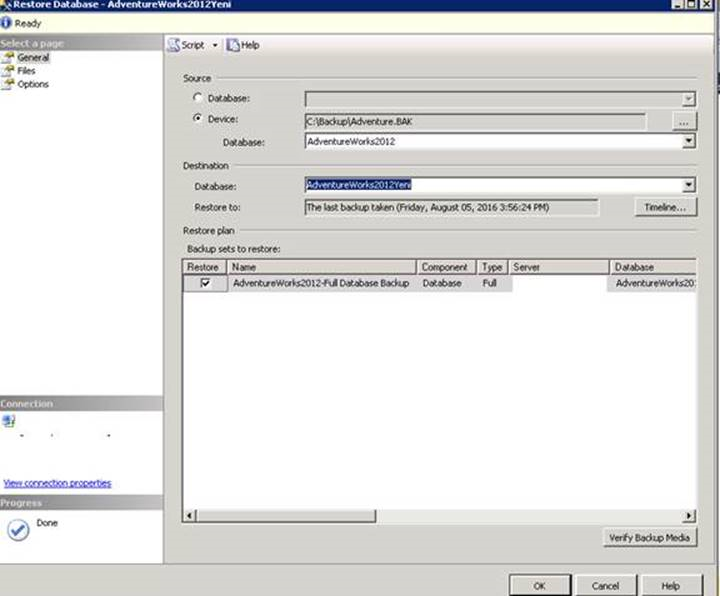
After the backup is finished, right-click on the Databases tab and select Restore Databases.
Select Device and click on the 3-point button on the right side of the Device.
In the tab that pops up we click Add and go to the path where we get the backup.
Double-click on the backup file and finaly ok.
SQL Server reads the backup file to see if it can be restored.
And in the “Backup sets to Restore” section, the backup information is listed.
The database name automatically appears in Destination.
But you have to change it.
For example, you can add a word at the end as shown in the picture below.
In the next step you are going to the Files tab in the image above.
You should go to the “Restore as” section and type the disk path you want to move the database files to.
Then, in the options tab, select “restore with norecovery” in the “recovery state” section and click OK.
You can click OK when you are working on small databases, but you must not click OK on SSMS when doing anything on large databases.
When you press the Script key you will create the entire script for that process and then you can run that script.
The important point here is: Restore with no recovery.
We have not turned on the database by selecting this option.
While the database is in recovery mode, we can recover the differential backups on it.
In the next step, we right-click on Database and select Task-> Backup.
This time we select “TransactionLog” from the Backup Type and we get log backup by repeating the other operations that we did while taking the full backup.
Differently, the extension of the backup file is .BAK in full backup and its .trn in Log backup.
We disable the login as described in the first method.
We right-click on the database in which we added “Yeni” and in restoring mode, and select Task-> Restore-> TransactionLog.
From the drop-down menu, select “From device” and click on the right side … and select the log backup we received.
Then we select the box under Restore and press OK.
If there was another log backup file to restore, we need to restore the log file by selecting restore with norecovery from the options tab.
We only perform restore with recovery in the restore of the last log file.
In this process, we will restore only one logbackup file, so we did this without selecting anything.
We performed Backup-Restore operations.
But we still have the old database.
The database we are restoring has a “Yeni” word at the end of the name.
We use the following script to change the names of the restored and the old databases.
1 2 3 4 5 6 7 | ALTER DATABASE AdventureWorks2014 SET SINGLE_USER WITH ROLLBACK IMMEDIATE GO sp_renamedb 'AdventureWorks2014','AdventureWorks2014Eski' GO ALTER DATABASE AdventureWorks2014Eski SET MULTI_USER WITH ROLLBACK IMMEDIATE GO ALTER DATABASE AdventureWorks2014Eski SET READ_ONLY |
1 2 3 4 5 | ALTER DATABASE AdventureWorks2014Yeni SET SINGLE_USER WITH ROLLBACK IMMEDIATE GO sp_renamedb 'AdventureWorks2014Yeni','AdventureWorks2014' GO ALTER DATABASE AdventureWorks2014 SET MULTI_USER WITH ROLLBACK IMMEDIATE |
And after running the script we delete the old database and re-enable Login.
With this method, we can change the disk of our database with a very short interruption no matter how big the database is.
![]()