 Database Tutorials MSSQL, Oracle, PostgreSQL, MySQL, MariaDB, DB2, Sybase, Teradata, Big Data, NOSQL, MongoDB, Couchbase, Cassandra, Windows, Linux
With the Log Shipping technology, the backup of the SQL Server Transaction Log file is periodically transferred to another instance and recovered on the secondary instance. A job is automatically defined for each step.
• A job that receives Transaction Log Backup(On Primary Instance),
• A job that copies the log backup to the secondary server(On Secondary Instance),
• A job that restored the backup copied on the Secondary server(On Secondary Instance),
• A job that generates alerts when there is a problem or delay in any job(On Monitor Server Instance. I’ll refer to the monitor server instance.)
Each of the above jobs has a schedule. This means that you can configure x job to run every 5 minutes and y job to run for 15 minutes. Depending on this time, you can find the time difference between the secondary database and the primary database.
Log Shipping is created at the database level. The Recovery Model of the database must be Full.
Although it is one of the HA (High Availability) options, there will always be a time difference between the primary and secondary database. Log Shipping does not have automatic fail over mode, so it doesn’t make sense to use it for HA. But you can do Log Shipping on the basis of database for reporting purposes.
Let’s clarify the subject by making a sample on 2 test servers.
We will transfer the database AdventureWorks2014 from the instance on the first server to an instance on the second server by log shipping.
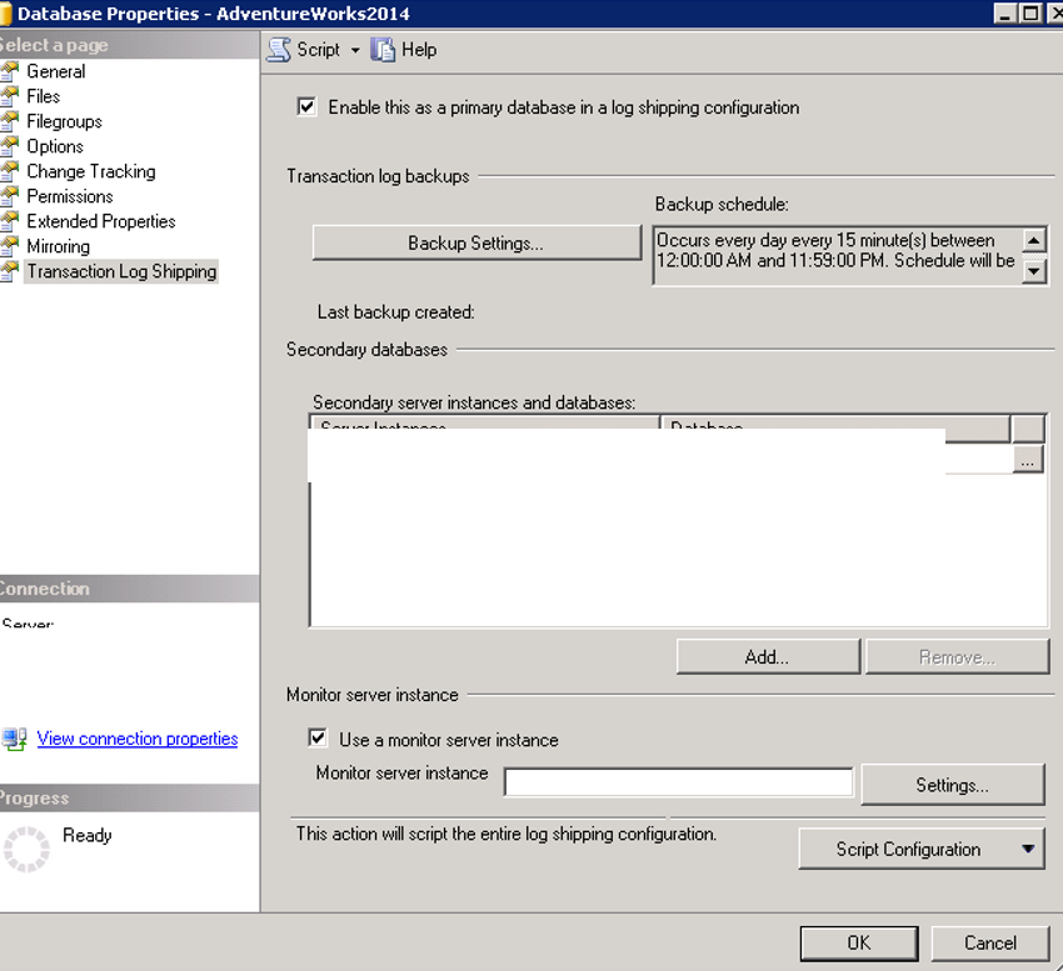
Right-click on the AdventureWorks2014 database on the first instance and click on Properties. Click “Enable this as a primary database in a log shipping configuration” from the Transaction Log Shipping tab as follows.
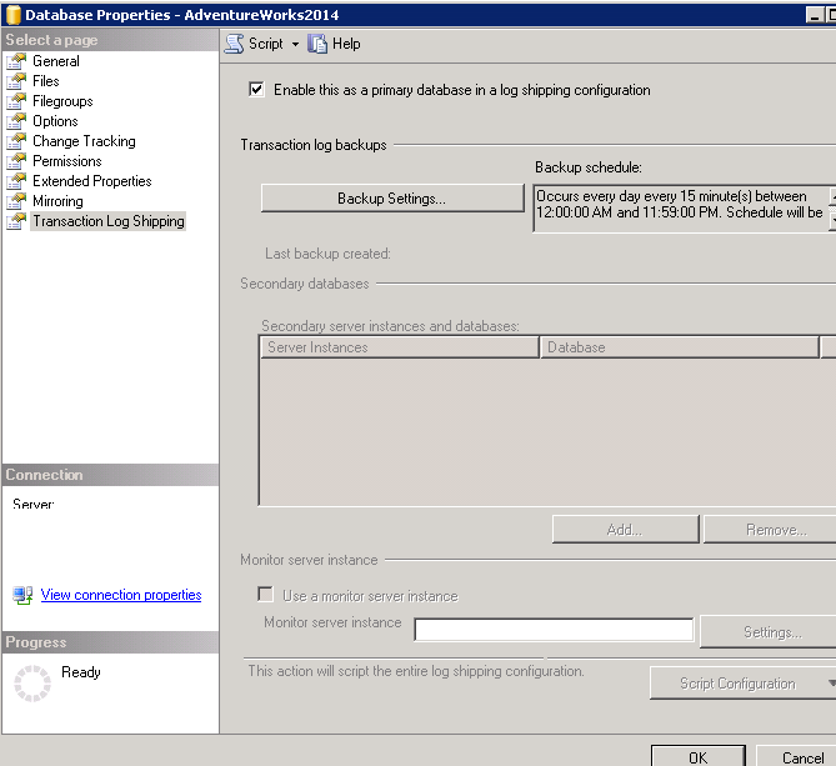
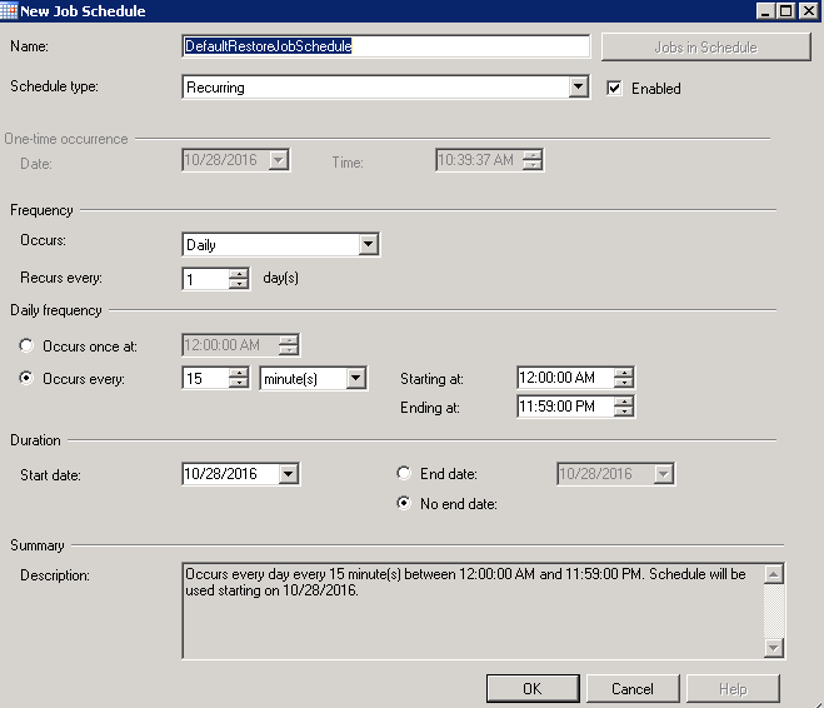
Then, by clicking Backup Settings, we set the schedule of the job that will get backup from the first server. When you click Backup Settings, you will see a screen like below.
Either you must give a share name to the part that starts with “network path” or you must give a local path to the part that starts with “if the backup”.
The SQL Server service account and the SQL Server Agent service account of the primary instance must have read and write permission on this path. And secondary instance’s SQL Server Agent account must have read permission on this path.
Since I need to authorize Secondary instance, I will use shared folder.
How many hours later an old backup will be deleted can be set on “Delete files older than” tab.
How many hours later an alert has been generated can be set on “Alert if no backup occurs within” tab, if the transaction log is not backed up.
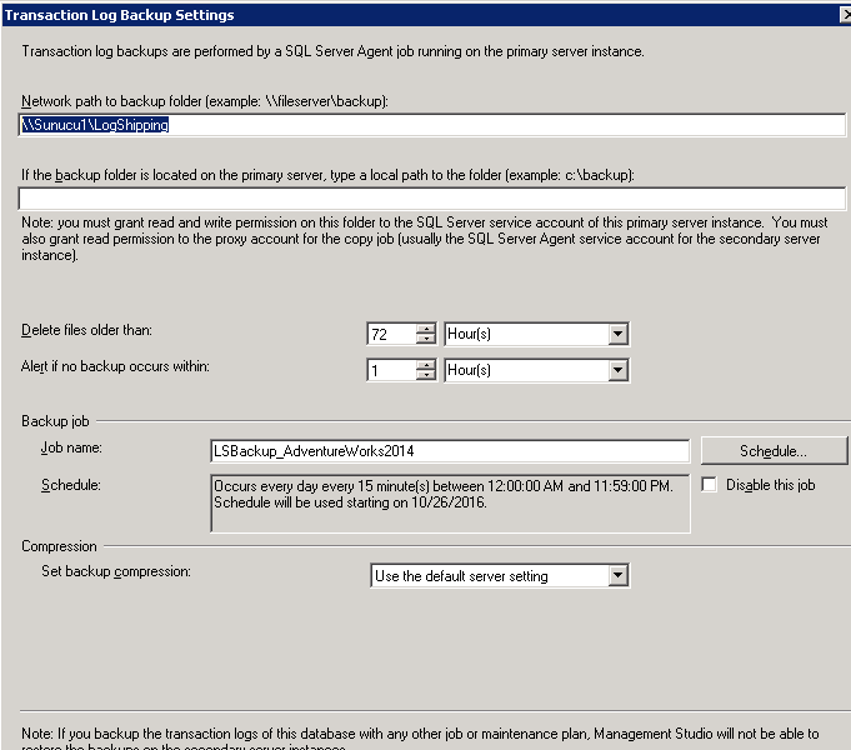
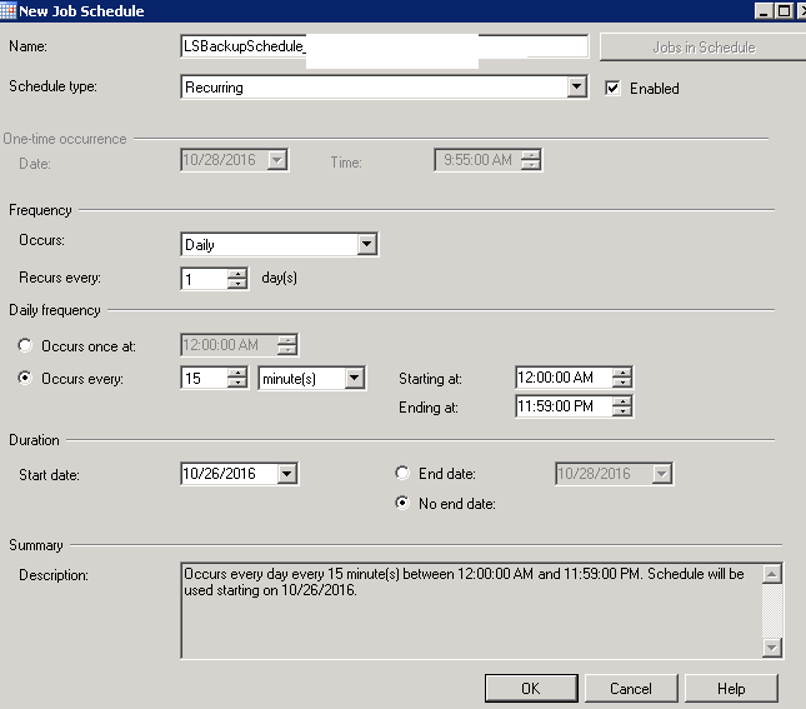
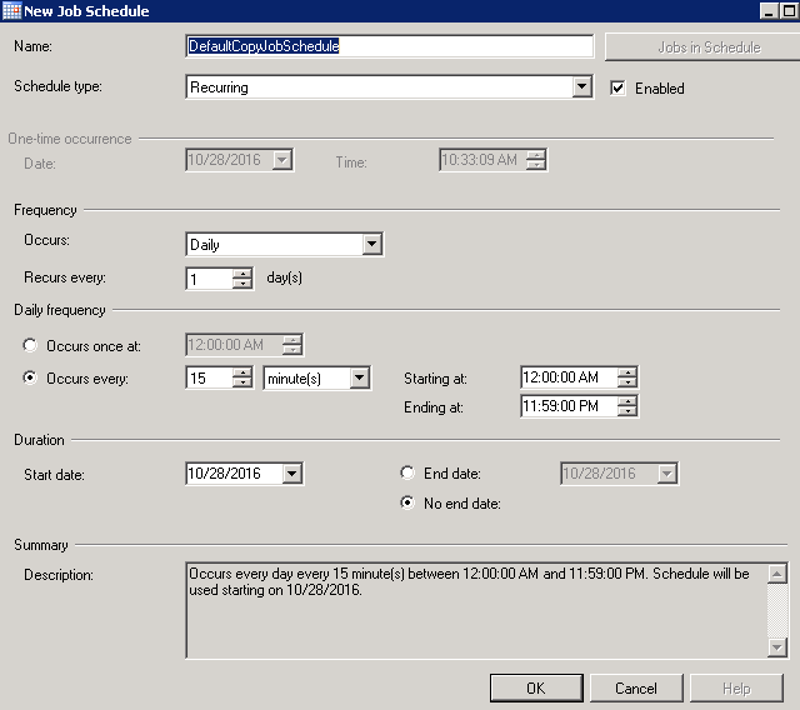
Under Backup job, click on Schedule and set it to backup every 15 minutes as follows. You can increase or decrease this time if you wish.
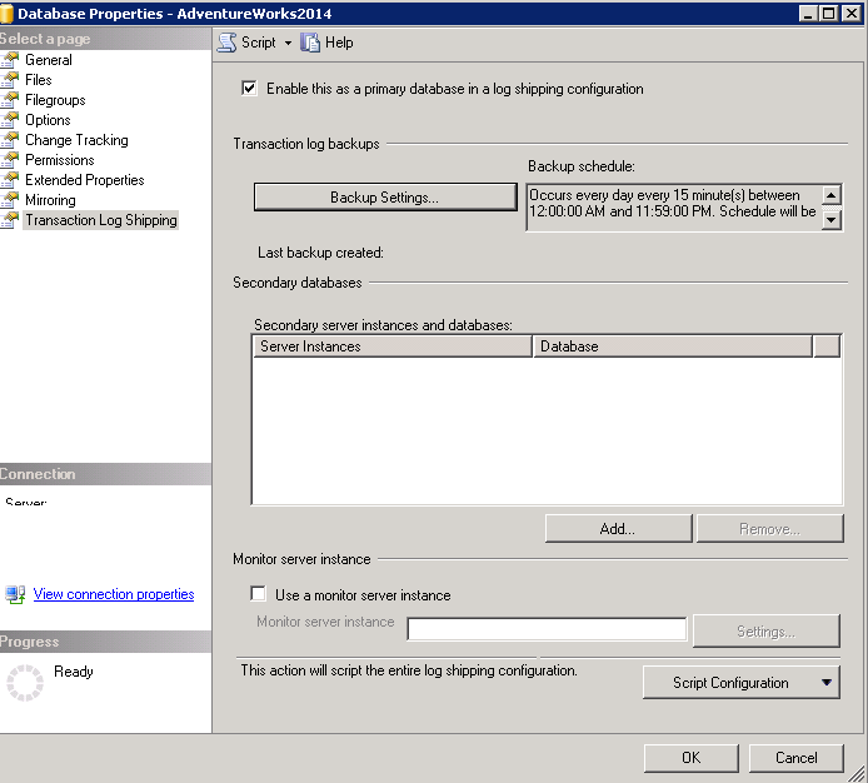
After setting the schedule for Transaction Log Backup, we click Add from Secondary databases on the screen below.
We choose where the Secondary database will be copied by clicking Connect on the screen. In the Secondary Database we make the necessary selection as follows.
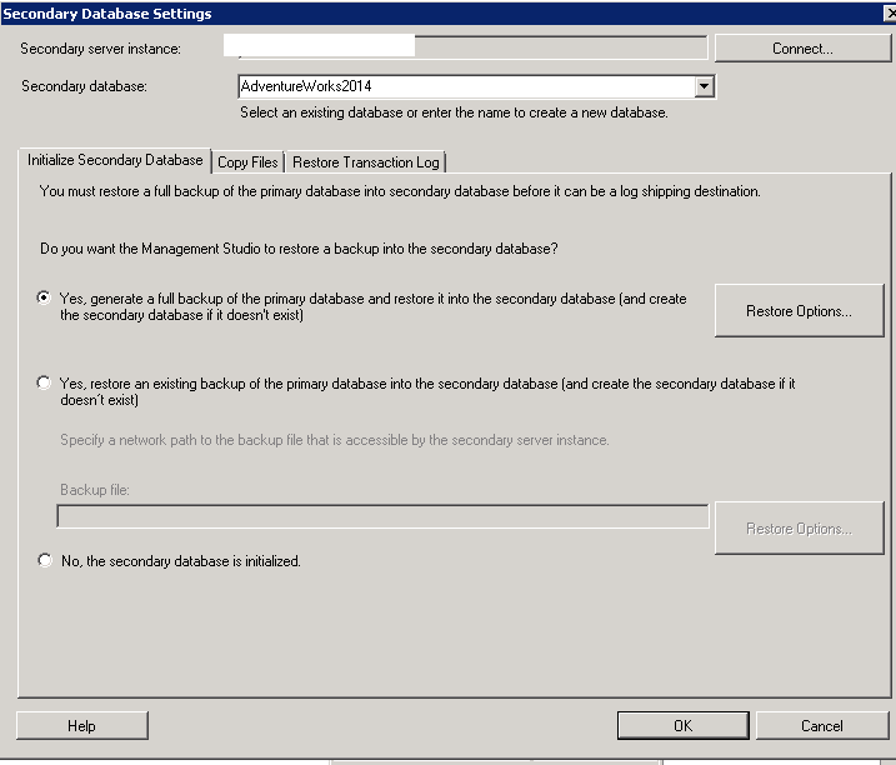
On the “Initialize Secondary Database” tab;
On the “Do you want the Management Studio to restore…” option,
If we choose “Yes, generate a full backup”, it will take the backup from the first server and restore it to the second server.
If we select “Yes, restore an existing backup”, the current backup will be restored to the secondary.
If you select the “No, the secondary database is initilalize” section, you must manually restore the backup to the secondary server in norecovery mode.
We are moving to the Copy Files Tab by selecting the first option as follows.
On the Copy Files tab,
You should write a local path on the secondary server to the section that begins with “Destination folder for”.
The backup files in the shared folder will be copied to the path we specified here. On this path, the sql server service account and the sql server agent service account must have read and write permission.
I set the “Delete copied files after” part as 72 hours. This means that backups that are copied to this path will be deleted after 72 hours.
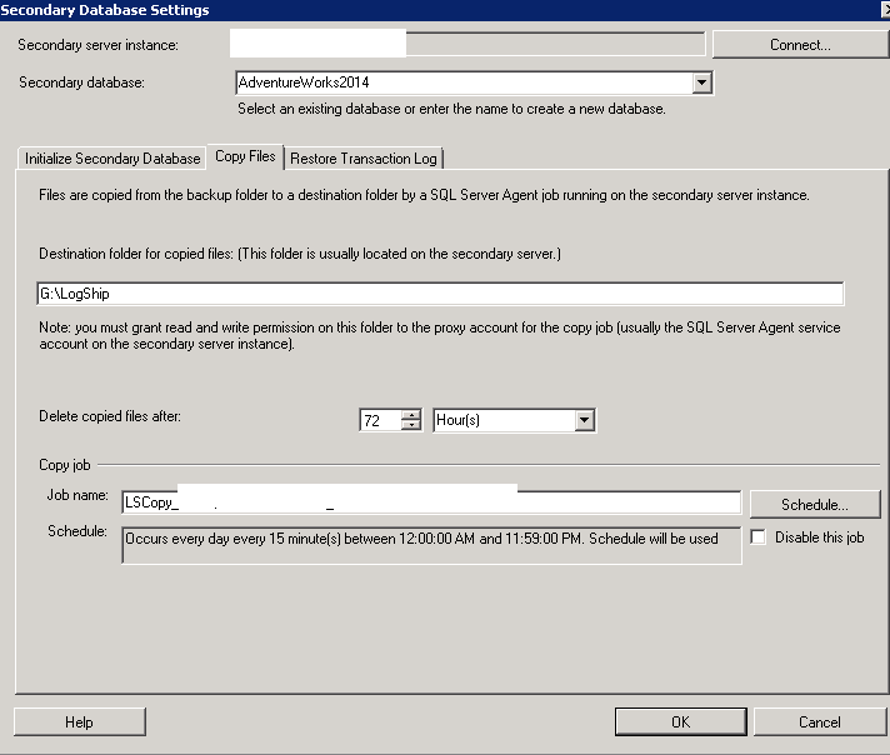
Then, click the schedule on the right side of the “Copy Job” section and set the copy job to run every 15 minutes.
You can increase or decrease this time.
After clicking Ok, we are going to the Restore Transaction Log tab.
If we choose No recovery mode, it will restore the backup from the first server to the second server and restore it in norecovery mode. This means that you can not read from the second server.
If you select Standby mode, you can read from the second server. If we choose this mode, there is another option.
Disconnect users in the database when restoring backups: If we select this option, it will disconnect the users connected to the database and then restore the backups.
We choose this option as follows.
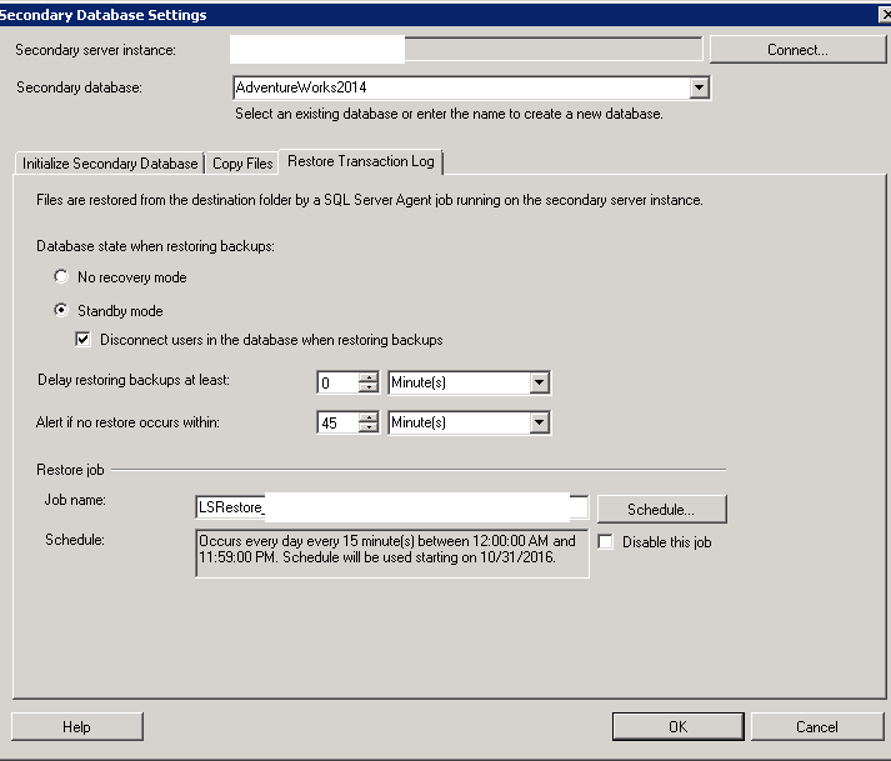
By clicking on the Schedule on the right side of the Restore Job section, we schedule the job to restore the copied backups to the secondary server. I’ve set it to be 15 minutes. If you want, you can increase or decrease this time.
After this process, the settings in the secondary database are finished and we click ok.
After clicking Okey, we go back to Database Properties and click Use a monitor server instance as follows and then click settings.
Let me tell you a little what the Monitor server will do. If there is a problem at Log Shipping( on backup job, copy job or restore job), it generates a warning about the problem.
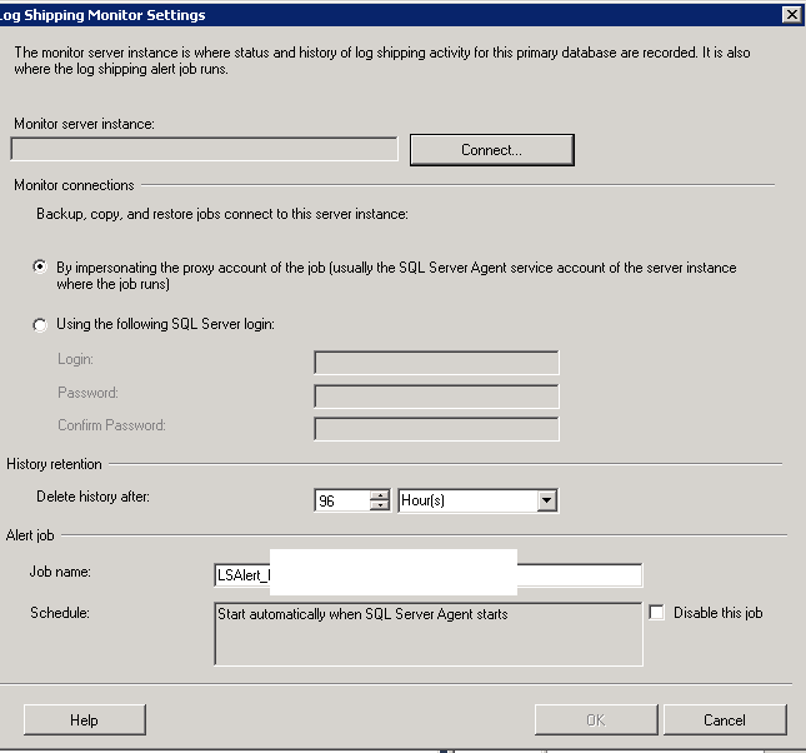
After clicking on Settings a screen will appear as below. By clicking Connect next to Monitor Server instance, we select a monitor server to monitor if there is a problem with Log Shipping.
If you have another instance other than these two instances, it is best to select that instance. Because, let’s assume that our first instance is a monitor server. If the first instance is closed and the backup or copy job does not work, the alert will not be generated. Because we chose first instance as monitor server. Therefore, I recommend that you select a third instance.
On the monitor server instance, we need to enter a user to monitor the backup, copy and restore job.
If we choose “By impersonating the proxy”, we select the SQL Server Agent service account of the monitor server instance.
You can enter SQL Login and password by selecting “Use the following SQL Server Login”. We chose the first option.
The user who will perform the monitor operation must have sysadmin authority on the primary and secondary instance. As I mentioned above, since I chose “By impersonating the proxy”, I gave the sysadmin right on the Primary and Secondary instance to the Monitor Server Instance’s SQL Server Agent service account.
When we complete all operations and click ok, a screen like below should be displayed.
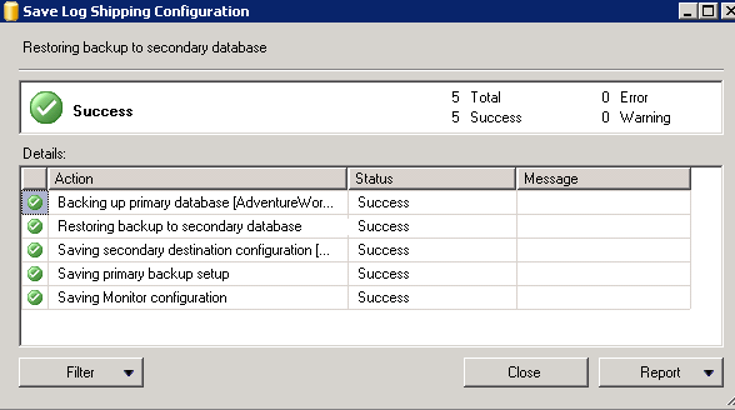
I’m running the backup job on the first server manually. After completing this job, I am running the copy job on the second server manually . After finishing this job, I’m running the restore job on the second server. If the configuration is done correctly, all jobs will work successfully. By doing this, we have tested the configuration.
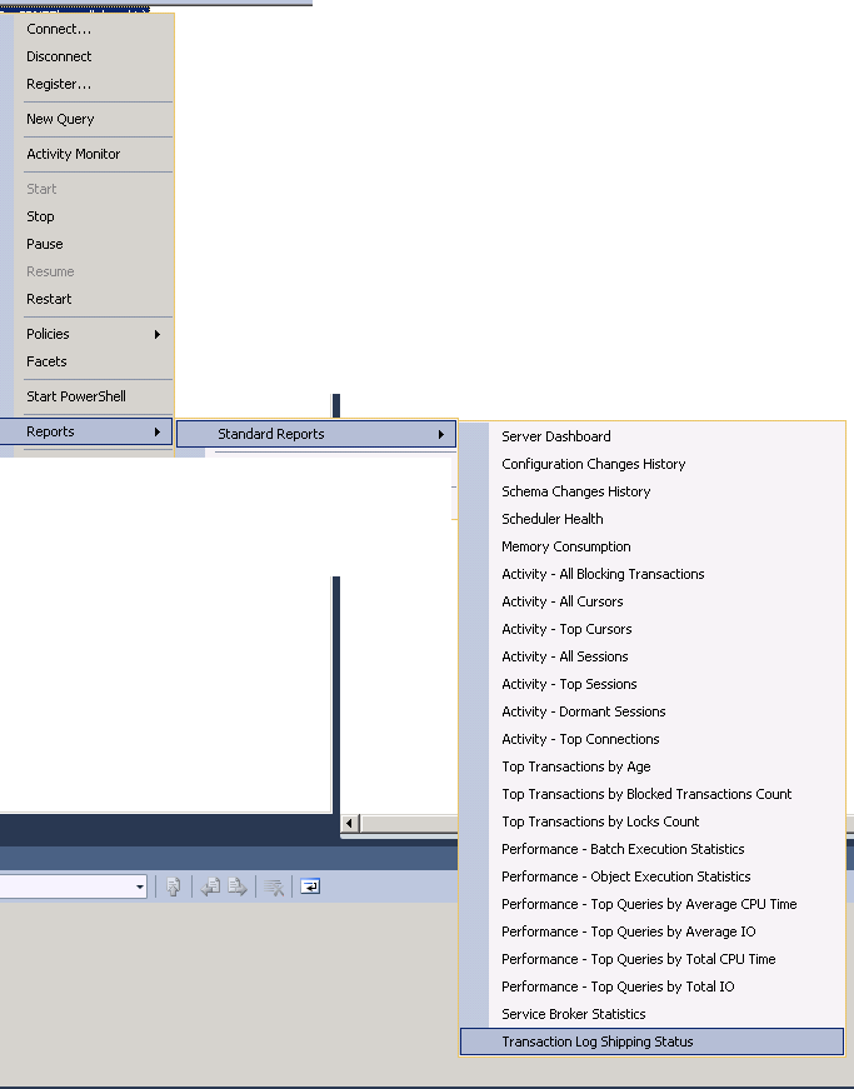
To see the current status of Log Shipping, you can right-click on the second instance and then click Connect-> Reports-> Standard Reports-> Transaction Log Shipping Status.
![]()