 Database Tutorials MSSQL, Oracle, PostgreSQL, MySQL, MariaDB, DB2, Sybase, Teradata, Big Data, NOSQL, MongoDB, Couchbase, Cassandra, Windows, Linux
In order to understand this article more clearly, I suggest you read the article “SQL Server Replication Types“.
First, the snaphot of the table to be replicated is taken and transferred to the subscriber.
After this process, changes in data and schema are transferred in a sequential manner to the subscribers almost in real time. The transactions in the actual database are transferred in the same order to the subscriber. In this way, Transaction consistency is guaranteed.
I have used Transactional Replication for reporting purposes on systems I have managed so far. Report queries can cause performance problems because the actual server has very intensive operations. Therefore, we can transfer the tables related to the report queries to another server and run our report queries without loss of performance on the main server.
Because Transactional Replication will run almost simultaneously, our reports will be almost real-time. If we were using Always ON, we would be able to read from the secondary server, but report queries may need many indexes. However, index cannot be created on the secondary server in Always ON. Therefore, if we want to use Always On’s secondary server for reporting purposes, we need to create the necessary indexes for the reports on the primary server. You may not want to add the index for the purpose of reporting on the primary server because it will slow down the insert, update, and delete performance of the running application. You may want to use Transactional Replication in this case.
If you still want to get your reports from Always On’s Secondary Server, I suggest you read the article “Readable Secondary On SQL Server Always On Availability Group“. If you are interested in Availability Group, you can find a lot of articles that will help you if you write “Availability Group” in our search section.
In this section, we examine the operational principles of Transactional Repliation.
It uses Snapshot Agent, Log Reader Agent, and Distribution Agent. Details of these concepts can be found in my article namd “SQL Server Replication Types”
To summarize briefly;
The snapshot of the database is retrieved by the snapshot agent and applied to the subscriber. Then, transactions marked as being replicated in the publisher are transferred to the “distribution” database by the Log Reader Agent.
The Distribution Agent transfers the snapshot received by the Snapshot Agent and the transactions transferred to the “distribution” database by the Log Reader Agent to the Subscriber.
As an important note, in Transactional Replication, any changes to the actual database are reflected in the replicated database. So in the first transaction, you set the column a to 3 and in the second transaction to 5. Transactional replication does not set the column a in the replica database to 5 directly. It sets 3 and then 5. This allows retrospective monitoring.
Now, step-by-step, let’s set up Transactional Replication between two servers:
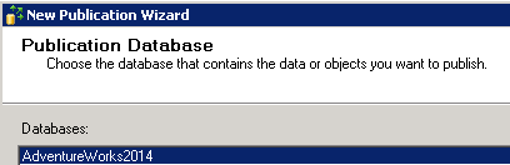
We have two instances. One of them will be Publisher and Distributor, (ie local Distributor) and the other will be Subscriber. We will transfer the Person.Person table of the AdventureWorks2014 database in our first instance(Publisher and Distributor).
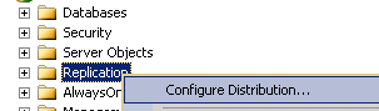
First, we will create the distribution database. Click on Configure Distribution as follows.
On the next screen, select Do not show this page again and click next.
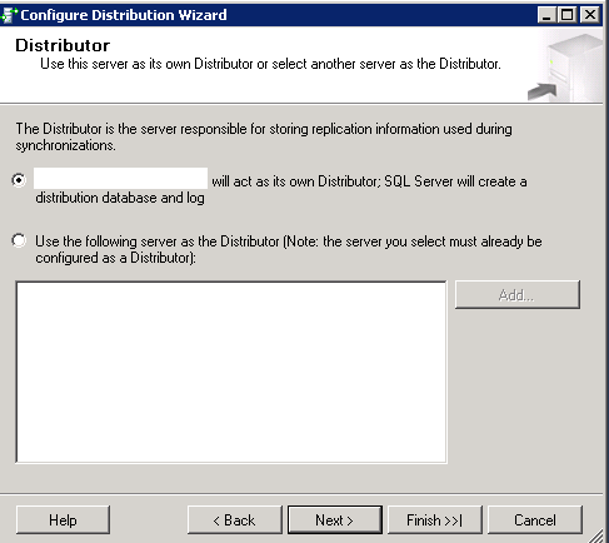
On the next screen, we create the Distributor on the server on which we install. In the background, the distribution database will also occur. We’re moving forward by clicking Next.
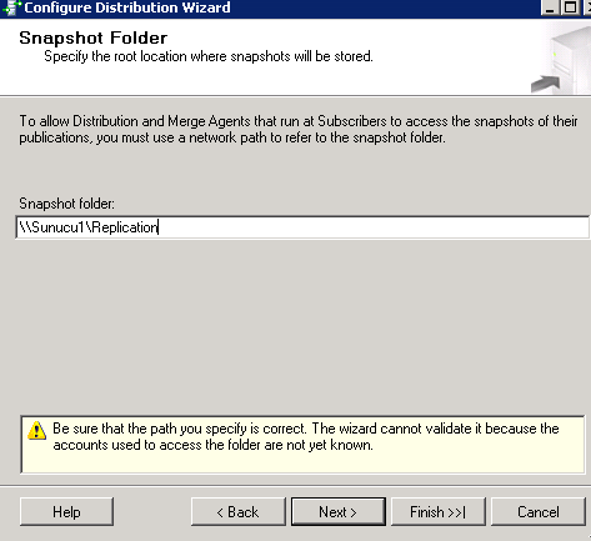
On the next screen It wants a share to hold snapshot files. I explained how to create a shared folder in the article named “How To Define a Share and Map This Share To Windows“.
On the shared folder, you must authorize the SQL Server service account and the SQL Server Agent service account that is used by two instances, and the user you are installing.
I created a folder named Replication on Sunucu1 and gave the necessary privileges and I wrote the share address as Snapshot folder. We’re moving forward by clicking Next.
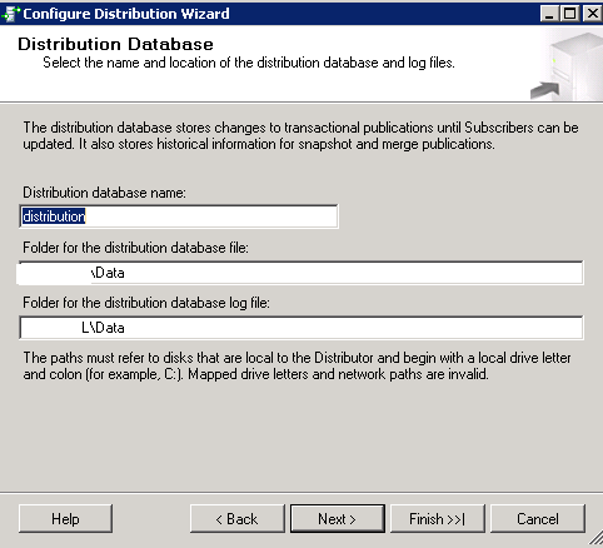
On the next screen, we write the path information for the data and log files of the distribution database as follows and we click next.
On the next screen we specify Publisher that this distribution database will use. We will install Publisher and distributor on the same instance, so we select the same instance and click Next.
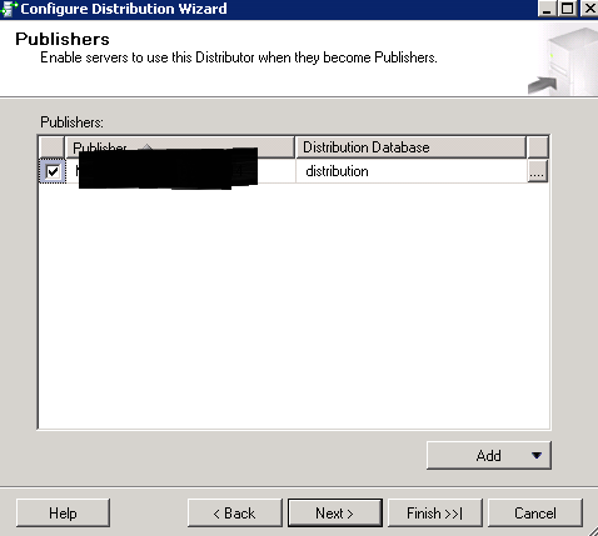
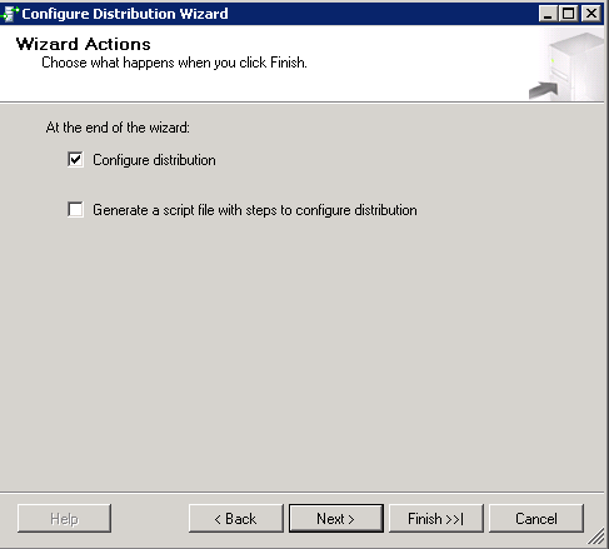
On the next screen, click Next and Finish to complete the distributor configuration when Configure Distribution is selected.
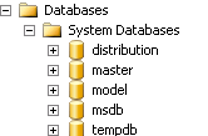
After the installation is complete, you should see the distribution database in the system databases as follows.
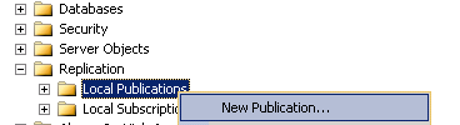
After our Distributor configuration is complete, we click New Publication on the same server (because we’ve created Publisher and Distributor on the same server) by right-clicking Local Publications.
We select the database that we will replicate as follows.
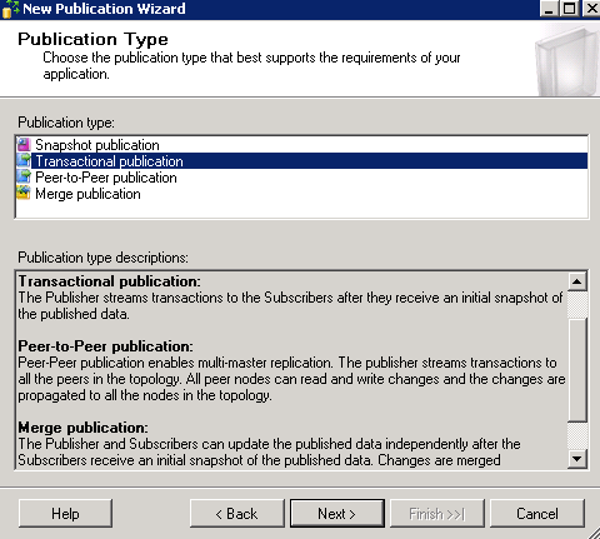
Select Transactional Publication as follows and click Next.
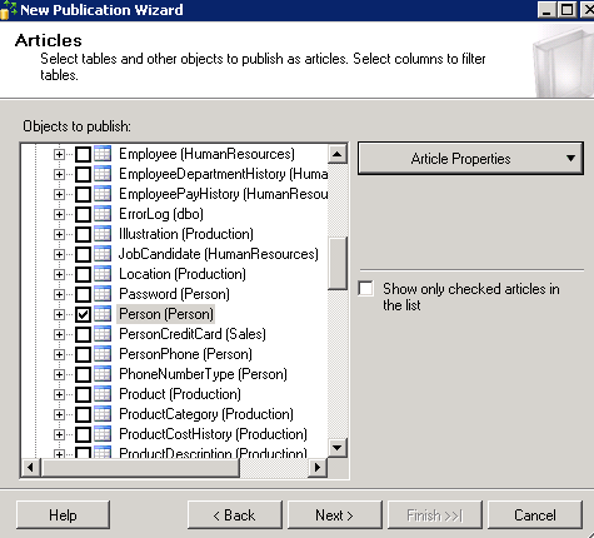
Since we are going to transfer only the Person.Person table, we select the following and click next.
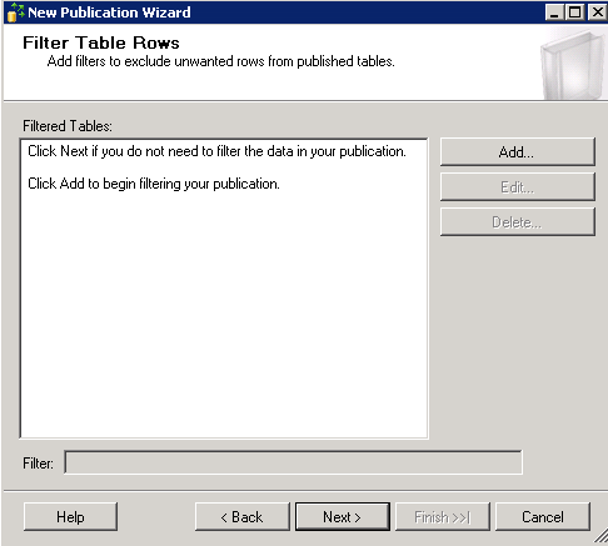
In the next step, we can add a filter by clicking Add from the following screen to replicate a certain part of the table. We proceed by clicking next without any filtering.
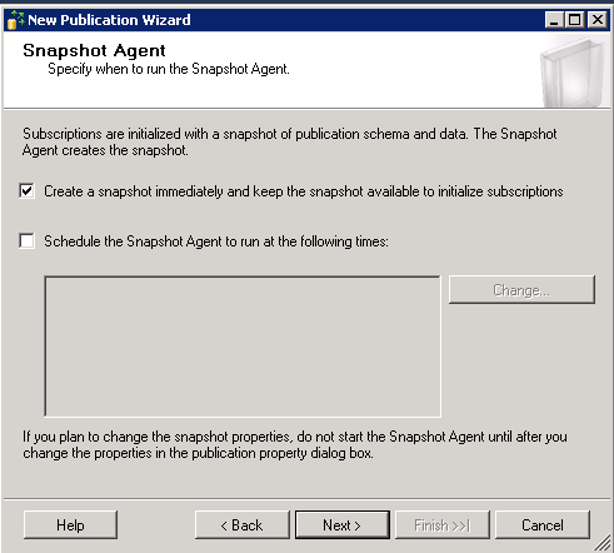
The next screen asks whether the snapshot of the data is to be taken now or later. By selecting “Create a snapshot right now and keep the snapshot available”, we specify that we want the snapshot to be taken now, and we’re proceeding by clicking next.
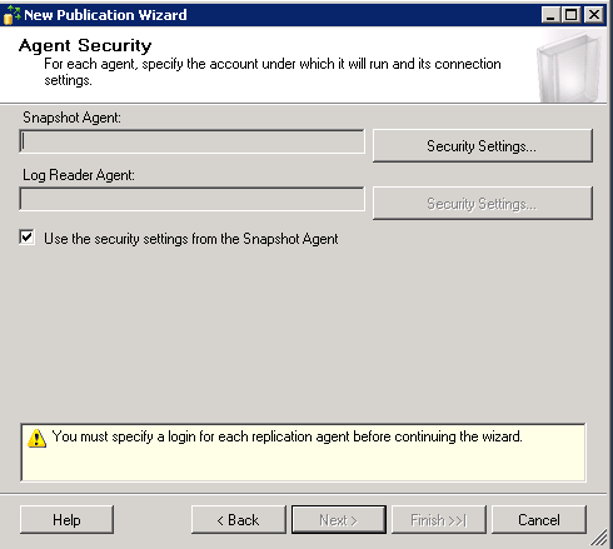
The next screen aks the user accounts that the Snapshot Agent and Log Reader Agent will use. Click Security Settings to set related users.
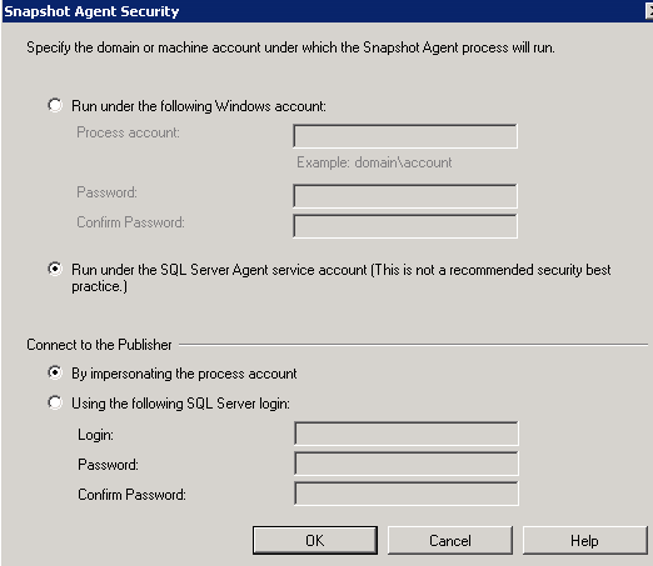
The minimum rights of the user you set for Snapshot Agent:
• Must be db_owner in the Distribution database.
• Must be db_owner in publication database.
• Must have write right on the snapshot share.
The minimum rights of the user you set for the Log Reader Agent:
• Must be db_owner in the Distribution database.
• Must be db_owner in publication database.
Microsoft recommends that we use Windows Account for these two accounts.
In my own test environment, two sql server instances and two sql server agent instances use the same windows sql server service account and have the necessary privileges. I have previously authorized this user on the snapshot share. So I’m going to set it as follows.
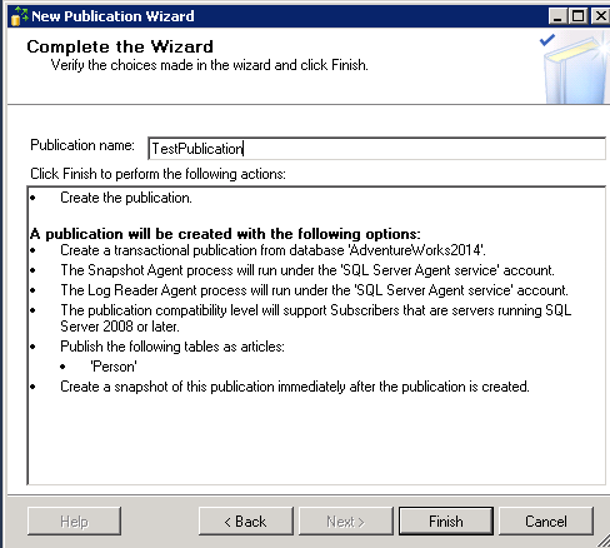
On the next screen, click “Next” while selecting “Create the publication”.
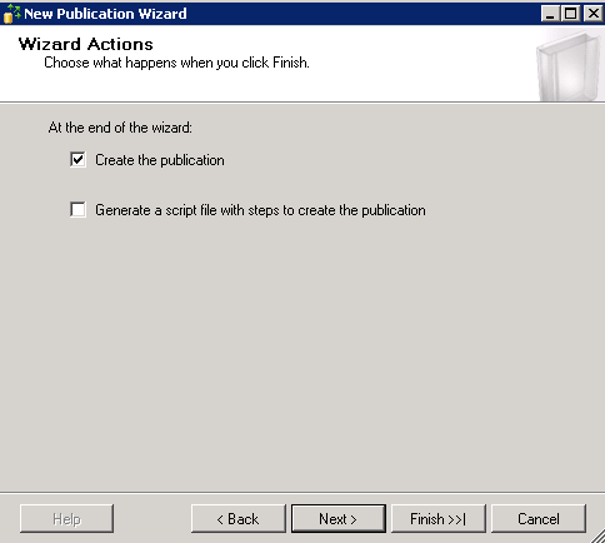
On the next screen, we give a name to Publication, and we click finish to complete the publication installation.
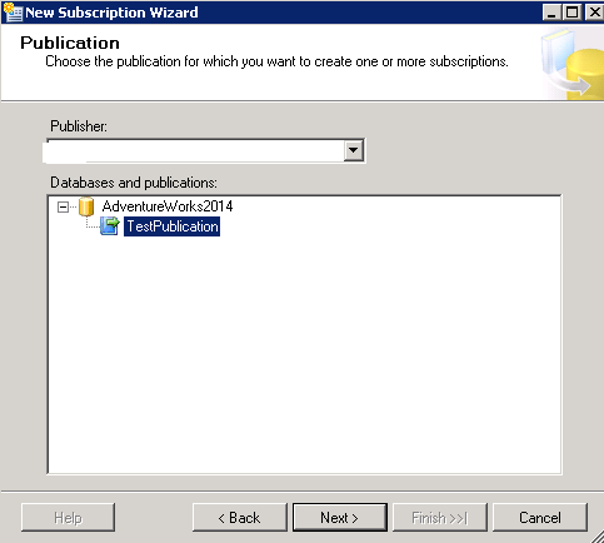
In the next step, right click on Local Subscription on the instance where we will install Subscriber and click New Subscriptions.

On the next screen, we select the instance on the first server where we install Publisher from the publisher section, and the following screen appears. We’re moving forward by clicking next.
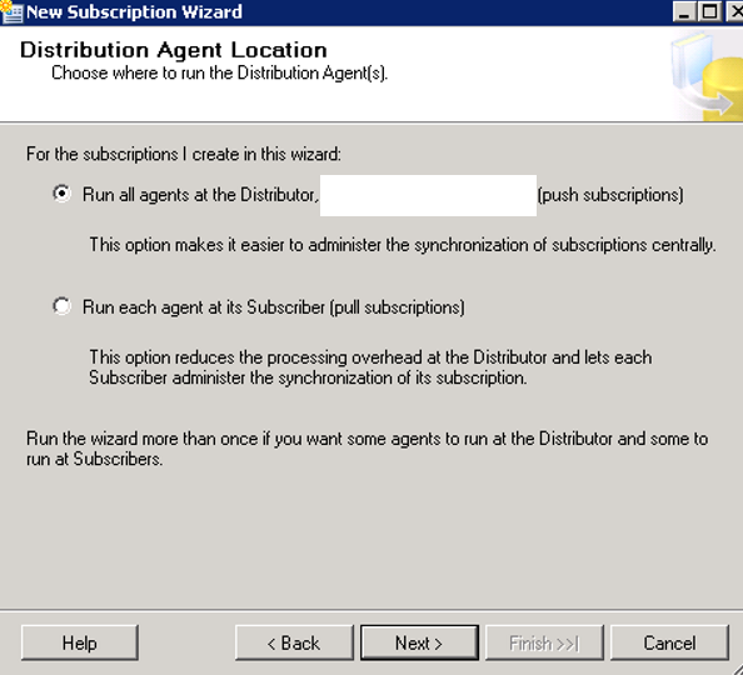
The next screen asks how to transmit data to subcriptions. So the data will be transferred from the Distributor to the subcscriber or the subscriber will get the data from the distributor. These methods are called Push or Pull Subscription.
If you have read the article “SQL Server replication Types“, I will continue with the example there. The
The question is:
Will the stock tracking staff distribute the newspapers to the subscribers? ,
or subscribers go to the newspaper store and get the newspaper of theirself?
You can find detailed information about push and pull subscription in the article named “SQL Server replication Types”
As Microsoft recommends, for easy management, we select push subscriptions and set the distrubution agent to run in the instance where the distributor is located, and proceed by clicking next.
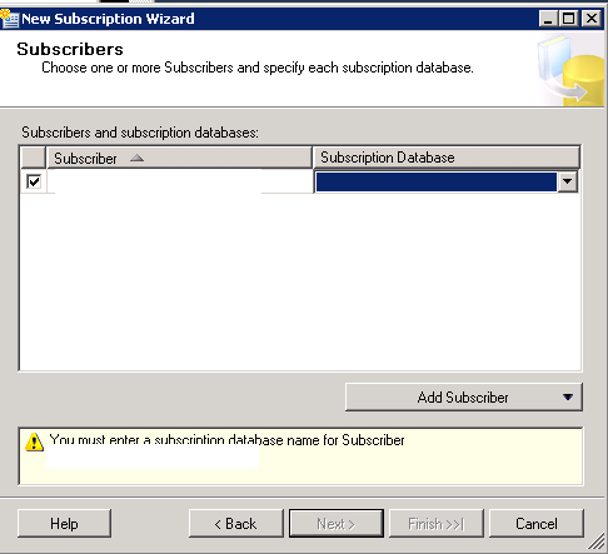
In the next screen, we’ll determine the target intance and the database in which we’ll replicate the tables.
We can select a new instace by clicking Add Subscriber. We select the target instance from Subscriber and the target database from SubscriptionDatabase.
I created a database named ReplikeTest and selected this database and clicked Next.
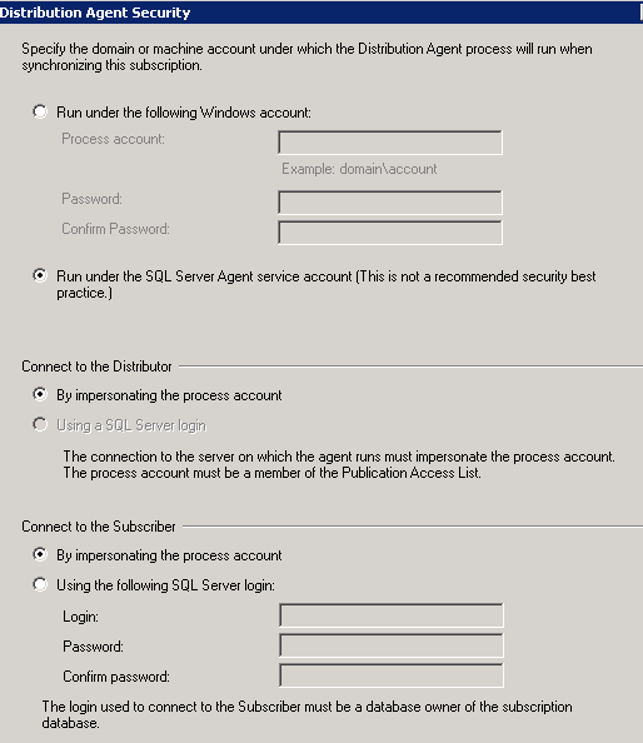
The next screen asks which user “Distribution Agent” will work with. Click the “….”
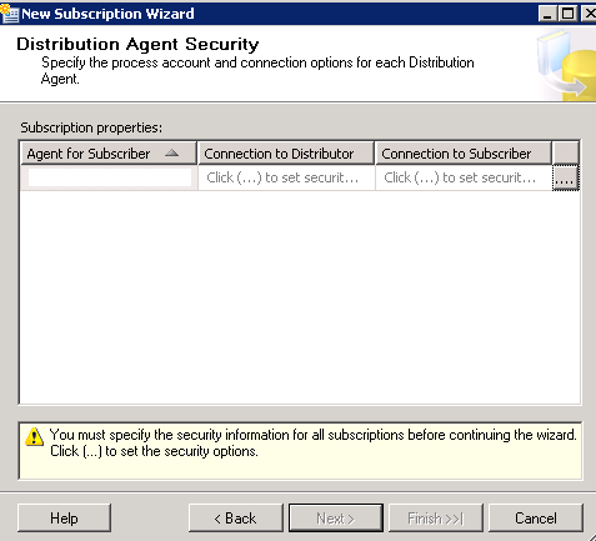
The minimum rights of the user you set for the Distribution Agent:
- Must be db_owner in the Distribution database.
- If you will use Pull Subscription, must be db_owner in the subscription database.
- Must have read rights in the snapshot share.
- Must be a member of Publication Access List (PAL).
To make the user a member of the PAL, right-click the on publication in the publisher’s instance and click Properties.
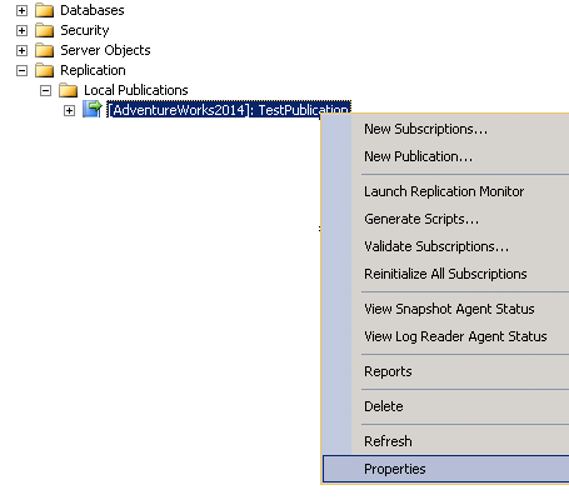
As follows, we go to “Public Access list”to see if our own user is listed.
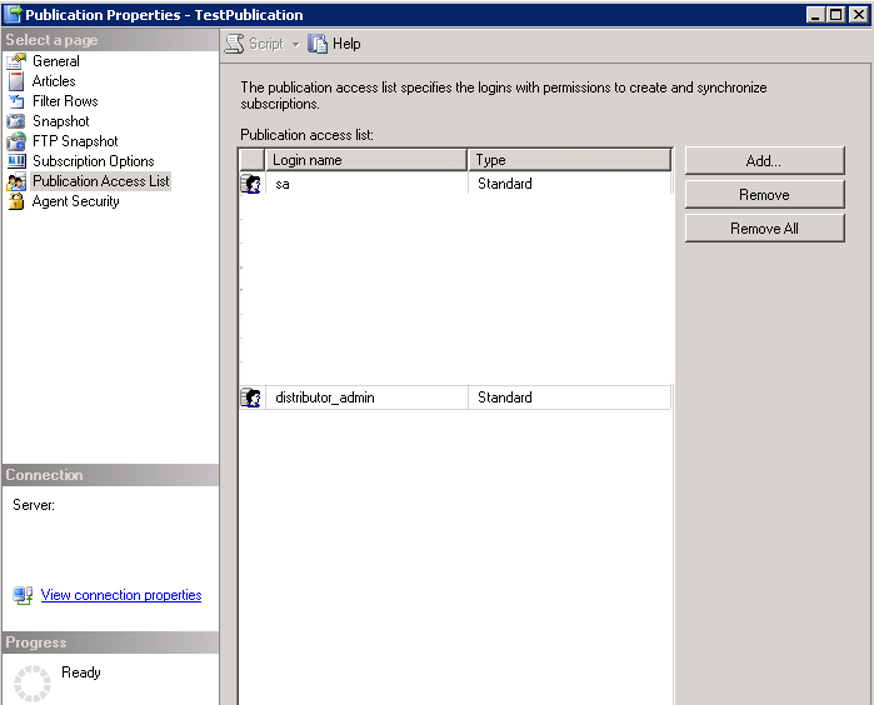
If not, click Add to add our user to this list. If the user does not appear when we click Add, we will see a warning like below.

The alert says that the user must be defined in publisher and Distributor instance to be listed here and that we must have access to the AdventureWorks2014 database that we will replicate. If your user is not listed here, you must define your user on the instance of publisher and distributor and authorize it on AdventureWorks2014.
Then go back to Distribution Agent Security. I continue by selecting “Run under the SQL Server Agent service account” and “By impersonating the process account”. I have given the necessary privileges to my SQL Server Agent Service account.
The next screen asks how to do the synchronization.
If we choose “Run continuous”, it will be synchronized continuously and will be almost real-time.
If we select “Run on demand only,” it only works when we trigger.
If we choose “Define schedule” we will ensure that it runs regularly at certain intervals.
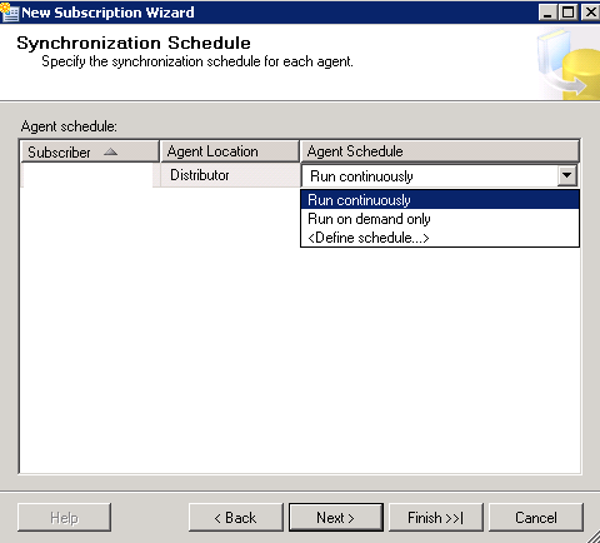
We choose “Run continuously”.
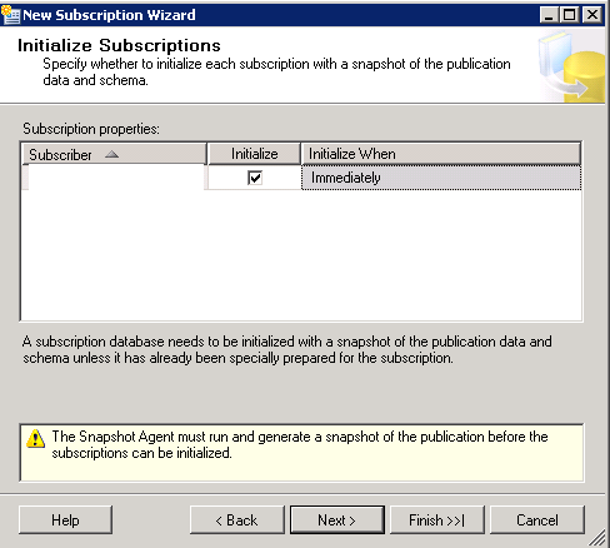
On the next screen, select Immediately to transfer the data immediately to the subscriber and click next.
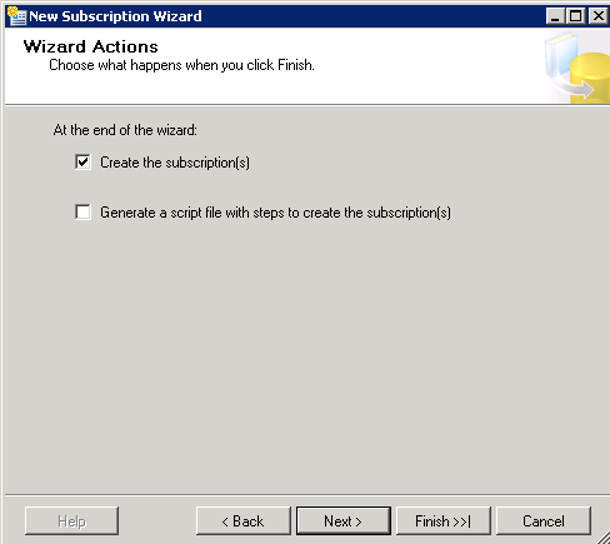
On the next screen, select “Create the subscription (s)” and click Next and Finish to complete the process.
You can check the job created for replication by saying View Job history in the instance of Publisher and Distributor. Make sure that you perform all authorizations that I have specified in the article.
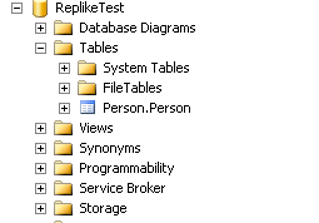
As you can see below, the Person.Person table has been replicated successfully to the ReplikeTest database.
To make sure that the replication process is done correctly, add a record with the help of the following script.
1 2 3 4 5 6 7 8 9 10 11 12 13 14 15 16 17 18 19 20 21 22 23 24 25 26 27 28 29 30 31 32 33 34 35 36 37 38 | USE [AdventureWorks2014] GO INSERT INTO [Person].[BusinessEntity] ([rowguid] ,[ModifiedDate]) VALUES (NEWID() ,'2016-10-21') GO INSERT INTO [Person].[Person] ([BusinessEntityID] ,[PersonType] ,[NameStyle] ,[Title] ,[FirstName] ,[MiddleName] ,[LastName] ,[Suffix] ,[EmailPromotion] ,[AdditionalContactInfo] ,[Demographics] ,[rowguid] ,[ModifiedDate]) VALUES (1 ,'EM' ,0 ,'t' ,'t' ,'test' ,'test' ,'test' ,2 ,null ,null ,newid() ,'2016-10-21') GO |
You will then see the corresponding record replicated when we select the Person.Person table in the ReplikeTest database.
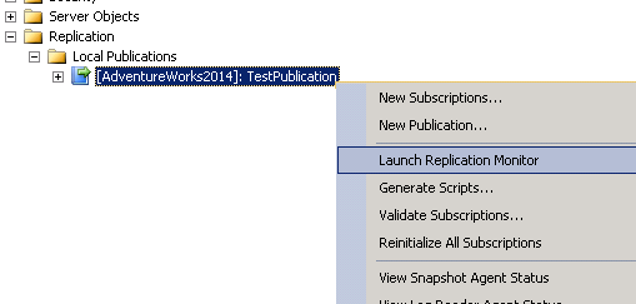
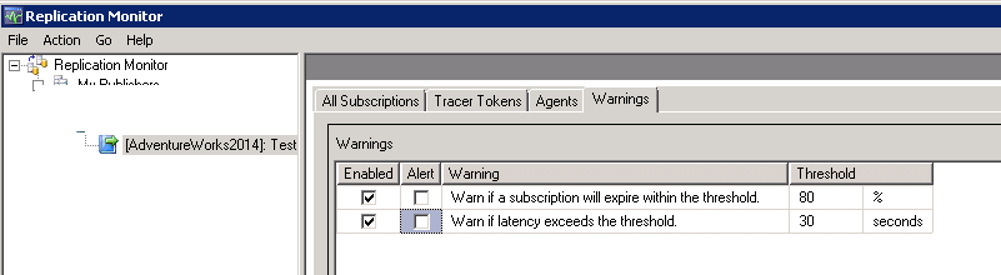
You can see the replication status by right clicking on the corresponding Publication and clicking Launch Replication Monitor.
You can create alerts from the “Warnings” tab on the screen that opens. You can also get information about the replication status from other tabs.
![]()