 Database Tutorials MSSQL, Oracle, PostgreSQL, MySQL, MariaDB, DB2, Sybase, Teradata, Big Data, NOSQL, MongoDB, Couchbase, Cassandra, Windows, Linux
We use Telnet Client to check if the port we want to use is open when we access a server from another server. In our case, we check if we have access to the SQL port of the SQL Server Database server.
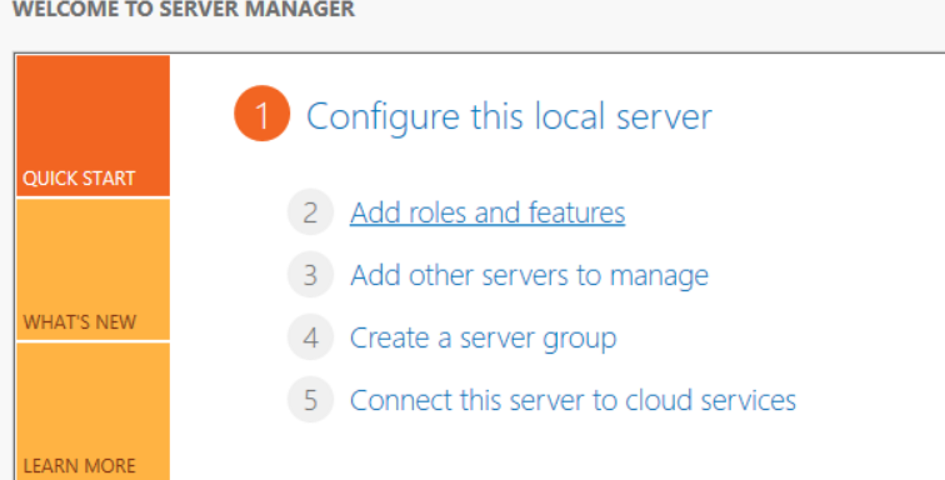
Telnet client must be installed on the server to be able to control the port using telnet. Open Server Manager and click “Add roles and features” on Windows Server 2012 as follows.
On the next screen, select “skip this page by default” and click next.
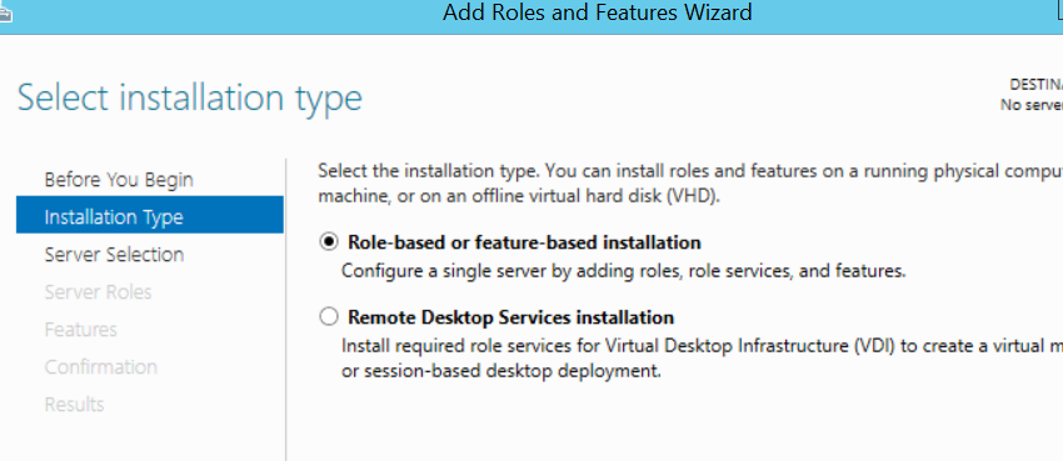
Select “Role-based or feature-based installation” from the following screen and click next.
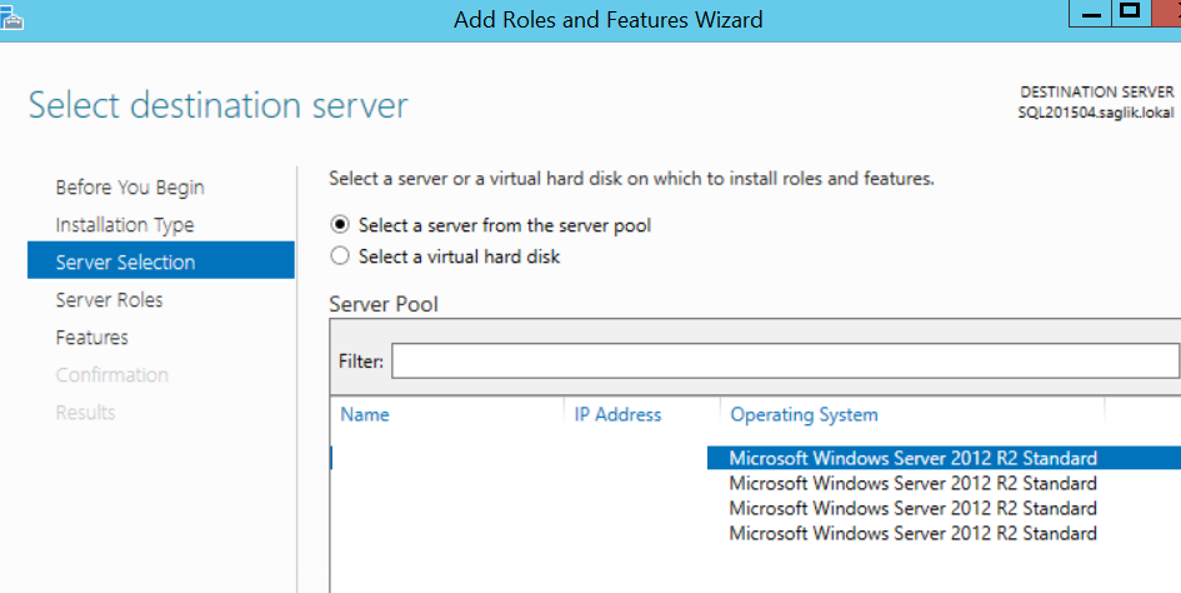
In the following screen, we select “server from the server pool” as below and select the server we want to install telnet client from the servers listed below and click next.
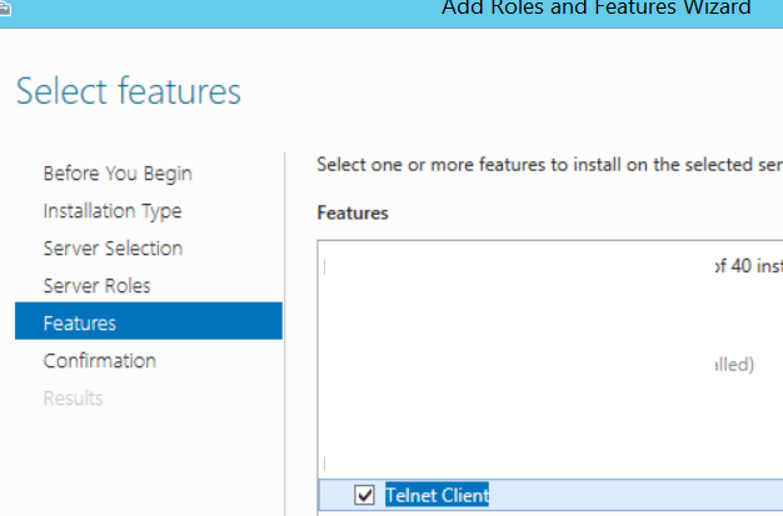
In the server roles screen, click Next without any selection, and then click Next by selecting Telnet Client as shown below in the Features screen.
The following screen asks if we need to restart the server where we will install Telnet Client. We leave this blank and we click install.
After the installation is complete, click Close to complete the process.
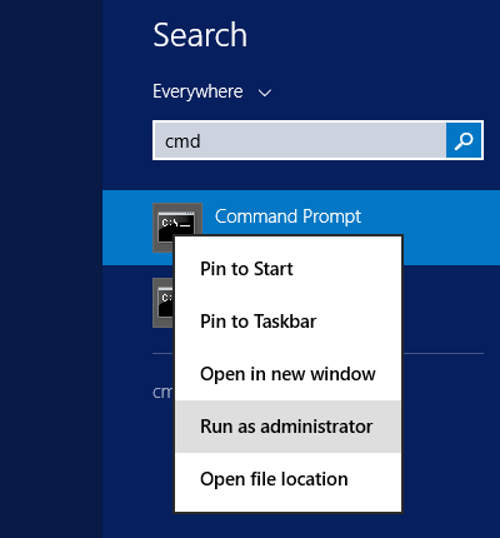
Then we write cmd in windows search and run it as an administrator.
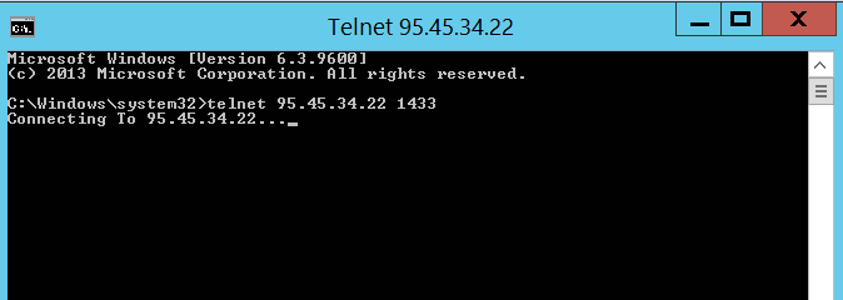
When the CMD command promt is opened, we can use the following command to check if we have access to the corresponding server via the corresponding port.
1 | telnet server_ip_that_we_want_to_access port_that_we_want_to_access |
If it says “connection to” as follows, it means telnet has failed. You should tell your security team that you cannot access the corresponding port via Telnet. If a blank screen is displayed when you performed telnet, it means telnet is successful.
In this way, you can check whether you have access to a server through a specific port using the telnet client.

![]()