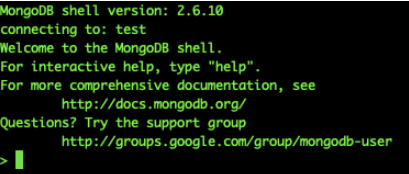
The main purpose of this article is how to install MongoDB on Ubuntu Server(single node). Follow the steps below for the installation one by one.
Step1:
Install Mongodb Packages on Ubuntu
Ubuntu’s official package repositories contain an updated version of MongoDB; which means we can install the required packages using apt.
First, update the package list to have the latest version of the repository lists:
1 | sudo apt update |
Now install the MongoDB package.
1 | sudo apt install -y mongodb |
This command installs several packages containing the latest version of MongoDB, as well as useful management tools for the MongoDB server. The database server is started automatically after installation.
Next, let’s verify that the server is working correctly.
Step 2:
Checking mongodb Service and Database on Ubuntu
The installation process started MongoDB automatically, but let’s verify that the service is started and the database is running.
Check mongodb status on ubuntu
1 | sudo systemctl status mongodb |
1 2 3 4 5 6 7 | mongodb.service - An object/document-oriented database Loaded: loaded (/lib/systemd/system/mongodb.service; enabled; vendor preset: enabled) Active: active (running) since Fri 2019-07-05 07:45:45 +03; 14min ago Docs: man:mongod(1) Main PID: 39953 (mongod) CGroup: /system.slice/mongodb.service └─39953 /usr/bin/mongod --config /etc/mongodb.conf |
We can really verify this by connecting to the database server and executing a diagnostic command.
Execute this command:
1 | mongo --eval 'db.runCommand({ connectionStatus: 1 })' |
Command Output:
1 2 3 | MongoDB shell version: 2.6.10 connecting to: test [object Object] |
Step 3:
Managing MongoDB Service
MongoDB is installed as a system service, so you can also manage it using standard system commands.
Check Mongodb Service Status
1 | sudo systemctl status mongodb |
Stop Mongodb Service
1 | sudo systemctl stop mongodb |
Start Mongodb Service
1 | sudo systemctl start mongodb |
Restart Mongodb Service
1 | sudo systemctl restart mongodb |
1 | sudo systemctl disable mongodb |
1 | sudo systemctl enable mongodb |
Connect to Mongodb
After our installations are completed successfully, we provide Connection with mongo command.
1 | mongo |

List Mongodb Databases
1 | show dbs |
Show Connected Mongodb Database Name
1 | db |
Switch To Another Database
1 | use demo |
List Mongodb Commands
1 | db.help() |
Check MongoDB Statistics
1 | db.stats() |
![]()
 Database Tutorials MSSQL, Oracle, PostgreSQL, MySQL, MariaDB, DB2, Sybase, Teradata, Big Data, NOSQL, MongoDB, Couchbase, Cassandra, Windows, Linux