 Database Tutorials MSSQL, Oracle, PostgreSQL, MySQL, MariaDB, DB2, Sybase, Teradata, Big Data, NOSQL, MongoDB, Couchbase, Cassandra, Windows, Linux
In this article, we will create data guard broker configuration. You can see the overview of data guard broker in the article named “What is Oracle Data Guard Broker“.
Our current data guard environment is as follows;
[Primary Side]1 2 3 4 5 6 7 8 9 10 11 12 13 14 15 16 17 18 | [oracle@primary1 ~]$ srvctl config database -d primary Database unique name: primary Database name: primary Oracle home: /u01/app/oracle/product/11.2.0/db_1 Oracle user: oracle Spfile: +DATA/primary/spfileprimary.ora Domain: Start options: open Stop options: immediate Database role: PRIMARY Management policy: AUTOMATIC Server pools: primary Database instances: primary1,primary2 Disk Groups: DATA Mount point paths: Services: Type: RAC Database is administrator managed |
1 2 3 4 5 6 7 8 | [Primary-1] SQL> set linesize 500 [Primary-1] SQL> select d.open_mode, d.database_role, a.database_mode, a.recovery_mode, a.protection_mode from v$archive_dest_status a, v$database d where a.database_mode <> 'UNKNOWN'; OPEN_MODE DATABASE_ROLE DATABASE_MODE RECOVERY_MODE PROTECTION_MODE -------------------- ---------------- --------------- ----------------------- -------------------------------------- ------------------------------------------ READ WRITE PRIMARY OPEN IDLE MAXIMUM PERFORMANCE READ WRITE PRIMARY MOUNTED-STANDBY MANAGED REAL TIME APPLY MAXIMUM PERFORMANCE READ WRITE PRIMARY OPEN LOGICAL REAL TIME APPLY MAXIMUM PERFORMANCE |
1 2 3 4 5 6 7 8 9 10 11 12 13 14 15 16 17 18 | [oracle@standby1 ~]$ srvctl config database -d standby Database unique name: standby Database name: primary Oracle home: /u01/app/oracle/product/11.2.0/db_1 Oracle user: oracle Spfile: +DATA/STANDBY/PARAMETERFILE/spfilestandby.ora Domain: Start options: mount Stop options: immediate Database role: PHYSICAL_STANDBY Management policy: AUTOMATIC Server pools: standby Database instances: primary1,primary2 Disk Groups: DATA,FRA Mount point paths: Services: Type: RAC Database is administrator managed |
1 2 3 4 5 6 | [Physical-1] SQL> set linesize 500 [Physical-1] SQL> select d.open_mode, d.database_role, a.database_mode, a.recovery_mode, a.protection_mode from v$archive_dest_status a, v$database d where a.database_mode <> 'UNKNOWN'; OPEN_MODE DATABASE_ROLE DATABASE_MODE RECOVERY_MODE PROTECTION_MODE -------------------- ---------------- --------------- ----------------------- -------------------- READ ONLY WITH APPLY PHYSICAL STANDBY OPEN_READ-ONLY MANAGED REAL TIME APPLY MAXIMUM PERFORMANCE |
1 2 3 4 5 6 7 8 9 10 11 12 13 14 15 16 17 18 | [oracle@logical1 ~]$ srvctl config database -d logical Database unique name: logical Database name: primary Oracle home: /u01/app/oracle/product/11.2.0/db_1 Oracle user: oracle Spfile: +DATA/LOGICAL/PARAMETERFILE/spfilelogical.ora Domain: Start options: open Stop options: immediate Database role: PHYSICAL_STANDBY Management policy: AUTOMATIC Server pools: logical Database instances: primary1,primary2 Disk Groups: DATA,FRA Mount point paths: Services: Type: RAC Database is administrator managed |
1 2 3 4 5 6 | [Logical-1] SQL> set linesize 500 [Logical-1] SQL> select d.open_mode, d.database_role, a.database_mode, a.recovery_mode, a.protection_mode from v$archive_dest_status a, v$database d where a.database_mode <> 'UNKNOWN'; OPEN_MODE DATABASE_ROLE DATABASE_MODE RECOVERY_MODE PROTECTION_MODE -------------------- ---------------- --------------- ----------------------- --------------------------------------------------------------------------- READ WRITE LOGICAL STANDBY OPEN LOGICAL REAL TIME APPLY MAXIMUM PERFORMANCE |
Step1:
Stop Redo Apply Services on Standby Database
[Physical-1]
1 2 3 | SQL> alter database recover managed standby database cancel; Database altered. |
[Standby-1]
1 2 3 4 5 6 7 8 9 10 11 12 13 14 15 16 17 18 19 20 21 22 23 24 25 26 27 28 29 30 31 32 33 34 35 36 | Fri Jan 13 10:00:28 2017 alter database recover managed standby database cancel Fri Jan 13 10:00:28 2017 MRP0: Background Media Recovery cancelled with status 16037 Errors in file /u01/app/oracle/diag/rdbms/standby/primary1/trace/primary1_pr00_14588.trc: ORA-16037: user requested cancel of managed recovery operation Fri Jan 13 10:00:28 2017 Managed Standby Recovery not using Real Time Apply Recovery interrupted! Recovered data files to a consistent state at change 4416720 Fri Jan 13 10:00:29 2017 Reconfiguration started (old inc 9, new inc 11) List of instances: 1 2 (myinst: 1) Global Resource Directory frozen Communication channels reestablished Master broadcasted resource hash value bitmaps Non-local Process blocks cleaned out Fri Jan 13 10:00:29 2017 LMS 0: 0 GCS shadows cancelled, 0 closed, 0 Xw survived Fri Jan 13 10:00:29 2017 LMS 1: 0 GCS shadows cancelled, 0 closed, 0 Xw survived Set master node info Submitted all remote-enqueue requests Dwn-cvts replayed, VALBLKs dubious All grantable enqueues granted Submitted all GCS remote-cache requests Fix write in gcs resources Reconfiguration complete Fri Jan 13 10:00:29 2017 Block change tracking service stopping. Stopping background process CTWR Fri Jan 13 10:00:30 2017 MRP0: Background Media Recovery process shutdown (primary1) Managed Standby Recovery Canceled (primary1) Completed: alter database recover managed standby database cancel |
[Standby-2]
1 2 3 4 5 6 7 8 9 10 11 12 13 14 15 16 17 18 19 20 21 22 23 | Fri Jan 13 10:00:23 2017 Managed Standby Recovery not using Real Time Apply Fri Jan 13 10:00:24 2017 Reconfiguration started (old inc 9, new inc 11) List of instances: 1 2 (myinst: 2) Global Resource Directory frozen Communication channels reestablished Fri Jan 13 10:00:24 2017 * domain 0 valid = 1 according to instance 1 Master broadcasted resource hash value bitmaps Non-local Process blocks cleaned out Fri Jan 13 10:00:24 2017 LMS 1: 0 GCS shadows cancelled, 0 closed, 0 Xw survived Fri Jan 13 10:00:24 2017 LMS 0: 0 GCS shadows cancelled, 0 closed, 0 Xw survived Set master node info Submitted all remote-enqueue requests Dwn-cvts replayed, VALBLKs dubious All grantable enqueues granted Submitted all GCS remote-cache requests Fix write in gcs resources Reconfiguration complete |
[Physical-2]
1 2 3 4 5 | SQL> alter database recover managed standby database cancel; alter database recover managed standby database cancel * ERROR at line 1: ORA-16136: Managed Standby Recovery not active |
The reason of ORA-16136: Managed Standby Recovery not active is that log apply services are running on one instance.
[Logical-1]
1 2 3 4 5 | SQL> alter database stop logical standby apply; alter database stop logical standby apply * ERROR at line 1: ORA-16283: operation not permitted on non-apply instance |
The reason of ORA-16283: operation not permitted on non-apply instance is that log apply services are running on one instance. If it is not running on Logical-1, it must be running on the other node.
[Logical-2]
1 2 3 | SQL> alter database stop logical standby apply; Database altered. |
[Logical-2] –>ALERT LOG
1 2 3 4 5 6 7 8 9 10 11 12 13 14 15 16 17 18 19 20 21 22 23 | Fri Jan 13 09:55:51 2017 alter database stop logical standby apply Fri Jan 13 09:55:52 2017 LOGSTDBY Analyzer process AS00 server id=0 pid=58 OS id=19087 stopped Fri Jan 13 09:55:52 2017 LOGSTDBY Apply process AS05 server id=5 pid=63 OS id=19111 stopped Fri Jan 13 09:55:52 2017 LOGSTDBY Apply process AS02 server id=2 pid=60 OS id=19095 stopped Fri Jan 13 09:55:52 2017 LOGSTDBY Apply process AS03 server id=3 pid=61 OS id=19103 stopped Fri Jan 13 09:55:52 2017 LOGSTDBY Apply process AS04 server id=4 pid=62 OS id=19107 stopped Fri Jan 13 09:55:52 2017 LOGSTDBY Apply process AS01 server id=1 pid=59 OS id=19091 stopped Fri Jan 13 09:55:52 2017 LOGMINER: session#=1 (Logical_Standby$), preparer MS02 pid=57 OS id=19083 sid=79 stopped Fri Jan 13 09:55:52 2017 LOGMINER: session#=1 (Logical_Standby$), builder MS01 pid=56 OS id=19079 sid=17 stopped Fri Jan 13 09:55:52 2017 LOGMINER: session#=1 (Logical_Standby$), reader MS00 pid=55 OS id=19075 sid=200 stopped Fri Jan 13 09:55:52 2017 LOGSTDBY status: ORA-16128: User initiated stop apply successfully completed Completed: alter database stop logical standby apply |
Step2:
Since I use RAC structure, I move Broker Configuration files to Shared area (ASM) where all instances can be read.
I want to create one to DATA and the other to FRA in terms of being a backup. That’s why I’m creating a directory in DATA and FRA.
1 2 3 4 5 6 7 8 9 10 11 12 13 14 15 16 17 18 19 20 21 22 23 24 25 26 27 28 29 30 31 32 33 34 35 36 37 38 39 40 41 42 43 44 45 46 | [grid@primary2 ~]$ asmcmd ASMCMD> ls DATA/ FRA/ OCR_VOTE/ ASMCMD> cd data ASMCMD> ls PRIMARY/ ASMCMD> cd PRIMARY ASMCMD> ls CHANGETRACKING/ CONTROLFILE/ DATAFILE/ ONLINELOG/ PARAMETERFILE/ TEMPFILE/ spfileprimary.ora ASMCMD> mkdir BROKER_CONF_FILE ASMCMD> ls BROKER_CONF_FILE/ CHANGETRACKING/ CONTROLFILE/ DATAFILE/ ONLINELOG/ PARAMETERFILE/ TEMPFILE/ spfileprimary.ora ASMCMD> cd BROKER_CONF_FILE ASMCMD> ls ASMCMD> pwd +data/PRIMARY/BROKER_CONF_FILE ASMCMD> cd +FRA ASMCMD> ls PRIMARY/ ASMCMD> cd PRIMARY ASMCMD> ls ARCHIVELOG/ ONLINELOG/ ASMCMD> mkdir BROKER_CONF_FILE ASMCMD> ls ARCHIVELOG/ BROKER_CONF_FILE/ ONLINELOG/ ASMCMD> cd BROKER_CONF_FILE ASMCMD> pwd +FRA/PRIMARY/BROKER_CONF_FILE |
Set parameters to new locations.
1 2 3 4 5 6 7 | [Primary-1] SQL> alter system set dg_broker_config_file1='+data/PRIMARY/BROKER_CONF_FILE/dr1primary.dat' scope=both sid='*'; System altered. [Primary-1] SQL> alter system set dg_broker_config_file2='+FRA/PRIMARY/BROKER_CONF_FILE/dr2primary.dat' scope=both sid='*'; System altered. |
Start the DMON process and check the locations of the configuration files.
1 2 3 | [Primary-1] SQL> alter system set dg_broker_start=TRUE scope=both sid='*'; System altered. |
1 2 | [oracle@primary1 ~]$ ps -ef | grep dmon oracle 3623 1 0 10:07 ? 00:00:00 ora_dmon_primary1 |
1 2 3 4 5 6 | [Primary-1] SQL> show parameter dg_broker_config_file NAME TYPE VALUE ------------------------------------ ----------- ------------------------------ dg_broker_config_file1 string +data/PRIMARY/BROKER_CONF_FILE/dr1primary.dat dg_broker_config_file2 string +FRA/PRIMARY/BROKER_CONF_FILE/dr2primary.dat |
Apply these processes in the same way in Physical and Logical Standbys.
Step3:
Clear LOG_ARCHIVE_DEST_n parameters with SERVICE attribute in all instances.
1 2 3 4 5 6 7 8 9 10 11 12 13 14 15 16 17 18 | [Primary-1] SQL> column name format a30 [Primary-1] SQL> column value format a94 [Primary-1] SQL> set linesize 9000 [Primary-1] SQL> select name, value from v$parameter where lower(name) like '%log_archive_dest%' and lower(name) not like '%log_archive_dest_state%' and value is not null; NAME VALUE ------------------------------ ---------------------------------------------------------------------------------------------- log_archive_dest_1 LOCATION=USE_DB_RECOVERY_FILE_DEST VALID_FOR=(ALL_LOGFILES,ALL_ROLES) DB_UNIQUE_NAME=primary log_archive_dest_2 SERVICE=standby SYNC VALID_FOR=(ONLINE_LOGFILES,PRIMARY_ROLE) DB_UNIQUE_NAME=standby log_archive_dest_3 SERVICE=logical SYNC REOPEN=15 valid_for=(ONLINE_LOGFILES,PRIMARY_ROLE) db_unique_name=logical [Primary-1] SQL> alter system set log_archive_dest_2='' scope=both sid='*'; System altered. [Primary-1] SQL> alter system set log_archive_dest_3='' scope=both sid='*'; System altered. |
I am running it in a single instance in RAC structure. With the sid = ‘*’ command, I make the parameter change in all instances.
1 2 3 4 5 6 7 8 9 10 11 12 | [Physical-1] SQL> column name format a30 [Physical-1] SQL> column value format a94 [Physical-1] SQL> select name, value from v$parameter where lower(name) like '%log_archive_dest%' and lower(name) not like '%log_archive_dest_state%' and value is not null; NAME VALUE ------------------------------ ---------------------------------------------------------------------------------------------- log_archive_dest_1 LOCATION=USE_DB_RECOVERY_FILE_DEST VALID_FOR=(ALL_LOGFILES,ALL_ROLES) DB_UNIQUE_NAME=standby log_archive_dest_2 SERVICE=primary SYNC VALID_FOR=(ONLINE_LOGFILES,PRIMARY_ROLE) DB_UNIQUE_NAME=primary [Physical-1] SQL> alter system set log_archive_dest_2='' scope=both sid='*'; System altered. |
1 2 3 4 5 6 7 8 9 10 11 12 | [Logical-1] SQL> column name format a30 [Logical-1] SQL> column value format a94 [Logical-1] SQL> select name, value from v$parameter where lower(name) like '%log_archive_dest%' and lower(name) not like '%log_archive_dest_state%' and value is not null; NAME VALUE ------------------------------ ---------------------------------------------------------------------------------------------- log_archive_dest_1 LOCATION=USE_DB_RECOVERY_FILE_DEST VALID_FOR=(ALL_LOGFILES,ALL_ROLES) DB_UNIQUE_NAME=logical [Logical-1] SQL> alter system set dg_broker_start=TRUE scope=both sid='*'; System altered. |
Connect to DGMGRL from Primary Database and login with SYS user.
1 2 3 4 5 6 7 8 | [oracle@primary1 ~]$ dgmgrl DGMGRL for Linux: Version 11.2.0.4.0 - 64bit Production Copyright (c) 2000, 2009, Oracle. All rights reserved. Welcome to DGMGRL, type "help" for information. DGMGRL> connect sys/Passw0rd4 Connected. |
If we were using 12c, we would be logging in with the “sysdg” user. But there is no such user in 11g.
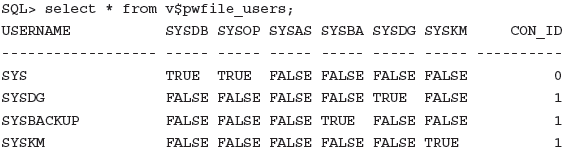
For this reason, we will do our transactions with the SYS user. We only have a SYS user in Password File.
1 2 3 4 5 | [Primary-1] SQL> select * from v$pwfile_users; USERNAME SYSDB SYSOP SYSAS ------------------------------ ----- ----- ----- SYS TRUE TRUE FALSE |
In 12c, in addition to SYS, there are users such as SYSDG, SYSBACKUP for security reasons.
Step5:
Create Broker Configuration
1 2 3 4 5 6 7 8 9 10 11 12 13 14 15 16 17 18 | DGMGRL> show configuration ORA-16532: Data Guard broker configuration does not exist Configuration details cannot be determined by DGMGRL DGMGRL> create configuration 'Broker_Configuration' as primary database is 'primary' connect identifier is primary; Configuration "DG_Configuration" created with primary database "primary" DGMGRL> show configuration Configuration - Broker_Configuration Protection Mode: MaxPerformance Databases: primary - Primary database Fast-Start Failover: DISABLED Configuration Status: DISABLED |
Step6:
Add Physical Standby Database to the configuration.
1 2 3 4 5 6 7 8 9 10 11 12 13 14 15 | DGMGRL> add database 'standby' as connect identifier is standby; Database "standby" added DGMGRL> show configuration Configuration -Broker_Configuration Protection Mode: MaxPerformance Databases: primary - Primary database standby - Physical standby database Fast-Start Failover: DISABLED Configuration Status: DISABLED |
Step7:
Add Logical Standby Database to the configuration.
1 2 3 4 5 6 7 8 9 10 11 12 13 14 15 16 | DGMGRL> add database 'logical' as connect identifier is logical; Database "logical" added DGMGRL> show configuration Configuration - Broker_Configuration Protection Mode: MaxPerformance Databases: primary - Primary database standby - Physical standby database logical - Logical standby database Fast-Start Failover: DISABLED Configuration Status: DISABLED |
Step8:
Make instance and database level checks before the broker configuration is enabled.
1 2 3 4 5 6 7 8 9 10 11 12 13 14 | DGMGRL> show configuration Configuration - Broker _Configuration Protection Mode: MaxPerformance Databases: primary - Primary database standby - Physical standby database logical - Logical standby database Fast-Start Failover: DISABLED Configuration Status: DISABLED |
1 | DGMGRL> show database verbose primary |
“Database:primary” => Indicates DB_UNIQUE_NAME.
“Role:PRIMARY” =>Indicates DB Role.
“Intended State:OFFLINE” => Indicates the status of Redo Transport services. OFFLINE indicates that there is no transport operation at the moment. The reason is that LOG_ARCHIVE_DEST_n parameters are deleted before Broker Configuration.
Instance(s):
primary1
primary2
Properties:
“DGConnectIdentifier = ‘primary'” => It searches for this name in the tnsnames.ORA file and tries to connect with that information.
ObserverConnectIdentifier = ”
LogXptMode = ‘ASYNC’ => Indicates how Redo Transport mode is. It can be SYNC, ASYNC or FASTSYNC.
DelayMins = ‘0’
Binding = ‘optional’ => Indicates whether the Redo destination is MANDATORY or OPTIONAL.
MANDATORY: = It must be written to that location. If it cannot be written, it stops the system from working because it will not overwrite ONLINE REDO LOG files.
MaxFailure = ‘0’ => It specifies the maximum number of sequential archive file errors before Redo Transport Services stops trying to transmit archive redo log files to the standby database.
MaxConnections = ‘1’ => It indicates how many processes an ARCH process will perform its operations in parallel.
ReopenSecs = ‘300’ => Specifies how many seconds after the ARCn process will try the next connect attempt for the destination where it fails to connect.
NetTimeout = ’30’ => Indicates that the LGWR process will continue its normal operation after how many seconds it does not receive feedback from Oracle Net Services.
RedoCompression = ‘DISABLE’ => It allows Redo to be sent by compression. Subject to an extra license. It makes tremendous compression.
LogShipping = ‘ON’ => It is the equivalent of the LOG_ARCHIVE_DEST_STATE_n parameter. ON = ENABLE, OFF = DEFER
PreferredApplyInstance = ”
ApplyInstanceTimeout = ‘0’
ApplyParallel = ‘AUTO’
LsbyASkipTxnCfgPr = ‘0,0,0’
LsbyDSkipTxnCfgPr = ‘0,0,0’
LsbyASkipCfgPr = ”
LsbyDSkipCfgPr = ”
LsbyASkipErrorCfgPr = ”
LsbyDSkipErrorCfgPr = ”
LsbyMaxEventsRecorded = ‘0’
LsbyPreserveCommitOrder = ”
LsbyRecordSkipErrors = ”
LsbyRecordSkipDdl = ”
LsbyRecordAppliedDdl = ”
StandbyFileManagement = ‘AUTO’
ArchiveLagTarget = ‘0’ => It specifies how many seconds the Log Switch operation will be performed without waiting for the Online Redo Log to fill.
LogArchiveMaxProcesses = ‘8’
LogArchiveMinSucceedDest = ‘1’
DbFileNameConvert = ‘standby, primary’
LogFileNameConvert = ‘standby, primary’
FastStartFailoverTarget = ”
InconsistentProperties = ‘(monitor)’
InconsistentLogXptProps = ‘(monitor)’
SendQEntries = ‘(monitor)’
LogXptStatus = ‘(monitor)’
RecvQEntries = ‘(monitor)’
LsbyParameters = ‘(monitor)’
LsbySkipTxnTable = ‘(monitor)’
LsbySkipTable = ‘(monitor)’
LsbyFailedTxnInfo = ‘(monitor)’
ApplyLagThreshold = ‘0’ => Allows Apply Lag to throw a warning error above the specified threshold.
TransportLagThreshold = ‘0’ => Allows Transport Lag to throw a warning error above the specified threshold.
TransportDisconnectedThreshold = ’30’ => Throws a warning error when communication is broken for the time specified by the Primary Database of Standby database or Far Sync instances.
SidName(*)
StaticConnectIdentifier(*)
StandbyArchiveLocation(*)
AlternateLocation(*) => If it fails to send archives to the location specified in StandbyArchiveLocation, alternatively the location to send archives is specified.
LogArchiveTrace(*)
LogArchiveFormat(*)
LsbyMaxSga(*)
LsbyMaxServers(*)
TopWaitEvents(*)
(*) – Please check specific instance for the property value
Database Status:
DISABLED => Indicates that the Configuration is not enabled.
1 2 3 4 5 6 7 8 9 10 11 12 13 14 15 16 17 18 19 | DGMGRL> show instance verbose primary1 on database primary Instance 'primary1' of database 'primary' Host Name: primary1.tivibulab.local PFILE: Properties: SidName = 'primary1' StaticConnectIdentifier = '(DESCRIPTION=(ADDRESS=(PROTOCOL=TCP)(HOST=172.20.42.23)(PORT=1521))(CONNECT_DATA=(SERVICE_NAME=primary_DGMGRL)(INSTANCE_NAME=primary1)(SERVER=DEDICATED)))' StandbyArchiveLocation = 'USE_DB_RECOVERY_FILE_DEST' AlternateLocation = '' LogArchiveTrace = '0' LogArchiveFormat = '%t_%s_%r.arc' LsbyMaxSga = '0' LsbyMaxServers = '0' TopWaitEvents = '(monitor)' Instance Status: DISABLED |
1 2 3 4 5 6 7 8 9 10 11 12 13 14 15 16 17 | DGMGRL> show instance verbose primary1 on database standby Instance 'primary1' of database 'standby' Host Name: standby1.tivibulab.local PFILE: Properties: SidName = 'primary1' StaticConnectIdentifier = '(DESCRIPTION=(ADDRESS=(PROTOCOL=TCP)(HOST=172.20.42.27)(PORT=1521))(CONNECT_DATA=(SERVICE_NAME=standby_DGMGRL)(INSTANCE_NAME=primary1)(SERVER=DEDICATED)))' StandbyArchiveLocation = 'USE_DB_RECOVERY_FILE_DEST' AlternateLocation = '' LogArchiveTrace = '0' LogArchiveFormat = '%t_%s_%r.arc' TopWaitEvents = '(monitor)' Instance Status: DISABLED |
1 2 3 4 5 6 7 8 9 10 11 12 13 14 15 16 17 18 19 | DGMGRL> show instance verbose primary1 on database logical Instance 'primary1' of database 'logical' Host Name: logical1.tivibulab.local PFILE: Properties: SidName = 'primary1' StaticConnectIdentifier = '(DESCRIPTION=(ADDRESS=(PROTOCOL=TCP)(HOST=172.20.42.43)(PORT=1521))(CONNECT_DATA=(SERVICE_NAME=logical_DGMGRL)(INSTANCE_NAME=primary1)(SERVER=DEDICATED)))' StandbyArchiveLocation = 'USE_DB_RECOVERY_FILE_DEST' AlternateLocation = '' LogArchiveTrace = '0' LogArchiveFormat = '%t_%s_%r.arc' LsbyMaxSga = '0' LsbyMaxServers = '0' TopWaitEvents = '(monitor)' Instance Status: DISABLED |
Step9:
Enable the configuration.
1 2 | DGMGRL> enable configuration Enabled. |
[Primary-1]–> ALERT LOG
1 2 3 4 5 6 7 8 9 10 11 12 13 14 15 16 17 18 19 20 21 22 23 24 25 26 27 28 29 30 31 32 33 34 35 36 37 38 39 40 41 42 43 | ******************************************************************** LGWR: Resetting 'active' archival for destination LOG_ARCHIVE_DEST_3 ******************************************************************** Fri Jan 13 10:42:23 2017 ALTER SYSTEM SET log_archive_dest_2='service="standby"','LGWR ASYNC NOAFFIRM delay=0 optional compression=disable max_failure=0 max_connections=1 reopen=300 db_unique_name="standby" net_timeout=30','valid_for=(all_logfiles,primary_role)' SCOPE=BOTH; Fri Jan 13 10:42:23 2017 NSA3 started with pid=67, OS id=10785 Thread 1 advanced to log sequence 379 (LGWR switch) Current log# 1 seq# 379 mem# 0: +DATA/primary/onlinelog/group_1.261.932222811 ****************************************************************** LGWR: Setting 'active' archival for destination LOG_ARCHIVE_DEST_2 ****************************************************************** LNS: Standby redo logfile selected for thread 1 sequence 379 for destination LOG_ARCHIVE_DEST_2 Fri Jan 13 10:42:27 2017 Archived Log entry 1384 added for thread 1 sequence 378 ID 0x697b7314 dest 1: Fri Jan 13 10:42:53 2017 Thread 1 cannot allocate new log, sequence 380 Checkpoint not complete Current log# 1 seq# 379 mem# 0: +DATA/primary/onlinelog/group_1.261.932222811 Fri Jan 13 10:42:56 2017 ALTER SYSTEM SET log_archive_dest_3='service="logical"','LGWR ASYNC NOAFFIRM delay=0 optional compression=disable max_failure=0 max_connections=1 reopen=300 db_unique_name="logical" net_timeout=30','valid_for=(all_logfiles,primary_role)' SCOPE=BOTH; ALTER SYSTEM SET log_archive_trace=0 SCOPE=BOTH SID='primary1'; ALTER SYSTEM SET log_archive_format='%t_%s_%r.arc' SCOPE=SPFILE SID='primary1'; ALTER SYSTEM SET standby_file_management='AUTO' SCOPE=BOTH SID='*'; ALTER SYSTEM SET archive_lag_target=0 SCOPE=BOTH SID='*'; ALTER SYSTEM SET log_archive_max_processes=8 SCOPE=BOTH SID='*'; ALTER SYSTEM SET log_archive_min_succeed_dest=1 SCOPE=BOTH SID='*'; ALTER SYSTEM SET db_file_name_convert='standby','primary' SCOPE=SPFILE; ALTER SYSTEM SET log_file_name_convert='standby','primary' SCOPE=SPFILE; ALTER SYSTEM ARCHIVE LOG Fri Jan 13 10:42:56 2017 NSA3 started with pid=35, OS id=10906 Thread 1 advanced to log sequence 380 (LGWR switch) Current log# 2 seq# 380 mem# 0: +DATA/primary/onlinelog/group_2.262.932222811 ****************************************************************** LGWR: Setting 'active' archival for destination LOG_ARCHIVE_DEST_3 ****************************************************************** Fri Jan 13 10:43:00 2017 LNS: Standby redo logfile selected for thread 1 sequence 380 for destination LOG_ARCHIVE_DEST_2 Archived Log entry 1388 added for thread 1 sequence 379 ID 0x697b7314 dest 1: LNS: Standby redo logfile selected for thread 1 sequence 380 for destination LOG_ARCHIVE_DEST_3 Fri Jan 13 10:43:07 2017 ARC4: Standby redo logfile selected for thread 1 sequence 379 for destination LOG_ARCHIVE_DEST_3 |
[Standby-2] —> ALERT LOG
1 2 3 4 5 6 7 8 9 10 11 12 13 14 15 16 17 18 19 20 21 22 23 24 25 26 27 28 29 30 31 32 33 34 35 36 37 38 39 40 41 42 43 44 45 46 47 48 49 50 51 52 53 54 55 56 57 58 59 60 61 62 63 64 65 66 67 68 69 70 71 72 73 74 75 76 77 78 79 80 81 82 83 84 85 86 87 88 89 90 91 92 93 94 95 96 97 98 99 | Fri Jan 13 10:42:14 2017 NSV0 started with pid=54, OS id=13418 Fri Jan 13 10:42:18 2017 RSM0 started with pid=56, OS id=13431 ALTER SYSTEM SET log_archive_trace=0 SCOPE=BOTH SID='primary2'; ALTER SYSTEM SET log_archive_format='%t_%s_%r.arc' SCOPE=SPFILE SID='primary2'; ALTER SYSTEM SET standby_file_management='AUTO' SCOPE=BOTH SID='*'; ALTER SYSTEM SET archive_lag_target=0 SCOPE=BOTH SID='*'; ALTER SYSTEM SET log_archive_max_processes=8 SCOPE=BOTH SID='*'; ALTER SYSTEM SET log_archive_min_succeed_dest=1 SCOPE=BOTH SID='*'; ALTER SYSTEM SET db_file_name_convert='primary','standby' SCOPE=SPFILE; ALTER SYSTEM SET log_file_name_convert='primary','standby' SCOPE=SPFILE; ALTER SYSTEM SET fal_server='primary' SCOPE=BOTH; ALTER DATABASE RECOVER MANAGED STANDBY DATABASE THROUGH ALL SWITCHOVER DISCONNECT USING CURRENT LOGFILE Attempt to start background Managed Standby Recovery process (primary2) Fri Jan 13 10:42:23 2017 MRP0 started with pid=57, OS id=13436 MRP0: Background Managed Standby Recovery process started (primary2) Fri Jan 13 10:42:23 2017 Archived Log entry 605 added for thread 2 sequence 240 ID 0x697b7314 dest 1: Fri Jan 13 10:42:27 2017 Archived Log entry 606 added for thread 1 sequence 378 ID 0x697b7314 dest 1: started logmerger process Fri Jan 13 10:42:28 2017 Managed Standby Recovery starting Real Time Apply Fri Jan 13 10:42:29 2017 Reconfiguration started (old inc 11, new inc 13) List of instances: 1 2 (myinst: 2) Global Resource Directory frozen Communication channels reestablished Fri Jan 13 10:42:29 2017 * domain 0 valid = 1 according to instance 1 Master broadcasted resource hash value bitmaps Non-local Process blocks cleaned out Fri Jan 13 10:42:29 2017 LMS 0: 0 GCS shadows cancelled, 0 closed, 0 Xw survived Fri Jan 13 10:42:29 2017 LMS 1: 0 GCS shadows cancelled, 0 closed, 0 Xw survived Set master node info Submitted all remote-enqueue requests Dwn-cvts replayed, VALBLKs dubious All grantable enqueues granted Submitted all GCS remote-cache requests Fix write in gcs resources Reconfiguration complete Parallel Media Recovery started with 4 slaves Fri Jan 13 10:42:30 2017 Block change tracking file is current. Starting background process CTWR Fri Jan 13 10:42:30 2017 CTWR started with pid=61, OS id=13465 Block change tracking service is active. Waiting for all non-current ORLs to be archived... All non-current ORLs have been archived. Media Recovery Log +FRA/standby/archivelog/2017_01_13/thread_2_seq_240.441.933158543 Media Recovery Log +FRA/standby/archivelog/2017_01_13/thread_1_seq_378.424.933158547 Fri Jan 13 10:42:31 2017 Completed: ALTER DATABASE RECOVER MANAGED STANDBY DATABASE THROUGH ALL SWITCHOVER DISCONNECT USING CURRENT LOGFILE Media Recovery Waiting for thread 2 sequence 241 Fri Jan 13 10:42:32 2017 Primary database is in MAXIMUM PERFORMANCE mode RFS[5]: Assigned to RFS process 13499 RFS[5]: Selected log 5 for thread 1 sequence 379 dbid 1769705496 branch 932222810 Fri Jan 13 10:42:35 2017 Primary database is in MAXIMUM PERFORMANCE mode RFS[6]: Assigned to RFS process 13506 RFS[6]: Selected log 8 for thread 2 sequence 242 dbid 1769705496 branch 932222810 Fri Jan 13 10:42:36 2017 RFS[7]: Assigned to RFS process 13510 RFS[7]: Selected log 9 for thread 2 sequence 241 dbid 1769705496 branch 932222810 Fri Jan 13 10:42:36 2017 Archived Log entry 607 added for thread 2 sequence 241 ID 0x697b7314 dest 1: Media Recovery Log +FRA/standby/archivelog/2017_01_13/thread_2_seq_241.423.933158557 Media Recovery Waiting for thread 1 sequence 379 (in transit) Recovery of Online Redo Log: Thread 1 Group 5 Seq 379 Reading mem 0 Mem# 0: +DATA/standby/onlinelog/group_5.267.932283683 Mem# 1: +FRA/standby/onlinelog/group_5.260.932283683 Media Recovery Waiting for thread 2 sequence 242 (in transit) Recovery of Online Redo Log: Thread 2 Group 8 Seq 242 Reading mem 0 Mem# 0: +DATA/standby/onlinelog/group_8.270.932283685 Mem# 1: +FRA/standby/onlinelog/group_8.263.932283685 Fri Jan 13 10:43:06 2017 RFS[5]: Selected log 6 for thread 1 sequence 380 dbid 1769705496 branch 932222810 Fri Jan 13 10:43:06 2017 Archived Log entry 608 added for thread 1 sequence 379 ID 0x697b7314 dest 1: Fri Jan 13 10:43:06 2017 Media Recovery Waiting for thread 1 sequence 380 (in transit) Recovery of Online Redo Log: Thread 1 Group 6 Seq 380 Reading mem 0 Mem# 0: +DATA/standby/onlinelog/group_6.268.932283683 Mem# 1: +FRA/standby/onlinelog/group_6.261.932283683 Fri Jan 13 10:43:09 2017 RFS[6]: Selected log 9 for thread 2 sequence 243 dbid 1769705496 branch 932222810 Fri Jan 13 10:43:09 2017 Archived Log entry 609 added for thread 2 sequence 242 ID 0x697b7314 dest 1: Media Recovery Waiting for thread 2 sequence 243 (in transit) Recovery of Online Redo Log: Thread 2 Group 9 Seq 243 Reading mem 0 Mem# 0: +DATA/standby/onlinelog/group_9.271.932283685 Mem# 1: +FRA/standby/onlinelog/group_9.264.932283685 |
[Logical-2]—> ALERT LOG
1 2 3 4 5 6 7 8 9 10 11 12 13 14 15 16 17 18 19 20 21 22 23 24 25 26 27 28 29 30 31 32 33 34 35 36 37 38 39 40 41 42 43 44 45 46 47 48 49 50 51 52 53 54 55 56 57 58 59 60 61 62 63 64 65 66 67 68 69 70 71 72 73 74 75 76 77 78 79 80 81 82 83 84 85 86 87 88 89 90 91 92 93 94 95 96 97 98 99 100 101 | Fri Jan 13 10:42:04 2017 NSV0 started with pid=51, OS id=1107 Fri Jan 13 10:42:09 2017 RSM0 started with pid=55, OS id=1122 ALTER SYSTEM SET log_archive_trace=0 SCOPE=BOTH SID='primary2'; ALTER SYSTEM SET log_archive_format='%t_%s_%r.arc' SCOPE=SPFILE SID='primary2'; LOGSTDBY: APPLY_UNSET: MAX_EVENTS_RECORDED LOGSTDBY: APPLY_UNSET: PRESERVE_COMMIT_ORDER LOGSTDBY: APPLY_UNSET: RECORD_SKIP_ERRORS LOGSTDBY: APPLY_UNSET: RECORD_SKIP_DDL LOGSTDBY: APPLY_UNSET: RECORD_APPLIED_DDL ALTER SYSTEM SET standby_file_management='AUTO' SCOPE=BOTH SID='*'; ALTER SYSTEM SET archive_lag_target=0 SCOPE=BOTH SID='*'; ALTER SYSTEM SET log_archive_max_processes=8 SCOPE=BOTH SID='*'; ALTER SYSTEM SET log_archive_min_succeed_dest=1 SCOPE=BOTH SID='*'; ALTER SYSTEM SET db_file_name_convert='logical','primary' SCOPE=SPFILE; ALTER SYSTEM SET log_file_name_convert='primary','logical' SCOPE=SPFILE; ALTER SYSTEM SET fal_server='primary','standby' SCOPE=BOTH; LOGSTDBY: APPLY_UNSET: MAX_EVENTS_RECORDED LOGSTDBY: APPLY_UNSET: PRESERVE_COMMIT_ORDER LOGSTDBY: APPLY_UNSET: RECORD_SKIP_ERRORS LOGSTDBY: APPLY_UNSET: RECORD_SKIP_DDL LOGSTDBY: APPLY_UNSET: RECORD_APPLIED_DDL LOGSTDBY: APPLY_UNSET: MAX_SGA LOGSTDBY: APPLY_UNSET: MAX_SERVERS ALTER DATABASE START LOGICAL STANDBY APPLY IMMEDIATE ALTER DATABASE START LOGICAL STANDBY APPLY (primary2) with optional part IMMEDIATE Attempt to start background Logical Standby process Fri Jan 13 10:42:14 2017 LSP0 started with pid=59, OS id=1136 Completed: ALTER DATABASE START LOGICAL STANDBY APPLY IMMEDIATE LOGMINER: Parameters summary for session# = 1 LOGMINER: Number of processes = 3, Transaction Chunk Size = 201 LOGMINER: Memory Size = 30M, Checkpoint interval = 150M LOGMINER: SpillScn 4415076, ResetLogScn 925702 LOGMINER: summary for session# = 1 LOGMINER: StartScn: 0 (0x0000.00000000) LOGMINER: EndScn: 0 (0x0000.00000000) LOGMINER: HighConsumedScn: 4415069 (0x0000.00435e5d) LOGMINER: session_flag: 0x1 LOGMINER: Read buffers: 16 LOGMINER: Memory LWM: limit 10M, LWM 24M, 80% LOGMINER: Memory Release Limit: 1M Fri Jan 13 10:42:15 2017 LOGMINER: session#=1 (Logical_Standby$), reader MS00 pid=60 OS id=1140 sid=20 started Fri Jan 13 10:42:15 2017 LOGMINER: session#=1 (Logical_Standby$), builder MS01 pid=61 OS id=1144 sid=86 started Fri Jan 13 10:42:15 2017 LOGMINER: session#=1 (Logical_Standby$), preparer MS02 pid=62 OS id=1148 sid=143 started LOGMINER: Begin mining logfile for session 1 thread 1 sequence 378, +DATA/logical/onlinelog/group_6.274.932894839 Fri Jan 13 10:42:15 2017 LOGSTDBY Analyzer process AS00 started with server id=0 pid=63 OS id=1152 Fri Jan 13 10:42:15 2017 LOGSTDBY Apply process AS02 started with server id=2 pid=65 OS id=1162 LOGMINER: Begin mining logfile for session 1 thread 2 sequence 240, +FRA/logical/foreign_archivelog/primary/2017_01_13/thread_2_seq_240.499.933158535 Fri Jan 13 10:42:15 2017 LOGSTDBY Apply process AS03 started with server id=3 pid=66 OS id=1168 Fri Jan 13 10:42:15 2017 LOGSTDBY Apply process AS01 started with server id=1 pid=64 OS id=1156 Fri Jan 13 10:42:15 2017 LOGSTDBY Apply process AS04 started with server id=4 pid=67 OS id=1172 Fri Jan 13 10:42:15 2017 LOGSTDBY Apply process AS05 started with server id=5 pid=68 OS id=1176 LOGMINER: Alternate logfile found. Transition to mining archived logfile for session 1 thread 1 sequence 378, +FRA/logical/foreign_archivelog/primary/2017_01_13/thread_1_seq_378.548.933158539 LOGMINER: End mining logfile for session 1 thread 2 sequence 240, +FRA/logical/foreign_archivelog/primary/2017_01_13/thread_2_seq_240.499.933158535 Fri Jan 13 10:42:56 2017 Primary database is in MAXIMUM PERFORMANCE mode RFS[1]: Assigned to RFS process 1317 RFS[1]: Selected log 5 for thread 1 sequence 380 dbid 1769705496 branch 932222810 Fri Jan 13 10:42:59 2017 Primary database is in MAXIMUM PERFORMANCE mode RFS[2]: Assigned to RFS process 1357 RFS[2]: Selected log 8 for thread 2 sequence 243 dbid 1769705496 branch 932222810 Fri Jan 13 10:42:59 2017 RFS[3]: Assigned to RFS process 1361 RFS[3]: Selected log 9 for thread 2 sequence 242 dbid 1769705496 branch 932222810 Fri Jan 13 10:42:59 2017 RFS LogMiner: Registered logfile [+FRA/logical/foreign_archivelog/primary/2017_01_13/thread_2_seq_242.549.933158579] to LogMiner session id [1] Fri Jan 13 10:43:04 2017 RFS[4]: Assigned to RFS process 1366 RFS[4]: Selected log 6 for thread 1 sequence 379 dbid 1769705496 branch 932222810 Fri Jan 13 10:43:04 2017 RFS LogMiner: Registered logfile [+FRA/logical/foreign_archivelog/primary/2017_01_13/thread_1_seq_379.552.933158585] to LogMiner session id [1] Fri Jan 13 10:43:04 2017 LOGMINER: Begin mining logfile for session 1 thread 2 sequence 241, +FRA/logical/foreign_archivelog/primary/2017_01_13/thread_2_seq_241.551.933158583 LOGMINER: End mining logfile for session 1 thread 1 sequence 378, +FRA/logical/foreign_archivelog/primary/2017_01_13/thread_1_seq_378.548.933158539 LOGMINER: Begin mining logfile for session 1 thread 1 sequence 379, +FRA/logical/foreign_archivelog/primary/2017_01_13/thread_1_seq_379.552.933158585 LOGMINER: End mining logfile for session 1 thread 2 sequence 241, +FRA/logical/foreign_archivelog/primary/2017_01_13/thread_2_seq_241.551.933158583 LOGMINER: Begin mining logfile for session 1 thread 2 sequence 242, +FRA/logical/foreign_archivelog/primary/2017_01_13/thread_2_seq_242.549.933158579 LOGMINER: End mining logfile for session 1 thread 1 sequence 379, +FRA/logical/foreign_archivelog/primary/2017_01_13/thread_1_seq_379.552.933158585 LOGMINER: Begin mining logfile for session 1 thread 1 sequence 380, +DATA/logical/onlinelog/group_5.273.932894839 LOGMINER: End mining logfile for session 1 thread 2 sequence 242, +FRA/logical/foreign_archivelog/primary/2017_01_13/thread_2_seq_242.549.933158579 LOGMINER: Begin mining logfile for session 1 thread 2 sequence 243, +DATA/logical/onlinelog/group_8.276.932894841 Fri Jan 13 10:45:59 2017 Thread 2 advanced to log sequence 48 (LGWR switch) Current log# 4 seq# 48 mem# 0: +DATA/logical/onlinelog/group_4.272.932899829 Current log# 4 seq# 48 mem# 1: +FRA/logical/onlinelog/group_4.259.932899829 Fri Jan 13 10:46:01 2017 Archived Log entry 117 added for thread 2 sequence 47 ID 0xc0660c72 dest 1: |
1 2 3 4 5 6 7 8 9 10 11 12 13 14 | DGMGRL> show configuration Configuration - Broker _Configuration Protection Mode: MaxPerformance Databases: primary - Primary database standby - Physical standby database logical - Logical standby database Fast-Start Failover: DISABLED Configuration Status: SUCCESS |
From now on, we have to make all Parameter changes in the Data Guard Environment through the Broker. Otherwise the Broker may not work properly.
Step10:
Check the status of LOG_ARCHIVE_DEST_n parameters after the broker is ENABLED.
1 2 3 4 5 6 7 8 9 10 11 12 13 | [Primary-1] SQL> column name format a30 [Primary-1] SQL> column value format a94 [Primary-1] SQL> set linesize 9000 [Primary-1] SQL> select name, value from v$parameter where lower(name) like '%log_archive_dest%' and lower(name) not like '%log_archive_dest_state%' and value is not null; NAME VALUE ------------------------------ ---------------------------------------------------------------------------------------------- log_archive_dest_1 LOCATION=USE_DB_RECOVERY_FILE_DEST VALID_FOR=(ALL_LOGFILES,ALL_ROLES) DB_UNIQUE_NAME=primary log_archive_dest_2 service="standby", LGWR ASYNC NOAFFIRM delay=0 optional compression=disable max_failure=0 max_ connections=1 reopen=300 db_unique_name="standby" net_timeout=30, valid_for=(all_logfiles,prim ary_role) log_archive_dest_3 service="logical", LGWR ASYNC NOAFFIRM delay=0 optional compression=disable max_failure=0 max_ connections=1 reopen=300 db_unique_name="logical" net_timeout=30, valid_for=(all_logfiles,primary_role) |
1 2 3 4 5 6 7 | [Physical-1] SQL> column name format a30 [Physical-1] SQL> column value format a94 [Physical-1] SQL> set linesize 9000 [Physical-1] SQL> select name, value from v$parameter where lower(name) like '%log_archive_dest%' and lower(name) not like '%log_archive_dest_state%' and value is not null; NAME VALUE ------------------------------ ---------------------------------------------------------------------------------------------- log_archive_dest_1 LOCATION=USE_DB_RECOVERY_FILE_DEST VALID_FOR=(ALL_LOGFILES,ALL_ROLES) DB_UNIQUE_NAME=standby |
1 2 3 4 5 6 7 | [Logical-1] SQL> column name format a30 [Logical-1] SQL> column value format a94 [Logical-1] SQL> set linesize 9000 [Logical-1] SQL> select name, value from v$parameter where lower(name) like '%log_archive_dest%' and lower(name) not like '%log_archive_dest_state%' and value is not null; NAME VALUE ------------------------------ ---------------------------------------------------------------------------------------------- log_archive_dest_1 LOCATION=USE_DB_RECOVERY_FILE_DEST VALID_FOR=(ALL_LOGFILES,ALL_ROLES) DB_UNIQUE_NAME=logical |
1 2 3 4 5 | [Primary-1] SQL> show parameter log_archive_config NAME TYPE VALUE ------------------------------------ ----------- ------------------------------ log_archive_config string dg_config=(primary,standby,logical) |
1 2 3 4 5 | [Physical-1] SQL> show parameter log_archive_config NAME TYPE VALUE ------------------------------------ ----------- ------------------------------ log_archive_config string dg_config=(standby,primary,logical) |
1 2 3 4 5 | [Logical-1] SQL> show parameter log_archive_config NAME TYPE VALUE ------------------------------------ ----------- ------------------------------ log_archive_config string dg_config=(logical,primary,standby) |
As you can see, LOG_ARCHIVE_DEST_2 and LOG_ARCHIVE_DEST_3 parameters, which were deleted before the Broker Configuration was created, were re-set with Default values. This is to enable Redo-Transport. It also offers us great convenience so that we can see the settings after the Broker Configuration is removed.
Step11:
Check everything is OK.
1 2 3 4 5 6 7 | [Primary-2] SQL> select table_name from dba_tables where owner='TEST'; TABLE_NAME ------------------------------ JOBS_YEDEK JOB_HISTORY_YEDEK EMPLOYEES_YEDEK |
1 2 3 4 5 6 7 | [Physical-1] SQL> select table_name from dba_tables where owner='TEST'; TABLE_NAME ------------------------------ JOBS_YEDEK JOB_HISTORY_YEDEK EMPLOYEES_YEDEK |
1 2 3 4 5 6 7 | [Logical-1] SQL> select table_name from dba_tables where owner='TEST'; TABLE_NAME ------------------------------ EMPLOYEES_YEDEK JOBS_YEDEK JOB_HISTORY_YEDEK |
1 2 3 4 5 6 7 8 9 10 | [Primary-2] SQL> drop table test.JOBS_YEDEK; Table dropped. [Primary-2] SQL> select table_name from dba_tables where owner='TEST'; TABLE_NAME ------------------------------ JOB_HISTORY_YEDEK EMPLOYEES_YEDEK |
1 2 3 4 5 6 | [Physical-1] SQL> select table_name from dba_tables where owner='TEST'; TABLE_NAME ------------------------------ JOB_HISTORY_YEDEK EMPLOYEES_YEDEK |
1 2 3 4 5 6 | [Logical-1] SQL> select table_name from dba_tables where owner='TEST'; TABLE_NAME ------------------------------ EMPLOYEES_YEDEK JOB_HISTORY_YEDEK |
I stopped Redo-Apply before starting Broker Configurations, and then I saw that the dropped table was gone from Standby even though I never opened it. This is because while enabling Broker Configuration, it also launches Redo-Apply. We can see this with the following query.
1 2 3 4 5 6 7 | [Primary-2] SQL> select DATABASE_MODE, RECOVERY_MODE, PROTECTION_MODE from v$archive_dest_status; DATABASE_MODE RECOVERY_MODE PROTECTION_MODE --------------- ----------------------- -------------------- OPEN IDLE MAXIMUM PERFORMANCE OPEN_READ-ONLY MANAGED REAL TIME APPLY MAXIMUM PERFORMANCE OPEN LOGICAL REAL TIME APPLY MAXIMUM PERFORMANCE |
Step12:
Configuration can be managed not only from the Primary Database, but from all instances in the Broker Environment. The reason is that the configuration file is in all Instances and the DMONs in the instances communicate with each other for the changes to be made and the files are updated.
1 2 3 4 5 6 7 8 9 10 11 12 13 14 15 16 17 18 19 20 21 22 23 | [oracle@logical1 ~]$ dgmgrl DGMGRL for Linux: Version 11.2.0.4.0 - 64bit Production Copyright (c) 2000, 2009, Oracle. All rights reserved. Welcome to DGMGRL, type "help" for information. DGMGRL> connect sys/Passw0rd4 Connected. DGMGRL> show configuration ; Configuration - Broker _Configuration Protection Mode: MaxPerformance Databases: primary - Primary database standby - Physical standby database logical - Logical standby database Fast-Start Failover: DISABLED Configuration Status: SUCCESS |
1 2 3 4 5 6 7 8 9 10 11 12 13 14 15 16 17 18 19 20 21 22 | [oracle@standby2 ~]$ dgmgrl DGMGRL for Linux: Version 11.2.0.4.0 - 64bit Production Copyright (c) 2000, 2009, Oracle. All rights reserved. Welcome to DGMGRL, type "help" for information. DGMGRL> connect sys/Passw0rd4 Connected. DGMGRL> show configuration; Configuration - Broker _Configuration Protection Mode: MaxPerformance Databases: primary - Primary database standby - Physical standby database logical - Logical standby database Fast-Start Failover: DISABLED Configuration Status: SUCCESS |
![]()