 Database Tutorials MSSQL, Oracle, PostgreSQL, MySQL, MariaDB, DB2, Sybase, Teradata, Big Data, NOSQL, MongoDB, Couchbase, Cassandra, Windows, Linux
In today’s article, I will tell you centos 7 installation.
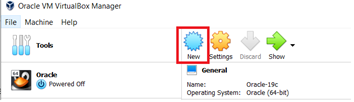
First of all, we make New in VirtualBox and create a new machine.
On the screen that opens, we determine the location of the linux and the name of the machine. We go to the next step by clicking Next.

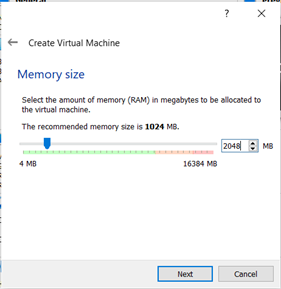
We choose the memory size and then move on.
We create by selecting the ‘Create a virtual hard disk now’ option.

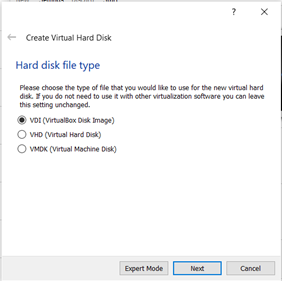
We proceed by selecting the hard disk file type VDI.
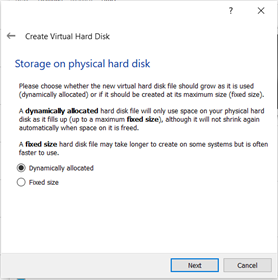
We continue by choosing dynamically allocated.
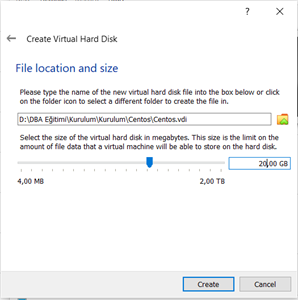
We specify the size for storage. Then we create the machine.
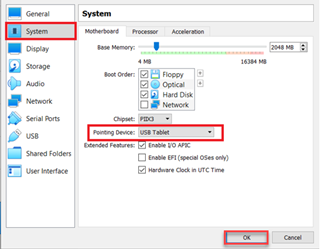
We choose Settings-> System-> Pointing Device: USB Tablet so that the mouse can work both in the virtual machine and in windows.
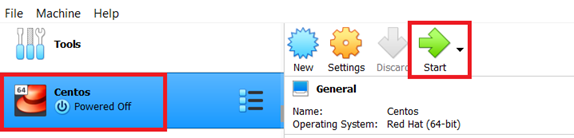
We start the machine by pressing Start.
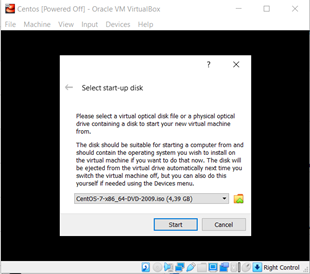
We continue by selecting the previously downloaded CentOS 7 iso file.
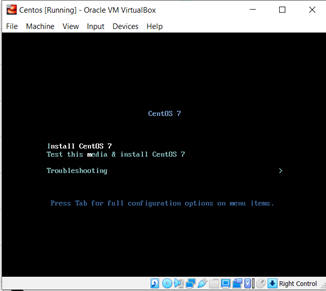
We start the installation by selecting the Install CentOS 7 option.
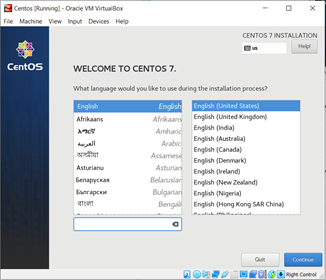
The language for this machine setup is English. We continue by selecting the desired language.
After clicking the Continue button, the following screen will appear. We have to make the settings of the components that appear on this screen one by one.
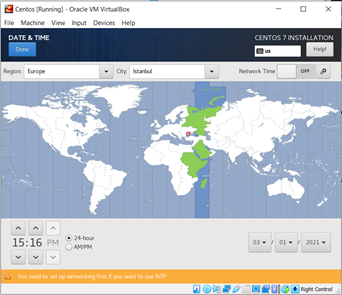
We select the region found by selecting Date & Time.
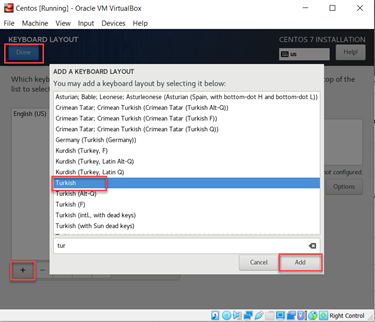
We choose the keyboard from the Keyboard Layout.
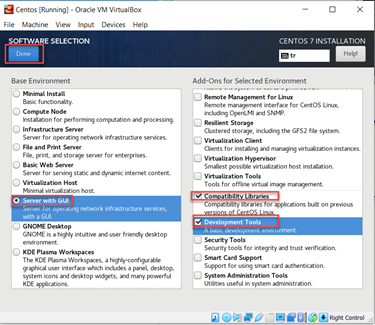
If a GUI is desired, after selecting the following options from the Software Selection section, we exit the screen by clicking Done.
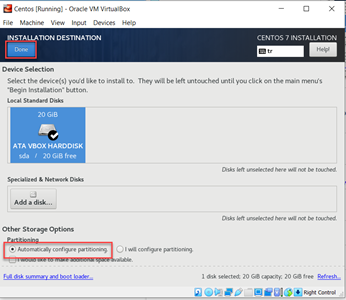
In the Install Destination section, we select the disk partitioning option. If desired, we can manually partition the disk by selecting the ‘I will configure partitioning’ option.
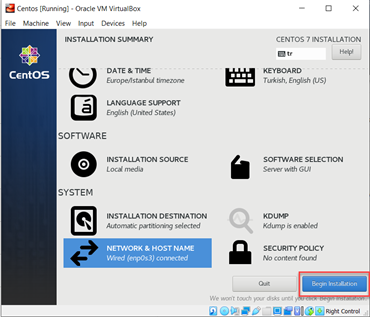
We make the network settings from the Network & Hostname section.

We can manually define the ip by pressing Configure.

After the settings are finished, we start the installation by clicking Begin Installation.
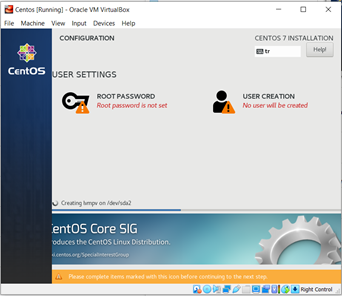
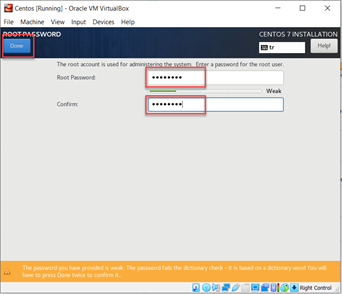
After the installation starts, we set the root password at the address and create a new user.
When the installation is complete, we restart the machine by clicking the Reboot button.
After the machine is restarted, we accept the license agreement by clicking the LICENCE INFORMATION option on the screen that appears.
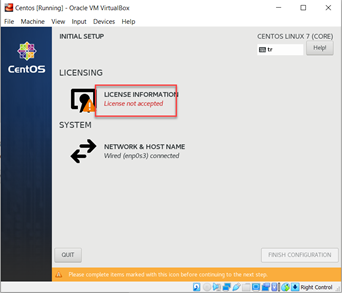
By clicking the FINISH CONFIGURATION button on the screen that comes up, we finalize the configuration processes and the machine turns on.
We can disable the firewall as follows.
Sudo systemctl stop firewalld
Sudo systemctl disable firewalld
![]()