 Database Tutorials MSSQL, Oracle, PostgreSQL, MySQL, MariaDB, DB2, Sybase, Teradata, Big Data, NOSQL, MongoDB, Couchbase, Cassandra, Windows, Linux
In today’s article, we will talk about Physical Standby Setup-SINGLE NODE.
1. We query the status of the listener to see which services are running in the primary database.
2.
1 2 3 4 5 6 7 8 9 10 11 12 13 14 15 16 17 18 19 20 21 22 23 24 25 26 27 28 | [root@prod ~]# su - oracle [oracle@prod ~]$ lsnrctl status LSNRCTL for Linux: Version 11.2.0.4.0 - Production on 17-FEB-2017 07:02:36 Copyright (c) 1991, 2013, Oracle. All rights reserved. Connecting to (DESCRIPTION=(ADDRESS=(PROTOCOL=IPC)(KEY=EXTPROC1521))) STATUS of the LISTENER ------------------------ Alias LISTENER Version TNSLSNR for Linux: Version 11.2.0.4.0 - Production Start Date 16-FEB-2017 22:25:36 Uptime 0 days 8 hr. 37 min. 1 sec Trace Level off Security ON: Local OS Authentication SNMP OFF Listener Parameter File /u01/app/oracle/product/11.2.0/db_1/network/admin/listener.ora Listener Log File /u01/app/oracle/diag/tnslsnr/prod/listener/alert/log.xml Listening Endpoints Summary... (DESCRIPTION=(ADDRESS=(PROTOCOL=ipc)(KEY=EXTPROC1521))) (DESCRIPTION=(ADDRESS=(PROTOCOL=tcp)(HOST=prod.tivibulab.local)(PORT=1521))) Services Summary... Service "prod" has 1 instance(s). Instance "prod", status READY, has 1 handler(s) for this service... Service "prodXDB" has 1 instance(s). Instance "prod", status READY, has 1 handler(s) for this service... The command completed successfully |
3. We query the contents of the Listener.ORA file.
1 2 3 4 5 6 7 8 9 10 11 12 13 | [oracle@prod admin]$ cat listener.ora # listener.ora Network Configuration File: /u01/app/oracle/product/11.2.0/db_1/network/admin/listener.ora # Generated by Oracle configuration tools. LISTENER = (DESCRIPTION_LIST = (DESCRIPTION = (ADDRESS = (PROTOCOL = IPC)(KEY = EXTPROC1521)) (ADDRESS = (PROTOCOL = TCP)(HOST = prod)(PORT = 1521)) ) ) ADR_BASE_LISTENER = /u01/app/oracle |
4.We query the contents of the SQLNET.ORA file to see which naming methods are in the primary database.
1 2 3 4 5 6 7 8 9 10 | [oracle@prod ~]$ cd $ORACLE_HOME/network/admin [oracle@prod admin]$ ls listener.ora samples shrept.lst sqlnet.ora tnsnames.ora [oracle@prod admin]$ cat sqlnet.ora # sqlnet.ora Network Configuration File: /u01/app/oracle/product/11.2.0/db_1/network/admin/sqlnet.ora # Generated by Oracle configuration tools. NAMES.DIRECTORY_PATH= (TNSNAMES, EZCONNECT) ADR_BASE = /u01/app/oracle |
5. We query which services are registered in the TNSNAMES.ORA file.
1 2 3 4 5 6 7 8 9 10 11 12 | [oracle@prod admin]$ cat tnsnames.ora # tnsnames.ora Network Configuration File: /u01/app/oracle/product/11.2.0/db_1/network/admin/tnsnames.ora # Generated by Oracle configuration tools. PROD = (DESCRIPTION = (ADDRESS = (PROTOCOL = TCP)(HOST = prod)(PORT = 1521)) (CONNECT_DATA = (SERVER = DEDICATED) (SERVICE_NAME = prod) ) ) |
6.We add the TNSNAMES method to the SQLNET.ORA file. We use NETMGR for this.
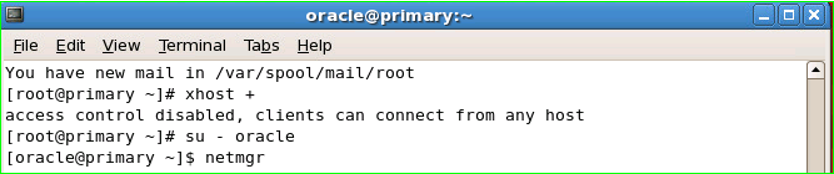
a. By connecting to the server from the terminal, switching to the Oracle user and running netmgr.

b. We check the “Profile” settings.
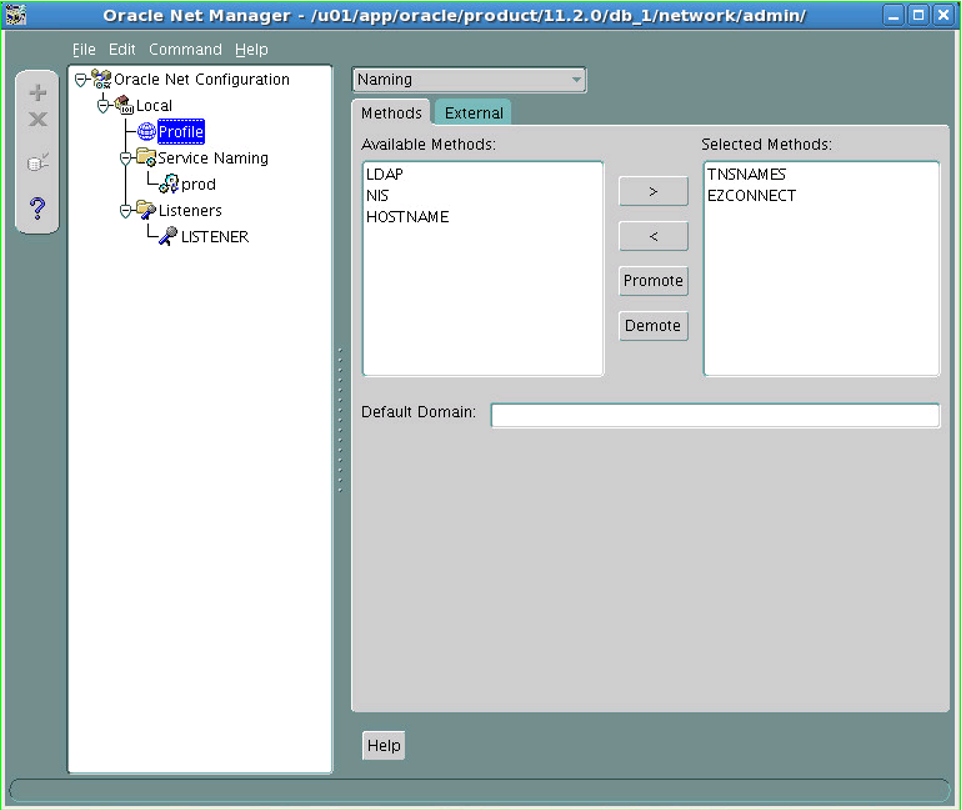
c. We extract the EZCONNECT method in the “Selected Methods” section.
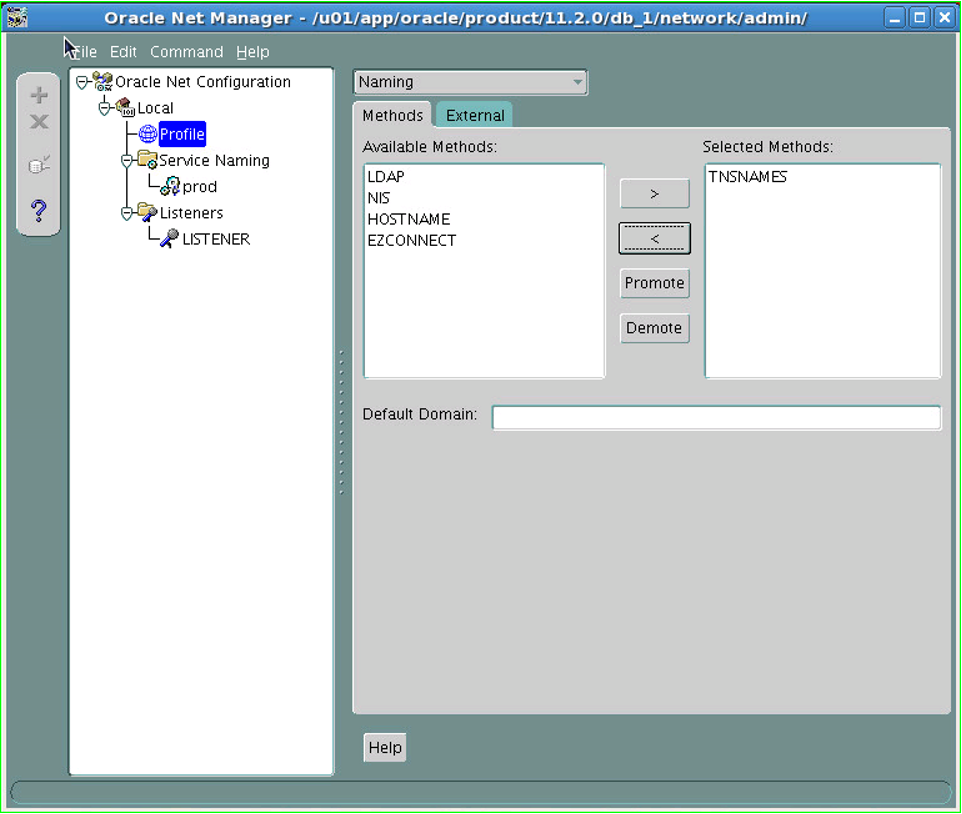
The reason why HOSTNAME is not added directly is because the order of Methods is wanted to be made as TNSNAMES-HOSTNAME-EZCONNECT. Otherwise, as we will see below, no method would be active.
1 2 3 4 5 | [oracle@prod admin]$ cat sqlnet.ora # sqlnet.ora Network Configuration File: /u01/app/oracle/product/11.2.0/db_1/network/admin/sqlnet.ora # Generated by Oracle configuration tools. ADR_BASE = /u01/app/oracle |
ç. First we add HOSTNAME and then EZCONNECT to “Selected Methods” .
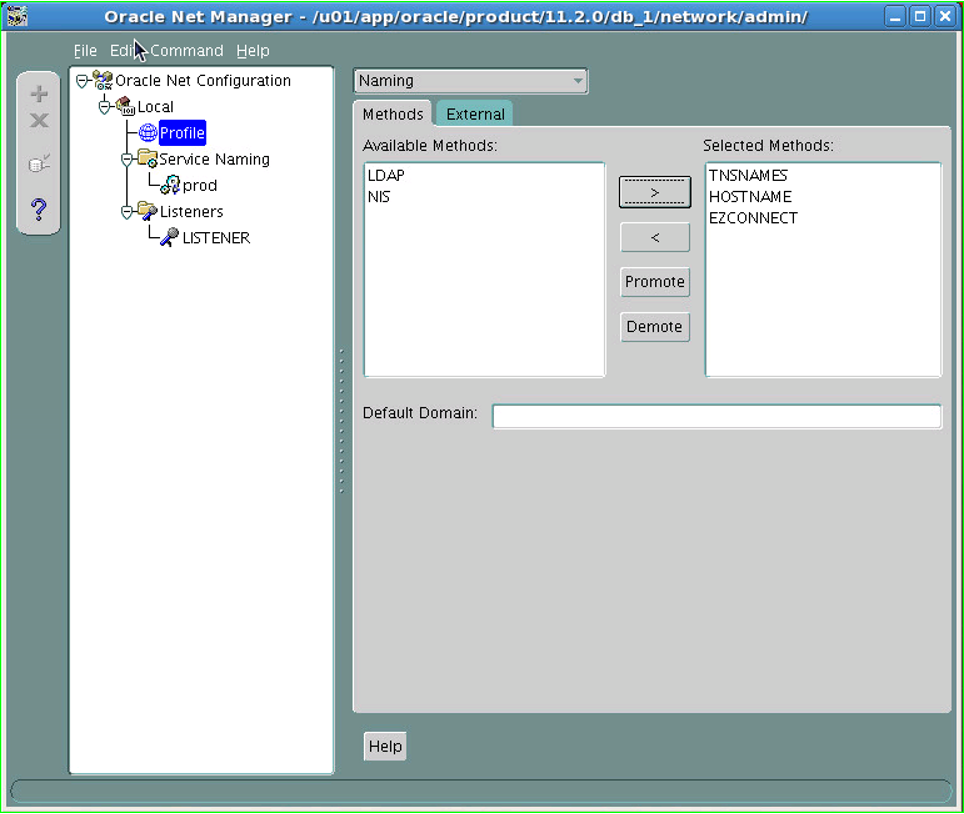
d. Save the changes made in the “File” section and exit.
e. We check whether the change is reflected in the SQLNET.ORA file.
1 2 3 4 5 6 7 | [oracle@prod admin]$ cat sqlnet.ora # sqlnet.ora Network Configuration File: /u01/app/oracle/product/11.2.0/db_1/network/admin/sqlnet.ora # Generated by Oracle configuration tools. NAMES.DIRECTORY_PATH= (TNSNAMES, HOSTNAME, EZCONNECT) ADR_BASE = /u01/app/oracle |
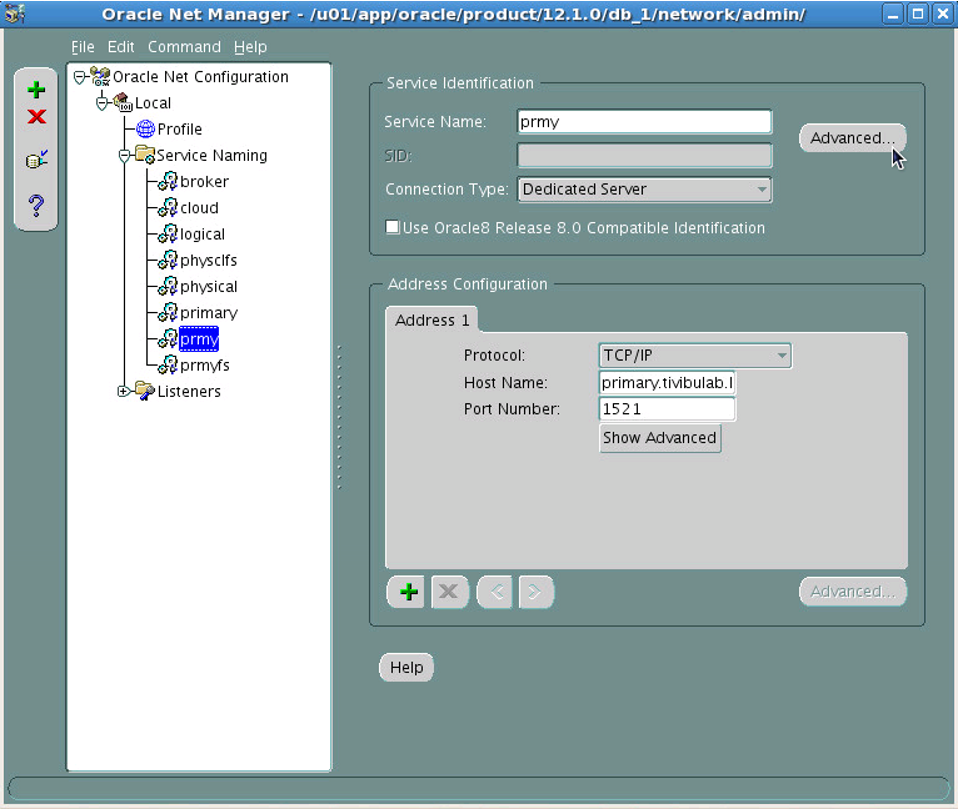
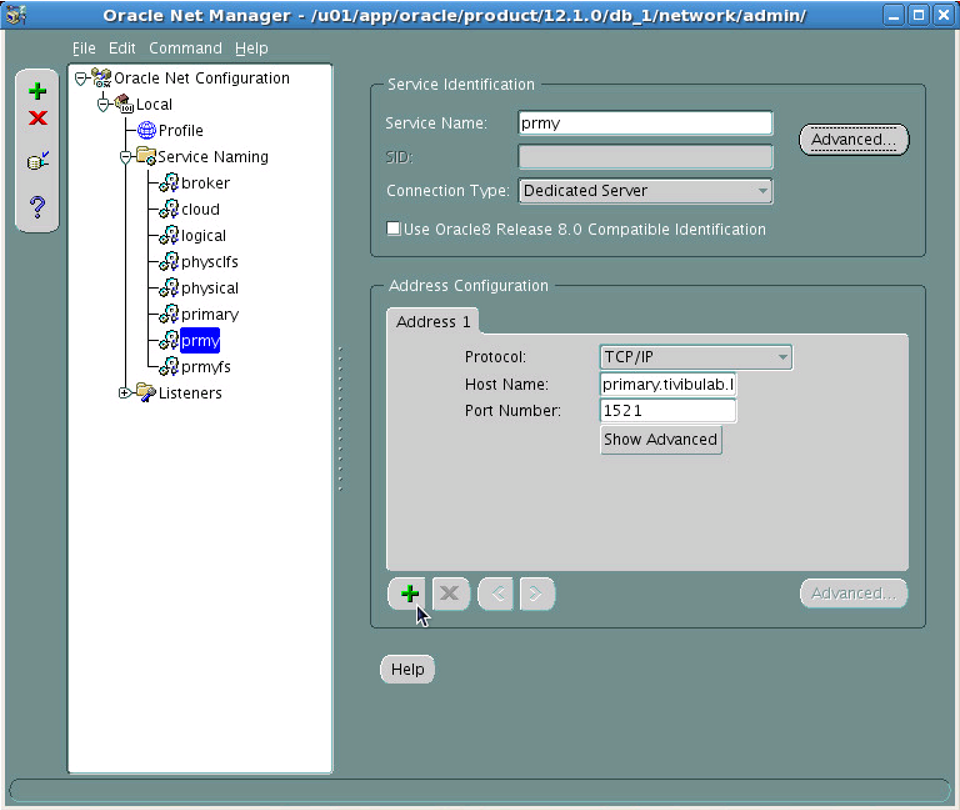
7. Services are added to the TNSNAMES.ORA file that will enable Clients to automatically connect to Standby when Physical Standby and Primary cannot be accessed. We use NETMGR for this.
a. By connecting to the server from the terminal, switch to the Oracle user and run netmgr.
b. In the window that opens, with the Service Naming tab active, click the Create button with the “+” sign.
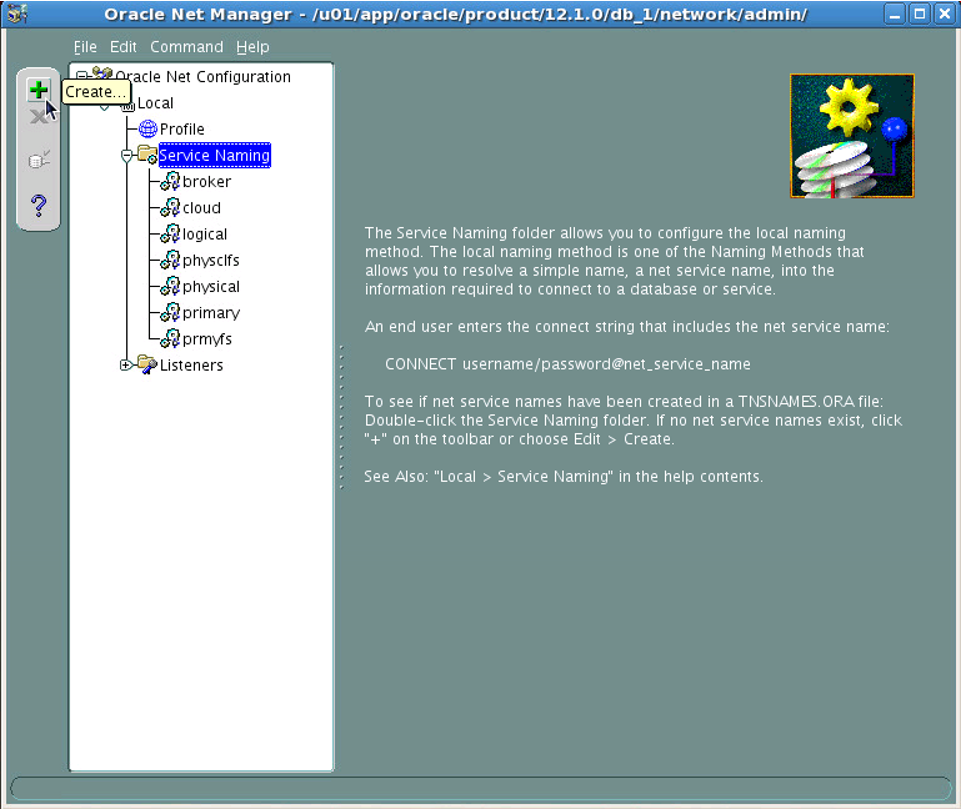
In our configuration, the Service Naming field will not be that much service. There will be only 1 service. It seems too much here because it was made for testing purposes.
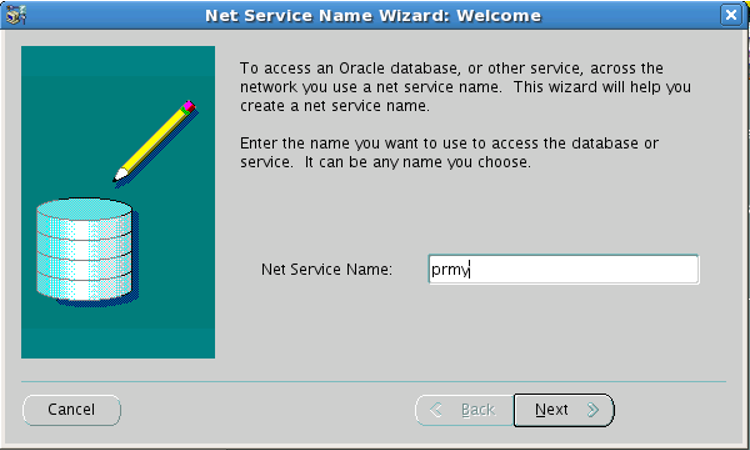
c. We write “standby” in the Net Service Naming field.
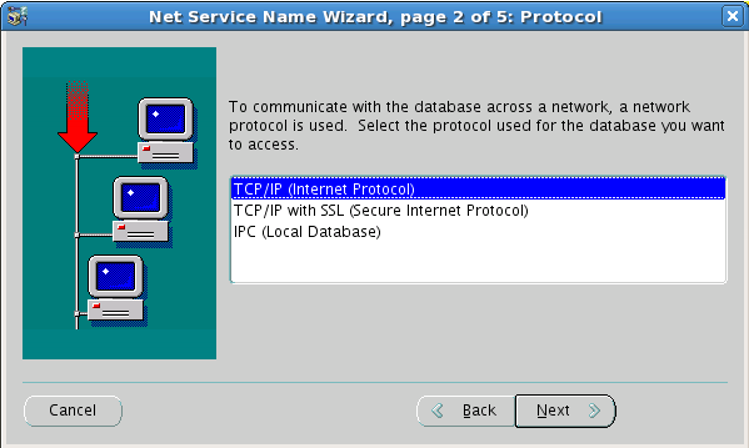
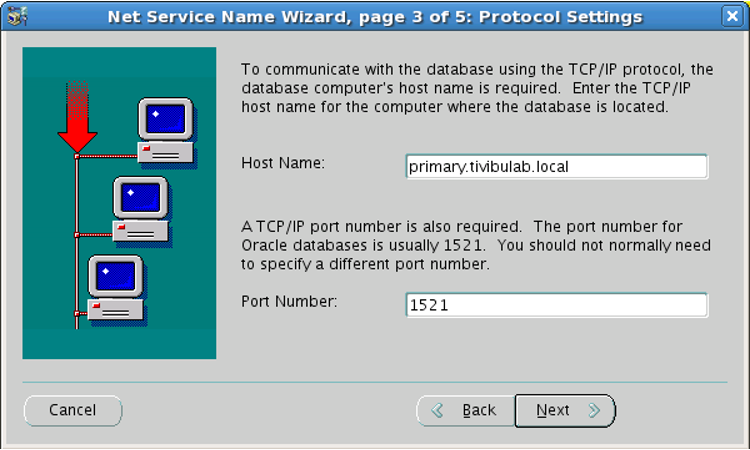
ç. We choose “TCP/IP” as the network protocol.
d. As Hostname, we write “prod.tivibulab.local”, which is the Hostname of the Primary database, and “1521” as the Port.
The hostname is learned as follows.
1 2 | [oracle@prod admin]$ hostname prod.tivibulab.local |

e. Select “standby” as Service Name and “Dedicated Server” as Connection Type.

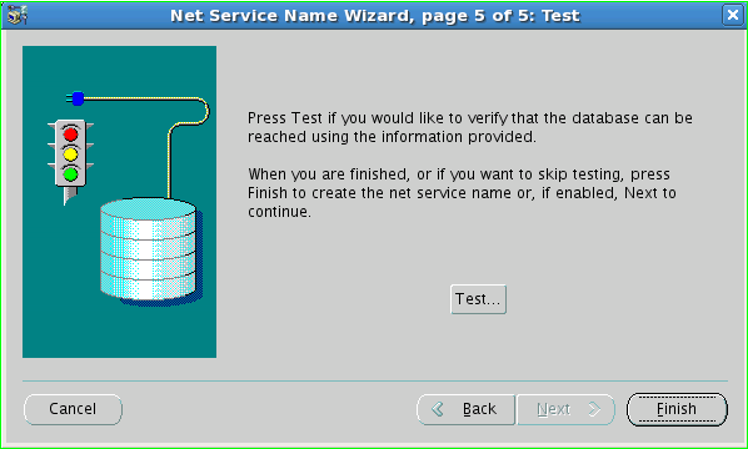
f. With Finish, we complete the service creation process
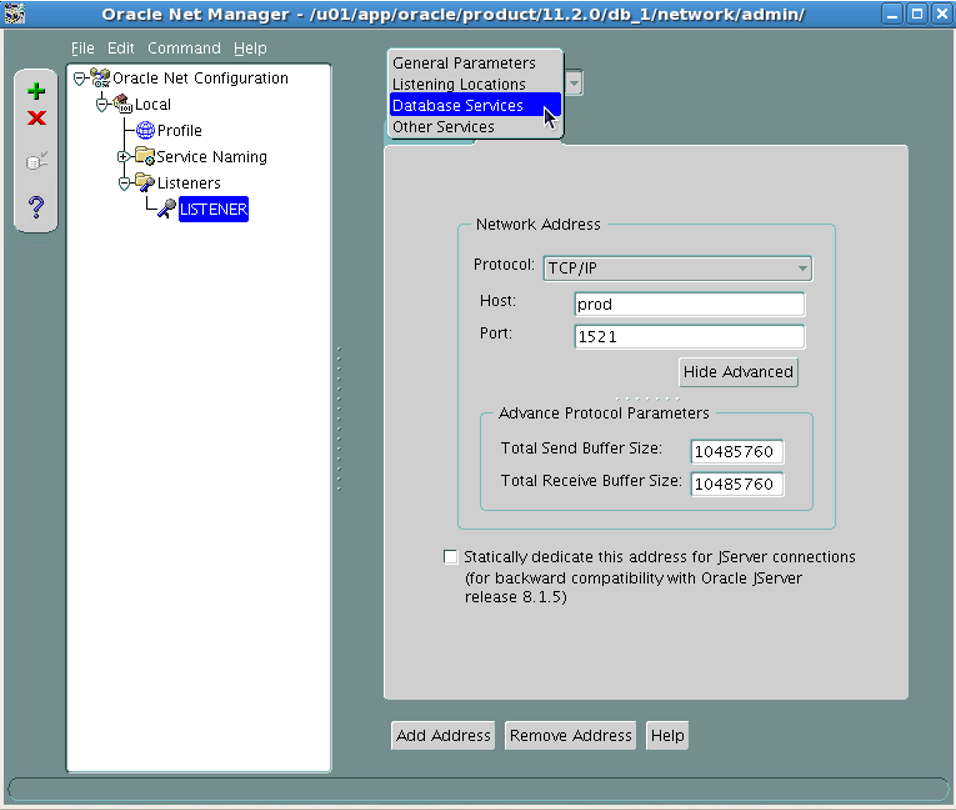
g. The service is configured. Click on the Advanced button.

ğ. We write “32767” in the Session Data Unit field. This value increases the network throughput. Normally, this value is 64KB for 12cR1, but we enter 32767 because NETMGR does not support this value. It will then be edited manually.
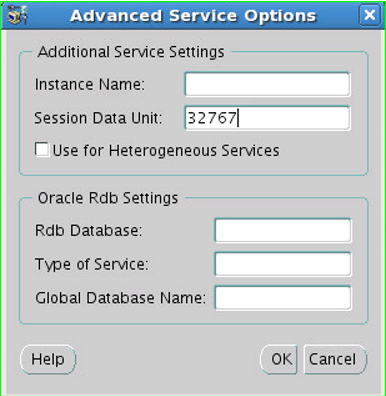
h. Send and Receive Buffer Sizes are set for the network throughput. We make this adjustment accordingly.
1 | TCP Socket Buffer size=BDP*3=network bandwidth*latency*3 |
This value is compared to 10 MB. Whichever is greater is entered.
Let’s calculate.
Network Bandwidth= 1 Gbit/s
Latency=0.288 ms [This value can be seen by pinging the Primary Far SYNC instance, where it sends the Redos from the Primary]
1 2 3 4 5 6 7 8 9 10 11 12 | [root@primary ~]# ping 172.20.42.62 PING 172.20.42.62 (172.20.42.62) 56(84) bytes of data. 64 bytes from 172.20.42.62: icmp_seq=1 ttl=64 time=0.339 ms 64 bytes from 172.20.42.62: icmp_seq=2 ttl=64 time=0.285 ms 64 bytes from 172.20.42.62: icmp_seq=3 ttl=64 time=0.301 ms 64 bytes from 172.20.42.62: icmp_seq=4 ttl=64 time=0.297 ms 64 bytes from 172.20.42.62: icmp_seq=5 ttl=64 time=0.294 ms 64 bytes from 172.20.42.62: icmp_seq=6 ttl=64 time=0.217 ms --- 172.20.42.62 ping statistics --- 6 packets transmitted, 6 received, 0% packet loss, time 5001ms rtt min/avg/max/mdev = 0.217/0.288/0.339/0.042 ms |
Therefore, the value of 10MB=10*1024*1024=10485760 bytes is written to the “Show Advanced” section of each 2 Adress Configuration section.

In our configuration, there will be only one Address in the “Address Configuration” field. Here, there are 2 for testing purposes.
ı. We write “prmy” in the Net Service Naming field.

i. Settings are saved by clicking “Save” in the “File” section.
j.We choose “TCP/IP” as the network protocol.

k. As Hostname, we write “prod.tivibulab.local”, which is the Hostname of the Primary database, and “1521” as the Port.
l. We choose “prmy” as Service Name and “Dedicated Server” as Connection Type.
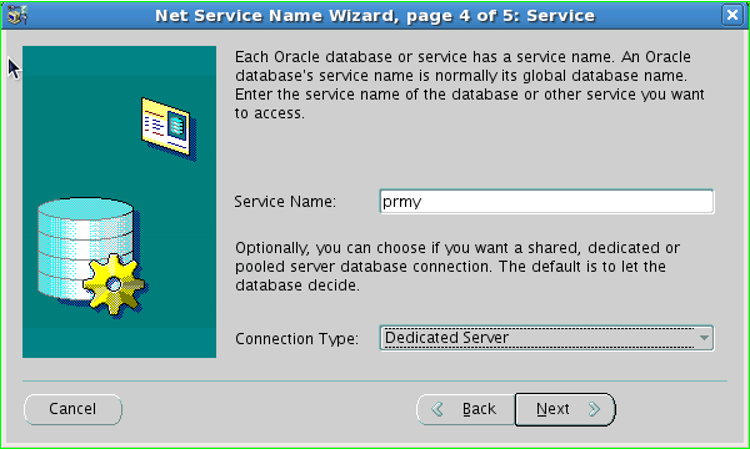
m. With Finish, we complete the service creation process.

n. The service is configured. Click on the Advanced button.
o. We write “32767” in the Session Data Unit field. This value increases the network throughput. Normally, this value is 64KB recommended for 12cR1, but 32767 is entered because NETMGR does not support this value. It will then be edited manually.

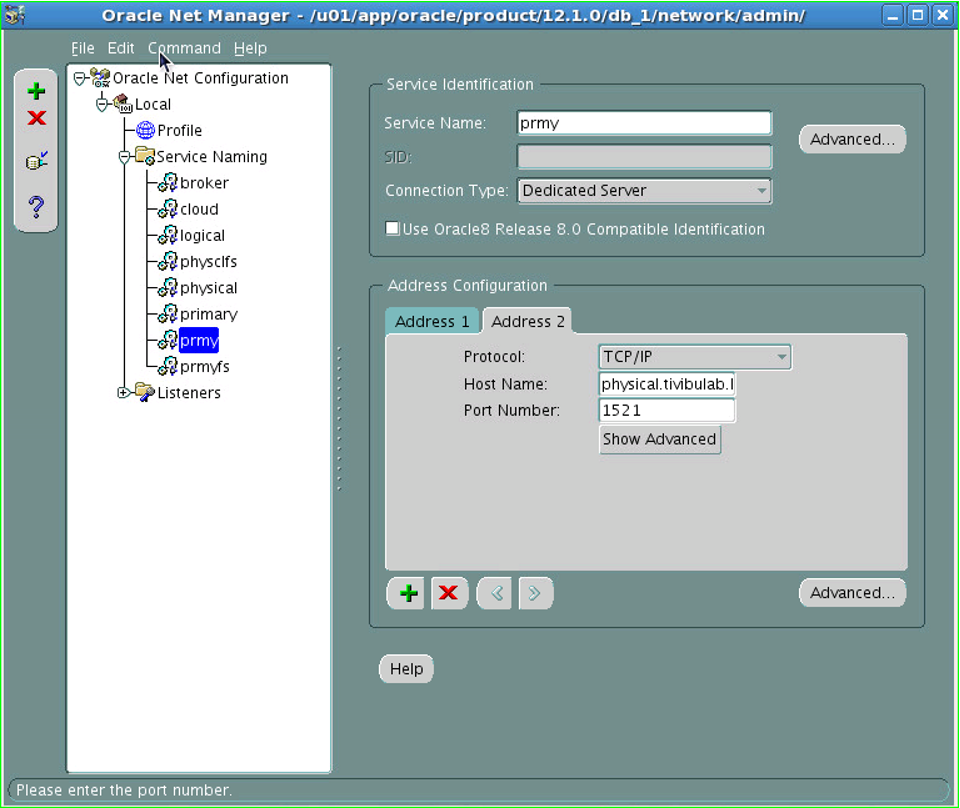
ö.The database that will be primary in the role change is added to the Address Configuration field. We do this with the + sign.
p. As the hostname, we write the Target Standby database information of Switchover and Failover. We write “standby.tivibulab.local” as the Hostname and “1521” as the Port.
r. Send and Receive Buffer Sizes are set for the network throughput. We make this adjustment accordingly.
TCP Socket Buffer size=BDP*3=network bandwidth*latency*3
This value is compared to 10MB. Whichever is greater is entered.
Let’s calculate.
Network Bandwidth= 1 Gbit/s
Latency=0.288 ms [This value can be seen by pinging the Primary Far SYNC instance where it sends the Redos from the Primary]
1 2 3 4 5 6 7 8 9 10 11 12 | [root@primary ~]# ping 172.20.42.62 PING 172.20.42.62 (172.20.42.62) 56(84) bytes of data. 64 bytes from 172.20.42.62: icmp_seq=1 ttl=64 time=0.339 ms 64 bytes from 172.20.42.62: icmp_seq=2 ttl=64 time=0.285 ms 64 bytes from 172.20.42.62: icmp_seq=3 ttl=64 time=0.301 ms 64 bytes from 172.20.42.62: icmp_seq=4 ttl=64 time=0.297 ms 64 bytes from 172.20.42.62: icmp_seq=5 ttl=64 time=0.294 ms 64 bytes from 172.20.42.62: icmp_seq=6 ttl=64 time=0.217 ms --- 172.20.42.62 ping statistics --- 6 packets transmitted, 6 received, 0% packet loss, time 5001ms rtt min/avg/max/mdev = 0.217/0.288/0.339/0.042 ms |
TCP Socket Buffer size= 1,000,000* (1/8) * 0.288*(1/1000)s * 3 = 108 bytes
Therefore, we write the value of 10MB=10*1024*1024=10485760 bytes in the “Show Advanced” section of each 2 Adress Configuration section.

s. Similarly, the SDU_UNIT and SEND-RECV_BUF_SIZE parameters of the PROD service are edited.
ş. We save it by clicking “Save” in the “File” section of the settings.
t. We change the SDU value to “65535”. For this, open the TNSNAMES.ORA file with the vi text editor and run the following command.
1 | :%s/SDU = 32767/SDU = 65535/g |
u. We check whether the change is reflected in the TNSNAMES.ORA file.
1 2 3 4 5 6 7 8 9 10 11 12 13 14 15 16 17 18 19 20 21 22 23 24 25 26 27 28 29 30 31 32 33 34 35 36 37 38 39 40 | [oracle@prod admin]$ cat tnsnames.ora # tnsnames.ora Network Configuration File: /u01/app/oracle/product/11.2.0/db_1/network/admin/tnsnames.ora # Generated by Oracle configuration tools. PROD = (DESCRIPTION = (ADDRESS_LIST = (ADDRESS = (PROTOCOL = TCP)(HOST = prod.tivibulab.local)(PORT = 1521)(SEND_BUF_SIZE = 10485760)(RECV_BUF_SIZE = 10485760)) ) (SDU = 65535) (CONNECT_DATA = (SERVER = DEDICATED) (SERVICE_NAME = prod) ) ) PRMY = (DESCRIPTION = (ADDRESS_LIST = (ADDRESS = (PROTOCOL = TCP)(HOST = prod.tivibulab.local)(PORT = 1521)(SEND_BUF_SIZE = 10485760)(RECV_BUF_SIZE = 10485760)) (ADDRESS = (PROTOCOL = TCP)(HOST = standby.tivibulab.local)(PORT = 1521)(SEND_BUF_SIZE = 10485760)(RECV_BUF_SIZE = 10485760)) ) (SDU = 65535) (CONNECT_DATA = (SERVER = DEDICATED) (SERVICE_NAME = prmy) ) ) STANDBY = (DESCRIPTION = (ADDRESS_LIST = (ADDRESS = (PROTOCOL = TCP)(HOST = standby.tivibulab.local)(PORT = 1521)(SEND_BUF_SIZE = 10485760)(RECV_BUF_SIZE = 10485760)) ) (SDU = 65535) (CONNECT_DATA = (SERVER = DEDICATED) (SERVICE_NAME = standby) ) ) |
8. Copy the TNSNAMES.ORA file to the Standby database.
1 2 3 4 5 6 7 | [oracle@prod admin]$ scp tnsnames.ora standby:/u01/app/oracle/product/11.2.0/db_1/network/admin/tnsnames.ora The authenticity of host 'standby (172.20.42.67)' can't be established. RSA key fingerprint is d5:8d:60:b8:52:55:f5:01:a4:fb:06:05:45:bd:55:a7. Are you sure you want to continue connecting (yes/no)? yes Warning: Permanently added 'standby,172.20.42.67' (RSA) to the list of known hosts. oracle@standby's password: tnsnames.ora 100% 1140 1.1KB/s 00:00 |
9.we check if the file goes to the Standby database.
1 2 3 4 5 6 7 8 9 10 11 12 13 14 15 16 17 18 19 20 21 22 23 24 25 26 27 28 29 30 31 32 33 34 35 36 37 38 39 40 | [oracle@standby admin]$ cat tnsnames.ora # tnsnames.ora Network Configuration File: /u01/app/oracle/product/11.2.0/db_1/network/admin/tnsnames.ora # Generated by Oracle configuration tools. PROD = (DESCRIPTION = (ADDRESS_LIST = (ADDRESS = (PROTOCOL = TCP)(HOST = prod.tivibulab.local)(PORT = 1521)(SEND_BUF_SIZE = 10485760)(RECV_BUF_SIZE = 10485760)) ) (SDU = 65535) (CONNECT_DATA = (SERVER = DEDICATED) (SERVICE_NAME = prod) ) ) PRMY = (DESCRIPTION = (ADDRESS_LIST = (ADDRESS = (PROTOCOL = TCP)(HOST = prod.tivibulab.local)(PORT = 1521)(SEND_BUF_SIZE = 10485760)(RECV_BUF_SIZE = 10485760)) (ADDRESS = (PROTOCOL = TCP)(HOST = standby.tivibulab.local)(PORT = 1521)(SEND_BUF_SIZE = 10485760)(RECV_BUF_SIZE = 10485760)) ) (SDU = 65535) (CONNECT_DATA = (SERVER = DEDICATED) (SERVICE_NAME = prmy) ) ) STANDBY = (DESCRIPTION = (ADDRESS_LIST = (ADDRESS = (PROTOCOL = TCP)(HOST = standby.tivibulab.local)(PORT = 1521)(SEND_BUF_SIZE = 10485760)(RECV_BUF_SIZE = 10485760)) ) (SDU = 65535) (CONNECT_DATA = (SERVER = DEDICATED) (SERVICE_NAME = standby) ) ) |
1. Copy the SQLNET.ORA file to the Standby database.
1 2 3 | [oracle@prod admin]$ scp sqlnet.ora standby:/u01/app/oracle/product/11.2.0/db_1/network/admin/sqlnet.ora oracle@standby's password: sqlnet.ora 100% 229 0.2KB/s 00:00 |
2. We check if the file is in the Standby database.
1 2 3 4 5 6 7 | [oracle@standby admin]$ cat sqlnet.ora # sqlnet.ora Network Configuration File: /u01/app/oracle/product/11.2.0/db_1/network/admin/sqlnet.ora # Generated by Oracle configuration tools. NAMES.DIRECTORY_PATH= (TNSNAMES, HOSTNAME, EZCONNECT) ADR_BASE = /u01/app/oracle |
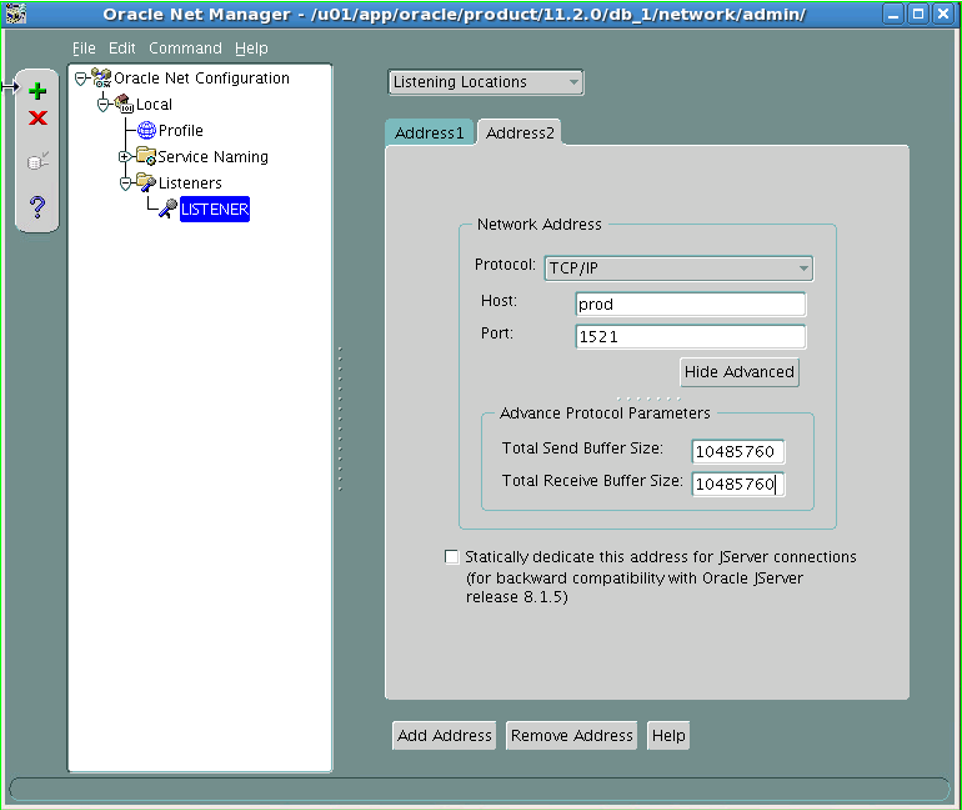
3. Edit the LISTENER.ORA file.
a. We set it for the Default LISTENER network throughput. We edit the SEND and RECV_BUFSIZE as stated above.
b. The change is saved.
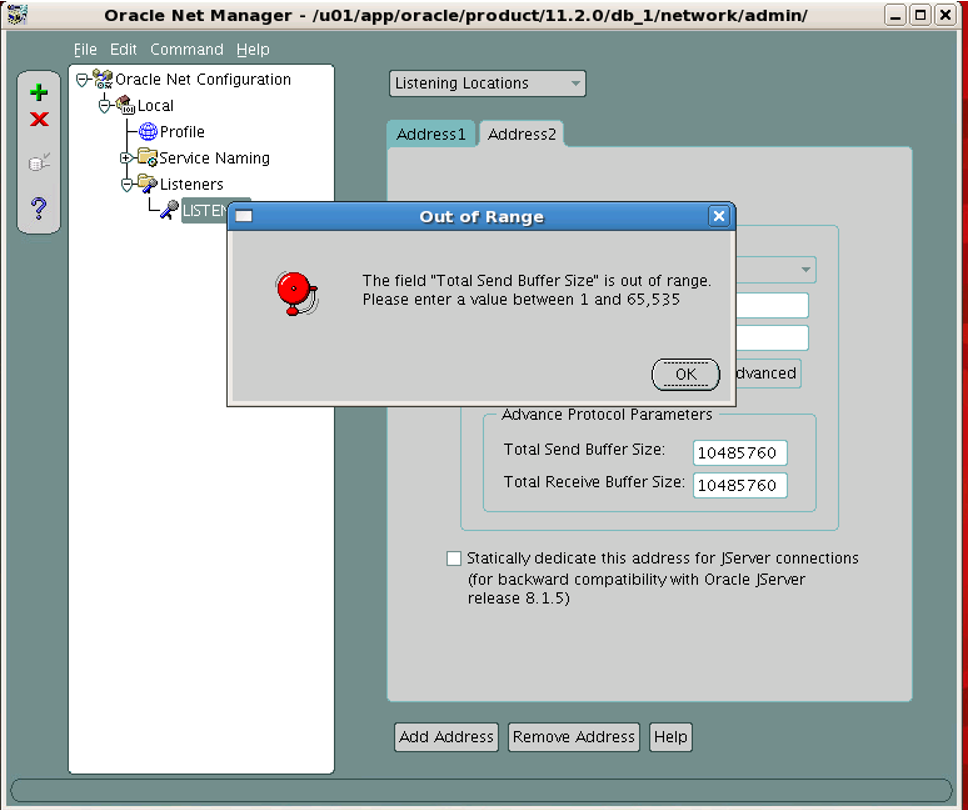
The reason for this error is that this value cannot be set as 10485760 in NETMGR. Therefore, the value 65535 is set. Then we open the file from the vi text editor and edit it.
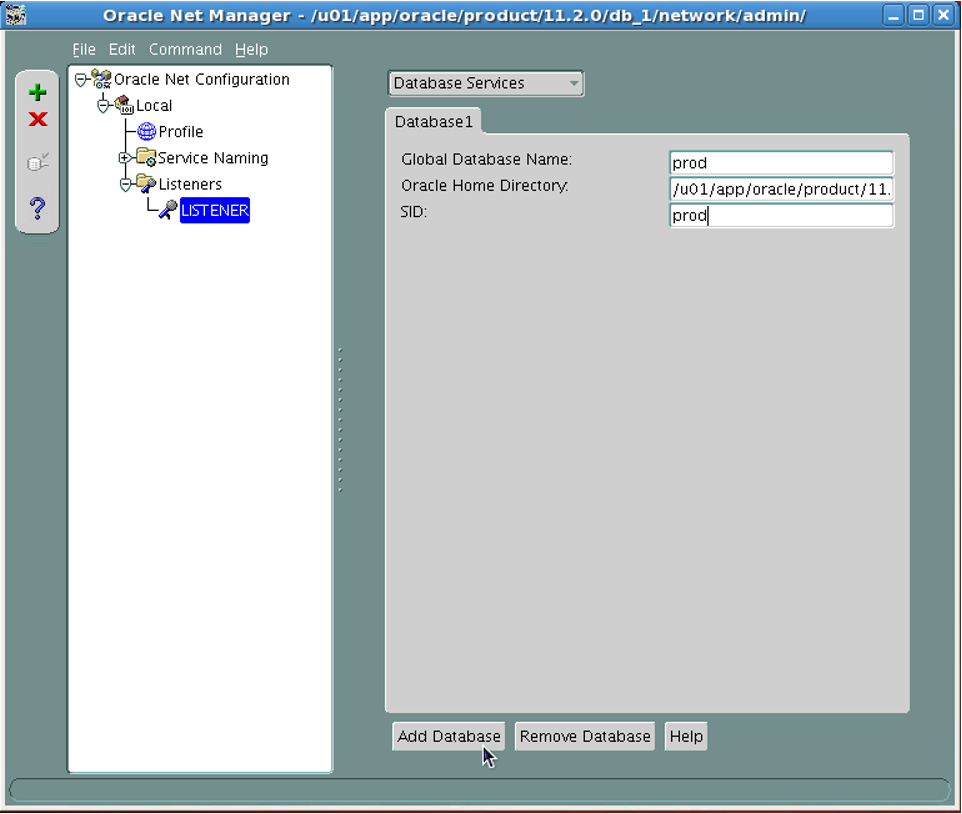
c. Click on “Database Services” and add Static listener. This is because RMAN and Broker can open the database when the database is closed.
ç. As the first service, we add the Primary database.
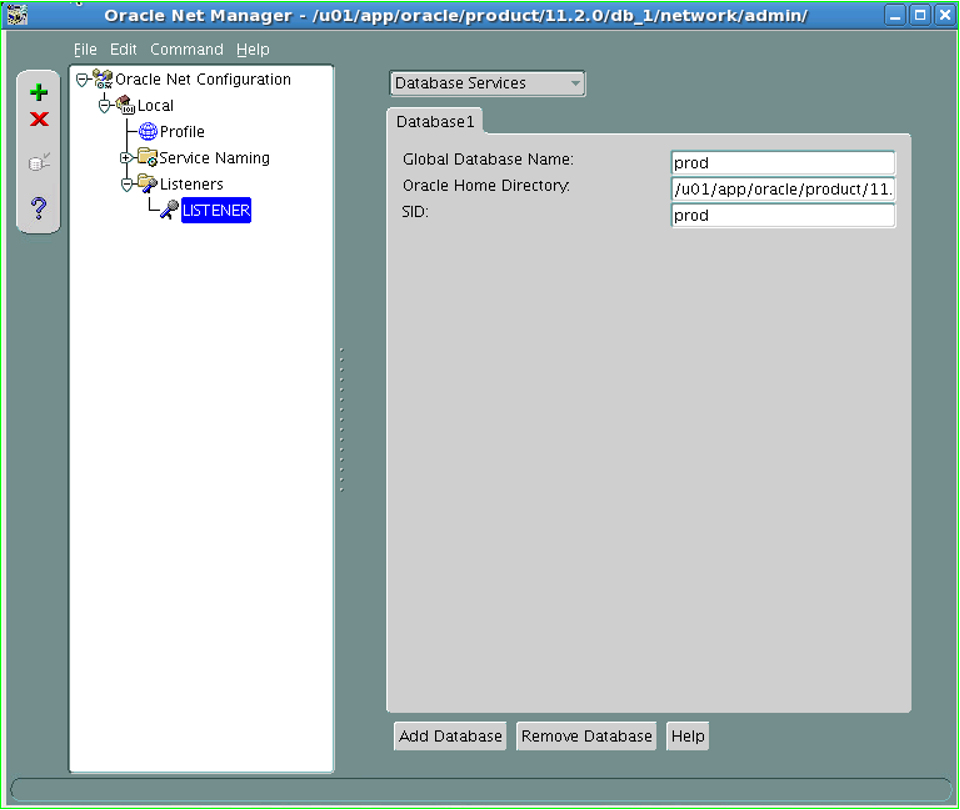
d. We add the second database from the “Add Database” tab.
e.The second database’s name has a format. This format is <instance_name>_DGMGRL_<domain_name>. It is added in accordance with this format.
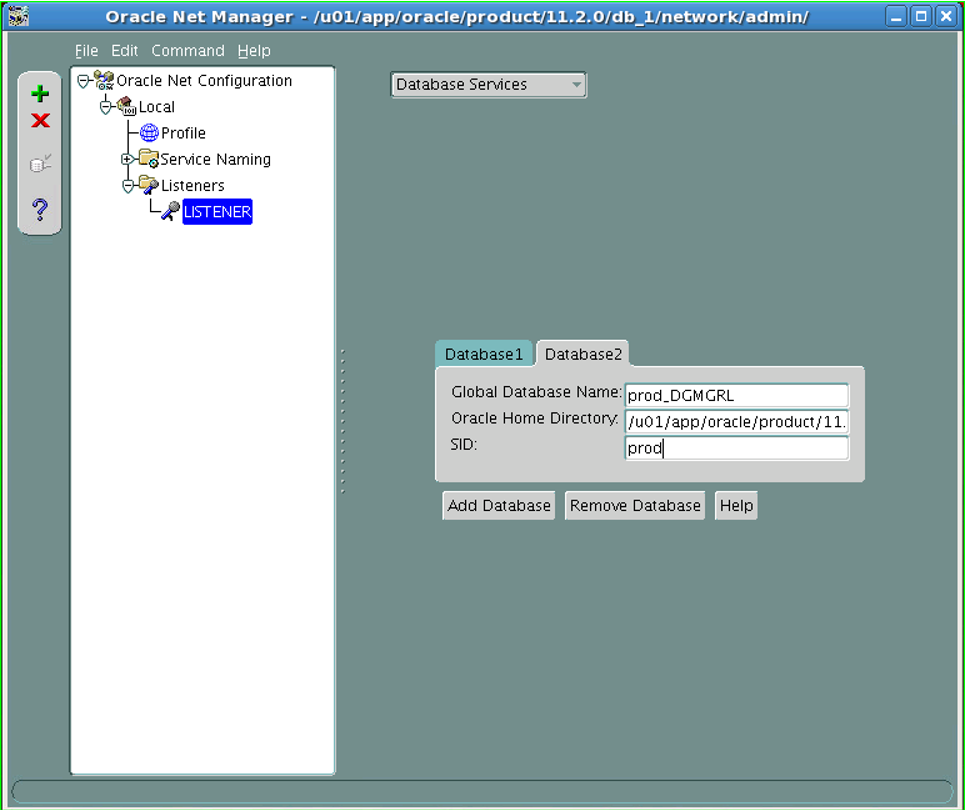
f. Changes made are saved in the “File” section.
g. We check the correctness of the changes in the LISTENER.ORA file.
1 2 3 4 5 6 7 8 9 10 11 12 13 14 15 16 17 18 19 20 21 22 23 24 25 26 27 28 29 | [oracle@prod admin]$ cat listener.ora # listener.ora Network Configuration File: /u01/app/oracle/product/11.2.0/db_1/network/admin/listener.ora # Generated by Oracle configuration tools. SID_LIST_LISTENER = (SID_LIST = (SID_DESC = (GLOBAL_DBNAME = prod) (ORACLE_HOME = /u01/app/oracle/product/11.2.0/db_1) (SID_NAME = prod) ) (SID_DESC = (GLOBAL_DBNAME = prod_DGMGRL) (ORACLE_HOME = /u01/app/oracle/product/11.2.0/db_1) (SID_NAME = prod) ) ) LISTENER = (DESCRIPTION_LIST = (DESCRIPTION = (ADDRESS = (PROTOCOL = IPC)(KEY = EXTPROC1521)) ) (DESCRIPTION = (ADDRESS = (PROTOCOL = TCP)(HOST = prod)(PORT = 1521)(SEND_BUF_SIZE = 65535)(RECV_BUF_SIZE = 65535)) ) ) ADR_BASE_LISTENER = /u01/app/oracle |
ğ.We optimize the BUF_SIZE parameters. We open the file with vi and make the necessary adjustments.
1 | :%s/BUF_SIZE = 65535/BUF_SIZE = 10485760/g |
h.We’ll check if there’s any change.
1 2 3 4 5 6 7 8 9 10 11 12 13 14 15 16 17 18 19 20 21 22 23 24 25 26 27 28 29 | [oracle@prod admin]$ cat listener.ora # listener.ora Network Configuration File: /u01/app/oracle/product/11.2.0/db_1/network/admin/listener.ora # Generated by Oracle configuration tools. SID_LIST_LISTENER = (SID_LIST = (SID_DESC = (GLOBAL_DBNAME = prod) (ORACLE_HOME = /u01/app/oracle/product/11.2.0/db_1) (SID_NAME = prod) ) (SID_DESC = (GLOBAL_DBNAME = prod_DGMGRL) (ORACLE_HOME = /u01/app/oracle/product/11.2.0/db_1) (SID_NAME = prod) ) ) LISTENER = (DESCRIPTION_LIST = (DESCRIPTION = (ADDRESS = (PROTOCOL = IPC)(KEY = EXTPROC1521)) ) (DESCRIPTION = (ADDRESS = (PROTOCOL = TCP)(HOST = prod)(PORT = 1521)(SEND_BUF_SIZE = 10485760)(RECV_BUF_SIZE = 10485760)) ) ) ADR_BASE_LISTENER = /u01/app/oracle |
I. By RELOAD the Listener, we ensure the permanence of the changes.
1 2 3 4 5 6 7 8 | [oracle@prod admin]$ lsnrctl reload LSNRCTL for Linux: Version 11.2.0.4.0 - Production on 17-FEB-2017 08:03:29 Copyright (c) 1991, 2013, Oracle. All rights reserved. Connecting to (DESCRIPTION=(ADDRESS=(PROTOCOL=TCP)(HOST=prod.tivibulab.local)(PORT=1521)(SEND_BUF_SIZE=65535)(RECV_BUF_SIZE=65535))) The command completed successfully |
i. We check the status of the Listener to see if the services have started.
1 2 3 4 5 6 7 8 9 10 11 12 13 14 15 16 17 18 19 20 21 22 23 24 25 26 27 28 29 30 | [oracle@prod admin]$ lsnrctl status LSNRCTL for Linux: Version 11.2.0.4.0 - Production on 17-FEB-2017 07:48:48 Copyright (c) 1991, 2013, Oracle. All rights reserved. Connecting to (DESCRIPTION=(ADDRESS=(PROTOCOL=IPC)(KEY=EXTPROC1521))) STATUS of the LISTENER ------------------------ Alias LISTENER Version TNSLSNR for Linux: Version 11.2.0.4.0 - Production Start Date 17-FEB-2017 07:25:12 Uptime 0 days 0 hr. 23 min. 35 sec Trace Level off Security ON: Local OS Authentication SNMP OFF Listener Parameter File /u01/app/oracle/product/11.2.0/db_1/network/admin/listener.ora Listener Log File /u01/app/oracle/diag/tnslsnr/prod/listener/alert/log.xml Listening Endpoints Summary... (DESCRIPTION=(ADDRESS=(PROTOCOL=ipc)(KEY=EXTPROC1521))) (DESCRIPTION=(ADDRESS=(PROTOCOL=tcp)(HOST=prod.tivibulab.local)(PORT=1521))) Services Summary... Service "prod" has 2 instance(s). Instance "prod", status UNKNOWN, has 1 handler(s) for this service... Instance "prod", status READY, has 1 handler(s) for this service... Service "prodXDB" has 1 instance(s). Instance "prod", status READY, has 1 handler(s) for this service... Service "prod_DGMGRL" has 1 instance(s). Instance "prod", status UNKNOWN, has 1 handler(s) for this service... The command completed successfully |
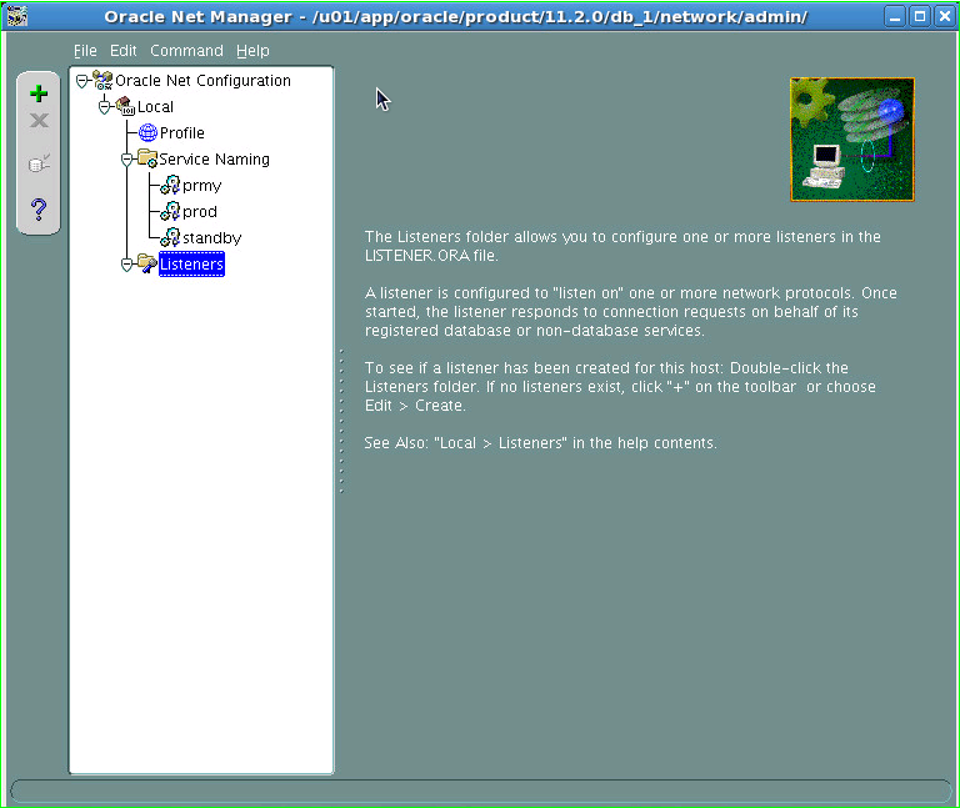
j. Similar arrangements are made in the standby database. But there is no LISTENER.ORA because there is no database installed in Standby yet. We can also see this when checked from NETMGR.
k.A listener named LISTENER is created.
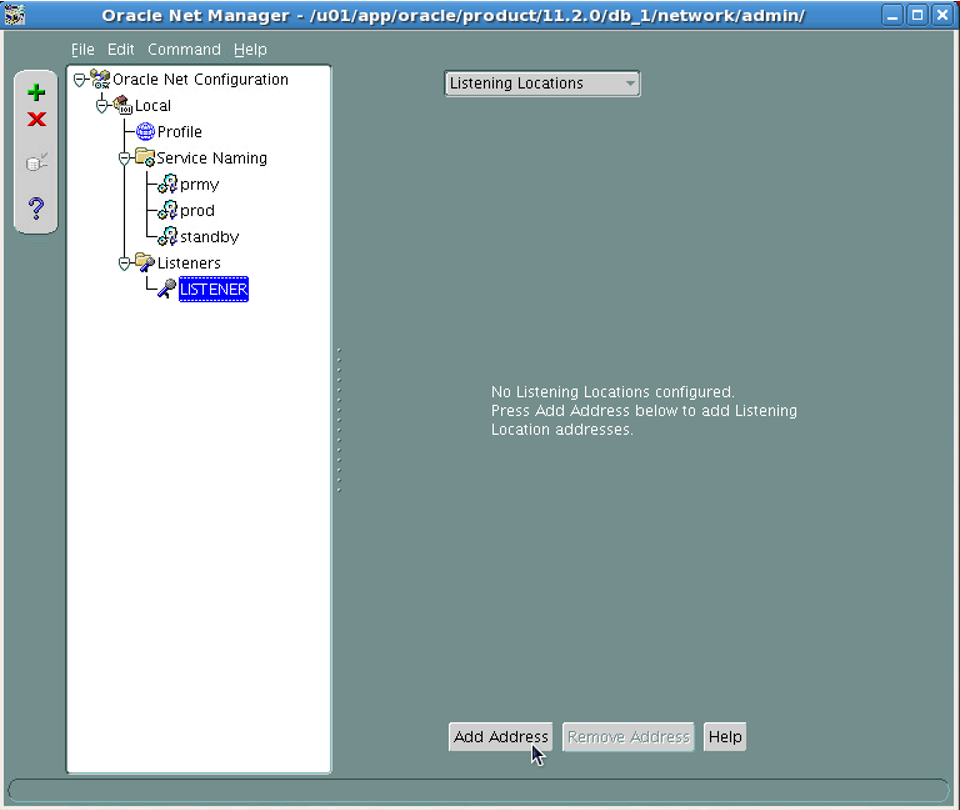
l. After the Listener is created, we initialize the Listener for the persistence of the changes. The RELOAD command will give an error because there is no LISTENER running here, so it cannot be STOPed. Therefore, the START command is executed.
1 2 3 4 5 6 7 8 9 10 11 12 13 14 15 16 17 18 19 20 21 22 23 24 25 26 27 28 29 30 31 32 33 34 35 36 | [oracle@standby admin]$ lsnrctl LSNRCTL for Linux: Version 11.2.0.4.0 - Production on 17-FEB-2017 07:54:49 Copyright (c) 1991, 2013, Oracle. All rights reserved. Welcome to LSNRCTL, type "help" for information. LSNRCTL> start Starting /u01/app/oracle/product/11.2.0/db_1/bin/tnslsnr: please wait... TNSLSNR for Linux: Version 11.2.0.4.0 - Production System parameter file is /u01/app/oracle/product/11.2.0/db_1/network/admin/listener.ora Log messages written to /u01/app/oracle/diag/tnslsnr/standby/listener/alert/log.xml Listening on: (DESCRIPTION=(ADDRESS=(PROTOCOL=tcp)(HOST=standby.tivibulab.local)(PORT=1521))) Connecting to (DESCRIPTION=(ADDRESS=(PROTOCOL=TCP)(HOST=standby.tivibulab.local)(PORT=1521)(SEND_BUF_SIZE=65535)(RECV_BUF_SIZE=65535))) STATUS of the LISTENER ------------------------ Alias LISTENER Version TNSLSNR for Linux: Version 11.2.0.4.0 - Production Start Date 17-FEB-2017 07:54:52 Uptime 0 days 0 hr. 0 min. 0 sec Trace Level off Security ON: Local OS Authentication SNMP OFF Listener Parameter File /u01/app/oracle/product/11.2.0/db_1/network/admin/listener.ora Listener Log File /u01/app/oracle/diag/tnslsnr/standby/listener/alert/log.xml Listening Endpoints Summary... (DESCRIPTION=(ADDRESS=(PROTOCOL=tcp)(HOST=standby.tivibulab.local)(PORT=1521))) Services Summary... Service "standby" has 1 instance(s). Instance "standby", status UNKNOWN, has 1 handler(s) for this service... Service "standby_DGMGRL" has 1 instance(s). Instance "standby", status UNKNOWN, has 1 handler(s) for this service... The command completed successfully |
4. Since I don’t want the database to start automatically when the server with the standby database reboots, I make the necessary adjustments in /etc/oratab.
1 | [oracle@standby admin]$ echo standby:/u01/app/oracle/product/11.2.0/db_1:N >> /etc/oratab |
5. We check if the change is reflected.
1 2 3 4 5 6 7 8 9 10 11 12 13 14 15 16 17 18 19 20 21 22 23 24 | [oracle@standby admin]$ cat /etc/oratab # # This file is used by ORACLE utilities. It is created by root.sh # and updated by either Database Configuration Assistant while creating # a database or ASM Configuration Assistant while creating ASM instance. # A colon, ':', is used as the field terminator. A new line terminates # the entry. Lines beginning with a pound sign, '#', are comments. # # Entries are of the form: # $ORACLE_SID:$ORACLE_HOME:<N|Y>: # # The first and second fields are the system identifier and home # directory of the database respectively. The third filed indicates # to the dbstart utility that the database should , "Y", or should not, # "N", be brought up at system boot time. # # Multiple entries with the same $ORACLE_SID are not allowed. # # standby:/u01/app/oracle/product/11.2.0/db_1:N |
6. It is ensured that everything is logged in the primary database.
1 2 3 4 5 6 7 8 9 10 11 12 13 14 15 | Prod] SQL> select force_logging from v$database; FOR --- NO [Prod] SQL> alter database force logging; Database altered. [Prod] SQL> select force_logging from v$database; FOR --- YES |
7. We learn the number of Online Redo Logs in the primary database.
1 2 3 4 5 6 7 | [Prod] SQL> select group#,bytes from v$log; GROUP# BYTES ---------- ---------- 1 52428800 2 52428800 3 52428800 |
8. Standby Log Files are created in the primary database. The reason why this was created in Primary is to be ready before the role change processes.
1 2 3 4 5 6 7 8 9 10 11 12 13 14 15 | [Prod] SQL> alter database add standby logfile ('/u01/app/oracle/oradata/prod/stdbyredo01.log') size 50M; Database altered. [Prod] SQL> alter database add standby logfile ('/u01/app/oracle/oradata/prod/stdbyredo02.log') size 50M; Database altered. [Prod] SQL> alter database add standby logfile ('/u01/app/oracle/oradata/prod/stdbyredo03.log') size 50M; Database altered. [Prod] SQL> alter database add standby logfile ('/u01/app/oracle/oradata/prod/stdbyredo04.log') size 50M; Database altered. |
The reason for creating one more than the number of Online Redo Logs is that the Log Switch process in the Primary database is not kept waiting due to the slowness that will occur due to Network or other reasons, because the Redo’s go late to the Standby side.
9. We check whether the Standby Log Files are created.
1 2 3 4 5 6 7 8 | [Prod] SQL> select group#,bytes from v$standby_log; GROUP# BYTES ---------- ---------- 4 52428800 5 52428800 6 52428800 7 52428800 |
10. We set where the archives to be created in the primary database will be saved.
1 2 3 | [Prod] SQL> alter system set log_archive_dest_1='location=USE_DB_RECOVERY_FILE_DEST valid_for=(ALL_LOGFILES,ALL_ROLES) db_unique_name=prod' scope=both; System altered. |
11. We set the parameter to send the archives to the specified location. Although this parameter is already ENABLE in Default, we set it again for discipline.
1 2 3 | [Prod] SQL> alter system set log_archive_dest_state_1='enable' scope=both; System altered. |
12.We set the number of archive processes.
1 2 3 | [Prod] SQL> alter system set log_archive_max_processes=8 scope=both; System altered. |
13. We specify which databases the Data Guard Environment will consist of.
1 2 3 | [Prod] SQL> alter system set log_archive_config='dg_config=(prod,standby)' scope=both; System altered. |
14. We ensure that datafiles and online redo logs to be added to the Primary are automatically added to the Standby side.
1 2 3 | [Prod] SQL> alter system set standby_file_management='auto' scope=both; System altered. |
15. Necessary directories are created on the standby side.
1 2 3 | [oracle@standby ~]$ mkdir -p /u01/app/oracle/admin/standby/adump [oracle@standby ~]$ mkdir -p /u01/app/oracle/oradata/standby [oracle@standby ~]$ mkdir -p /u01/app/oracle/fast_recovery_area/standby |
16. In order for the standby database to be duplicated with RMAN, it must be in the NOMOUNT step.
2 parameters are required to bring a database to NOMOUNT. One of them is DB_NAME and the other is DB_DOMAIN.
With a PFILE with these parameters, the database can be brought to NOMOUNT. Other parameters take their default values in memory.
1 | [oracle@standby ~]$ echo 'DB_NAME=standby' > /u01/app/oracle/product/11.2.0/db_1/dbs/initstandby.ora |
We do not use the DB_DOMAIN parameter. If we were to use it, we would run the following command.
1 | echo 'DB_DOMAIN=example.com' >> /u01/app/oracle/product/11.2.0/db_1/dbs/initstandby.ora |
17. Copy the Primary’s Password file to the Standby side.
1 2 3 4 | [oracle@prod admin]$ cd /u01/app/oracle/product/11.2.0/db_1/dbs/ [oracle@prod dbs]$ scp orapwprod standby:/u01/app/oracle/product/11.2.0/db_1/dbs/orapwstandby oracle@standby's password: orapwprod 100% 1536 1.5KB/s 00:00 |
18. We NOMOUNT by connecting to the standby database.
1 2 3 4 5 6 7 8 9 10 11 12 13 14 15 16 | [oracle@standby dbs]$ sqlplus / as sysdba SQL*Plus: Release 11.2.0.4.0 Production on Fri Feb 17 08:50:14 2017 Copyright (c) 1982, 2013, Oracle. All rights reserved. Connected to an idle instance. [Standby] SQL> startup nomount; ORACLE instance started. Total System Global Area 263090176 bytes Fixed Size 2252256 bytes Variable Size 205521440 bytes Database Buffers 50331648 bytes Redo Buffers 4984832 bytes |
19. On the standby side, we connect to RMAN as TARGET as Primary database and as Standby database as AUXILIARY.
1 2 3 4 5 6 7 8 | [oracle@standby dbs]$ rman target sys/Passw0rd4@prod auxiliary sys/Passw0rd4@standby Recovery Manager: Release 11.2.0.4.0 - Production on Fri Feb 17 08:51:26 2017 Copyright (c) 1982, 2011, Oracle and/or its affiliates. All rights reserved. connected to target database: PROD (DBID=347976743) connected to auxiliary database: STANDBY (not mounted) |
20. Primary database is DUPLICATED
1 2 3 4 5 6 7 8 9 10 11 12 13 14 15 16 17 18 19 20 21 22 23 24 25 26 27 28 29 30 31 32 33 34 35 36 37 38 39 40 41 42 43 44 45 46 47 48 49 50 51 52 53 54 55 56 57 58 59 60 61 62 63 64 65 66 67 68 69 70 71 72 73 74 75 76 77 78 79 80 81 82 83 84 85 86 87 88 89 90 91 92 93 94 95 96 97 98 99 100 101 102 103 104 105 106 107 108 109 110 111 112 113 114 115 116 117 118 119 120 121 122 123 124 125 126 127 128 129 130 131 132 133 134 135 136 137 138 139 140 141 142 143 144 145 146 147 148 149 150 151 152 153 154 155 156 157 158 159 160 161 162 163 164 165 166 167 168 169 170 171 172 173 174 175 176 177 178 179 180 181 182 183 184 185 186 187 188 189 190 191 192 193 194 195 196 197 198 199 200 | RMAN> run { 2> allocate channel prmy1 type disk; 3> allocate auxiliary channel stby1 type disk; 4> duplicate target database for standby from active database 5> spfile 6> parameter_value_convert 'prod','standby' 7> set db_unique_name='standby' 8> set db_file_name_convert='prod','standby' 9> set log_file_name_convert='prod','standby' 10> set fal_server='prod' 11> nofilenamecheck; 12> allocate auxiliary channel stby type disk; 13> sql channel stby "alter database recover managed standby database disconnect"; } using target database control file instead of recovery catalog allocated channel: prmy1 channel prmy1: SID=73 device type=DISK allocated channel: stby1 channel stby1: SID=429 device type=DISK Starting Duplicate Db at 17-FEB-17 contents of Memory Script: { backup as copy reuse targetfile '/u01/app/oracle/product/11.2.0/db_1/dbs/orapwprod' auxiliary format '/u01/app/oracle/product/11.2.0/db_1/dbs/orapwstandby' targetfile '/u01/app/oracle/product/11.2.0/db_1/dbs/spfileprod.ora' auxiliary format '/u01/app/oracle/product/11.2.0/db_1/dbs/spfilestandby.ora' ; sql clone "alter system set spfile= ''/u01/app/oracle/product/11.2.0/db_1/dbs/spfilestandby.ora''"; } executing Memory Script Starting backup at 17-FEB-17 Finished backup at 17-FEB-17 sql statement: alter system set spfile= ''/u01/app/oracle/product/11.2.0/db_1/dbs/spfilestandby.ora'' contents of Memory Script: { sql clone "alter system set audit_file_dest = ''/u01/app/oracle/admin/standby/adump'' comment= '''' scope=spfile"; sql clone "alter system set control_files = ''/u01/app/oracle/oradata/standby/control01.ctl'', ''/u01/app/oracle/fast_recovery_area/standby/control02.ctl'' comment= '''' scope=spfile"; sql clone "alter system set dispatchers = ''(PROTOCOL=TCP) (SERVICE=standbyXDB)'' comment= '''' scope=spfile"; sql clone "alter system set log_archive_dest_1 = ''location=USE_DB_RECOVERY_FILE_DEST valid_for=(ALL_LOGFILES,ALL_ROLES) db_unique_name=standby'' comment= '''' scope=spfile"; sql clone "alter system set db_unique_name = ''standby'' comment= '''' scope=spfile"; sql clone "alter system set db_file_name_convert = ''prod'', ''standby'' comment= '''' scope=spfile"; sql clone "alter system set log_file_name_convert = ''prod'', ''standby'' comment= '''' scope=spfile"; sql clone "alter system set fal_server = ''prod'' comment= '''' scope=spfile"; shutdown clone immediate; startup clone nomount; } executing Memory Script sql statement: alter system set audit_file_dest = ''/u01/app/oracle/admin/standby/adump'' comment= '''' scope=spfile sql statement: alter system set control_files = ''/u01/app/oracle/oradata/standby/control01.ctl'', ''/u01/app/oracle/fast_recovery_area/standby/control02.ctl'' comment= '''' scope=spfile sql statement: alter system set dispatchers = ''(PROTOCOL=TCP) (SERVICE=standbyXDB)'' comment= '''' scope=spfile sql statement: alter system set log_archive_dest_1 = ''location=USE_DB_RECOVERY_FILE_DEST valid_for=(ALL_LOGFILES,ALL_ROLES) db_unique_name=standby'' comment= '''' scope=spfile sql statement: alter system set db_unique_name = ''standby'' comment= '''' scope=spfile sql statement: alter system set db_file_name_convert = ''prod'', ''standby'' comment= '''' scope=spfile sql statement: alter system set log_file_name_convert = ''prod'', ''standby'' comment= '''' scope=spfile sql statement: alter system set fal_server = ''prod'' comment= '''' scope=spfile Oracle instance shut down connected to auxiliary database (not started) Oracle instance started Total System Global Area 3457368064 bytes Fixed Size 2258120 bytes Variable Size 771754808 bytes Database Buffers 2667577344 bytes Redo Buffers 15777792 bytes allocated channel: stby1 channel stby1: SID=63 device type=DISK contents of Memory Script: { backup as copy current controlfile for standby auxiliary format '/u01/app/oracle/oradata/standby/control01.ctl'; restore clone controlfile to '/u01/app/oracle/fast_recovery_area/standby/control02.ctl' from '/u01/app/oracle/oradata/standby/control01.ctl'; } executing Memory Script Starting backup at 17-FEB-17 channel prmy1: starting datafile copy copying standby control file output file name=/u01/app/oracle/product/11.2.0/db_1/dbs/snapcf_prod.f tag=TAG20170217T085345 RECID=2 STAMP=936176025 channel prmy1: datafile copy complete, elapsed time: 00:00:01 Finished backup at 17-FEB-17 Starting restore at 17-FEB-17 channel stby1: copied control file copy Finished restore at 17-FEB-17 contents of Memory Script: { sql clone 'alter database mount standby database'; } executing Memory Script sql statement: alter database mount standby database contents of Memory Script: { set newname for tempfile 1 to "/u01/app/oracle/oradata/standby/temp01.dbf"; switch clone tempfile all; set newname for datafile 1 to "/u01/app/oracle/oradata/standby/system01.dbf"; set newname for datafile 2 to "/u01/app/oracle/oradata/standby/sysaux01.dbf"; set newname for datafile 3 to "/u01/app/oracle/oradata/standby/undotbs01.dbf"; set newname for datafile 4 to "/u01/app/oracle/oradata/standby/users01.dbf"; set newname for datafile 5 to "/u01/app/oracle/oradata/standby/example01.dbf"; backup as copy reuse datafile 1 auxiliary format "/u01/app/oracle/oradata/standby/system01.dbf" datafile 2 auxiliary format "/u01/app/oracle/oradata/standby/sysaux01.dbf" datafile 3 auxiliary format "/u01/app/oracle/oradata/standby/undotbs01.dbf" datafile 4 auxiliary format "/u01/app/oracle/oradata/standby/users01.dbf" datafile 5 auxiliary format "/u01/app/oracle/oradata/standby/example01.dbf" ; sql 'alter system archive log current'; } executing Memory Script executing command: SET NEWNAME renamed tempfile 1 to /u01/app/oracle/oradata/standby/temp01.dbf in control file executing command: SET NEWNAME executing command: SET NEWNAME executing command: SET NEWNAME executing command: SET NEWNAME executing command: SET NEWNAME Starting backup at 17-FEB-17 channel prmy1: starting datafile copy RMAN-03009: failure of backup command on prmy1 channel at 02/17/2017 08:53:53 ORA-19602: cannot backup or copy active file in NOARCHIVELOG mode continuing other job steps, job failed will not be re-run channel prmy1: starting datafile copy RMAN-03009: failure of backup command on prmy1 channel at 02/17/2017 08:53:53 ORA-19602: cannot backup or copy active file in NOARCHIVELOG mode continuing other job steps, job failed will not be re-run channel prmy1: starting datafile copy RMAN-03009: failure of backup command on prmy1 channel at 02/17/2017 08:53:53 ORA-19602: cannot backup or copy active file in NOARCHIVELOG mode continuing other job steps, job failed will not be re-run channel prmy1: starting datafile copy RMAN-03009: failure of backup command on prmy1 channel at 02/17/2017 08:53:53 ORA-19602: cannot backup or copy active file in NOARCHIVELOG mode continuing other job steps, job failed will not be re-run channel prmy1: starting datafile copy released channel: prmy1 released channel: stby1 RMAN-00571: =========================================================== RMAN-00569: =============== ERROR MESSAGE STACK FOLLOWS =============== RMAN-00571: =========================================================== RMAN-03002: failure of Duplicate Db command at 02/17/2017 08:53:53 RMAN-05501: aborting duplication of target database RMAN-03015: error occurred in stored script Memory Script RMAN-03009: failure of backup command on prmy1 channel at 02/17/2017 08:53:53 ORA-19602: cannot backup or copy active file in NOARCHIVELOG mode |
The cause of the error is that the Primary database is not in Archive mode.
21. We put the Standby databases in archive mode in order to prepare for Primary and Role change operations.
a. We query the archive mode states of the databases.
1 2 3 4 5 6 7 8 9 10 11 | [Prod] SQL> select log_mode from v$database; LOG_MODE ------------ NOARCHIVELOG [Standby] SQL> select log_mode from v$database; LOG_MODE ------------ NOARCHIVELOG |
b. The size of the archive area is set to a suitable value according to our disk size.
1 2 3 4 5 6 7 | [Prod] SQL> alter system set db_recovery_file_dest_size=10G scope=both; System altered. [Standby] SQL> alter system set db_recovery_file_dest_size=10G scope=both; System altered. |
c. We’ll check if the change has taken place.
1 2 3 4 5 6 7 8 9 10 11 12 13 14 15 | [Prod] SQL> show parameter db_recovery_file_dest NAME TYPE VALUE ------------------------------------ ----------- ------------------------------ db_recovery_file_dest string /u01/app/oracle/fast_recovery_ area db_recovery_file_dest_size big integer 10G [Standby] SQL> show parameter db_recovery_file_dest NAME TYPE VALUE ------------------------------------ ----------- ------------------------------ db_recovery_file_dest string /u01/app/oracle/fast_recovery_ area db_recovery_file_dest_size big integer 10G |
ç.We put databases in archive mode.
1 2 3 4 5 6 7 8 9 10 11 12 13 14 15 16 17 18 | [Prod] SQL> shu immediate; Database closed. Database dismounted. ORACLE instance shut down. [Prod] SQL> startup mount; ORACLE instance started. Total System Global Area 3457368064 bytes Fixed Size 2258120 bytes Variable Size 771754808 bytes Database Buffers 2667577344 bytes Redo Buffers 15777792 bytes Database mounted. [Prod] SQL> select status from v$instance; STATUS ------------ MOUNTED |
d. We’ll check if they switch to archive mode.
1 2 3 4 5 6 7 8 9 | [Prod] SQL> alter database archivelog; Database altered. [Prod] SQL> select log_mode from v$database; LOG_MODE ------------ ARCHIVELOG |
e.We initialize the primary database.
1 2 3 4 5 6 7 8 9 | [Prod] SQL> alter database open; Database altered. [Prod] SQL> select status from v$instance; STATUS ------------ OPEN |
f. Since some of the RMAN command was running, the database was switched to MOUNT mode and SPFILE was created. Therefore, the database is closed and the SPFILE file is deleted, and then we move on to the NOMOUNT step.
22. We restart the RMAN command.
1 2 3 4 5 6 7 8 9 10 11 12 13 14 15 16 17 18 19 20 21 22 23 24 25 26 27 28 29 30 31 32 33 34 35 36 37 38 39 40 41 42 43 44 45 46 47 48 49 50 51 52 53 54 55 56 57 58 59 60 61 62 63 64 65 66 67 68 69 70 71 72 73 74 75 76 77 78 79 80 81 82 83 84 85 86 87 88 89 90 91 92 93 94 95 96 97 98 99 100 101 102 103 104 105 106 107 108 109 110 111 112 113 114 115 116 117 118 119 120 121 122 123 124 125 126 127 128 129 130 131 132 133 134 135 136 137 138 139 140 141 142 143 144 145 146 147 148 149 150 151 152 153 154 155 156 157 158 159 160 161 162 163 164 165 166 167 168 169 170 171 172 173 174 175 176 177 178 179 180 181 182 183 184 185 186 187 188 189 190 191 192 193 194 195 196 197 198 199 200 201 202 203 204 205 206 207 208 209 210 211 212 213 214 215 216 217 218 219 220 221 222 223 224 225 226 227 | RMAN> run { 2> allocate channel prmy1 type disk; 3> allocate auxiliary channel stby1 type disk; 4> duplicate target database for standby from active database 5> spfile 6> parameter_value_convert 'prod','standby' 7> set db_unique_name='standby' 8> set db_file_name_convert='prod','standby' 9> set log_file_name_convert='prod','standby' 10> set fal_server='prod' 11> nofilenamecheck; 12> allocate auxiliary channel stby type disk; 13> sql channel stby "alter database recover managed standby database disconnect"; } using target database control file instead of recovery catalog allocated channel: prmy1 channel prmy1: SID=14 device type=DISK allocated channel: stby1 channel stby1: SID=429 device type=DISK Starting Duplicate Db at 17-FEB-17 contents of Memory Script: { backup as copy reuse targetfile '/u01/app/oracle/product/11.2.0/db_1/dbs/orapwprod' auxiliary format '/u01/app/oracle/product/11.2.0/db_1/dbs/orapwstandby' targetfile '/u01/app/oracle/product/11.2.0/db_1/dbs/spfileprod.ora' auxiliary format '/u01/app/oracle/product/11.2.0/db_1/dbs/spfilestandby.ora' ; sql clone "alter system set spfile= ''/u01/app/oracle/product/11.2.0/db_1/dbs/spfilestandby.ora''"; } executing Memory Script Starting backup at 17-FEB-17 Finished backup at 17-FEB-17 sql statement: alter system set spfile= ''/u01/app/oracle/product/11.2.0/db_1/dbs/spfilestandby.ora'' contents of Memory Script: { sql clone "alter system set audit_file_dest = ''/u01/app/oracle/admin/standby/adump'' comment= '''' scope=spfile"; sql clone "alter system set control_files = ''/u01/app/oracle/oradata/standby/control01.ctl'', ''/u01/app/oracle/fast_recovery_area/standby/control02.ctl'' comment= '''' scope=spfile"; sql clone "alter system set dispatchers = ''(PROTOCOL=TCP) (SERVICE=standbyXDB)'' comment= '''' scope=spfile"; sql clone "alter system set log_archive_dest_1 = ''location=USE_DB_RECOVERY_FILE_DEST valid_for=(ALL_LOGFILES,ALL_ROLES) db_unique_name=standby'' comment= '''' scope=spfile"; sql clone "alter system set db_unique_name = ''standby'' comment= '''' scope=spfile"; sql clone "alter system set db_file_name_convert = ''prod'', ''standby'' comment= '''' scope=spfile"; sql clone "alter system set log_file_name_convert = ''prod'', ''standby'' comment= '''' scope=spfile"; sql clone "alter system set fal_server = ''prod'' comment= '''' scope=spfile"; shutdown clone immediate; startup clone nomount; } executing Memory Script sql statement: alter system set audit_file_dest = ''/u01/app/oracle/admin/standby/adump'' comment= '''' scope=spfile sql statement: alter system set control_files = ''/u01/app/oracle/oradata/standby/control01.ctl'', ''/u01/app/oracle/fast_recovery_area/standby/control02.ctl'' comment= '''' scope=spfile sql statement: alter system set dispatchers = ''(PROTOCOL=TCP) (SERVICE=standbyXDB)'' comment= '''' scope=spfile sql statement: alter system set log_archive_dest_1 = ''location=USE_DB_RECOVERY_FILE_DEST valid_for=(ALL_LOGFILES,ALL_ROLES) db_unique_name=standby'' comment= '''' scope=spfile sql statement: alter system set db_unique_name = ''standby'' comment= '''' scope=spfile sql statement: alter system set db_file_name_convert = ''prod'', ''standby'' comment= '''' scope=spfile sql statement: alter system set log_file_name_convert = ''prod'', ''standby'' comment= '''' scope=spfile sql statement: alter system set fal_server = ''prod'' comment= '''' scope=spfile Oracle instance shut down connected to auxiliary database (not started) Oracle instance started Total System Global Area 3457368064 bytes Fixed Size 2258120 bytes Variable Size 771754808 bytes Database Buffers 2667577344 bytes Redo Buffers 15777792 bytes allocated channel: stby1 channel stby1: SID=63 device type=DISK contents of Memory Script: { backup as copy current controlfile for standby auxiliary format '/u01/app/oracle/oradata/standby/control01.ctl'; restore clone controlfile to '/u01/app/oracle/fast_recovery_area/standby/control02.ctl' from '/u01/app/oracle/oradata/standby/control01.ctl'; } executing Memory Script Starting backup at 17-FEB-17 channel prmy1: starting datafile copy copying standby control file output file name=/u01/app/oracle/product/11.2.0/db_1/dbs/snapcf_prod.f tag=TAG20170217T090636 RECID=3 STAMP=936176796 channel prmy1: datafile copy complete, elapsed time: 00:00:01 Finished backup at 17-FEB-17 Starting restore at 17-FEB-17 channel stby1: copied control file copy Finished restore at 17-FEB-17 contents of Memory Script: { sql clone 'alter database mount standby database'; } executing Memory Script sql statement: alter database mount standby database contents of Memory Script: { set newname for tempfile 1 to "/u01/app/oracle/oradata/standby/temp01.dbf"; switch clone tempfile all; set newname for datafile 1 to "/u01/app/oracle/oradata/standby/system01.dbf"; set newname for datafile 2 to "/u01/app/oracle/oradata/standby/sysaux01.dbf"; set newname for datafile 3 to "/u01/app/oracle/oradata/standby/undotbs01.dbf"; set newname for datafile 4 to "/u01/app/oracle/oradata/standby/users01.dbf"; set newname for datafile 5 to "/u01/app/oracle/oradata/standby/example01.dbf"; backup as copy reuse datafile 1 auxiliary format "/u01/app/oracle/oradata/standby/system01.dbf" datafile 2 auxiliary format "/u01/app/oracle/oradata/standby/sysaux01.dbf" datafile 3 auxiliary format "/u01/app/oracle/oradata/standby/undotbs01.dbf" datafile 4 auxiliary format "/u01/app/oracle/oradata/standby/users01.dbf" datafile 5 auxiliary format "/u01/app/oracle/oradata/standby/example01.dbf" ; sql 'alter system archive log current'; } executing Memory Script executing command: SET NEWNAME renamed tempfile 1 to /u01/app/oracle/oradata/standby/temp01.dbf in control file executing command: SET NEWNAME executing command: SET NEWNAME executing command: SET NEWNAME executing command: SET NEWNAME executing command: SET NEWNAME Starting backup at 17-FEB-17 channel prmy1: starting datafile copy input datafile file number=00001 name=/u01/app/oracle/oradata/prod/system01.dbf output file name=/u01/app/oracle/oradata/standby/system01.dbf tag=TAG20170217T090644 channel prmy1: datafile copy complete, elapsed time: 00:00:25 channel prmy1: starting datafile copy input datafile file number=00002 name=/u01/app/oracle/oradata/prod/sysaux01.dbf output file name=/u01/app/oracle/oradata/standby/sysaux01.dbf tag=TAG20170217T090644 channel prmy1: datafile copy complete, elapsed time: 00:00:15 channel prmy1: starting datafile copy input datafile file number=00005 name=/u01/app/oracle/oradata/prod/example01.dbf output file name=/u01/app/oracle/oradata/standby/example01.dbf tag=TAG20170217T090644 channel prmy1: datafile copy complete, elapsed time: 00:00:07 channel prmy1: starting datafile copy input datafile file number=00003 name=/u01/app/oracle/oradata/prod/undotbs01.dbf output file name=/u01/app/oracle/oradata/standby/undotbs01.dbf tag=TAG20170217T090644 channel prmy1: datafile copy complete, elapsed time: 00:00:03 channel prmy1: starting datafile copy input datafile file number=00004 name=/u01/app/oracle/oradata/prod/users01.dbf output file name=/u01/app/oracle/oradata/standby/users01.dbf tag=TAG20170217T090644 channel prmy1: datafile copy complete, elapsed time: 00:00:01 Finished backup at 17-FEB-17 sql statement: alter system archive log current contents of Memory Script: { switch clone datafile all; } executing Memory Script datafile 1 switched to datafile copy input datafile copy RECID=3 STAMP=936176857 file name=/u01/app/oracle/oradata/standby/system01.dbf datafile 2 switched to datafile copy input datafile copy RECID=4 STAMP=936176857 file name=/u01/app/oracle/oradata/standby/sysaux01.dbf datafile 3 switched to datafile copy input datafile copy RECID=5 STAMP=936176857 file name=/u01/app/oracle/oradata/standby/undotbs01.dbf datafile 4 switched to datafile copy input datafile copy RECID=6 STAMP=936176857 file name=/u01/app/oracle/oradata/standby/users01.dbf datafile 5 switched to datafile copy input datafile copy RECID=7 STAMP=936176857 file name=/u01/app/oracle/oradata/standby/example01.dbf Finished Duplicate Db at 17-FEB-17 allocated channel: stby channel stby: SID=131 device type=DISK sql statement: alter database recover managed standby database disconnect released channel: prmy1 released channel: stby1 released channel: stby RMAN> exit Recovery Manager complete. |
23. We query the status of the standby database.
1 2 3 4 5 | [Standby] SQL> select status from v$instance; STATUS ------------ MOUNTED |
24. We check the mode of the database.
1 2 3 4 5 | [Standby] SQL> select open_mode, database_role from v$database; OPEN_MODE DATABASE_ROLE -------------------- ---------------- MOUNTED PHYSICAL STANDBY |
25. We ensure that the Archive Redo Logs go to the Standby database.
1 2 3 4 5 6 7 8 9 10 11 12 | [Prod] SQL> alter system set log_archive_dest_2='SERVICE=standby SYNC REOPEN=15 valid_for=(ONLINE_LOGFILES,PRIMARY_ROLE) db_unique_name=standby' scope=both; System altered. [Prod] SQL> show parameter log_archive_dest_2 NAME TYPE VALUE ------------------------------------ ----------- ------------------------------ log_archive_dest_2 string SERVICE=standby SYNC REOPEN=15 valid_for=(ONLINE_LOGFILES,PR IMARY_ROLE) db_unique_name=sta ndby |
26. The installation process of our standby database is completed. Now we get to the controls.
a. We learn the current log sequence number.
1 2 3 4 5 6 7 8 9 10 11 | [Prod] SQL> SELECT MAX(SEQUENCE#), THREAD# FROM V$ARCHIVED_LOG GROUP BY THREAD#; MAX(SEQUENCE#) THREAD# -------------- ---------- 10 1 [Standby] SQL> SELECT MAX(SEQUENCE#), THREAD# FROM V$ARCHIVED_LOG GROUP BY THREAD#; MAX(SEQUENCE#) THREAD# -------------- ---------- 10 1 |
b. We check whether the logs go to Standby by performing the Log Switch operation.
1 2 3 4 5 6 7 8 9 10 11 12 13 14 15 | [Prod] SQL> alter system switch logfile; System altered. [Prod] SQL> SELECT MAX(SEQUENCE#), THREAD# FROM V$ARCHIVED_LOG GROUP BY THREAD#; MAX(SEQUENCE#) THREAD# -------------- ---------- 11 1 [Standby] SQL> SELECT MAX(SEQUENCE#), THREAD# FROM V$ARCHIVED_LOG GROUP BY THREAD#; MAX(SEQUENCE#) THREAD# -------------- ---------- 11 1 |
27. Logs go to Standby successfully, but we check if they are being applied.
1 2 3 4 5 | [Standby] SQL> select recovery_mode from v$archive_dest_status; RECOVERY_MODE ----------------------- MANAGED |
MANAGED
It means Archive Apply, not Real Time. In other words, as the logs come to the Standby side, the apply process will take place.
28. Since I want Standby to be active very quickly in the event of a disaster, I activate the Real-Time Apply feature.
1 2 3 4 5 6 7 8 9 10 11 12 13 | [Standby] SQL> alter database recover managed standby database cancel; Database altered. [Standby] SQL> alter database recover managed standby database using current logfile disconnect; Database altered. [Standby] SQL> select recovery_mode from v$archive_dest_status; RECOVERY_MODE ----------------------- MANAGED REAL TIME APPLY |
29. By creating a table, it is checked whether it is formed on the standby side.
1 2 3 4 5 6 7 8 9 10 11 12 13 14 15 16 17 18 19 20 21 22 23 | [Prod] SQL> create user test identified by test account unlock; User created. [Prod] SQL> grant dba to test; Grant succeeded. [Prod] SQL> create table test.employees_yedek as select * from hr.employees; Table created. [Prod] SQL> select table_name from dba_tables where owner='TEST'; TABLE_NAME ------------------------------ EMPLOYEES_YEDEK [Standby] SQL> select table_name from dba_tables where owner='TEST'; select table_name from dba_tables where owner='TEST' * ERROR at line 1: ORA-01219: database not open: queries allowed on fixed tables/views only |
The reason for this error is that the Database is not in OPEN mode. That is, Active Data Guard is not ENABLE.
30. Considering that we have a license, the database is transferred to Active Data Guard.
a. We stop the Log Apply process.
1 2 3 | [Standby] SQL> alter database recover managed standby database cancel; Database altered. |
b. We open the database.
1 2 3 | [Standby] SQL> alter database open; Database altered. |
c. We query the instance’s status.
1 2 3 4 5 | [Standby] SQL> select status from v$instance; STATUS ------------ OPEN |
ç. We query the role with the database’s open mode.
1 2 3 4 5 | [Standby] SQL> select open_mode, database_role from v$database; OPEN_MODE DATABASE_ROLE -------------------- ---------------- READ ONLY PHYSICAL STANDBY |
d. We query Recovery Mode.
1 2 3 4 5 | [Standby] SQL> select recovery_mode from v$archive_dest_status; RECOVERY_MODE ----------------------- IDLE |
e. We start Real Time Apply.
1 2 3 | [Standby] SQL> alter database recover managed standby database using current logfile disconnect; Database altered. |
f. We are checking if Real Time Apply has started.
1 2 3 4 5 | [Standby] SQL> select recovery_mode from v$archive_dest_status; RECOVERY_MODE ----------------------- MANAGED REAL TIME APPLY |
g. We check whether the table created in Article 37 is formed on the Standby side.
1 2 3 4 5 | [Standby] SQL> select table_name from dba_tables where owner='TEST'; TABLE_NAME ------------------------------ EMPLOYEES_YEDEK |
31. I want to take backups from standby side. For this reason, we make the necessary parameter adjustments so that Incremental Backups can be taken faster and without tiring the system.
1 2 3 4 5 6 7 8 9 10 11 12 | [Standby] SQL> alter database enable block change tracking using file '/u01/app/oracle/oradata/standby/rman_change_track.file'; Database altered. [Standby] SQL> select filename, status, bytes from v$block_change_tracking; FILENAME -------------------------------------------------------------------------------- STATUS BYTES ---------- ---------- /u01/app/oracle/oradata/standby/rman_change_track.file ENABLED 11599872 |
1 |
![]()