 Database Tutorials MSSQL, Oracle, PostgreSQL, MySQL, MariaDB, DB2, Sybase, Teradata, Big Data, NOSQL, MongoDB, Couchbase, Cassandra, Windows, Linux
In today’s article, we will talk about Oracle Business Process Management RCU installation.
I prepared the installation on Oracle Linux 6.5 with RCU version 11.1.1.7.
You can check the current versions via oracle and install them in the same directory.
First of all, we create a folder named “OracleSetup” in the root directory of the Oracle Linux operating system that we have installed.
Then we will throw all our installation files into this folder we created.
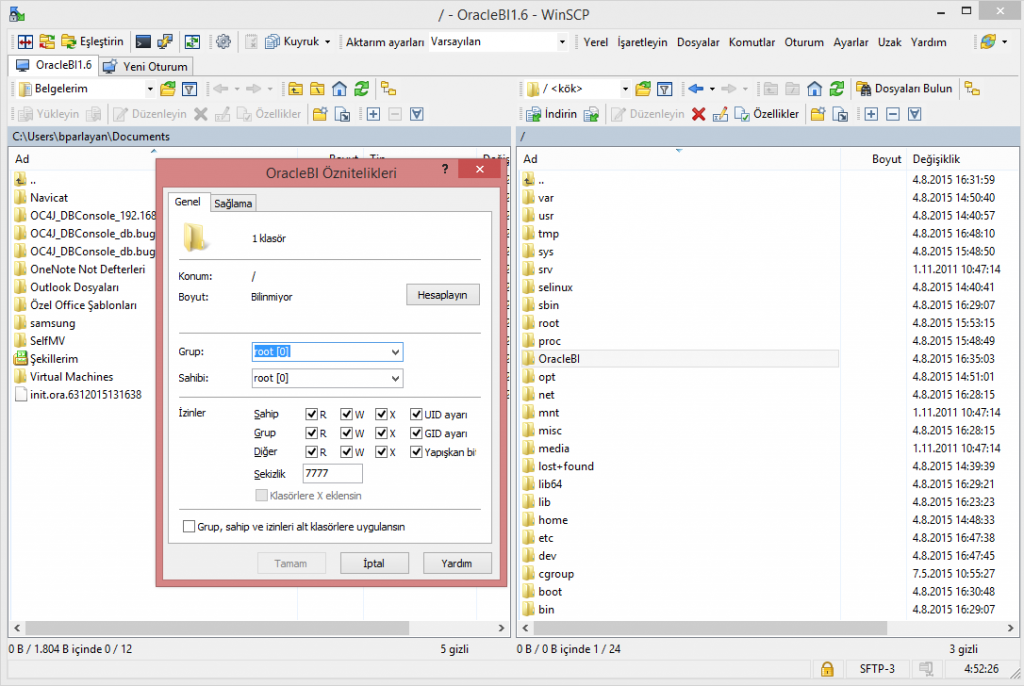
I do folder creation and folder permissions with WinSCP for convenience.
Create a folder “OracleSetup” on the Root Directory and upload your “ofm_rcu_linux_11.1.1.7.0_64_disk1_1of1” folder here.
Then, right-click on the “OracleSetup” folder, right-click properties, make the “Octate” field “7777”, mark “Group, owner and permissions apply to subfolder” and press the “OK” button, so we will give full access to OracleSetup and its subfolders.
Before the Oracle BPM installation, we will use the tool we call ” RCU ” for the Repository Database.
This tool will prepare the necessary pre-installations for BPM and the tables to be created in our database for us.
First we will edit our /etc/hosts/ file. We always use the DNS resolution facility in case the IP infrastructure changes in the future, so if one day the IP addresses change, it will be enough to edit the /etc/hosts file.
Open terminal window with root user and run the following command.
Edit the opened window according to the example below, save and exit.
1 2 3 4 | # gedit /etc/hosts <IP-address> <fully-qualified-machine-name> <machine-name> 192.168.1.1 db.bugraparlayan.com db. 192.168.1.2 bpm.bugraparlayan.com bpm |
Now that our host file editing, folder and file copying processes are finished, we can start the installation.
In order to avoid confusion in the installations and to save time, we will try to work from the visual interface in general.
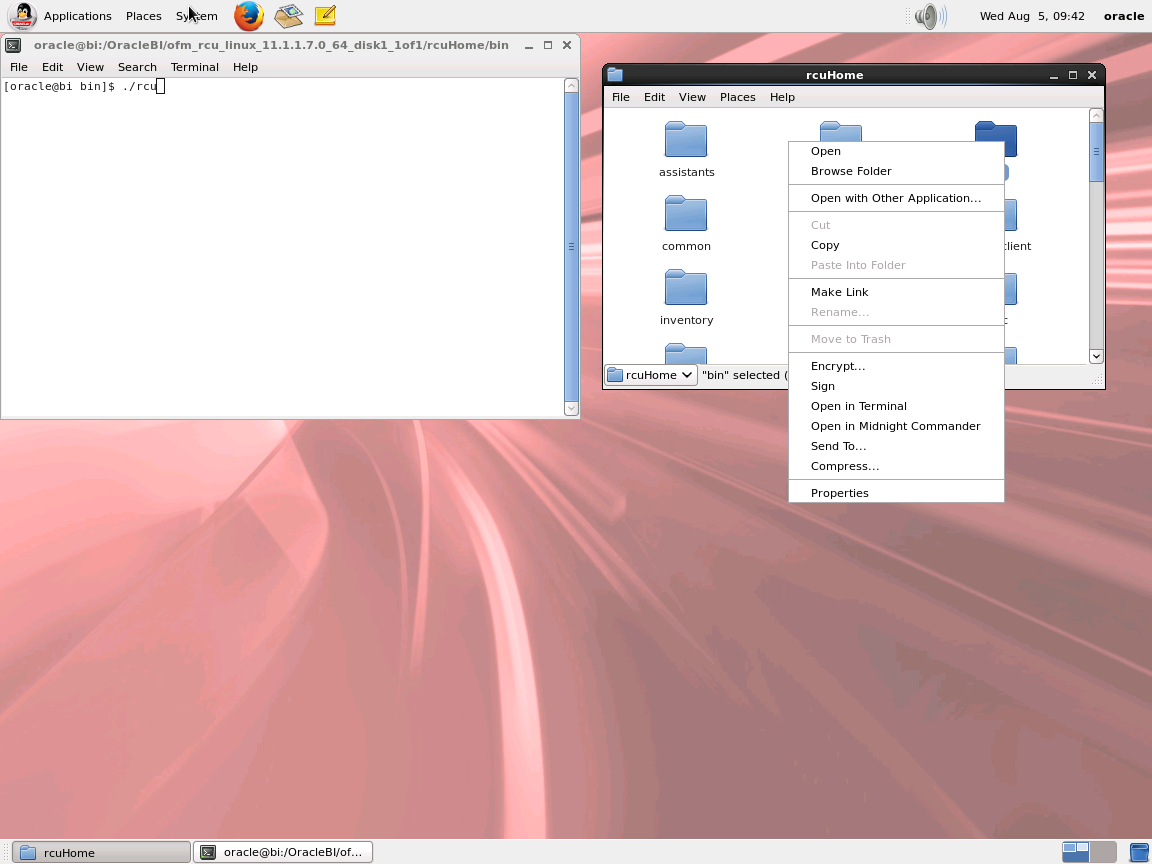
Desktop > Filesystem > OracleSetup > ofm_rcu_linux_11.1.17…. > rcuHome > Right click on the BIN folder and click “open terminal”.
In our terminal window that opens
We start the pre-installation with the $ ./rcu command.
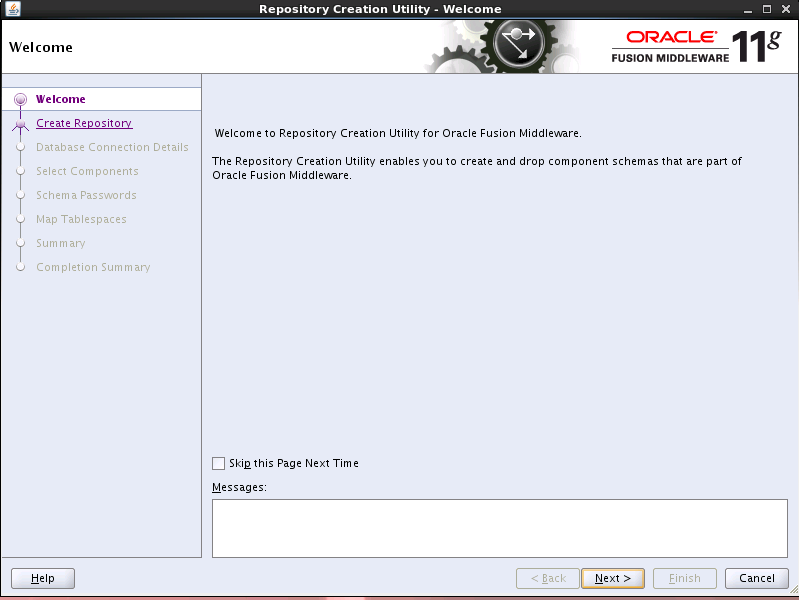
RCU ( Repository Creation Utility ) screen will welcome us. Continue by clicking the “NEXT” button.
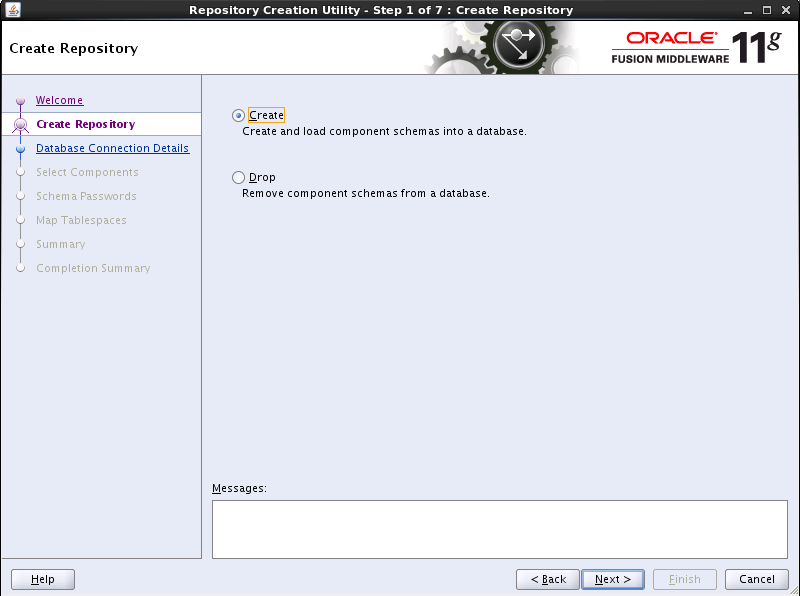
Since we will create a Schema for the first time, we continue by clicking the “NEXT” button with “Create” selected.
On this screen, it asks us for connection information. We will enter our Hostname , Port , Service Name , SYS user and SYS password.
Host Name : db.bugraparlayan.com (We give the database ip address directly to /etc/hosts as we resolve it to /etc/hosts. You can edit it according to the institution.)
Port : 1521 (Oracle port is 1521 in standard installation.)
Service Name : SHINING
Username: SYS (must be a dba or sysdba user)
Password : your password.
At this point, you need to do it with SYS. SYSDBA comes directly to the role.
We continue by filling in the empty fields as in the example below and clicking the “NEXT” button.
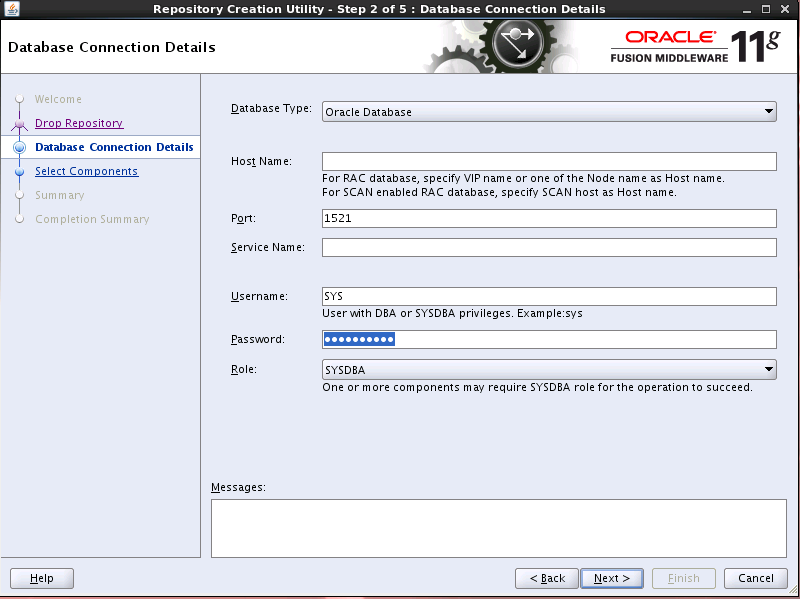
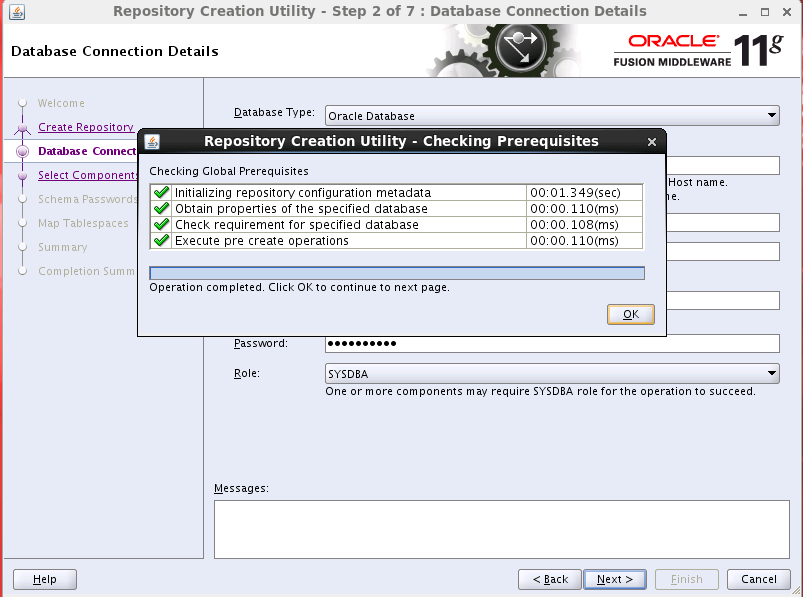
When you press the “NEXT” button, the RCU will perform an automatic check. If you get an error here, check the database settings, port and feature Service Name field.
The RCU checked our system and did not encounter any glitches. Continue by clicking the “OK” button.
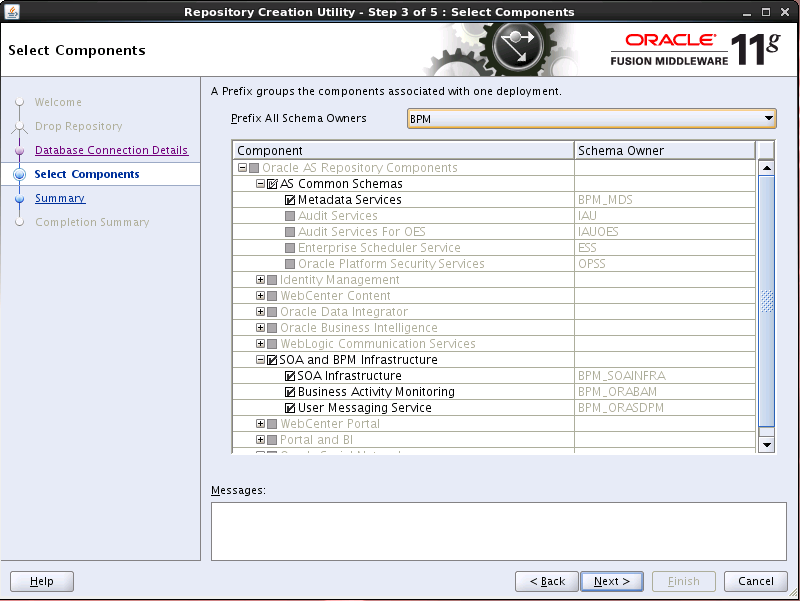
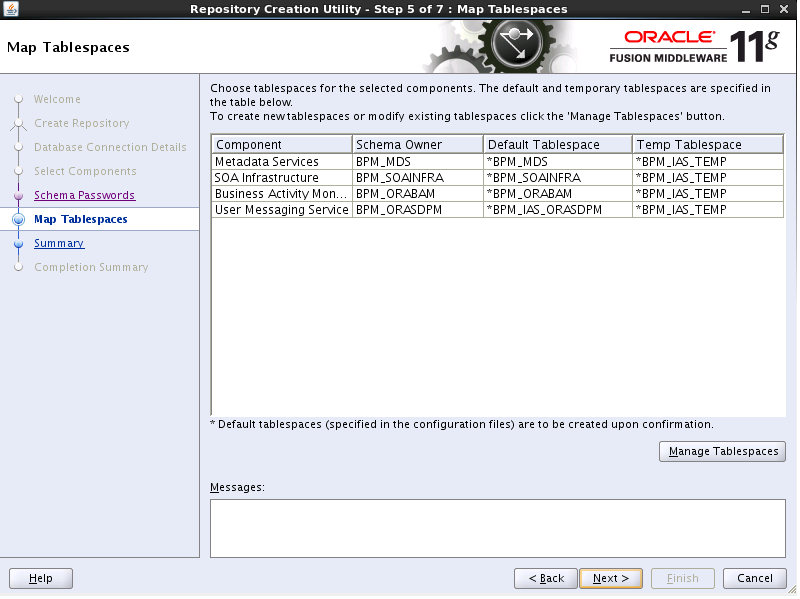
In this area, we will do our operations before creating the schema and tables.
We write “BPM” in the “Create a new Prefix” section. In this way, our tables will be opened as “PBM_**” when opening and we will quickly understand which table is used for which operation while the database is running.
As the second process, we will load the component. Here you click on “SOA and Infrastructure”. The RCU will automatically choose its own subpackages.
We click on the “NEXT” button and continue.
The RCU will do a check again, if there is a table with this name, it will warn us and ask us to change or edit the Prefix.
In this process, we move to the next step by clicking the “OK” button.
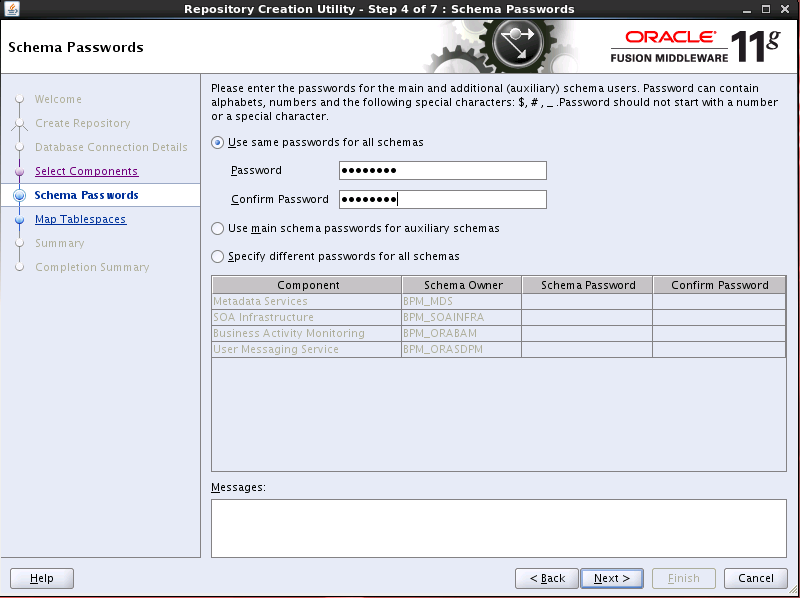
In this step, we set the password for the installations. Since I am a test environment, I will set my password as “Passw0rd”. You adjust it according to the institutional structure and procedures.
If you enter your password in the “Use sam e passwords for all schemas” field (we recommend this), the RCU will automatically assign the same password for both schemas.
By making our final checks, we continue by clicking the “NEXT” button.
It gives us warning that the selected schemas have been created. We press the “OK” button and it is Tested.
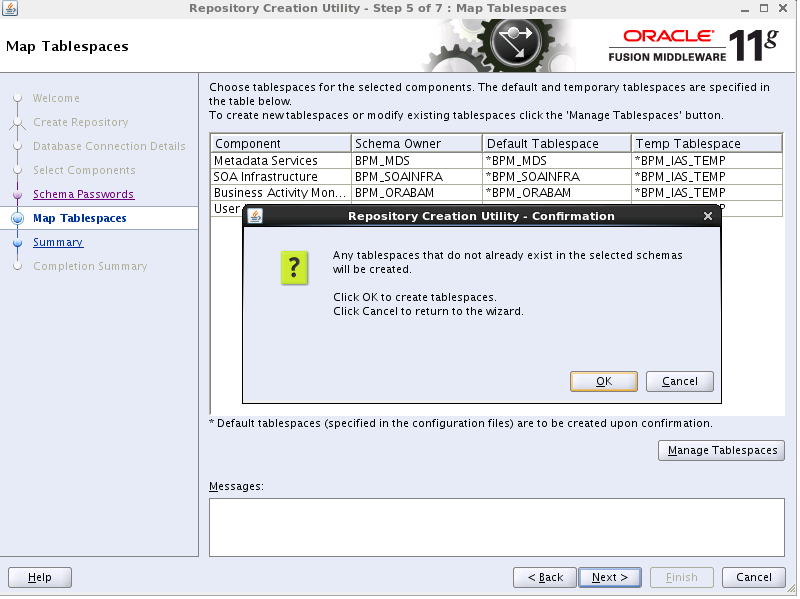
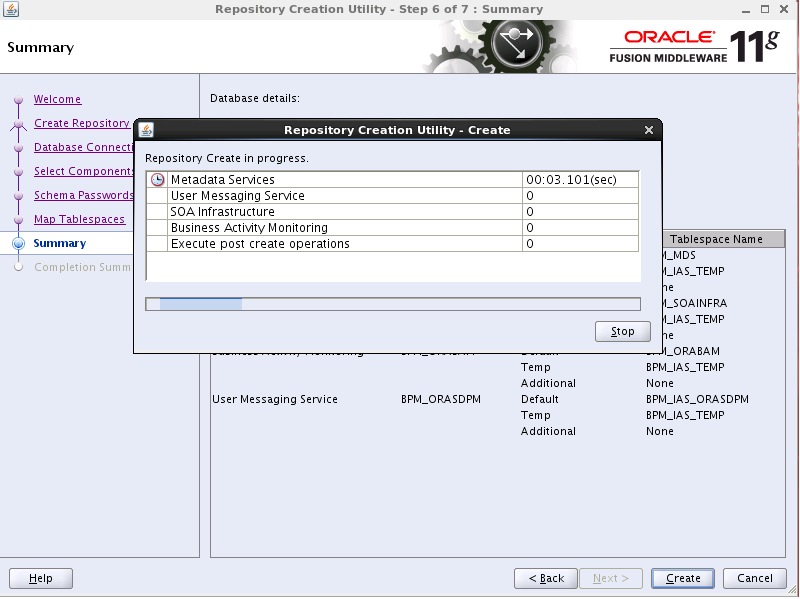
Now we can create our tables by clicking the “CREATE” button and start the process.
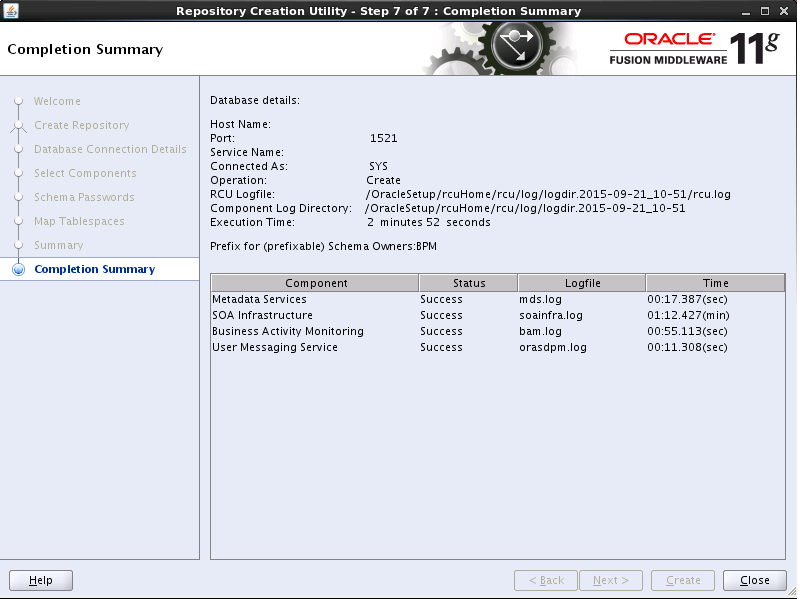
We created our BPM schemas via RCU. Now we can move on to the BI setup. We close the screen by saying “Close”.
![]()