 Database Tutorials MSSQL, Oracle, PostgreSQL, MySQL, MariaDB, DB2, Sybase, Teradata, Big Data, NOSQL, MongoDB, Couchbase, Cassandra, Windows, Linux
In today’s article we will learn how to Define Alerts To Azure SQL Database.
Many people, including those who use or are considering using Azure SQL Database,
have been on the minds of how to define an “alert” when managing a database.
As a matter of fact, Azure SQL Database is a PaaS service and database management is performed by Microsoft for you.
For example, you can create a warning if the DTU ( Database Transaction Unit ) you define for Azure SQL database exceeds 80%.
So you can investigate why this is happening or make the decision to switch to a higher DTU level service.
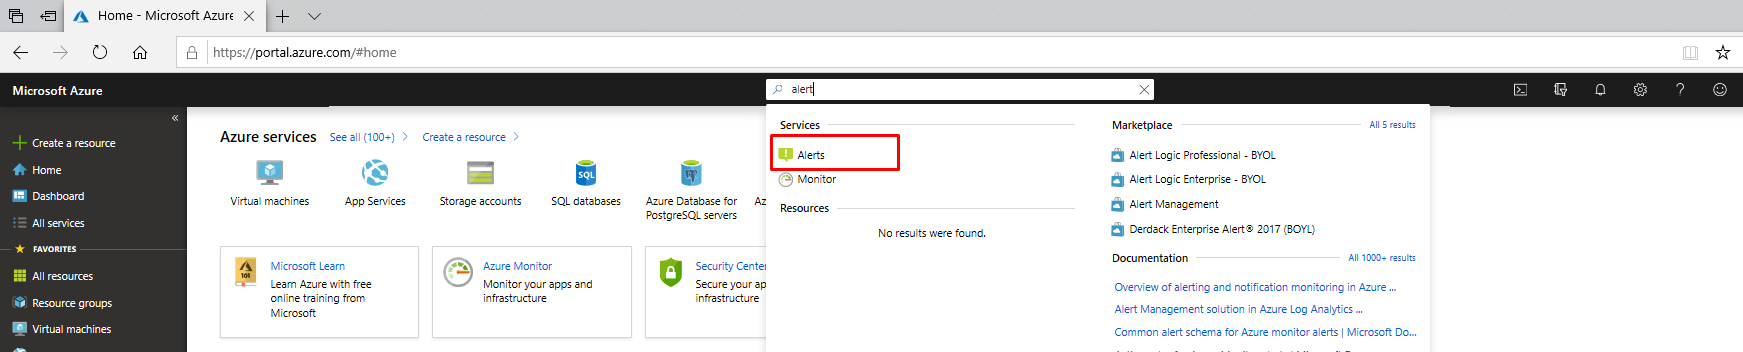
Where are alerts defined?
When you type “Alerts” in the search field on the Azure portal, you will see a screen like the one below.
When you select “Alerts”, you can view all the alerts defined in your account.
In the example below, you can also see the warnings I defined earlier.
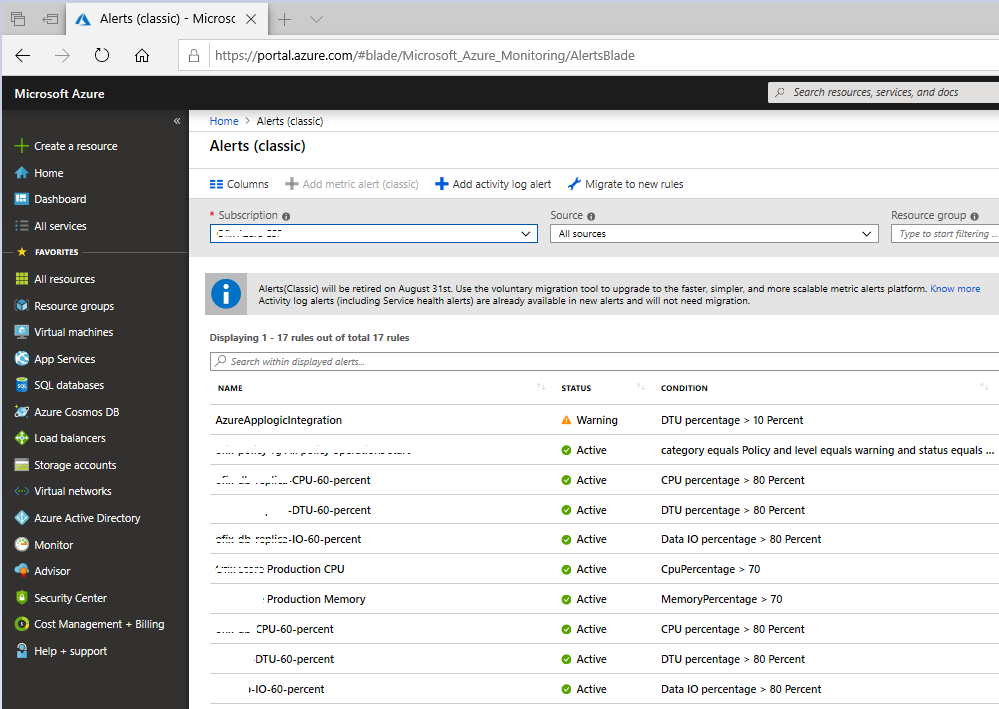
You can also define a new alert on the screen above, but when you use the screen above,
you may have difficulty choosing the service you want from among many services.
Therefore, in order to define a warning more quickly,
we need to continue the process in the service that we want to define the warning.
I come up with “Alerts” in the “Monitoring” section of Azure SQL Database.
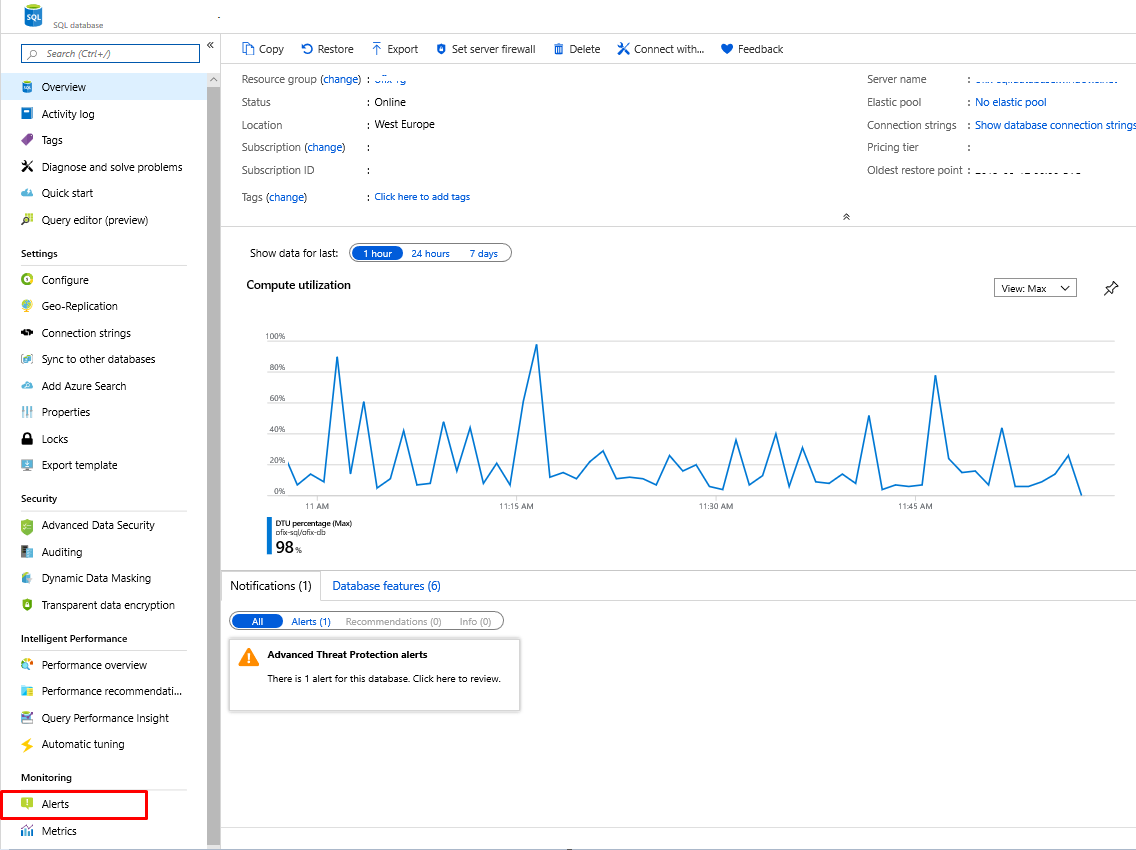
As seen in the picture above, we have achieved 100% usage at times. I will also explain the solution to this.
Let’s go back to our main topic, alarm – warning definition. We select “Alerts”.
Click on “New Alert Rule” on the screen that comes up.

Resource and Hierarchy sections were filled in the “Create Rule” screen,
if we were to continue from the screen in Picture-1, we would have to fill in these sections.
There is a screen that asks us to define a condition for the warning that we will define and the action to be taken if this condition is fulfilled.

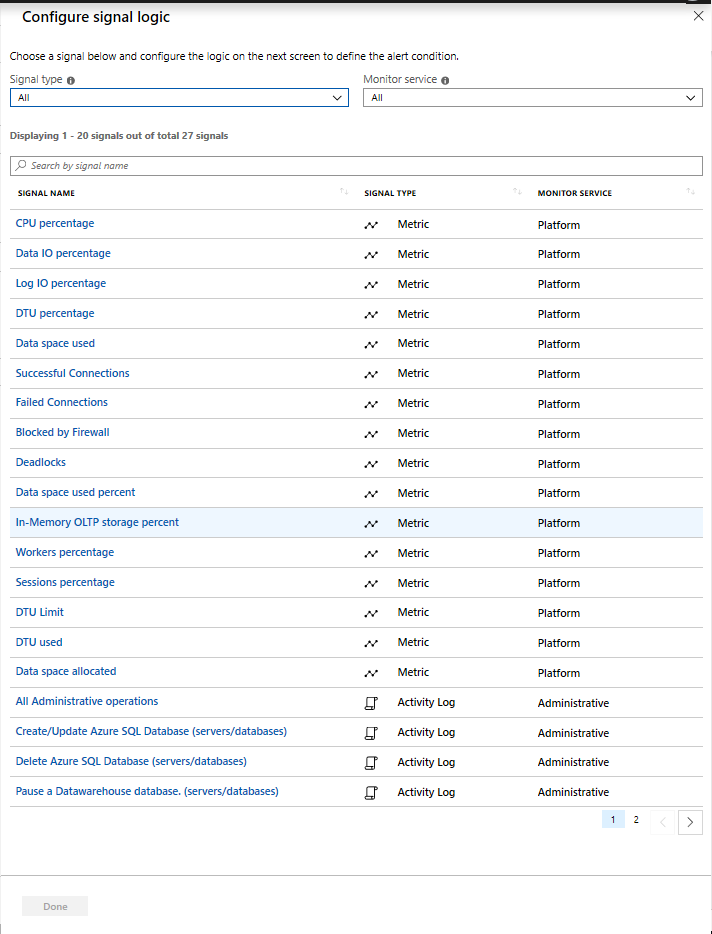
As you can see in the picture above, you can go to the second page for more condition definitions.
In order to complete our example, I choose “DTU Percentage” as a condition.
After the selection, I am faced with a screen that shows us the DTU percentage value of the service I have used in the last 6 hours by default and asks me to enter a default value for the condition.
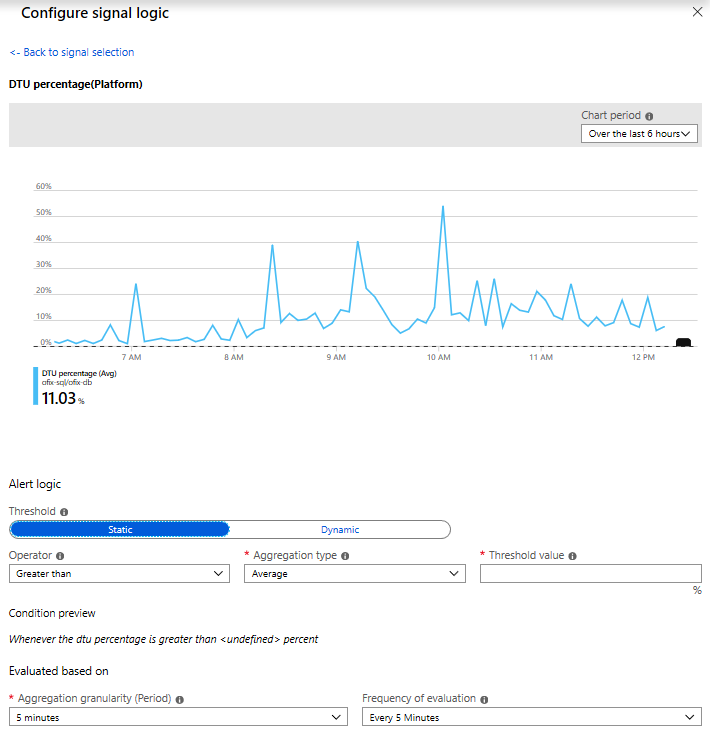
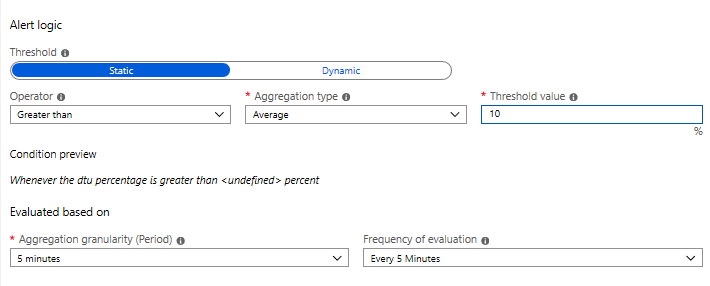
I am defining the above screen as follows.
I knowingly gave the 10% value so that we can see the warning information.
I would also like to point out that there will be a separate charge for each warning definition.
After defining the condition in the “Create Rule” screen, it will also show you the monthly estimated wage as information.
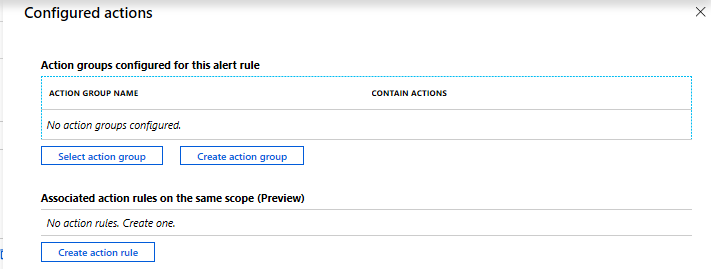
In order to be able to define in the “Action” section,
we encounter a screen that asks us to define an “action group” or to select a defined “action group”.
The action types we can choose are as follows.
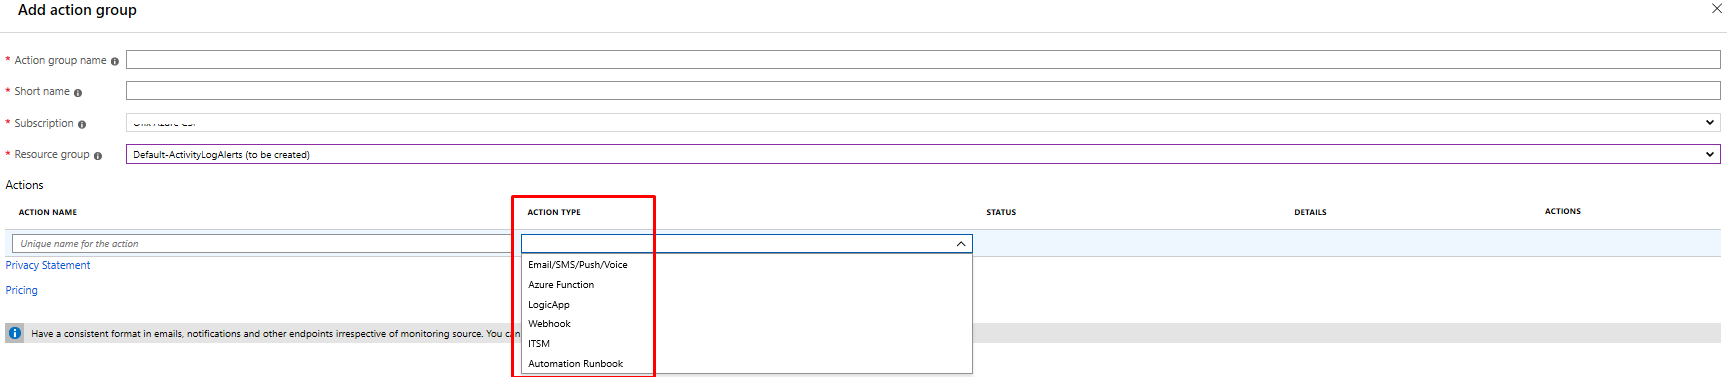
If you select “Email/SMS/Push/Voice” for “action type”, it will ask you for another screen for identification.

As you can see in the picture above, you can also make SMS notification and Call call.
But SMS and Call call only support some COUNTRIES for now.
(You can do this via webhook via a different service) We continue by defining the mail for our example.
After making the necessary definitions, we create and select the action group and continue with our warning – alert – definition.
Finally, we enter a name for the warning and we have successfully defined our warning.
If a situation occurs at the level of the warning condition we have defined, an e-mail notification will be sent.
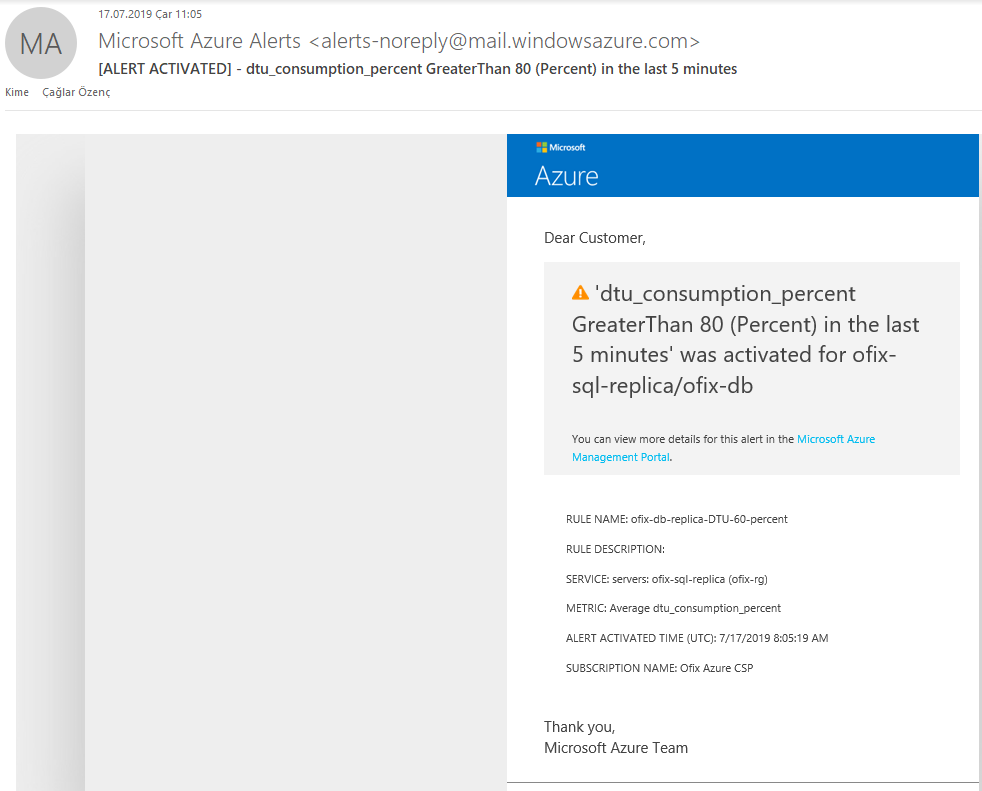
An example of an incoming email is as follows.
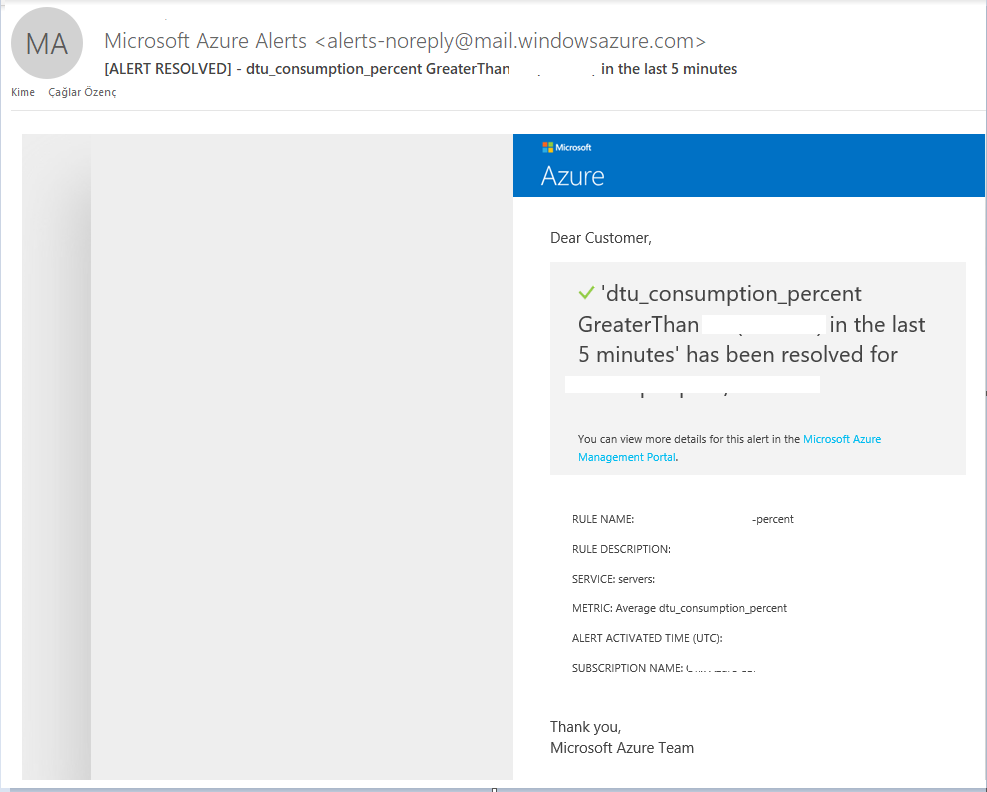
If the warning is resolved, the e-mail sent is as follows.
I have completed another article where I explain how you can define alerts for Azure SQL databases.
If you want to research more details about the subject, you can get detailed information from the address below
1 | https://docs.microsoft.com/en-us/azure/azure-monitor/platform/alerts-classic-portal |
![]()