 Database Tutorials MSSQL, Oracle, PostgreSQL, MySQL, MariaDB, DB2, Sybase, Teradata, Big Data, NOSQL, MongoDB, Couchbase, Cassandra, Windows, Linux
In this article, we will install SQL Server 2014. Other versions can be installed in similar ways.
Stand-Alone means installing only one instance on a single server without any cluster structure.
Right click on setup.exe in the SQL Server Setup File and select Run as Administrator to begin installation.
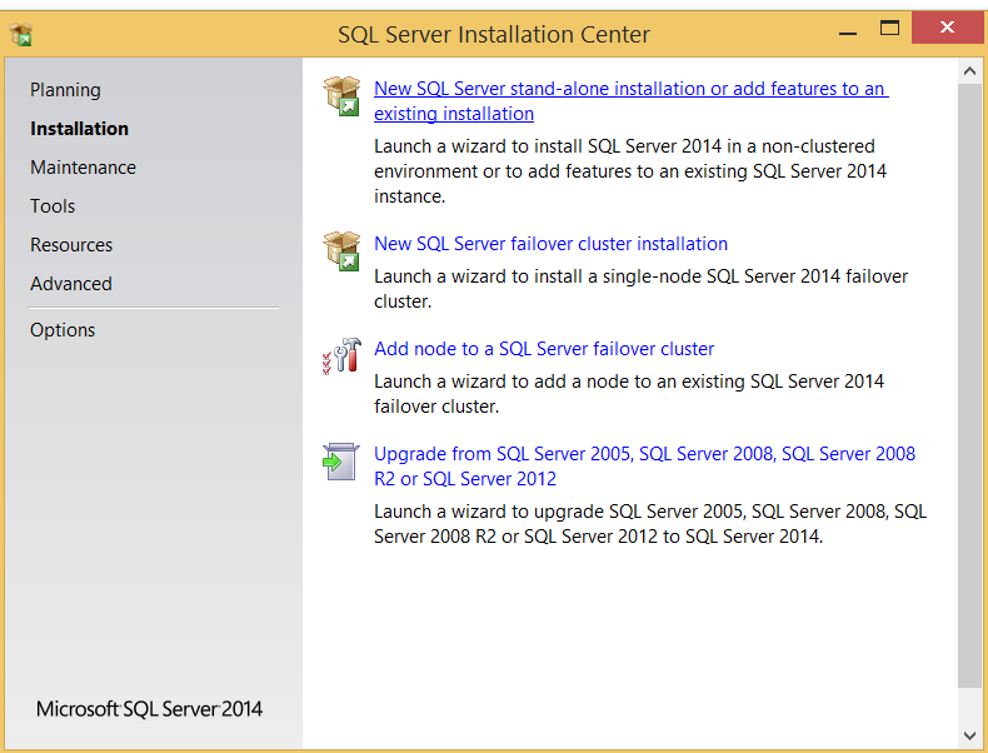
We go to the Installation tab on the left and click on New SQL Server stand-alone installation or add features to an existing installation as shown below.
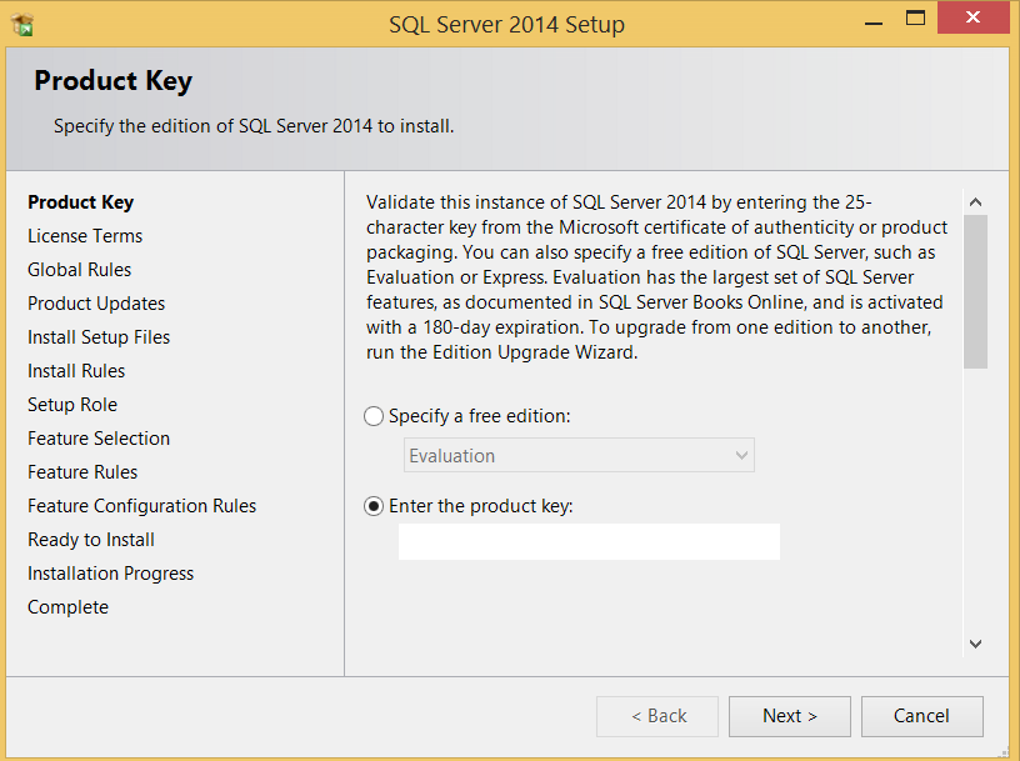
If the setup file is licensed, the license key will automatically appear below.
If you are installing without a license, you will need to select Evalution or Express from the Specify a free edition section.
Evalution Edition is the version you can use for 180 days with all its features.
Express Edition is a version that you can use continuously with limited features.
I choose the other option below because my setup file is licensed.
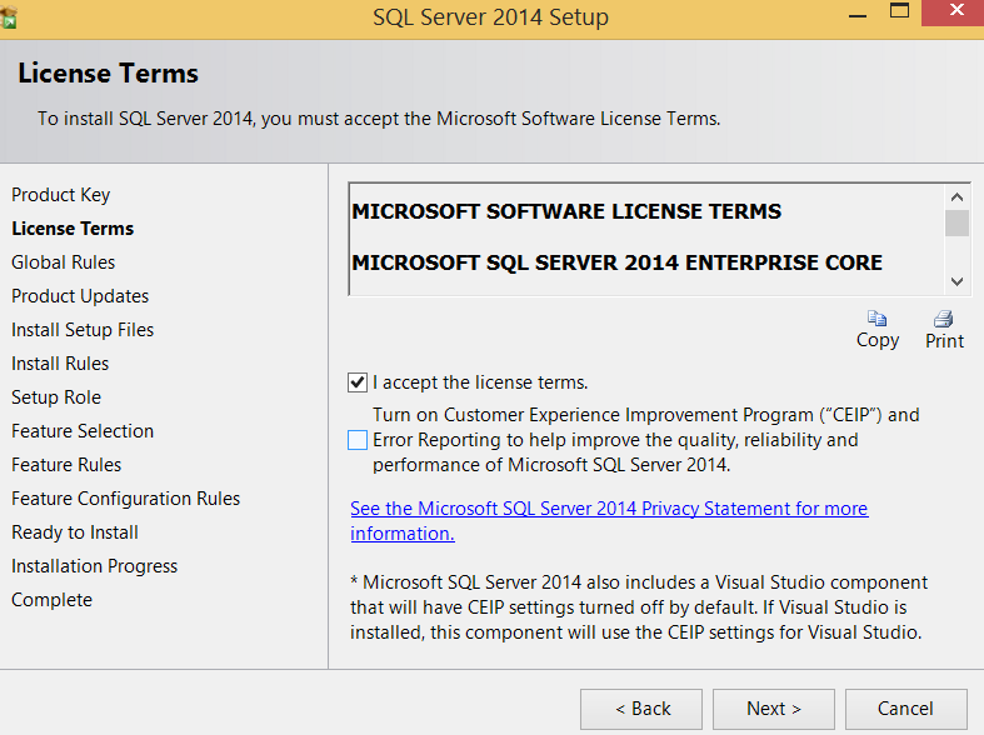
On the next screen you should select “I accept the license terms” as follows.
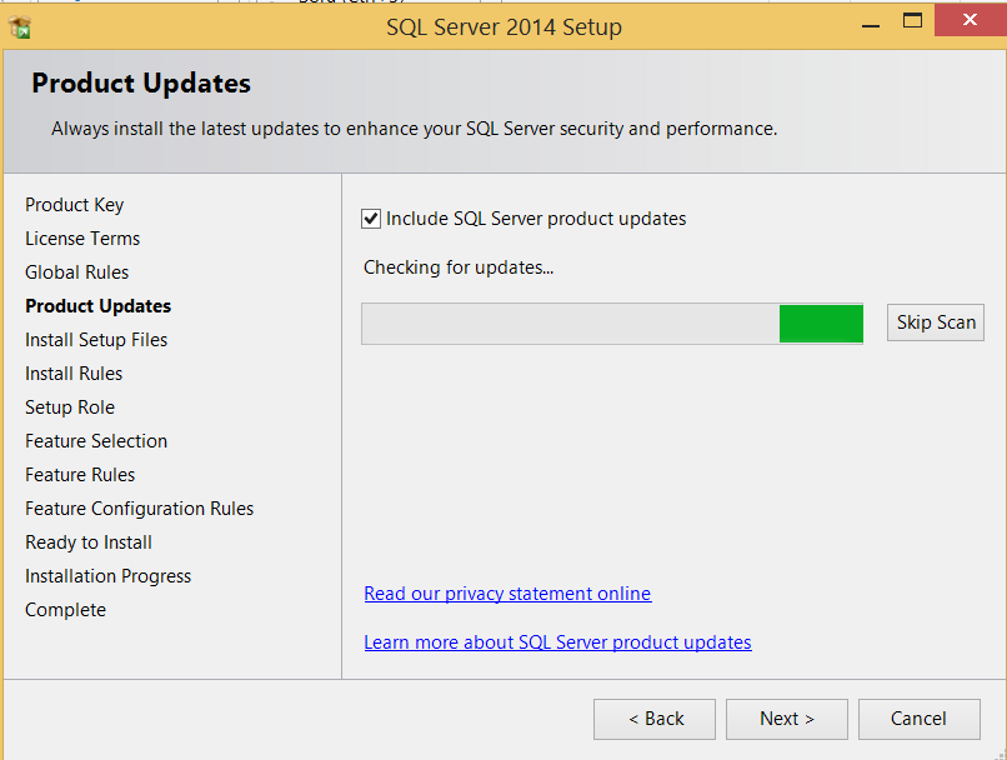
On the next screen, the installer checks if an updateable version of the file exists.
Skip Scan is enough if you want to install with the version of the current file.
On the next screen, it checks the pre-installation requirements and decides whether to install it.
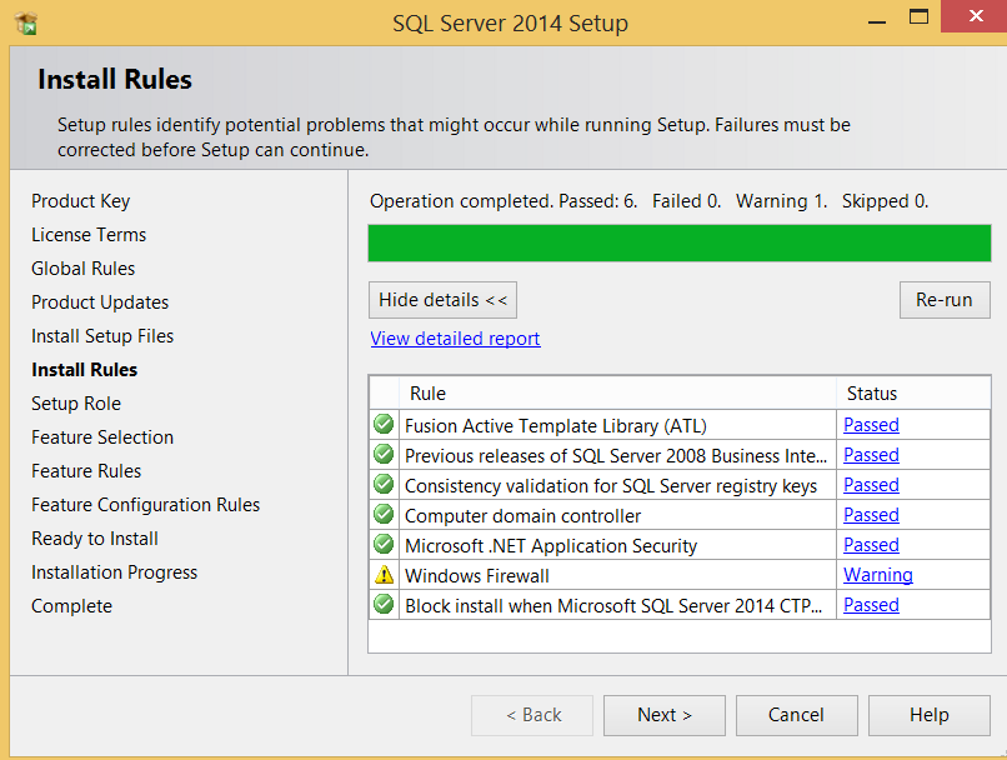
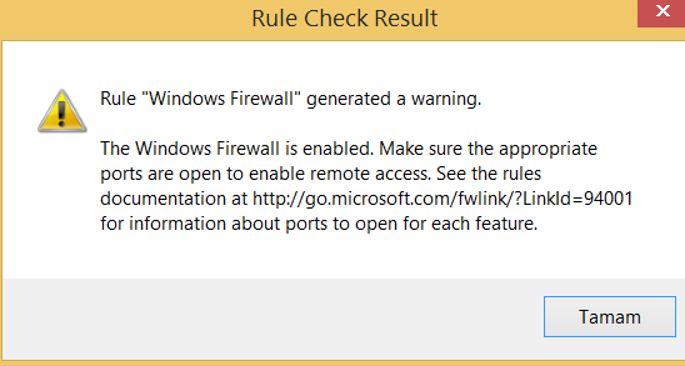
In my setup I just saw a warning about the firewall.
This warning indicates that my firewall is turned on as shown below.
For some ports, he says I’m sure the access is open.
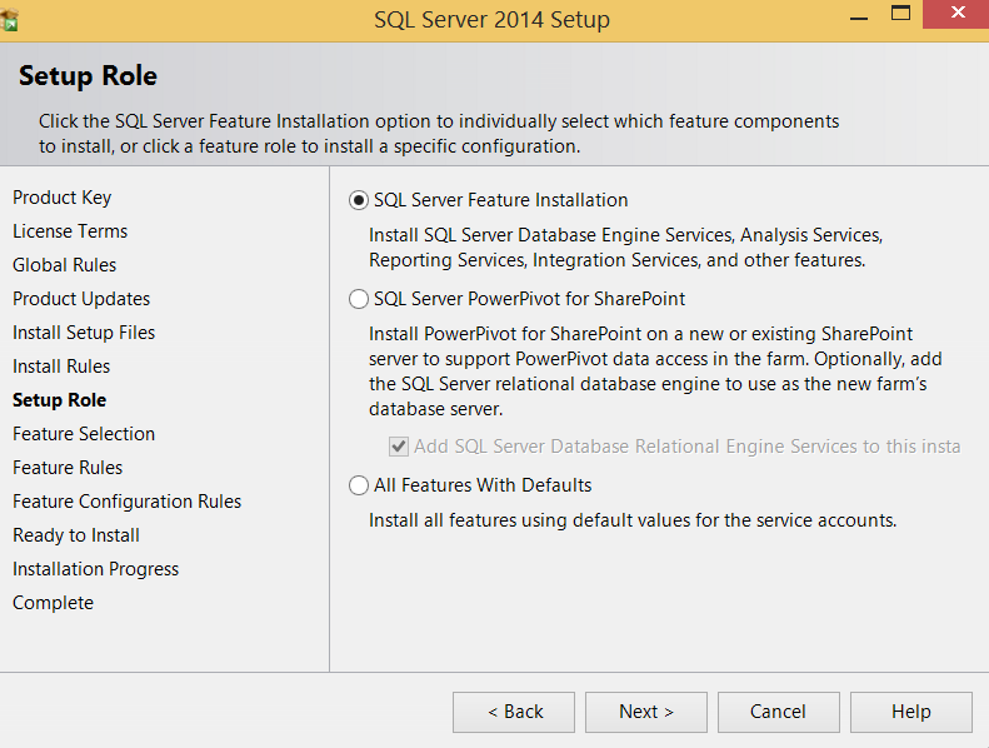
Without making any changes on the next screen, we go through as shown below.
We make selections based on what we need from the next screen.
I usually make the following choice.
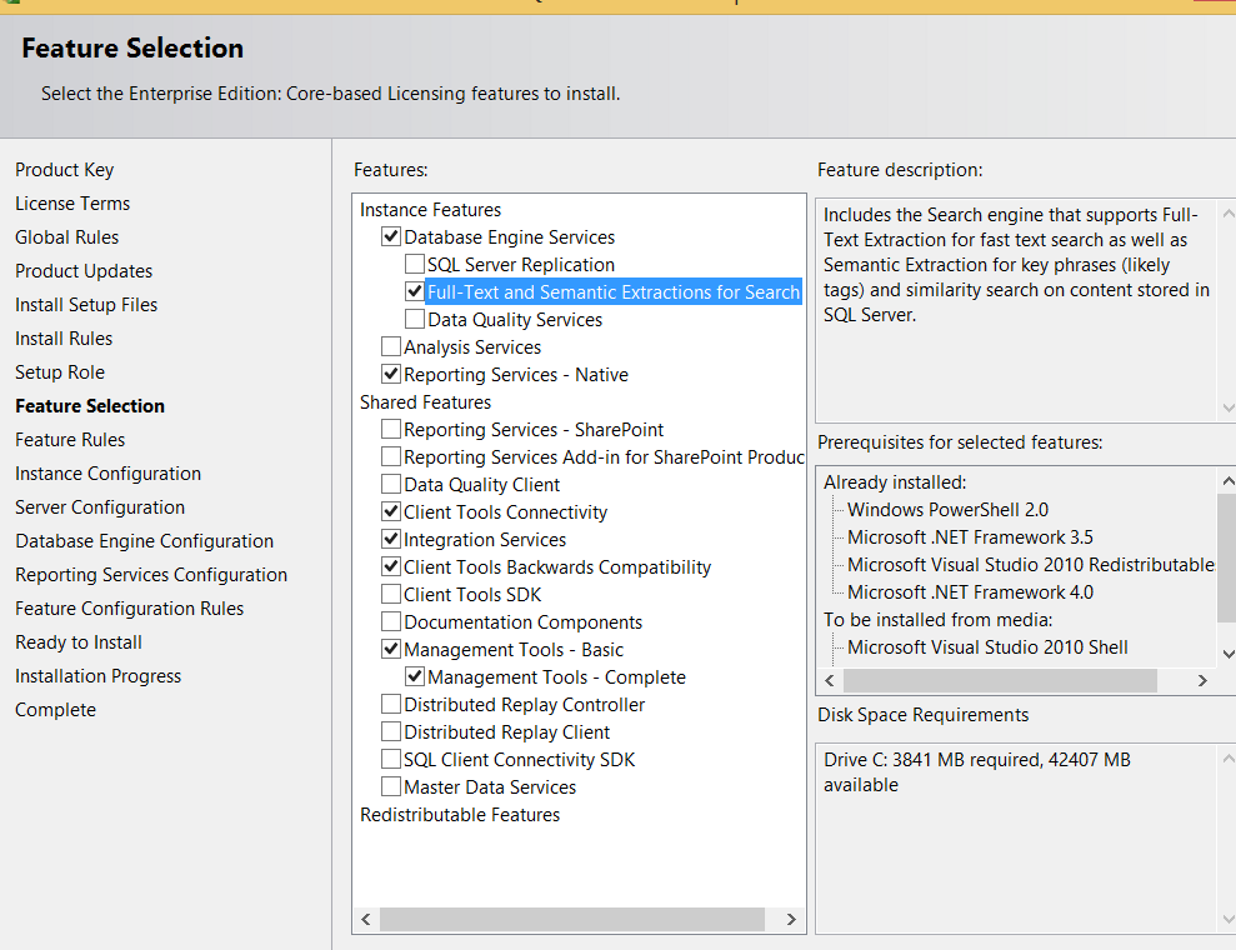
You can find the features in the image above in detail below.
In this way you can decide your own needs.
If you need it in the future, you can add features you did not select here.
| Database Engine Services | SQL Server installation. You can not create a database without selecting it. |
| SQL Server Replication | If you need to perform replication, you can choose this option. You can find the details of replication in the article “SQL Server Replication Types“. |
| Full-Text and Semantic Ex… | If you use Full Text Search in your databases, you should choose this option. You can find the details about Full Text Search in the full article “Fulltext Search On SQL Server“. |
| Data Quality Services | It is used to clear erroneous, repeating detail. For example, the values entered in the same column as IST and Istanbul have the same meaning. It seems to mean different meanings in statistics. You can use Data Quality Service to stop this. In fact, it’s more of a business intelligence specialist’s job. |
| Data Quality Client | It is a client application required to perform the cleaning process that we specified in Data Quality Service. It’s more of a business intelligence specialist’s job too. |
| Analysis Service | It is required for OLAP (Online Analytical Processing) type systems. It’s more of a business intelligence specialist’s job too. |
| Reporting Service | It is a tool used to prepare the report. |
| Data Quality Client | It is a client-based application for using Data Quality Services. |
| Client Tools Connectivity | Used for communication between clients and SQL Server. It contains the following components and must be selected. OLEDB for OLAP, ODBC, ADODB, and ADOMD+ |
| Integration Service | It is used to copy, move and convert data. It is often used by Business Intelligence Specialists. |
| Client Tools Backwards Compatibility | It includes “SQL Distributed Management Objects (SQL-DMO)” and “Decision Support Objects (DSO)”. These properties are used to manage SQL Server and Analysis Services objects. |
| Client Tools SDK | Includes software development kit for software developers. For example, some classes that come with this setup can be used to run an SSIS package in web services. |
| Documentation Components | If you want to load Books Online locally, you should choose this option. |
| Management Tools Basic-Complete | You must select these options for SQL Server Managemet Studio installation, the most basic tool we use to connect to SQL Server. If you select Basic, you can not use SQL Server Profiler, Database Engine Tuning Advisor, or SQL Server Utility management. If you need to use these features, you should also select Complete. |
| Distributed Replay Controller | If you are going to upgrade to SQL Server, you should choose this option if you want to make upgrade tests at the same density as the actual requests from the application. |
| Distributed Replay Client | If you are going to upgrade to SQL Server, you should choose this option if you want to make upgrade tests at the same density as the actual requests from the application. |
| SQL Client Connectivity SDK | Includes SQL Server Native Client (ODBC / OLE DB) to develop the database application. |
| Master Data Service | It is necessary for businesses to manage heterogeneous data from a single center. |
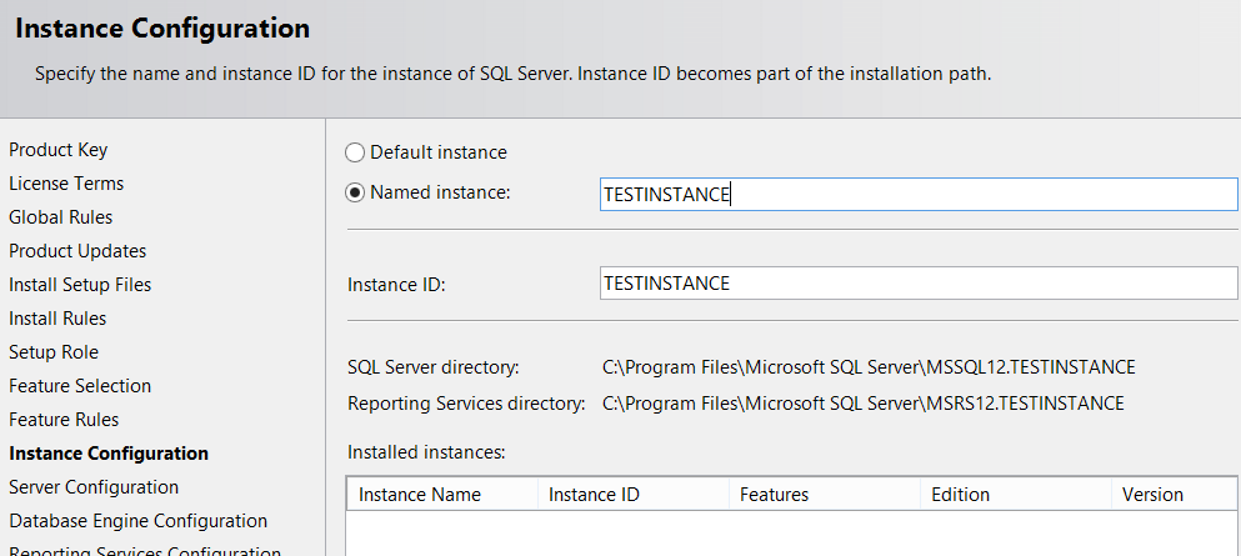
On the next screen you will see the option Default or Named.
Only one “Default Instance” can be installed on each server.
When connecting to SQL Server after “Default instance” setup, you can connect to SQL Server by typing server name only in Server Name.
A “Named Instance” can be set up more than once on a server.
When connecting to “Named Instance” you can connect as “ServerName\InstanceName”.
We set up a Named Instance in our example and give it TESTINSTANCE as a name.
On the next screen you will find user accounts and collation information.
If your Instance will be running stand alone, you can leave it like this.
I will choose Local System for Database Engine and SQL Server Agent even if I will install locally, but there is no problem in staying like this.
But if you are going to use Always On, SQL Server Failover Cluster, or similar, or if your Instance will be in contact with other servers in your domain, you need to create user accounts in the active directory for these accounts and define them in the following screen.
Microsoft recommends using different accounts for Database Engine and Agent in such installations.
For example,
DomainName\SQLServiceAccount for Database Engine,
DomainName\SQLAgentAccount for Agent.
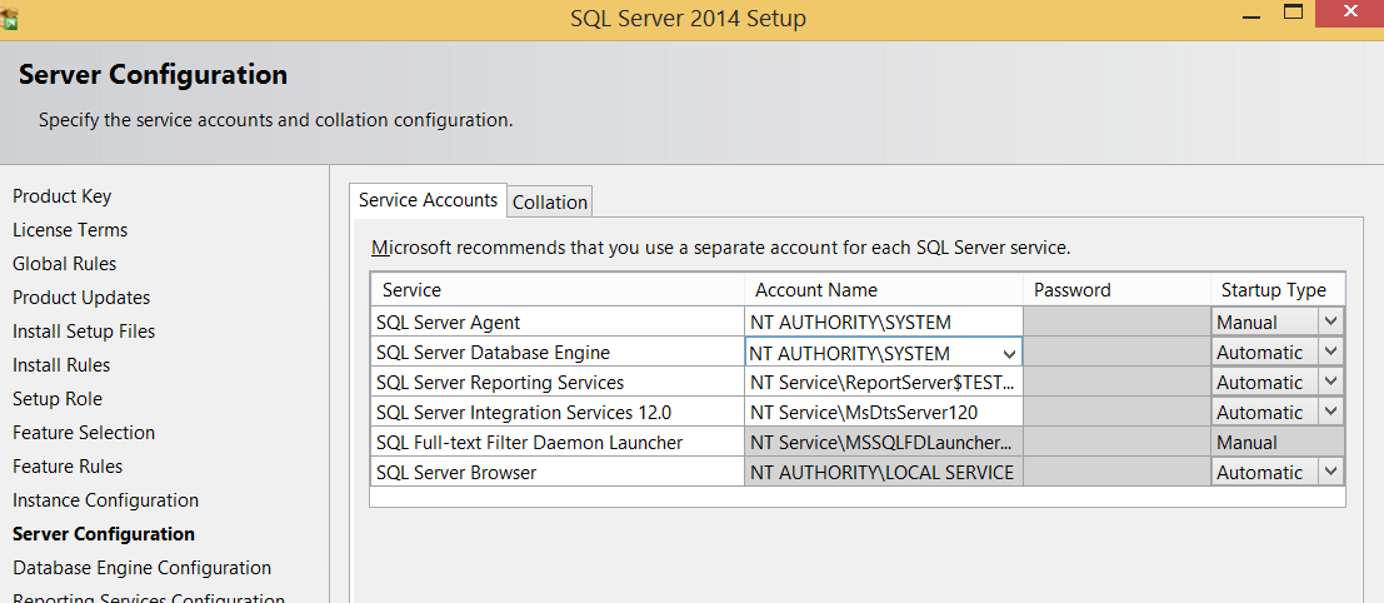
Since we are installing standalone, we only select and continue Local System for Agent and Database Engine.
To select the local system, you must click on the Account Name and browse to select your computer from the locations and type the system name in the “Object name to select” field and check the names.
You should choose the collation you want from the Collation tab.
You can also change Server collation after installation, but it requires a few complex operations.
And if you have databases in your existing system, it is not so easy to do this.
To change the Server Collation, you can look at the article titled “How To Change Server Collation On SQL Server“.
If you want to know the details of Collation, you can get detailed information by typing collation on our site(search section).
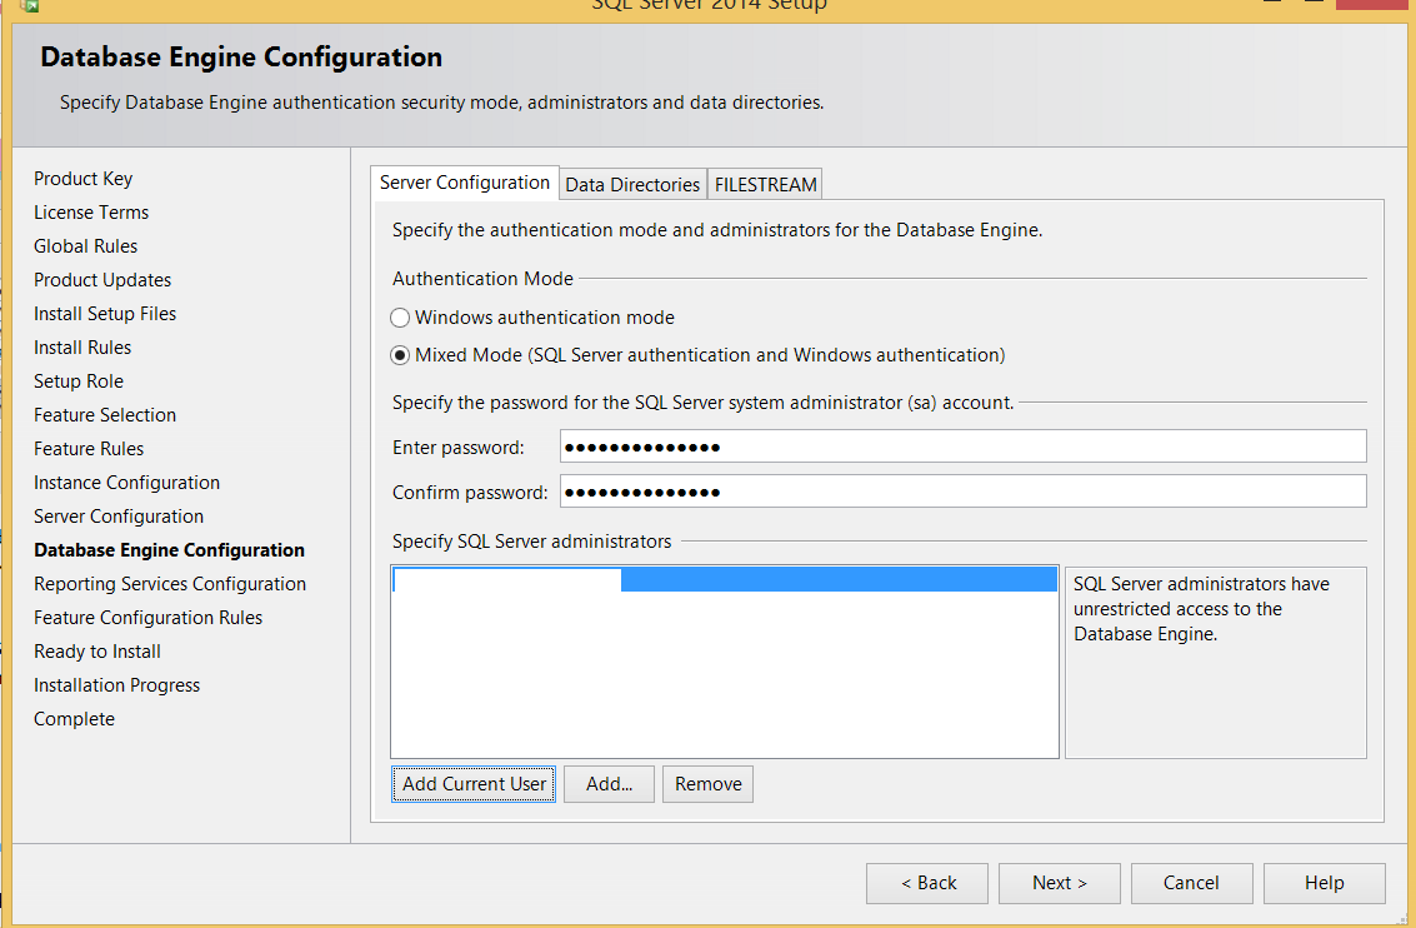
On the next screen we will set the connection type to the database. There are two types of connection.
Windows Authentication Mode:
Only an active directory user or a windows user defined on the local server can be logged in.
You can log in to SQL Server with SSMS without a password with the user you are logged on to.
Of course, the user you are logging into the server must be authorized on SQL Server.
If you choose this option, you can not login with SQL Authentication.
SQL Authentication Mode:
SQL Authentication is a way to connect to SQL Server with a user name and password without Active Directory. You must create this user on SQL Server.
Mixed Mode:
It means that both windows authentication and sql authentication can be done.
When you select this option, you will be prompted to enter a password and confirm this password as you see on the screen below.
This password will be set for sa(The most privileged user).
At the bottom, you need to click “Add Current User”
This will give sysadmin rights to the installer.
You need to go to the Data Directories tab before the next.
| Data Root Directory | The path to install SQL Server. If you leave it as default, your system databases will be lost if your operating system crashes. So you should definitely get your backups regularly and install a system that will let you know if there is a problem on backup For some people it might make more sense to create the Data Root Directory on a different disk than the operating system. But when you change the storage you use, you need to move your system databases. So I’m using the default settings here. |
| User database directory | It contains the information of the path that your data files of your databases will be created by default. The value written here will be set automatically during creation of the new database. but you can change it manually while creating the database. |
| User database log directory | It contains the information of the path that your log files of your databases will be created by default. The value written here will be set automatically during creation of the new database. but you can change it manually while creating the database. |
| Temp DB directory | The path of tempdb’s data files. |
| Temp DB log directory | The path of tempdb’s log files. |
| Backup directory | Default backup directory |
Below you can see how we set it up.
This does not mean that we will create all databases by default on these paths.
Since I installed SQL Server on my own computer and I did not have any other disk, I chose the C disk only.
Microsoft recommends keeping data and log files on separate disks and tempdb on separate disks.
Also some databases can be very large and you may need more IO.
Therefore, you may need to separate the database into file groups, create multiple data files, and spread these files to disk.
In the article “How To Create a Database On SQL Server” you can get details of how to create a database according to your needs.

If you want, you can enable file stream from the “File Stream” tab.
You can get detailed information on the article named “What is File Stream On SQL Server“.
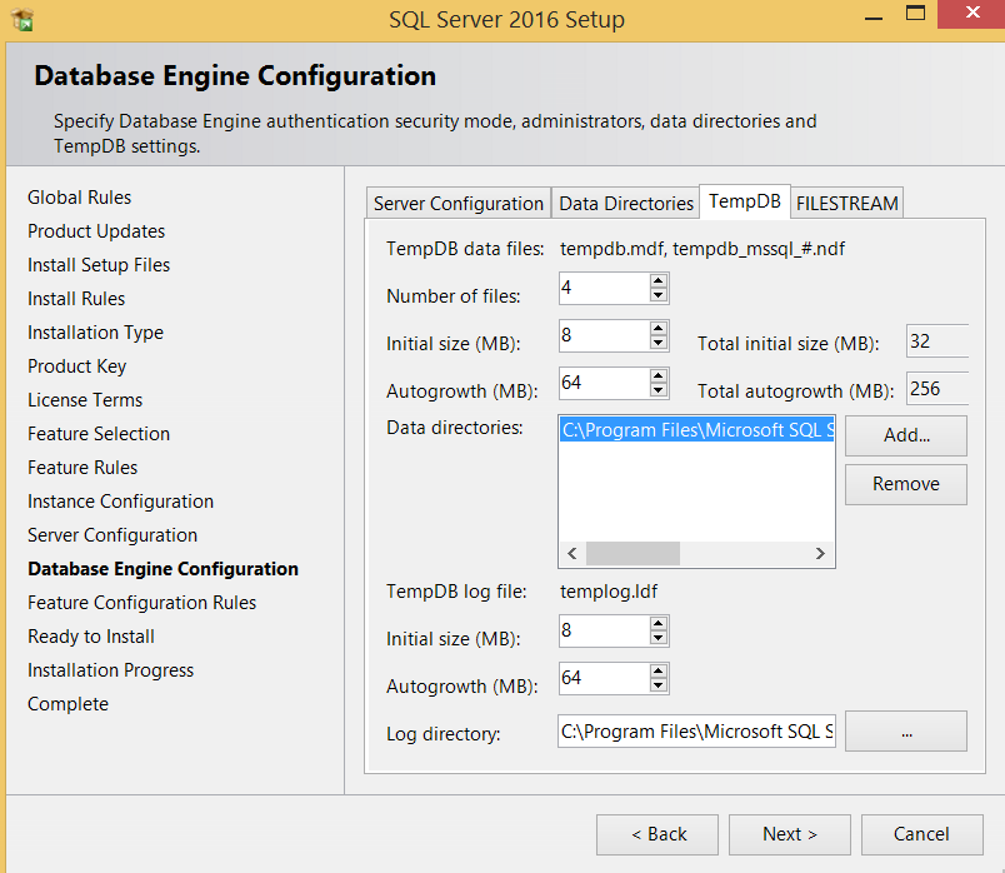
With SQL Server 2016 Management Studio, you can also configure tempdb on this screen as follows.
From the fields you see below, we can set the tempdb file count, initial size, auto growth, paths of data and log files.
It is generally advisable to set the number of tempdb files as many as the number of CPUs in your system.
Increases the number of tempdb files to prevent contention that can occur in tempdb.
Creating too many files can also have a negative impact.
So far I have created 8 or 16 tempdb files on a machine with 8 CPUs and I have not had a problem.
In a new system I had a serious contention in tempdb, and the first thing I did was to increase the tempdb file count.
As a result, the problem is solved.
Below you will see the screen where you will configure tempdb during installation.
We are proceeding by clicking Next.
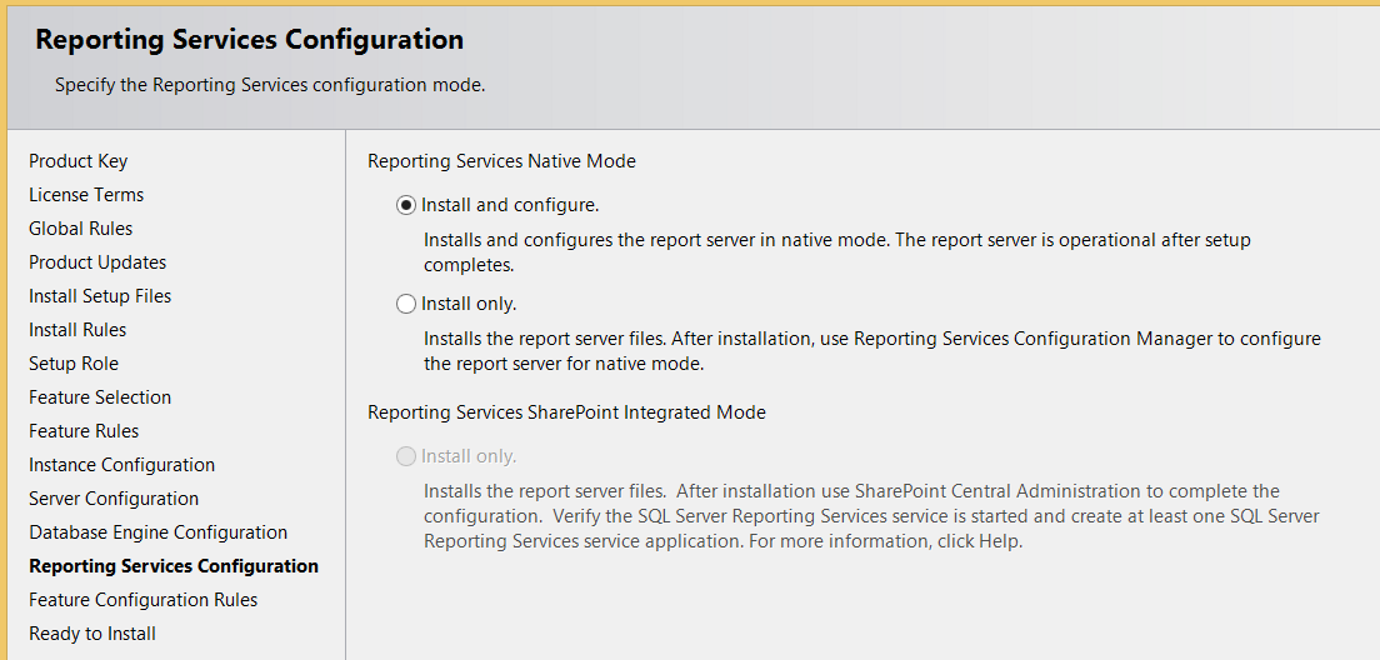
The Reporting Services configuration screen appears.
By default we leave as follows.
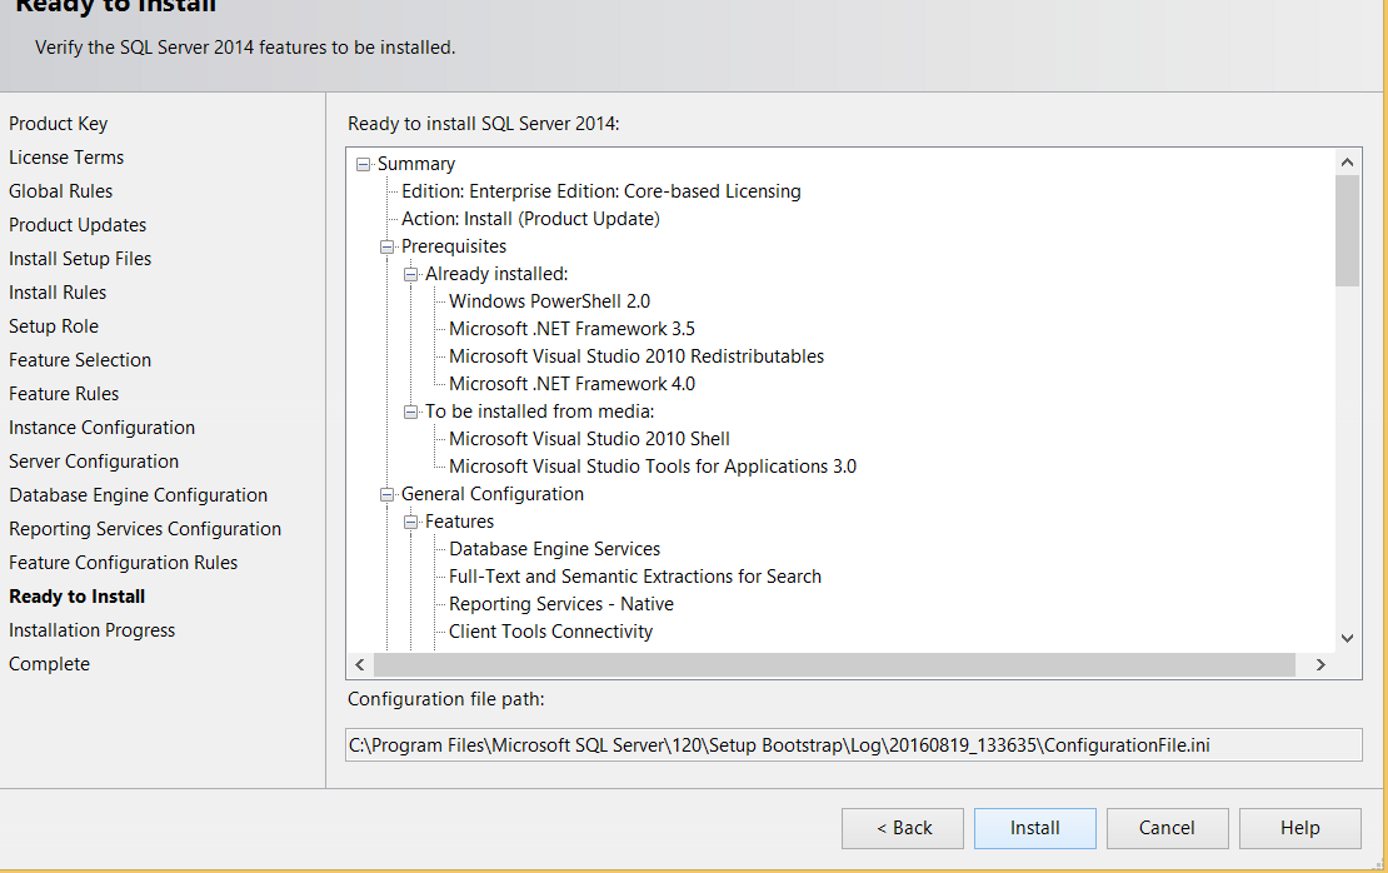
We are completing the installation by clicking Install.
After the installation is complete, I recommend reading the article “SQL Server Best Practices and Configurations that need to be made After Installation“.
![]()