 Database Tutorials MSSQL, Oracle, PostgreSQL, MySQL, MariaDB, DB2, Sybase, Teradata, Big Data, NOSQL, MongoDB, Couchbase, Cassandra, Windows, Linux
We can easily perform point-in-time recovery with Database Recovery Advisor. For example, we have a Full backup that has taken at 14:00 PM and we want to recover database to 13:59. We can perform this process with Database Recovery Advisor on SSMS.
We have a database called TestDB. I assume we regularly back up this database (Full+Log Backup). For example, suppose we have a full backup at 11:02 and log backup at 11:07. If I restore full backup with norecovery at 11:02, then restore log backup at 11:07, the database will be at 11:07. But if I want to recover the database to 11:05, I have to do point-in-time restore. You may want to browse the article “Backup Restore On SQL Server” for Backup-Restore operations.
Before Database Recovery Advisor was introduced in SQL Server 2012, we could not perform point-in-time restore through SSMS. With SQL Server 2012 you can easily restore point-in-time restore via SSMS.
For the scenario I described above, let’s perform point-in-time restore over SSMS to 11:05.
I will restore the database with the name AdventureWorks2014point_in_time_restore.
I’m going to do this in two ways.
In the 1st method, I will restore the full backup manually and then point-in-time restore manually.
In the 2nd method, I will perform the full backup restore + point-in-time recovery process with the database recovery advisor in a visual way.
First Method(Manual Full Backup and Log Backup Restore)
First of all, restore full backup with the name AdventureWorks2014point_in_time_restore in norecovery mode. Then, right click on the database and click Tasks-Restore-Transaction Log.
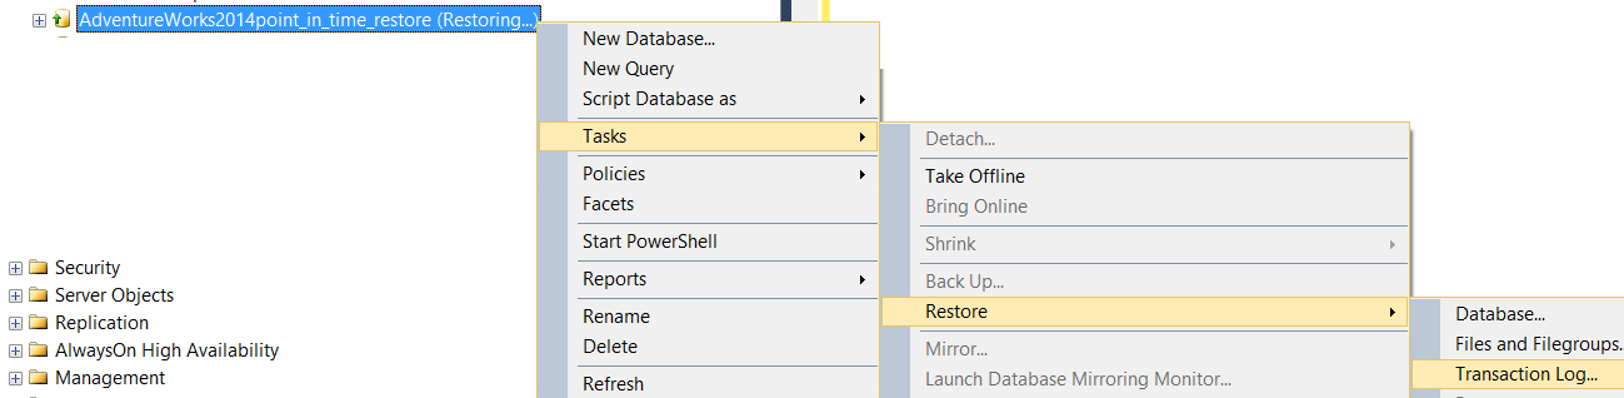
On the screen that appears, right click … From the From Device section and click Add. Then find the relevant log backup and then double-click the backup and click ok.
Then click on the checkbox under Restore as you see below.
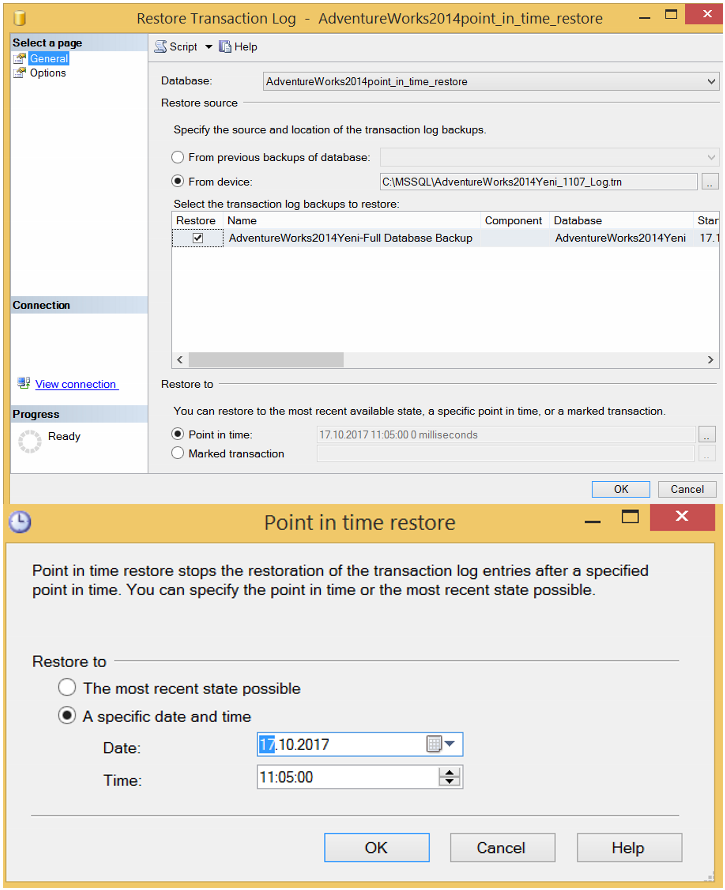
Finally, select Point in time from the Restore to section and click “…”, and write the hour, minute and second to recover the database to a specific time.
You can complete the process by clicking ok, but I usually take the script by clicking on the Script statement you see on the top left. I suggest you do it that way.
As you can see in the script below, it restores the LOG file with STOPAT command and performs point-in-time restore.
1 2 3 4 | RESTORE LOG [AdventureWorks2014point_in_time_restore] FROM DISK = N'C:\MSSQL\AdventureWorks2014Yeni_1107_Log.trn' WITH FILE = 1, NOUNLOAD, STATS = 10, STOPAT = N'2017-10-17T11:05:00' GO |
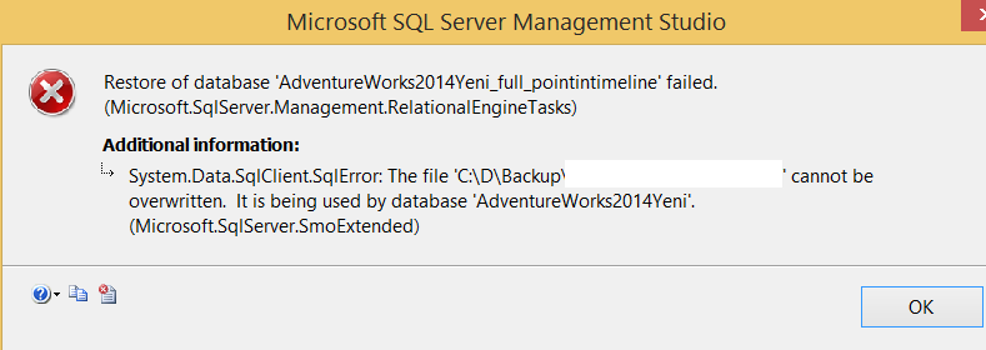
If you get an error like the following when you want to restore, you should follow the solution at the end of the article.
The file ‘xxx.mdf’ cannot be overwritten. It is being used by database”.
Second Method(Recover Database Using Database Recovery Advisor)
We can also perform all the steps in the first method more easily with the database recovery advisor at once. We will restore the database with a different name.
First of all, right-click Databases on SSMS and click Restore Database.

Then we select the database to be restored from the source section.
Then we write a new database name in destination section. This will create a new database instead of overwriting the existing database.
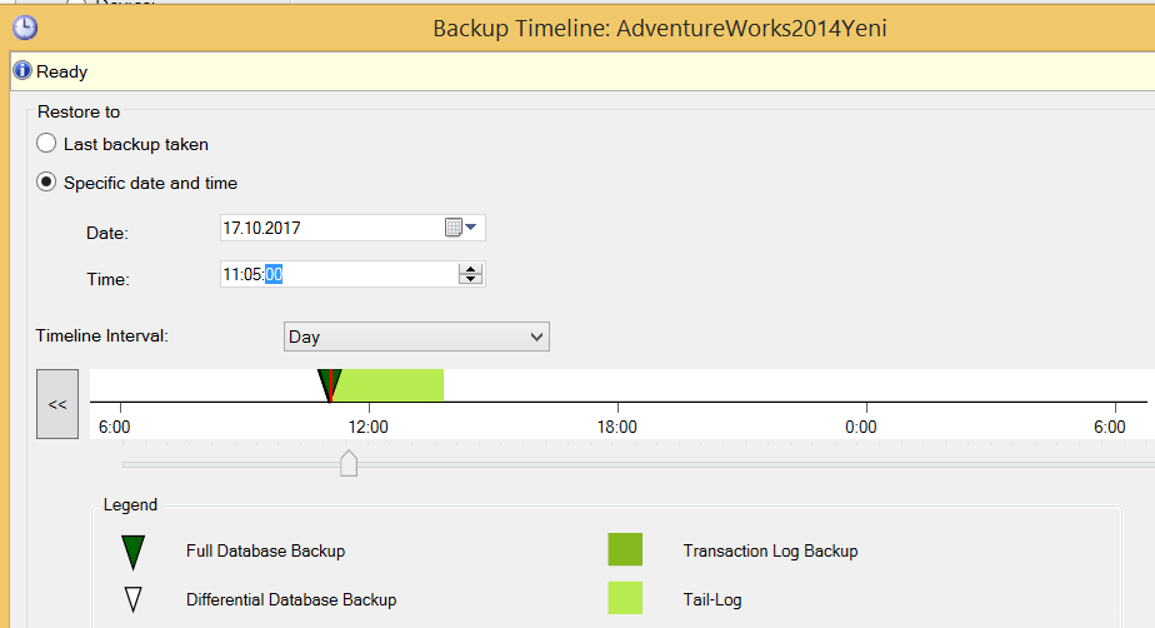
In the Destination section, click on the Timeline button and select a date and time as below to recover the database to that time.
As you can see, when we set the time we want to return, Database Recovery Advisor chose the best method to return to this moment.
Suppose that you have a full backup on every Sunday at 19:00, a differential backup at 19:00 every evening, and a log backup every 2 hours.
If you wanted to go back to Tuesday evening at 21:07, first you should restore Sunday’s full backup in norecovery mode, then restore the differential backup on Tuesday at 19:00 in norecovery mode, then restore the log backup at: 20:00 in norecovery mode.
Lastly, you should restore the log backup at 22:00 in recovery mode with stop at 21:07. With Database Recovery Advisor, we can easily do this all at once.
NOTE: Backups must be in the path shown. If SQL Server can not find the backup on those paths it can not restore.
After completing these operations, your Restore screen should look like the following. It depends your backups.
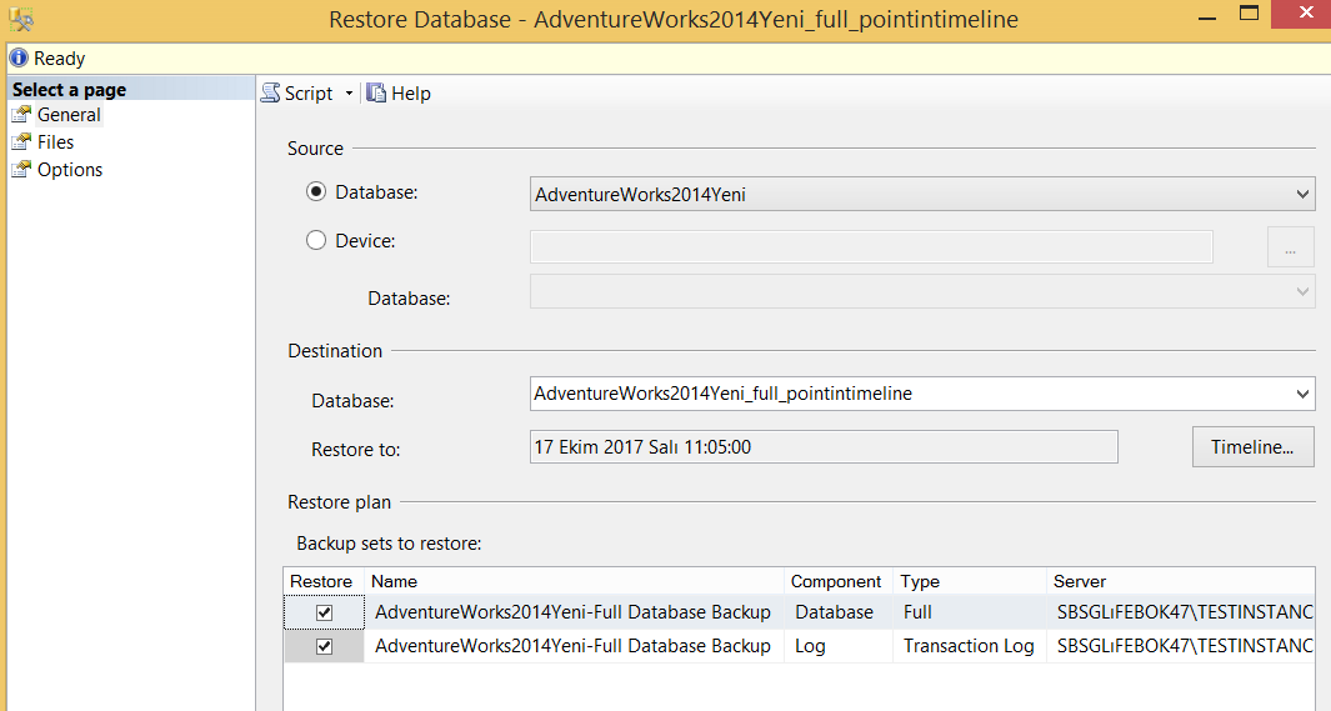
Click OK to complete the process or click the Script button to get the script.
When you click OK, you may get an error like the one below.
The file ‘xxx.mdf’ cannot be overwritten. It is being used by database”.
The reason for this error is that instead of overwriting the existing database with the REPLACE command, we want to create a new database with the same file names in same disk. Thus, it can not create the same file on the same disk.
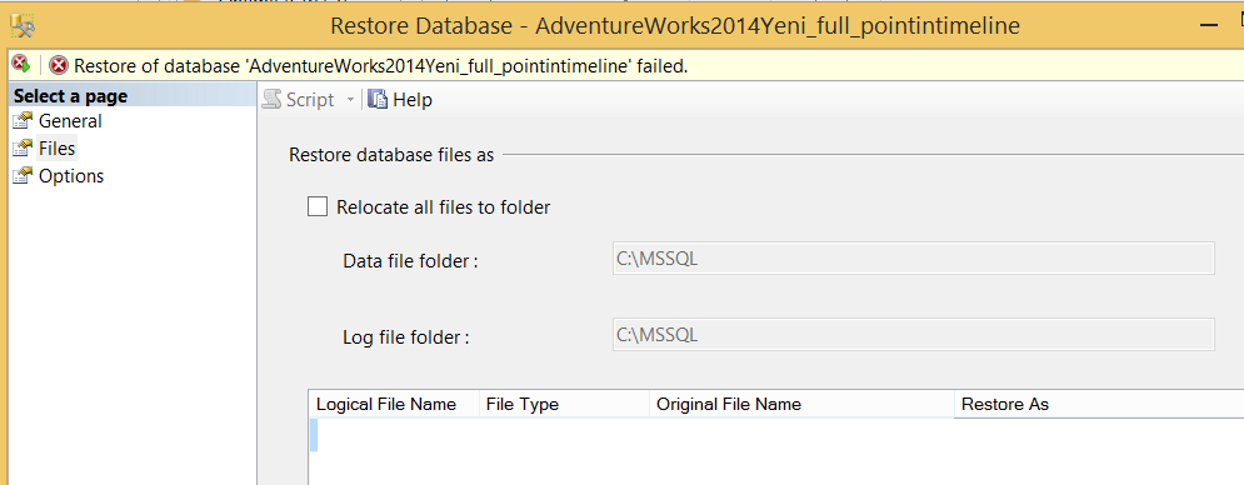
We can solve the problem by placing files of the same name in another folder by selecting Relocate all files to folder.
Or you can solve this problem by manually changing the file names from the Restore As section at the bottom.
![]()