 Database Tutorials MSSQL, Oracle, PostgreSQL, MySQL, MariaDB, DB2, Sybase, Teradata, Big Data, NOSQL, MongoDB, Couchbase, Cassandra, Windows, Linux
We can use Backup Restore for many operations. Below you can find the most common reasons for using it.
1. To get a regular backup
2. To get an instant one time backup
3. To restore a corrupted database using Backup
4. To move the database to another instance or another disk
We can get 3 types of backups.
Full Backup:
We can backup of the entire database with Full Backup.
Differential Backup:
We can backup the differential after the latest full backup is taken with Differential Backup.
Log Backup:
We can backup Transaction Log file with Log Backup.
With a sample scenario I will explain how to use these types of backups.
Consider the scenario that a full backup is taken once a week, a differential backup is taken at 20:00 every night, and a log backup is taken every 2 hours.
They said on Wednesday that there was a problem at 3 PM and that the database was erased accidentally. They want you to go back to the latest backup.
The process of returning to the last backup will be as follows. We restore the last taken full backup in norecovery mode.
Then we restore the differential backup taken on Tuesday evening at 20:00 in the database that we restored in norecovery mode again.
Then, after restoring all log backups taken after Differential Backup in norecovery mode, we restore the last log backup in recovery mode and complete the operation.
You can perform Backup and Restore operations either via SSMS or through a script.
For Full Backup:
Right click on the database via SSMS and select Task-> Backup options.
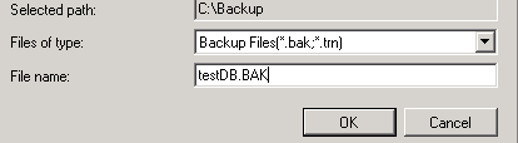
Then in the Destination section, click on the Add button on the right. And we give the backup a name with a .BAK extension like below and click OK.
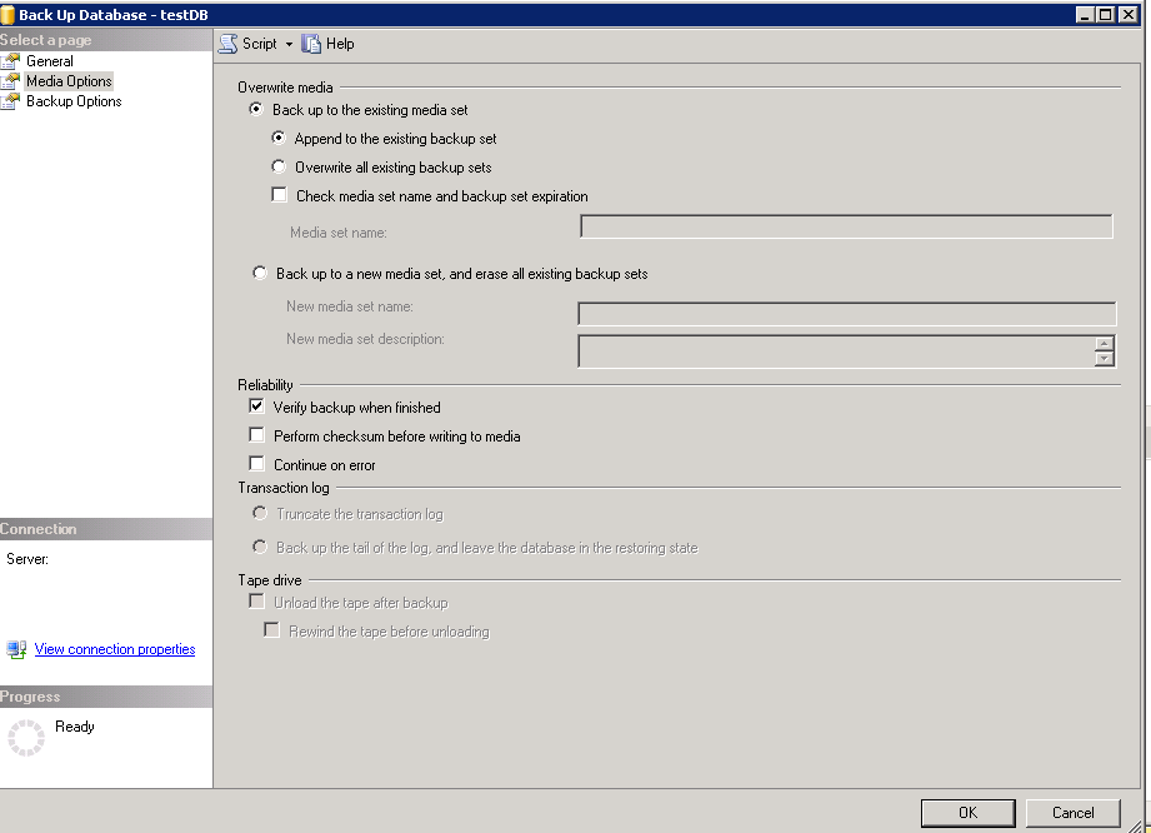
Then we click on Verify backup when finished from Media Options as below.
This will confirm the backup’s correctness with the “Restore HeaderOnly” statement after the backup is finished.
Do not be afraid. it does not restore it while confirming it.
However, after the backup is finished, it will extend your processing to approximately the time of the restore.
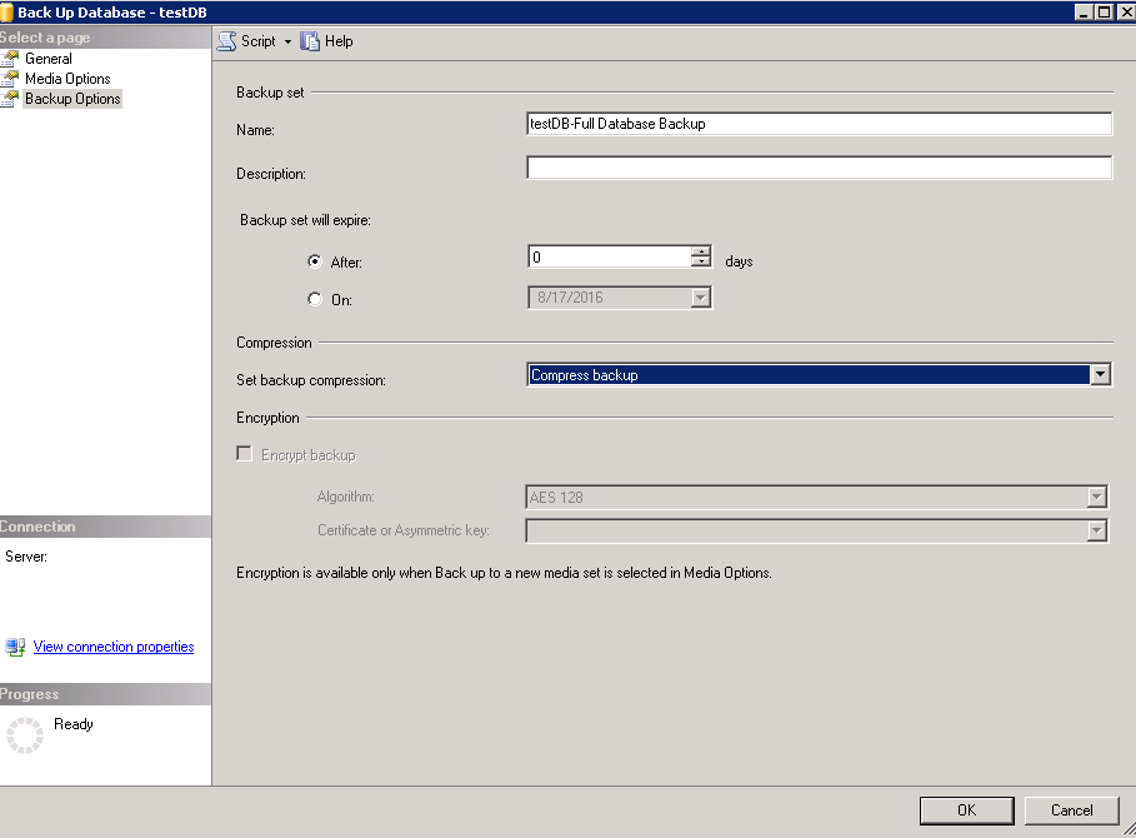
If you did not set backup compression default via sp_configure, it is useful to select “Set backup compression” via “Backup Options” as follows. This way you can reduce the backup size.
You can find details about sp configure in the article “sp_configure (Server Level Configurations in SQL Server)“.
After doing all these operations, click OK and you will get backup.
Or, if you click on the Script you see in the upper left in the picture above, it will give you the script of the actions you are going to take.
I do all the operations by taking the script and then running this script and I would recommend the same to you.
The script for the actions we do is as follows.
1 2 3 4 5 6 7 8 9 | BACKUP DATABASE [testDB] TO DISK = N'C:\Backup\testDB.BAK' WITH NOFORMAT, NOINIT, NAME = N'testDB-Full Database Backup', SKIP, NOREWIND, NOUNLOAD, COMPRESSION, STATS = 10 GO declare @backupSetId as int select @backupSetId = position from msdb..backupset where database_name=N'testDB' and backup_set_id=(select max(backup_set_id) from msdb..backupset where database_name=N'testDB' ) if @backupSetId is null begin raiserror(N'Verify failed. Backup information for database ''testDB'' not found.', 16, 1) end RESTORE VERIFYONLY FROM DISK = N'C:\Backup\testDB.BAK' WITH FILE = @backupSetId, NOUNLOAD, NOREWIND GO |
For Differential and Log Backup:
We perform the same operations with a few differences. After selecting Task-> Backup, we select Transaction Log for Log Backup and Differential for Differential Backup from Backup Type.
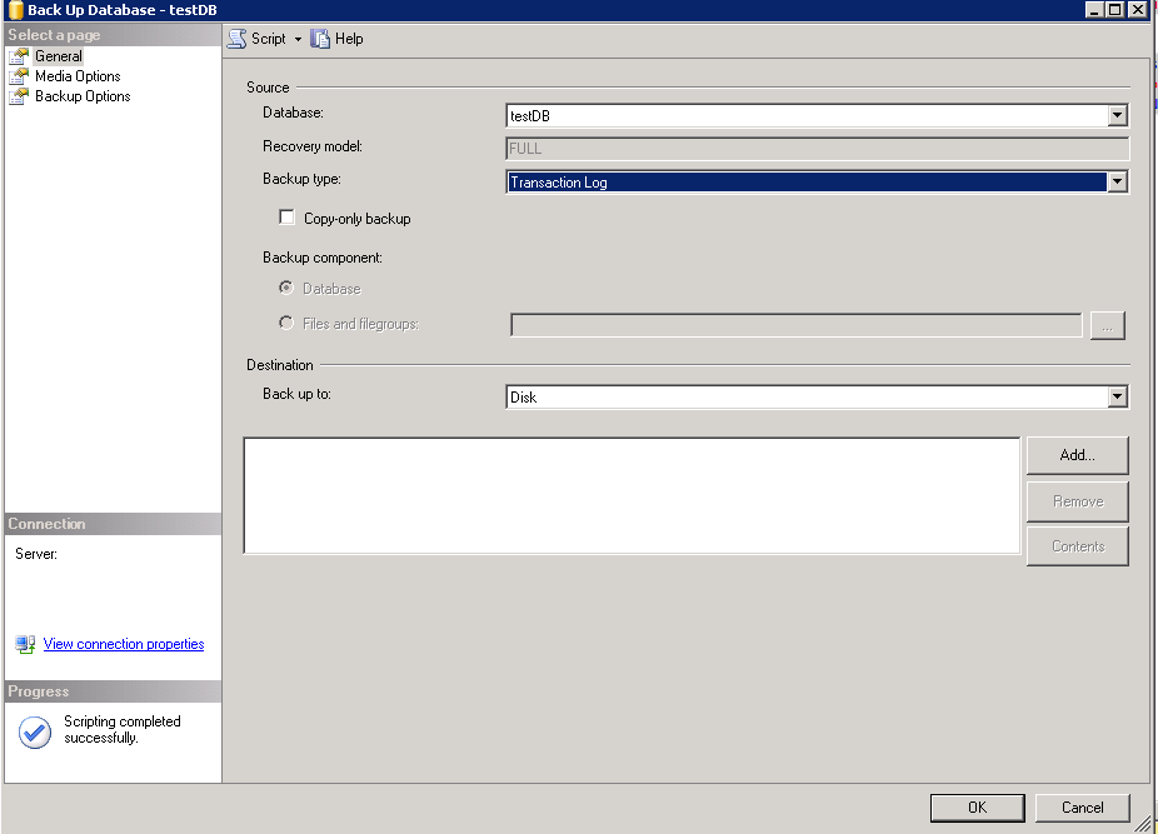
If we get a log backup, we write the backup name giving extension as .trn.
Restore: Right-click Databases on SSMS and select restore database.
In the source tab, we select the device and click on the add button on the right.
Find the backup file we want to restore and click OK and a screen like below appears.
If we select the database, we can perform the restore operation by selecting the desired backup from the backup history on msdb.
However, if backup does not exist on the specified path, restore will fail.
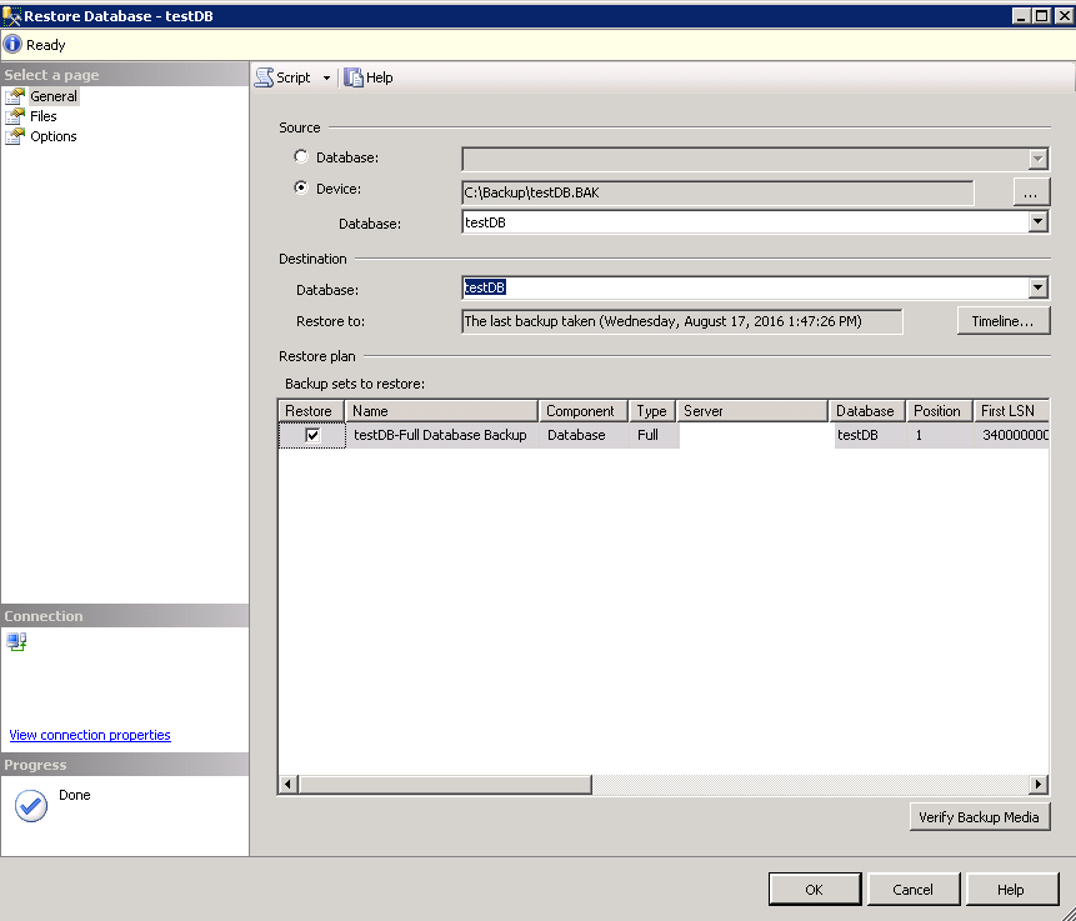
For example, restore the same instance with a different name. The new name is prodDB.
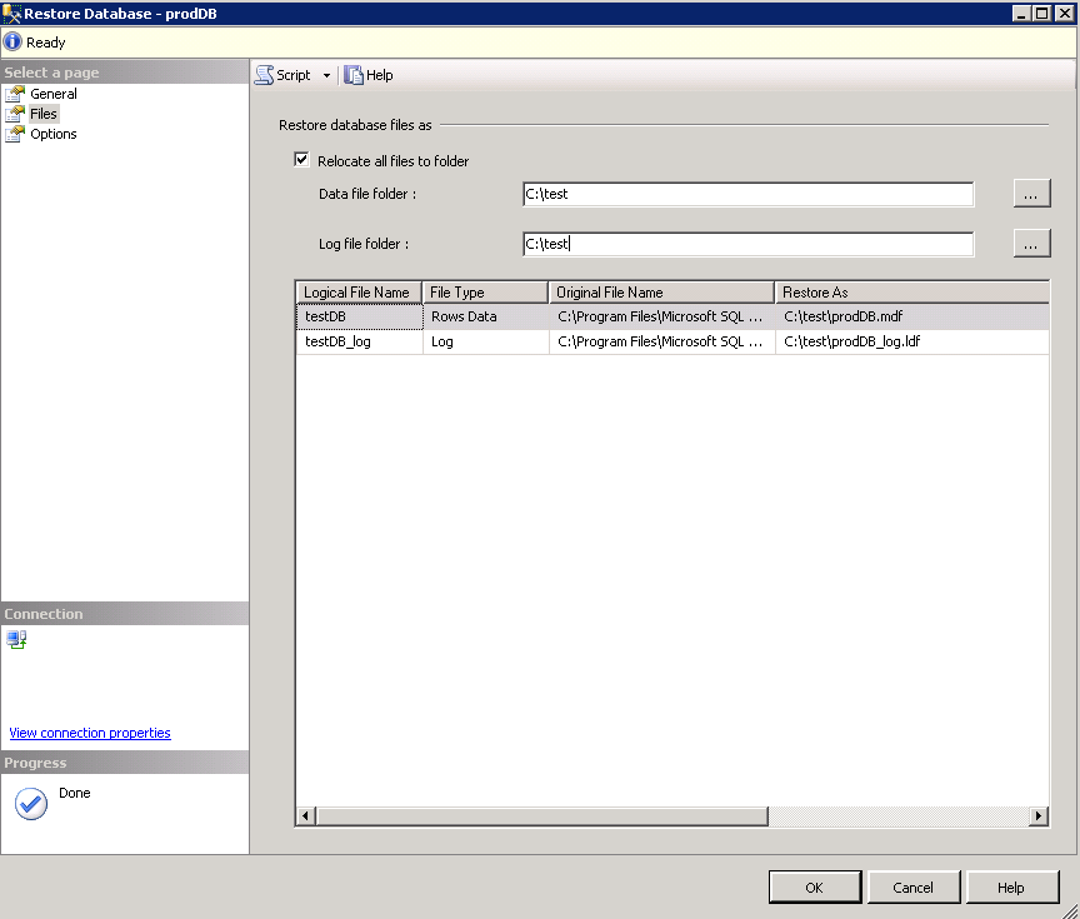
In the above screen, we write prodDB in the Database part of Destiantion and go to the Files tab.
You can change the path of the files that will be created from Restore As in Files.
Or if you are going to do a test restore and you have a lot of files and you want all the files to be on a single disk instead of distributing them to different disks you can display a single disk with the following Relocate all files to folder.
You also need to select the Log file folder for the log file.
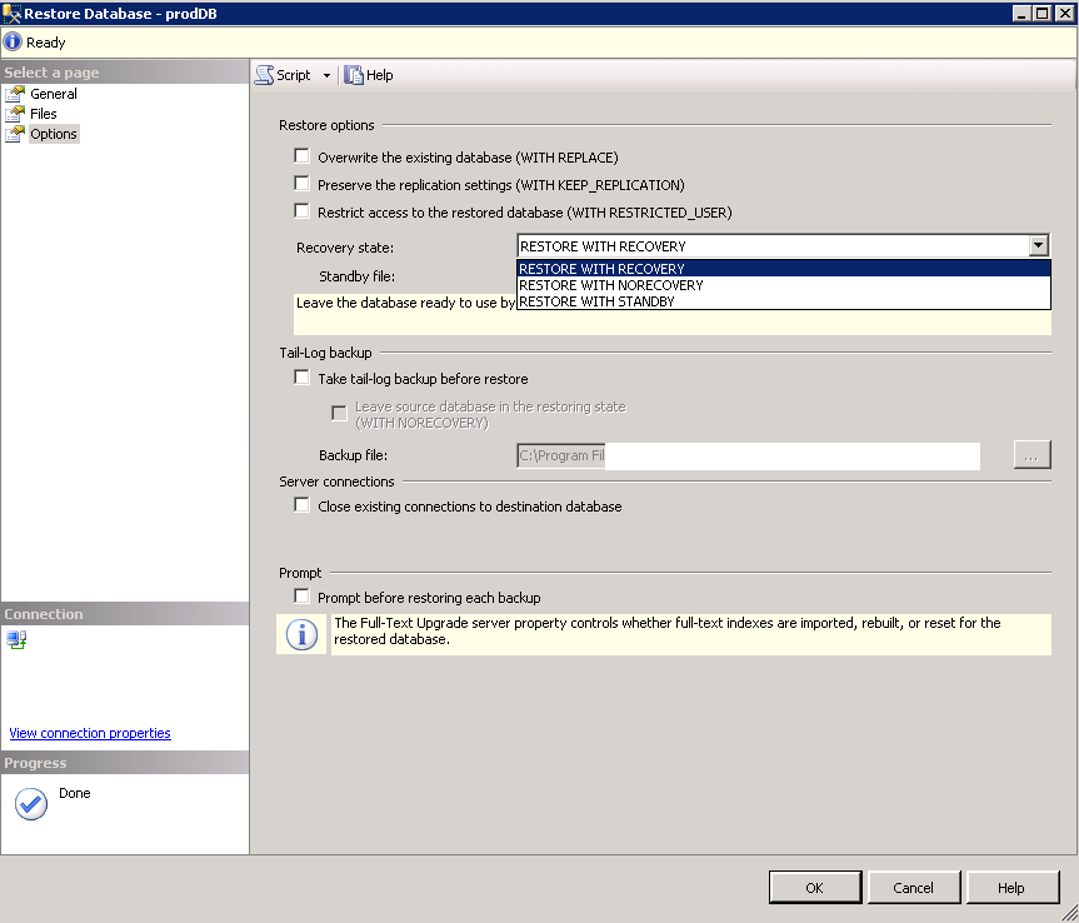
We go to Options. The option you see below, starting with “Overwrite the existing”, is the option you need to choose if you want to overwrite an existing database.
In Recovery State we choose to restore the database in recovery or norecovery mode.
I explained why you might need it in the sample scenario at the beginning of this article.
When we receive the script, the following script appears.
1 2 3 4 5 | USE [master] RESTORE DATABASE [prodDB] FROM DISK = N'C:\Backup\testDB.BAK' WITH FILE = 1, MOVE N'testDB' TO N'C:\test\prodDB.mdf', MOVE N'testDB_log' TO N'C:\test\prodDB_log.ldf', NOUNLOAD, STATS = 5 GO |
![]()