 Database Tutorials MSSQL, Oracle, PostgreSQL, MySQL, MariaDB, DB2, Sybase, Teradata, Big Data, NOSQL, MongoDB, Couchbase, Cassandra, Windows, Linux
I will use SQL Server 2014 in this article. Other versions can be installed in similar ways.
SQL Server Always On Failover Cluster was a HA (High Availability) solution that we used a lot before the Always ON Availability Group technology. In the rest of the article, I will use SSFC(Abbreviation for SQL Server Failover Cluster) instead of SQL Server Failover Cluster .
However, I prefer not to use SSFC after Microsoft has presented Always ON Availability Group. There are many reasons for this.
You may want to read my article “Difference Between Always On Failover Cluster, Database Mirroring, Always On Availability Group, Replication and Log Shipping“, which explains the reasons and the differences between these technologies. In this article I will just mention about the SSFC installation.
Let’s start an SSFC installation with 2 nodes. Before starting the installation, we must meet the following requirements.
- To be able to install SSFC, these servers must be in the same windows cluster.
- For Quorum (Witness), a disk that is visible to both servers,
- For a Distributed Transaction Coordinator (DTC), a disk that is visible to both servers,
- To keep SQL Server database files, a disk that is visible to both servers. (I recommend that you specify two shared disks to put data files and log files on separate disks),,
- The Windows Cluster Account (Windows Cluster’s name) installed on these 2 servers needs to be granted the Create Computer Object privilege in the OU (Organization Unit) where these 2 servers reside in Active Directory.
You should talk to the Active Directory expert in your organization and create an OU for your SQL Server Servers. After you create the OU, you must also specify the policies to be applied to this OU.
Policies in Active Directory can be applied on OU basis. So the OU (Organization Unit) is a group. In this way, policies that apply to other OUs do not affect SQL Server.
- You must also create the local disks that are required for tempdb on 2 servers. If you are going to use Buffer Pool Extension you should use local disk again. You can find details about Buffer Pool Extension in our article “What is Buffer Pool Extension“.
- Note that the user who is going to install is an active directory user (domain_name\user_name).
Add this user to the administrator group on both servers where you will install the failover cluster.
Lets Install SQL Server Failover Cluster Step by Step.
Step 1:
Right-click Setup.exe on the server and start SQL Server Setup by clicking Run As Administrator.
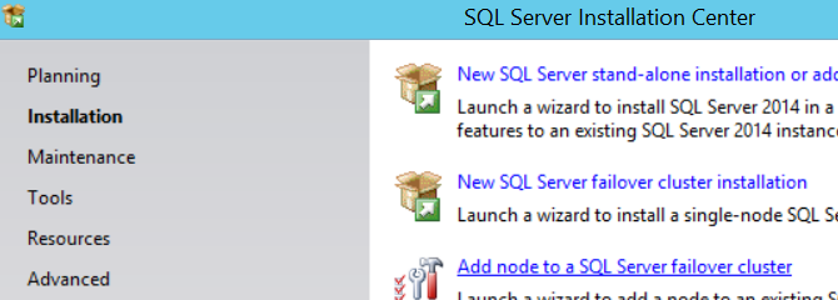
Come to the Installation tab and click New SQL Server failover cluster installation.

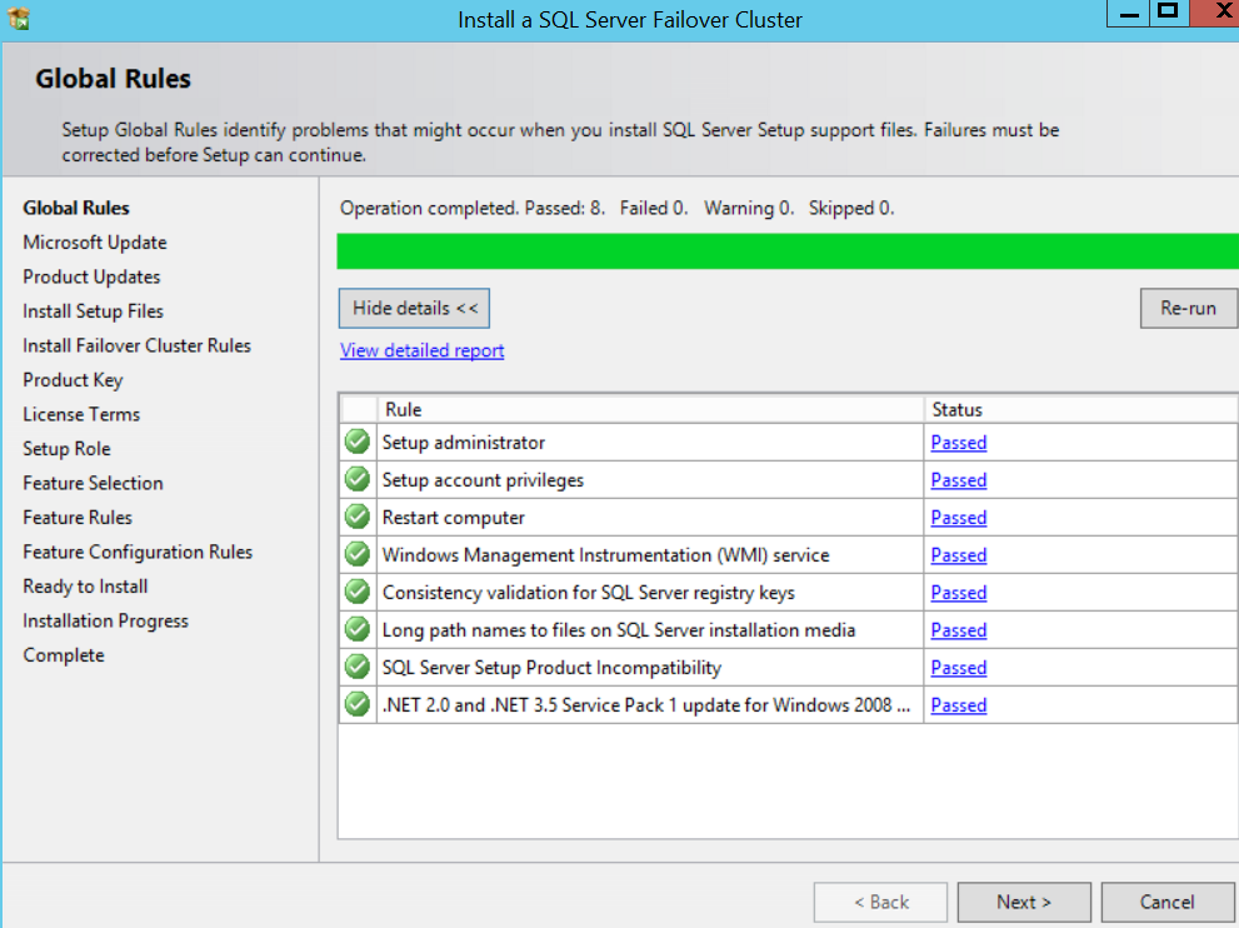
The next screen checks the general rules for a healthy installation.
If it gives an error, you can correct it first and then continue the installation. Our setup did not give any errors. You can see that all requirements are complete as follows.
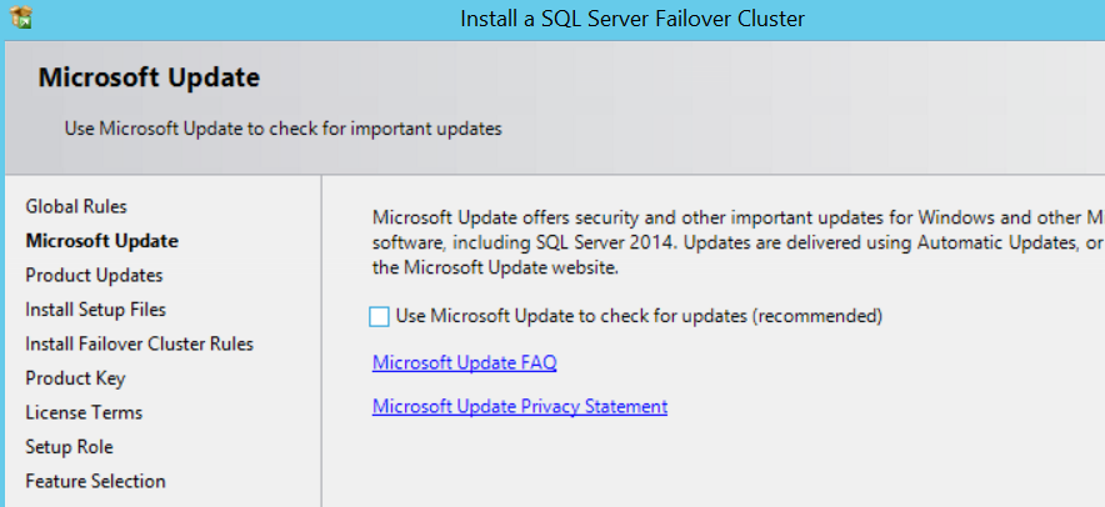
The next screen asks if we install an update to our installation file. If you select “Use Microsoft Update to check for updates” as it appears on the screen below, it makes the necessary updates. You can also apply these updates after the installation is finished. For now, I continue by clicking next without selecting this option.
The next screen controls the rules for failover cluster installation. If anything fails, correct the error and click Re-run.
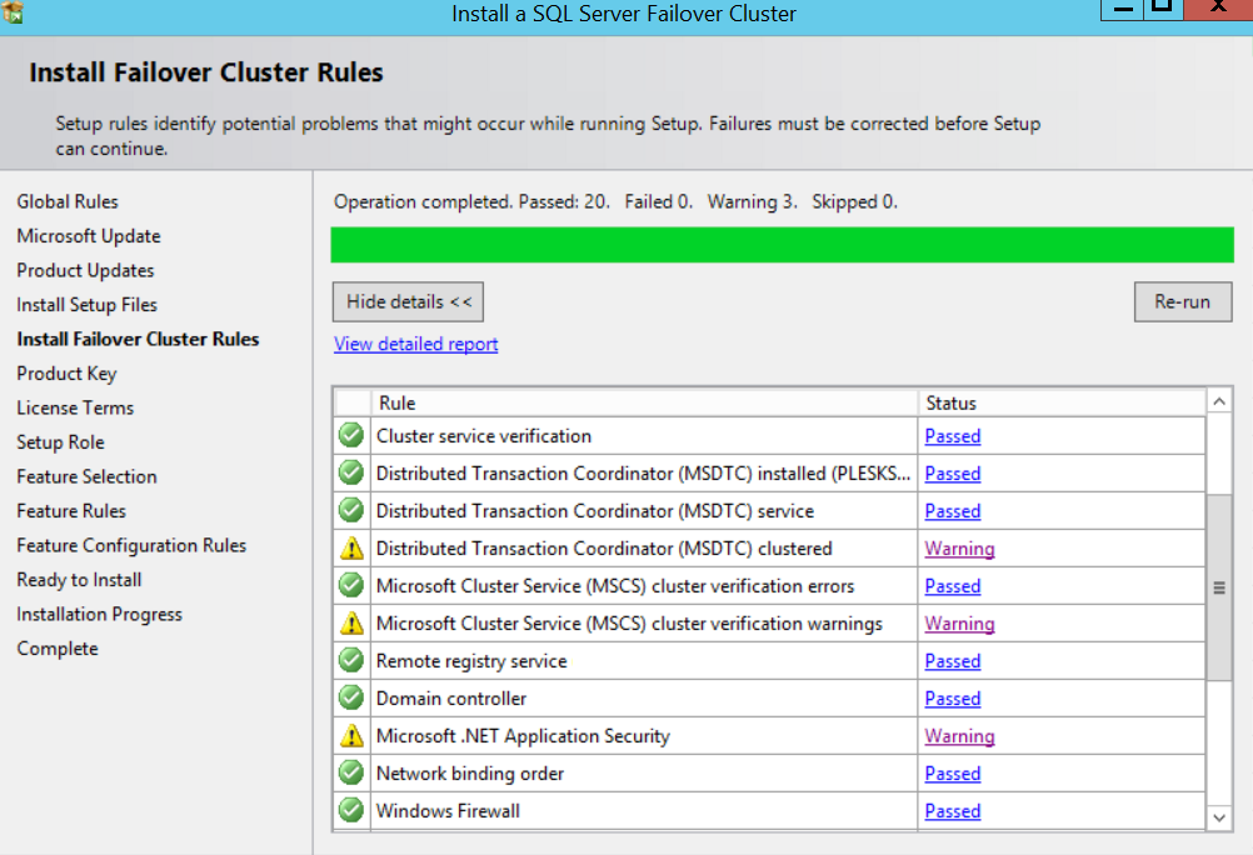
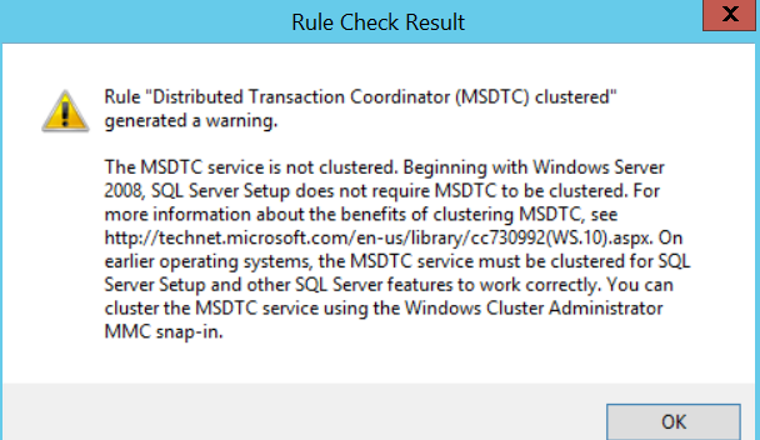
During testing, we received 3 warnings. The most important one for us is DTC. The warning we received is as follows.
As seen in the error, MS DTC is not required for failover cluster installation.
However, if an application database that you will include to the cluster will use MSDTC, you must add the MSDTC service to the cluster.
You can read my articles titled “How To Add MS DTC To The Cluster” and “How To Configure MSDTC For SQL Server“.
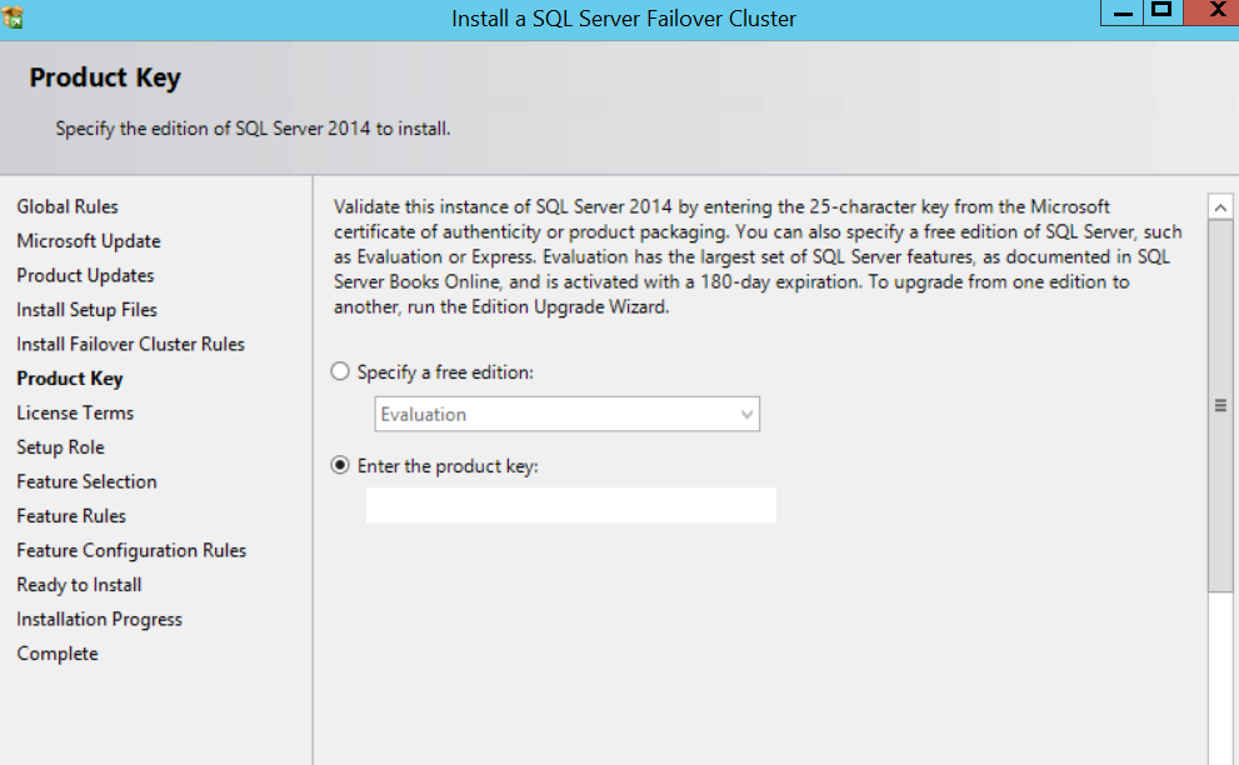
I’m proceeding by clicking next without doing anything for these warnings. In the next screen, we will be able to enter the product key or use one of the free versions. If you choose Evaluation, you are installing a 180-day trial. We continue by entering the Product key.
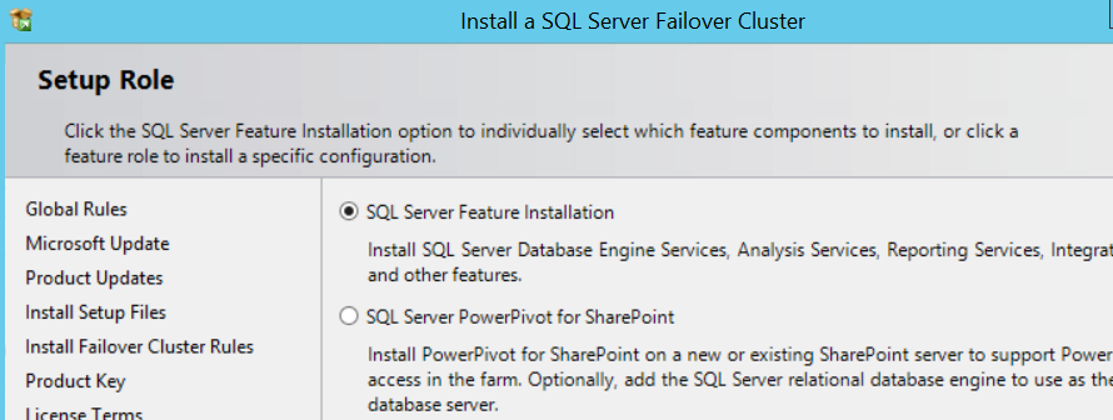
In the next screen, select I accept the license terms and click next. On the next screen, we select SQL Server Feature Installation as follows and click next.
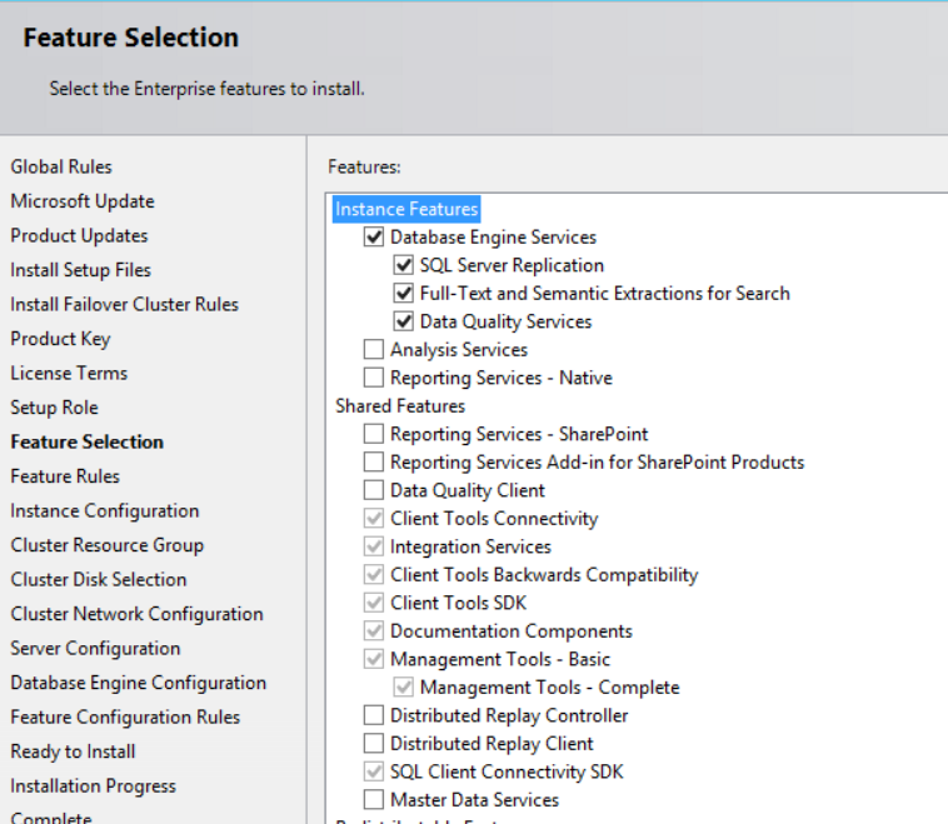
On the next screen, we select the features we want to install. You can decide how to choose these features by reading my article, “How To Install SQL Server“. You can find a detailed description of each feature in my article. We are making our selection as follows.
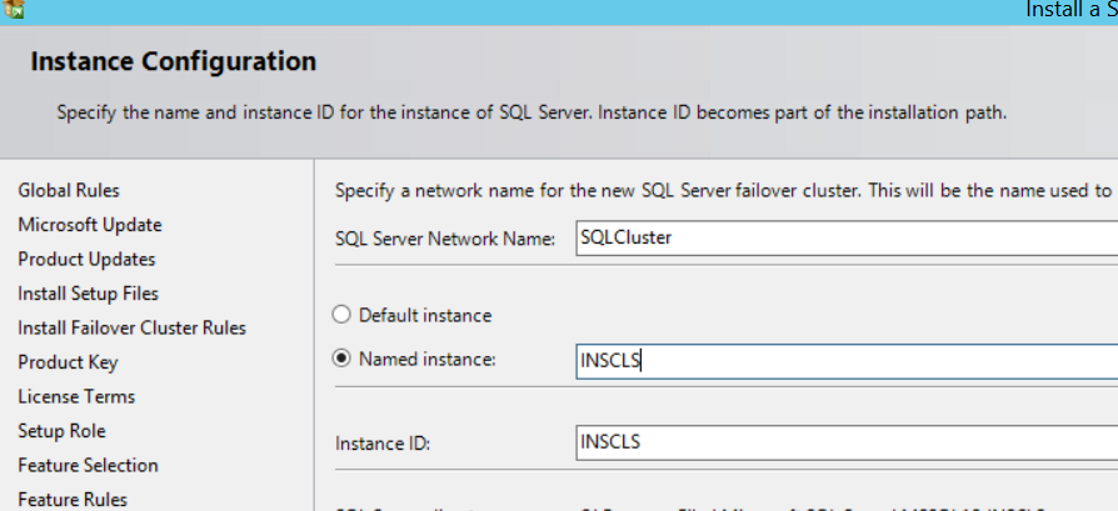
The next screen asks the Network name and Instance name as shown below.
We’re writing SQLCluster to the network name. Think of it as a virtual name.
Application developers will only know this name, or the IP of that name.
This IP or network name will direct the person who wants to connect to the database to the server where the database is currently active.
For example, suppose you have a windows cluster of 2 servers. The names of the servers are SQLNODE01 and SQLNODE02. We have installed SQL Server Failover Cluster on this windows cluster. The SQL Cluster name is “SQLCluster”.
Let’s assume that the database is active on SQLNODE01 in the T moment.
The application developer can connect to the database if he/she writes SQLNODE01 or SQLCluster to the ServerName section while connecting to the database.
However, if “SQLCluster” failover to SQLNODE02 at T + 1 moment, SQLNODE01 will no longer be able to connect to the database. Because SQLNODE01 is not active at T+1 moment.
The application or application developer connected with SQLCluster will be able to connect to the database without being affected by the failover process.
You can select the default instance as Instance name. Only one Default Instance can be installed on each server. If you have already installed the default instance, you must select named instance and give the instance a name. You can connect to SQL Server by simply typing the server name into the Server Name section when connecting to SQL Server after the installation of Default instance.
Named Instance can be installed on a server more than one. You can use one of the following methods when connecting to Named Instance.
ServerName\InstanceName
or
ServerName,port
Example: SQLNODE01,1435 or 156.43.56.71,1435
We named the instance INCLS and continue by clicking next.
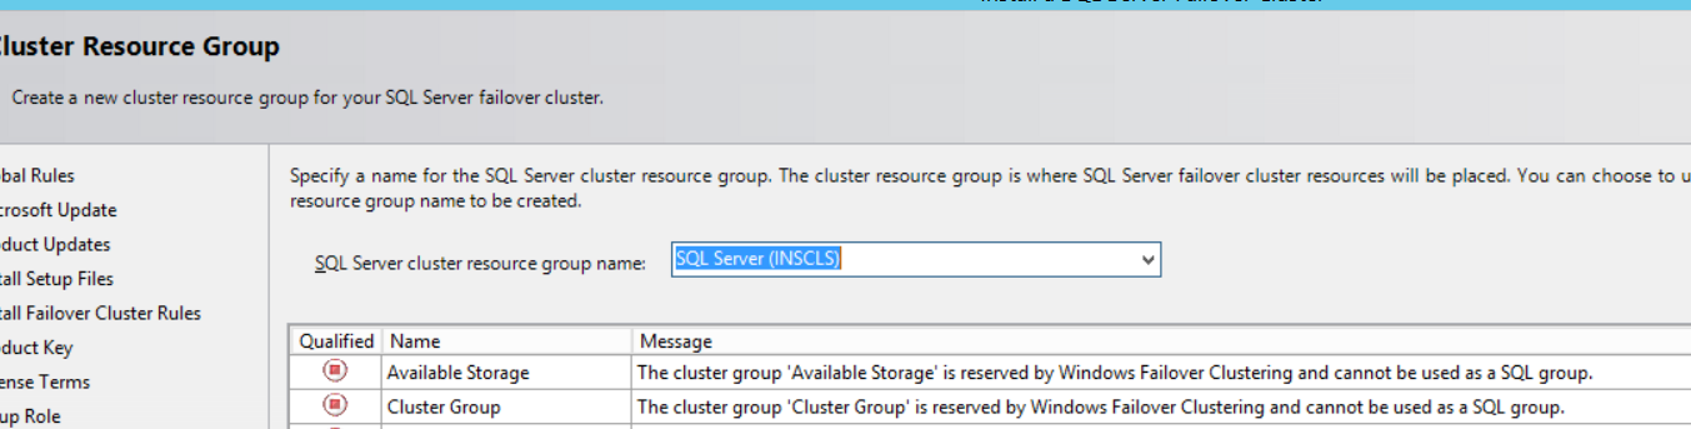
On the next screen, we will create a cluster resource group. Failover cluster components will be included in the cluster resource group. A cluster resource group with the name of our Instance automatically created. Click Next to proceed.
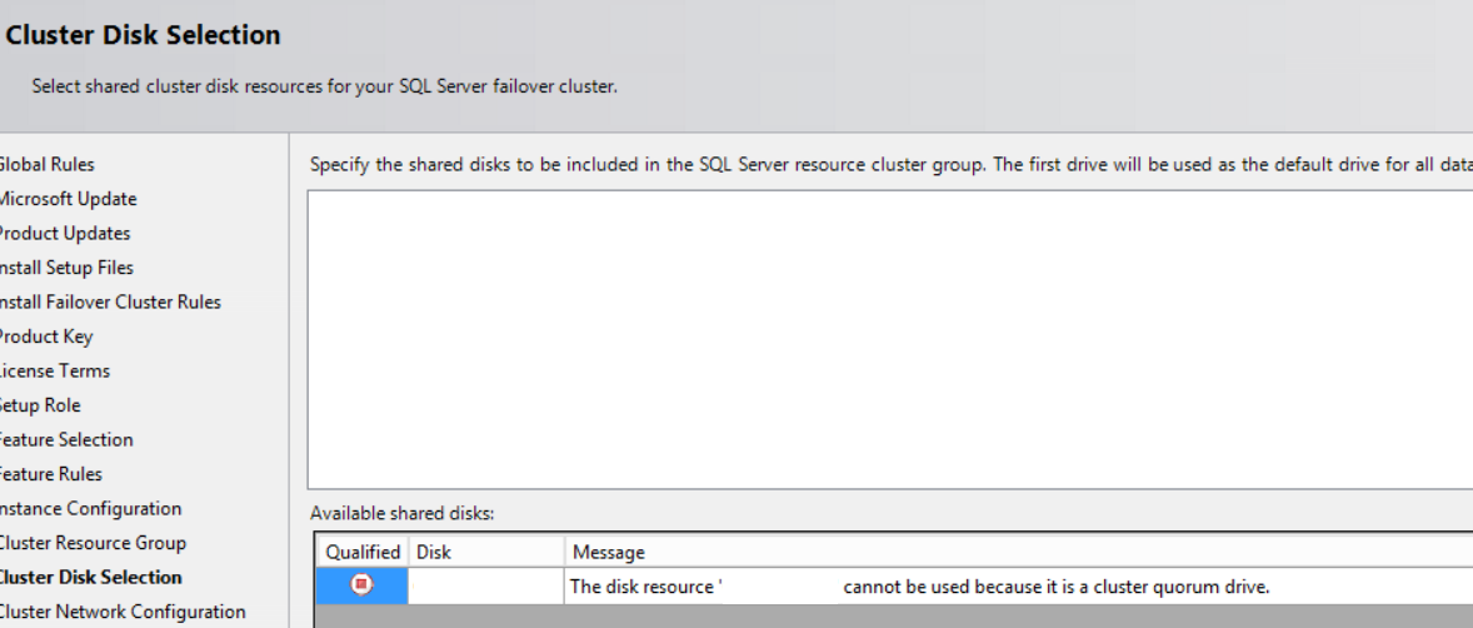
In the next screen, we need to select the disk or disks that the failover cluster will use. Since we don’t have a shared disk that we can use, the list is blank as you see below.
We open diskmanagement and give a letter to the disk we will use for our data, log and backup files that can be seen on each server on the windows cluster.
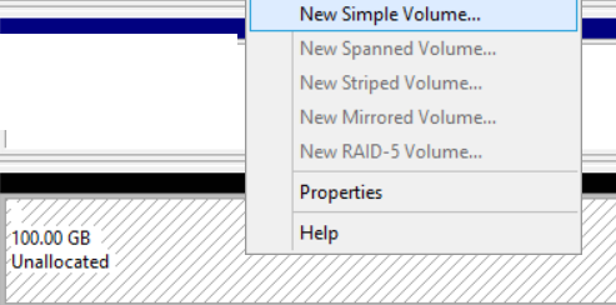
Right click on the disk defined by the system team and click Online and initilalize. Then Right-click on unallocated and click new simple volume as below.
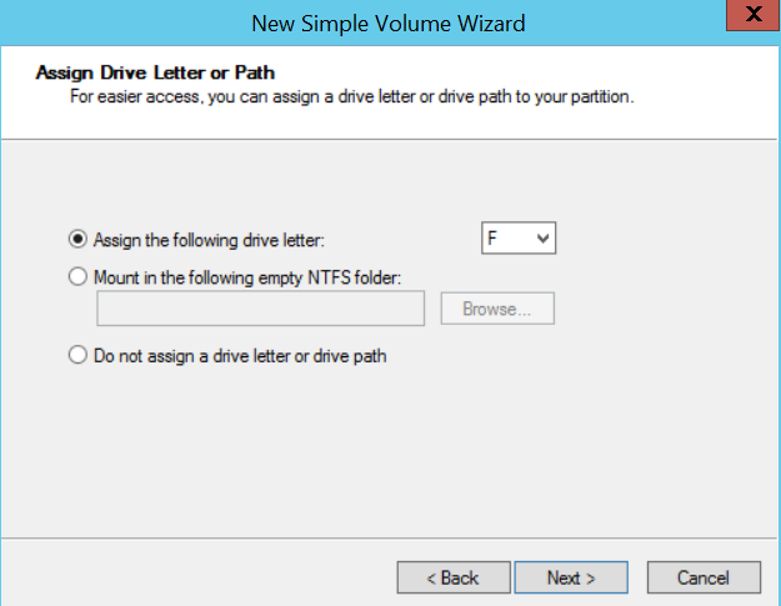
We are proceeding by clicking next and next and when the following screen comes up, we choose an unused letter on any server in the windows cluster.
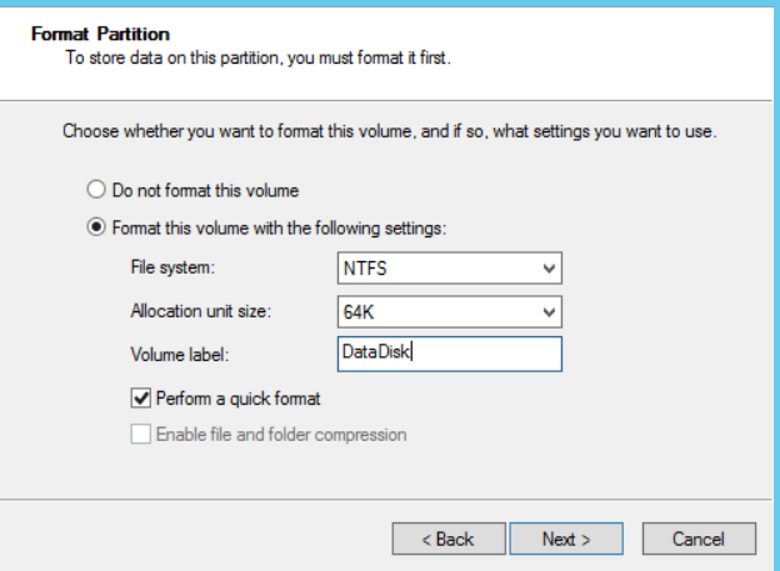
Next we will format the disk. We select the File system as NTFS as follows. The best practice recommended for the Allocation unit is 64K for SQL Server. You must also give the volume label a name.
If you are going to use separate disks for data and log files, you will need to define 2 disk that each of the 2 servers can see and perform the above operations. After these processes, we come to the failover cluster manager and we click Storage-> Disks-> Add Disk as below.
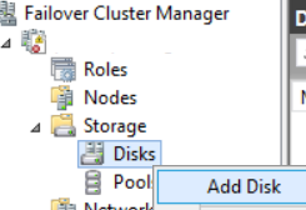
We see the disk that can be seen on 2 servers and click okey and add the disk to the cluster. (This disk is the disk we just defined)
We’re going back to the installation. We just click refresh on the Cluster Disk Selection page. The disk we added to the Cluster is selected and green now.
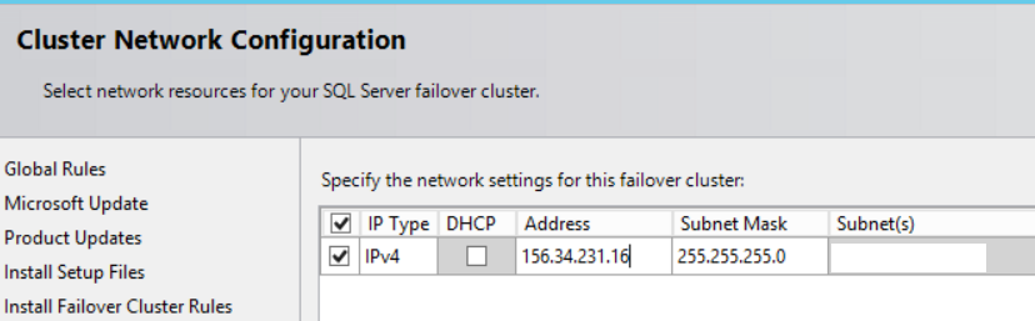
In the next screen, we select IPv4. In the Address field, we enter the IP that is not used by another application. This IP is the IP of the networkname that we defined at the beginning of the installation. In our example, we gave the name SQLCluster.This IP can also be called virtual IP. Your IP must be on the same subnet as physical IPs.
For example, if the IP of SQLNODE01 is 156.34.231.11, your virtual IP might be 156.34.231.16, but not 156.34.240.16. Only the last digit may be different. Your network group will make the necessary adjustments. Click Next to proceed.
In the next screen, we will determine the service accounts that SQL Server Agent and SQL Server Database Engine will use. Since we are going to install the cluster, we will authorize a user defined in the active directory. For example, “domainname\username”.
We select the user from active directory by clicking Browse for SQL Server Agent and SQL Server Database Engine as follows. You need to set Startup types automatically.

We go to the Collation tab and choose the collation we want. You can find detailed information about Collation in the article “How to Create a Database on SQL Server“. For more detailed information, you should write collation to our search section. We are usually set as Turkish_CI_AS in Turkey. You can set as follows.
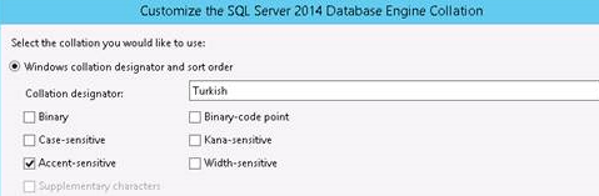
Click Next to proceed.
On the next screen, we will set the connection type to the database. There will be two options.
Windows Authentication mode:
You can only login with the active directory user or with a windows user defined on the local server. In this authentication mode, you can login to the SQL Server without entering password by using the user you have logged into windows. The user you are logging on to windows must be authorized on SQL Server. You cannot login with SQL Authentication.
SQL Authentication is an authentication mode that a user created on SQL Server connects to the sql server.
Mixed Mode:
It means that you can log in with both windows authentication and sql authentication. If you select this option, you need to enter a password and confirm it as you see in the screenshot below. This password will be set as the sa password of the instance to be installed.
You need to click “Add Current User” in the field that says “Specify SQL Server Administrator”. In this way, you will give the sysadmin permission to your user.
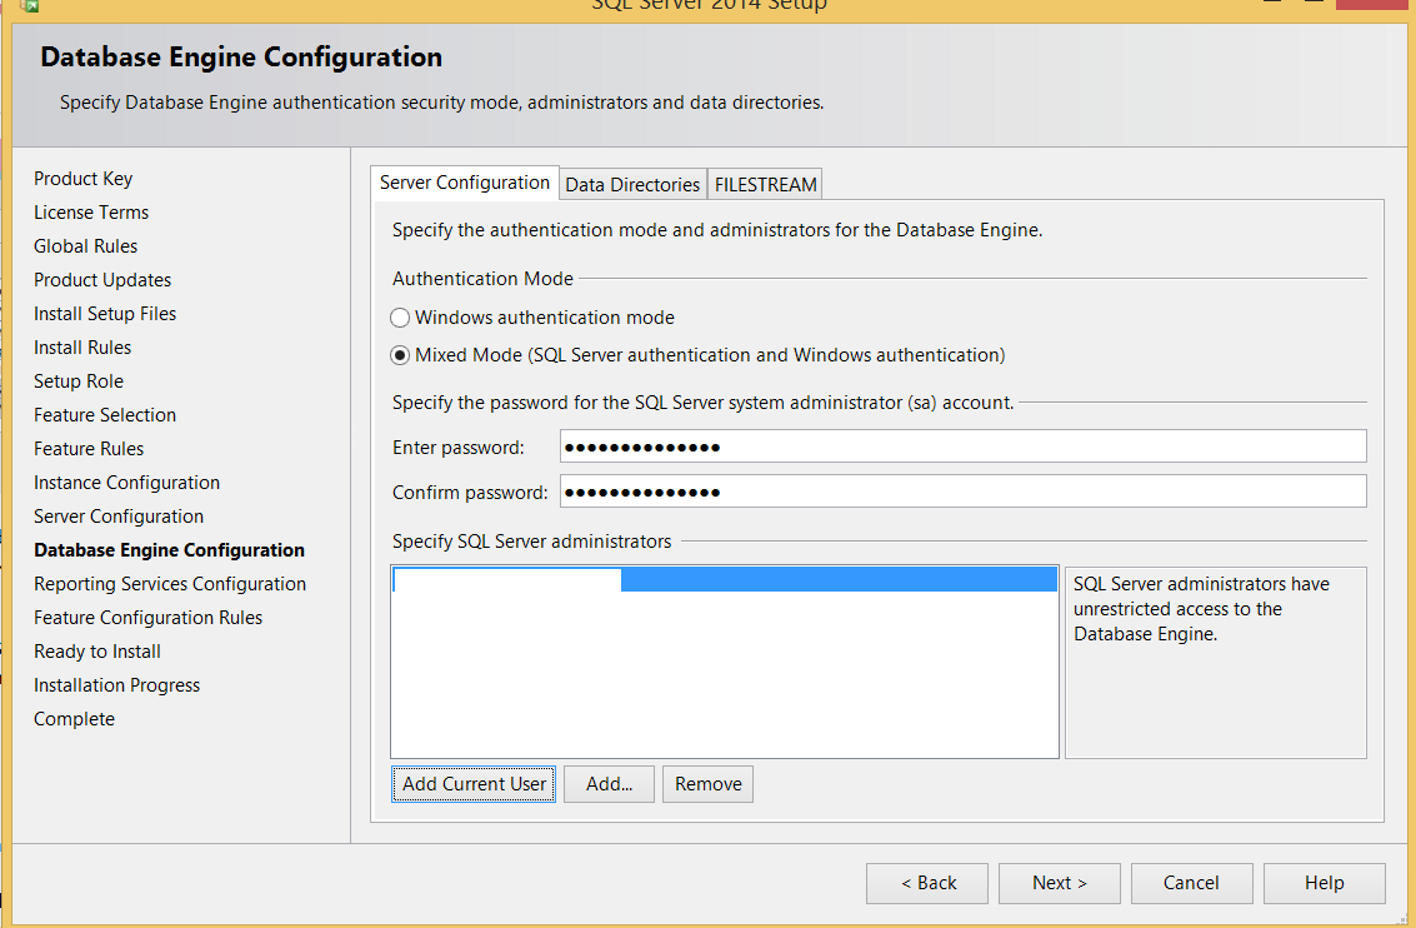
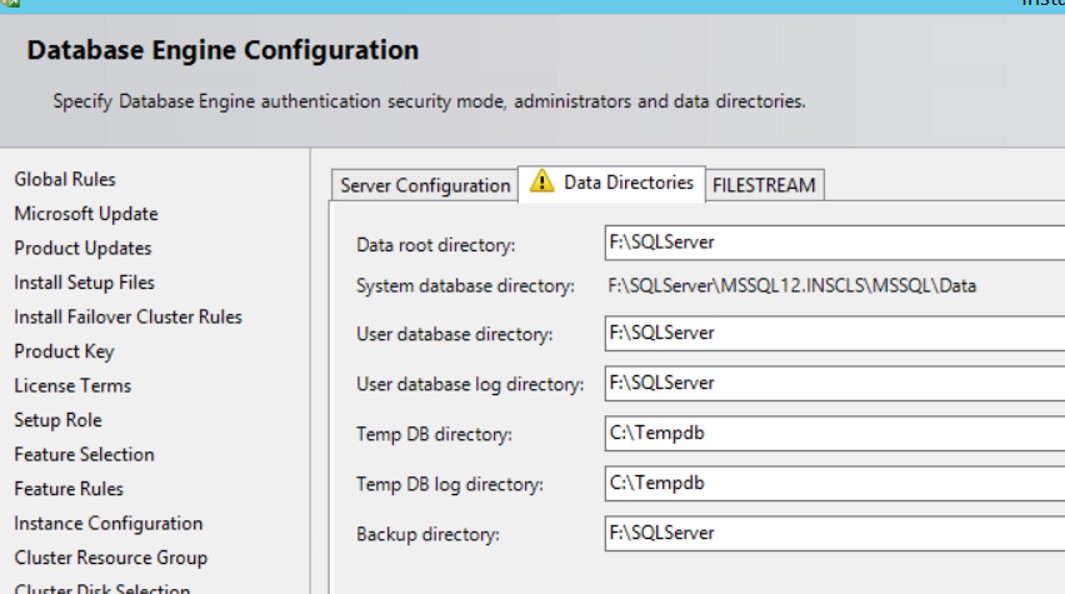
You need to switch to Data Directories tab before clicking Next.
| Data Root Directory | This section contains the path information to install SQL Server. I recommend that you do not change the default value. Of course if your system crashes, your system databases will be gone. Therefore, you should always take backups regularly and set up a system to let you know when backup is failed. According to some people, it may make more sense to create Data Root Directory on a disk that is different from the operating system. So here I am using the default settings. |
| User database directory | This section contains the information of the path where the data file(mdf) is created by default during the initial creation. Of course if your system crashes, your system databases will be gone. Therefore, you should always take backups regularly and set up a system to let you know when backup is failed. According to some people, it may make more sense to create Data Root Directory on a disk that is different from the operating system. So here I am using the default settings. |
| User database log directory | This section contains the information of the path where the log file(ldf) is created by default during the initial creation. Of course if your system crashes, your system databases will be gone. Therefore, you should always take backups regularly and set up a system to let you know when backup is failed. According to some people, it may make more sense to create Data Root Directory on a disk that is different from the operating system. So here I am using the default settings. |
| Temp DB directory | This section contains the information of the path where the tempdb data file is created. The Tempdb can be held on the local disk for the Server Failover Cluster. That’s what we’re gonna do. |
| Temp DB log directory | This section contains the information of the path where the tempdb log file is created. The Tempdb can be held on the local disk for the Server Failover Cluster. That’s what we’re gonna do. |
| Backup directory | This section contains the information of the backup path by default. |
Below you can see how we set. “F:\” is the disk we have defined above with the name DataDisk.
It gives a warning about Tempdb as follows.
You have specified a local directory C:\Tempdb as the tempdb data or log directory for a SQL Server cluster. To avoid possible failures during a failover, you must make sure that the same directory exists on each cluster node and grant read/write permission to SQL server service.
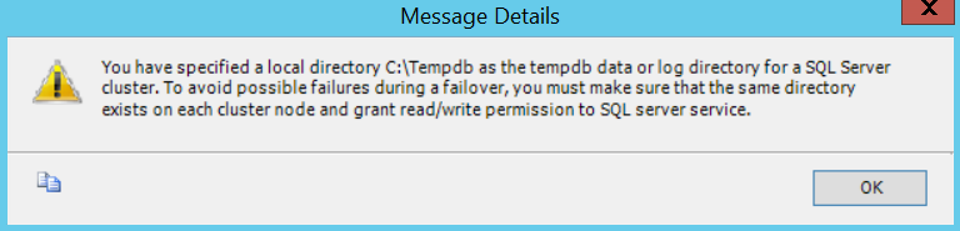
That’s why we need to authorize the SQL Server Service account for the Tempdb folder on two nodes.
You can give this authorization as follows.
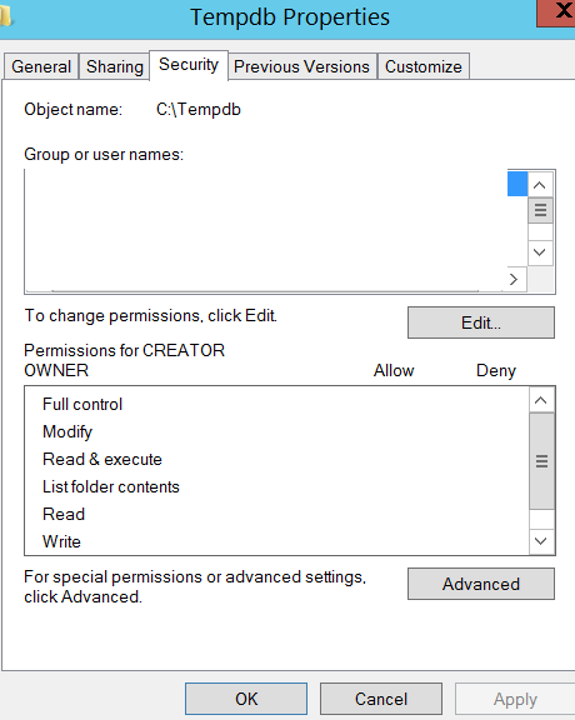
Right-click the tempdb folder to click properties.
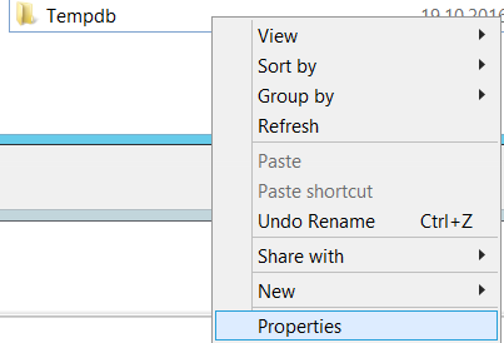
Then come to the Security tab and click Edit.
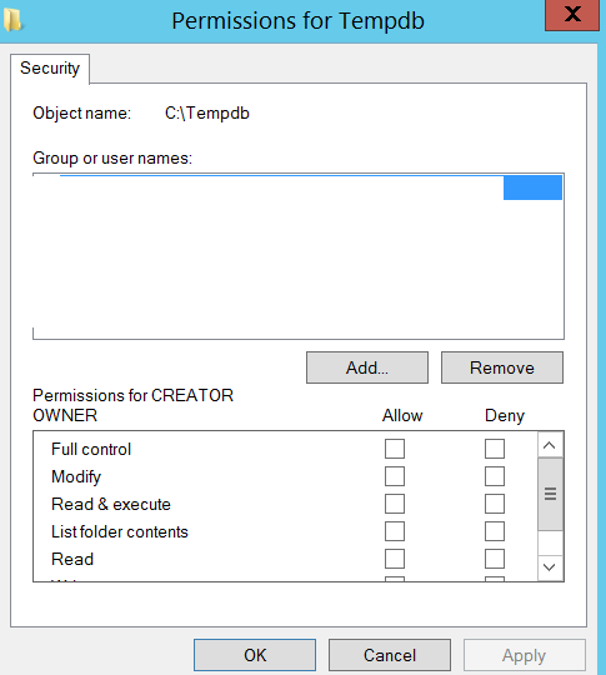
On the next screen we click Add as follows.
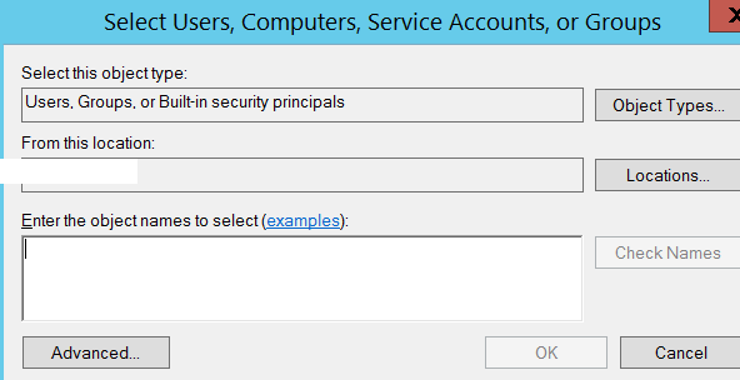
On the next screen, you must first select your own Active Directory under Entire Directory by clicking on Locations. For example, “mydomain.local”.
You must enter the name of the sql server service account that is defined in the active directory on “enter the object names to select”.
Then checknames and click ok.
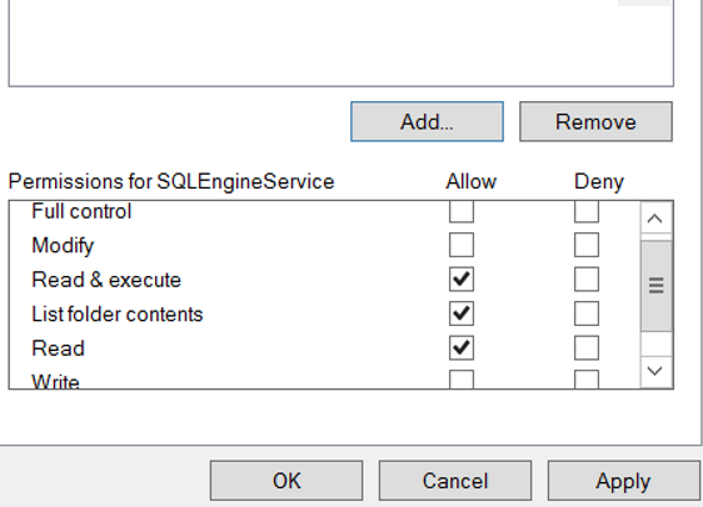
On the next screen, you should click OK when Read and Write is selected from the following screen while your corresponding user is selected.
Microsoft recommends that we put data, log, and tempdb files on separate disks. Also some databases can be very large and may need more IO. Therefore, you may need to split the database into file groups and create more than one data file and spread these files onto the disks.
You can find detailed information in the article “How To Create a Database on SQL Server“. You can find more information about Tempdb in my article, “SQL Server System Databases“.
Go back to the installation and click Next and Finish to complete the installation on the 1st server and switch to the 2nd server.
On the second server, right click on the setup file and click Run As Administrator to start the installation.
Go to the Installation tab and click Add node to a SQL Server failover cluster.
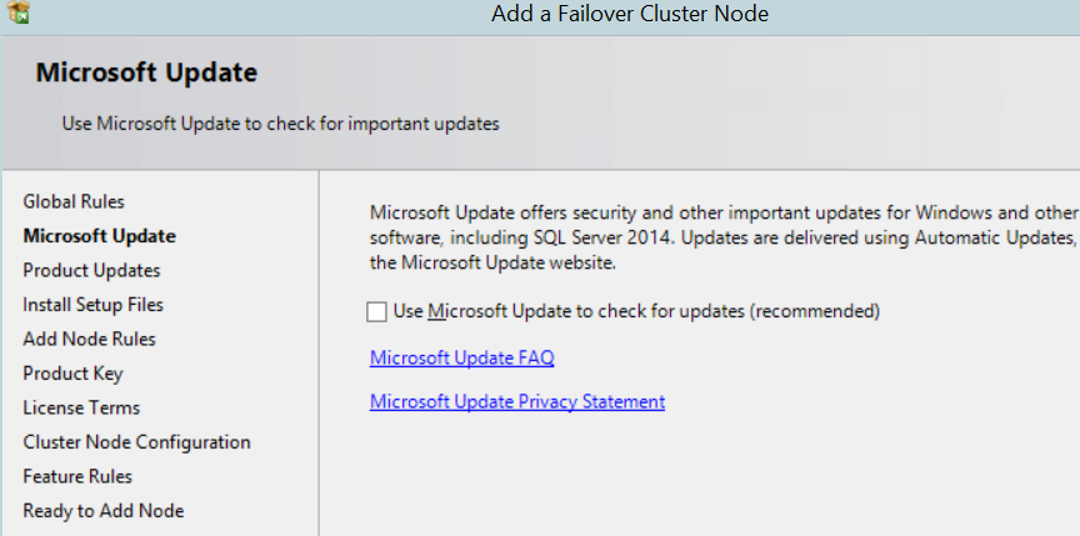
The next screen asks if we have an update in the installation file. If we click on “Use Microsoft Update to check for updates (recommended)”, it checks for updates. As the server we are installing is closed to the internet and we can do this update later, we are proceeding without clicking.
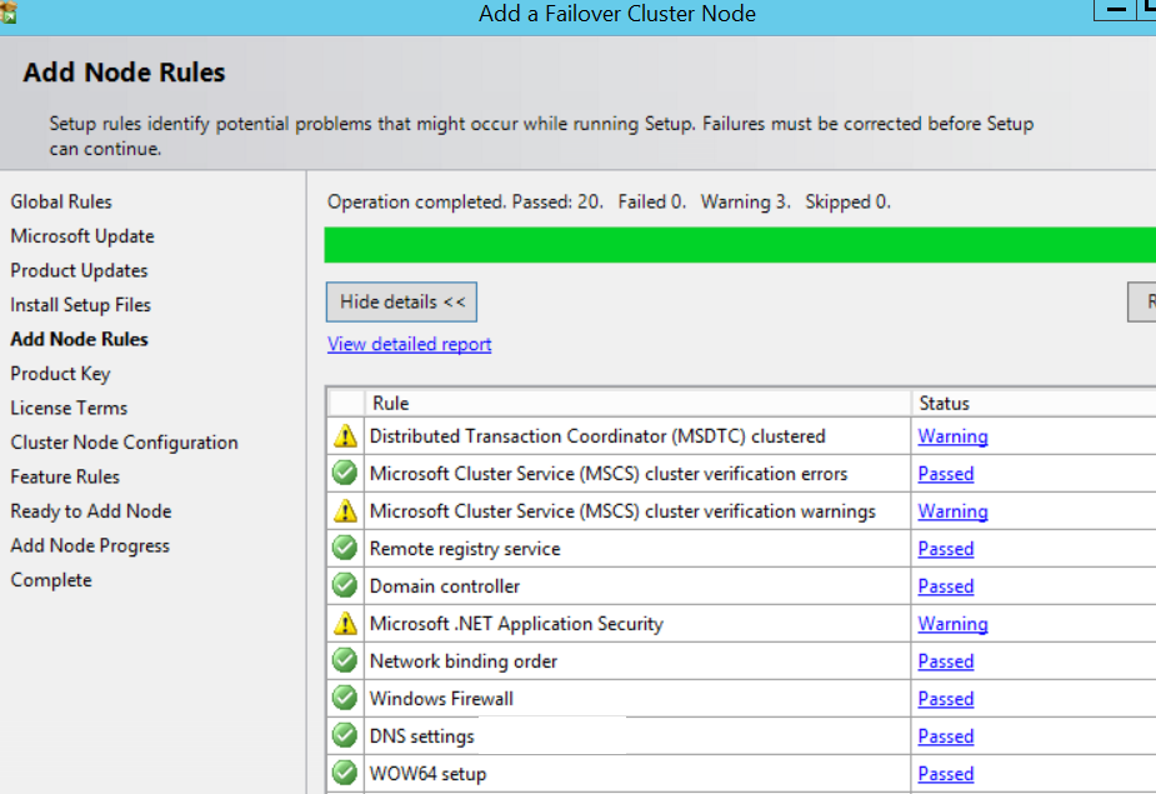
The next screen makes the necessary checks. We receive the same warnings we received when installing the first node. Click Next to continue.
The next screen asks for the product key. We repeat the process we did on the first server.
In the next screen, mark I accept the license terms and click next.
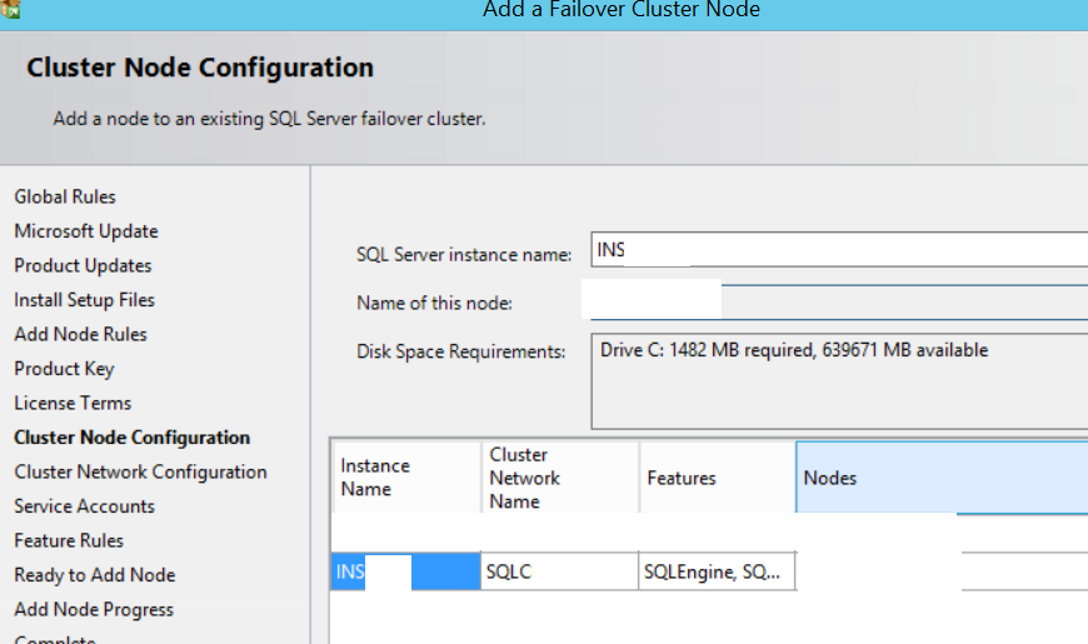
In the next screen, we need to select the instance we installed on the first server from the following SQL Server instance name. After making the required selection, we continue by clicking next.
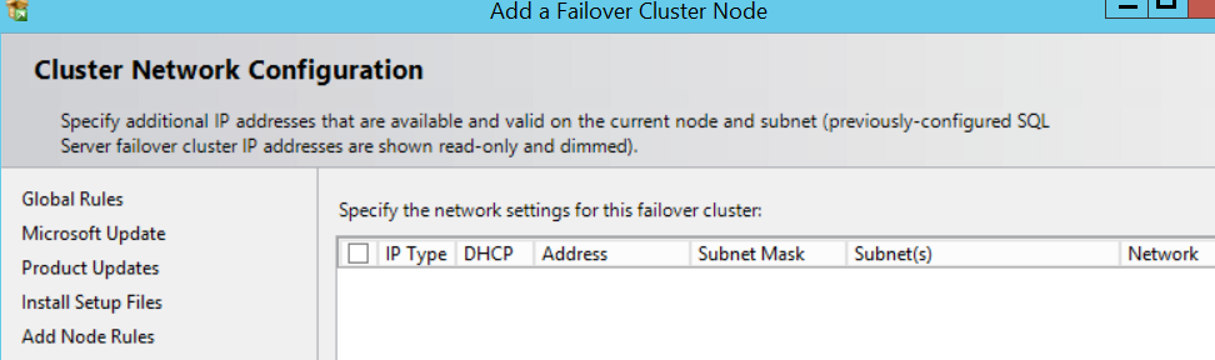
In the next screen you will see cluster network configuration as follows. When you click the box on the left, you will see the configuration you made on the first server. We’re proceeding by clicking Next.
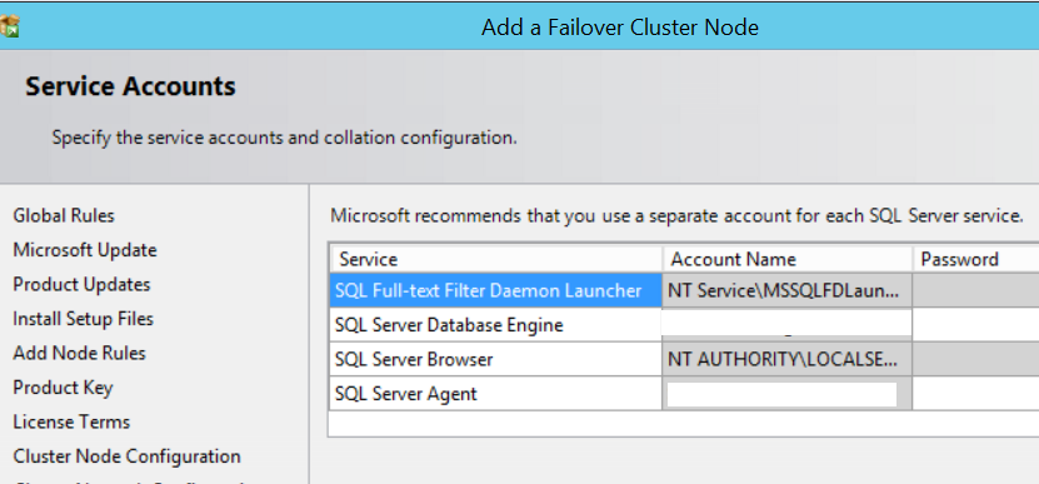
On the next screen we will determine the sql server service accounts. The accounts that we set on the first server for the SQL Server Database Engine and the SQL Server Agent service accounts will be listed. We’re just writing their password, and we’re proceeding by clicking next.
On the last screen, we complete the installation by clicking install. You must perform the configurations in the article “How To Configure SQL Server After Installation” for both servers.
After these operations are completed, you can connect with one of the following methods.
ServerName\InstanceName
or
ServerName,port
or
IP\InstanceName
or
IP,port
![]()