 Database Tutorials MSSQL, Oracle, PostgreSQL, MySQL, MariaDB, DB2, Sybase, Teradata, Big Data, NOSQL, MongoDB, Couchbase, Cassandra, Windows, Linux
In this article I will tell the installation of Kibana on Centos 7. Before reading this article, I suggest you read the following article about Kibana.
Installation Steps
Java Installation
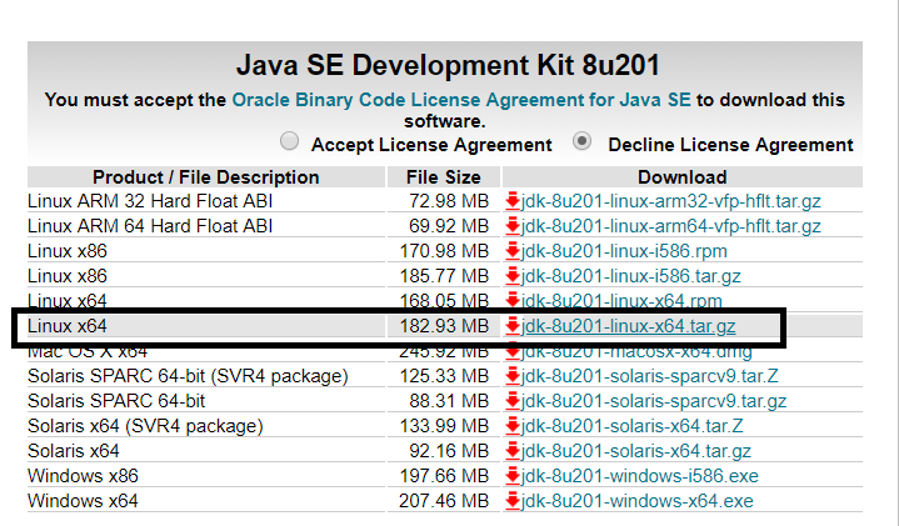
First, we are installing java. To install Java you must download the file that is compatible with your system from the link below. If you have already installed, you can skip this step.
https://www.oracle.com/technetwork/java/javase/downloads/jdk8-downloads-2133151.html
Since we are going to install on 64 bit linux system, we are downloading the file below.
Then we create a folder like below to install java. The Java installation is done under the usr/bin folder by default. I’ll make installation in the folder I’ll create below for easier use.
as root:
1 | mkdir /opt/jdk |
We extract the downloaded java files into the /opt/jdk directory and ensure that the java works from this directory.
1 | tar -zxf server-jre-8u161-linux-x64.tar.gz -C /opt/jdk |
1 | update-alternatives --install /usr/bin/java java /opt/jdk/jdk1.8.0_161/bin/java 100 |
1 | update-alternatives --install /usr/bin/javac javac /opt/jdk/jdk1.8.0_161/bin/javac 100 |
We set JAVA_HOME using the following commands.
1 2 | export JAVA_HOME=/opt/jdk/jdk1.8.0_201/ export PATH=$JAVA_HOME/bin:$PATH |
Kibana Installation
You can download the installation file from the link below.
https://www.elastic.co/downloads/kibana

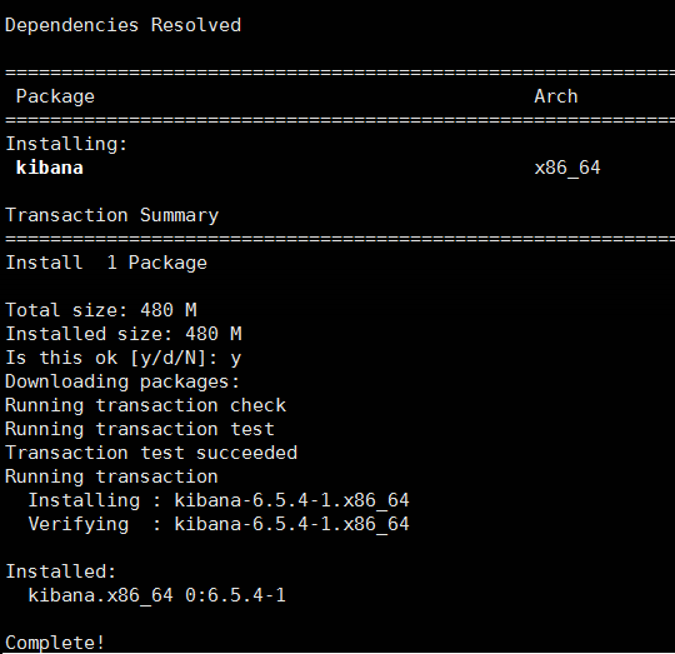
Since we will install on CENTOS, we download the RPM package and copy it to the server.
You can go to the directory where you copied the RPM package on the server and install Kibana using the following command.
as root:
1 | yum install kibana-6.5.4-x86_64.rpm |
If you have internet access via the server, you can perform Kibana installation as below.
1 | yum install https://artifacts.elastic.co/downloads/kibana/kibana-6.5.4-x86_64.rpm |
Necessary Configurations After Installation
Enable kibana service
We enable kibana service using the command below.
1 | systemctl enable kibana.service |
![]()
We are editing the kibana.yml file which is the elasticsearch configuration file using the command below.
1 | vi /etc/kibana/kibana.yml |
After opening the file, we configure it as follows. If there is # at the beginning of the line, this line is a comment line or contains an inactive configuration information.
Note: I recommend that you read the lines beginning with #. Because I’ve written some notes.
Do not copy the below yml file. Just change the necessary parameters according to your system.
1 2 3 4 5 6 7 8 9 10 11 12 13 14 15 16 17 18 19 20 21 22 23 24 25 26 27 28 29 30 31 32 33 34 35 36 37 38 39 40 41 42 43 44 45 46 47 48 49 50 51 52 53 | # Kibana is served by a back end server. This setting specifies the port to use. #This is my note->your kibana port server.port: 5601 # Specifies the address to which the Kibana server will bind. IP addresses and host names are both valid values. # The default is 'localhost', which usually means remote machines will not be able to connect. # To allow connections from remote users, set this parameter to a non-loopback address. #This is my note->Set Your Kibana IP server.host: "your_kibana_ip" # Enables you to specify a path to mount Kibana at if you are running behind a proxy. # Use the `server.rewriteBasePath` setting to tell Kibana if it should remove the basePath # from requests it receives, and to prevent a deprecation warning at startup. # This setting cannot end in a slash. #server.basePath: "" # The maximum payload size in bytes for incoming server requests. #server.maxPayloadBytes: 1048576 # The Kibana server's name. This is used for display purposes. #server.name: "your-hostname" # The URL of the Elasticsearch instance to use for all your queries. elasticsearch.url: "http://your_elasticsearch_master_ip:elasticsearch_master_port" # When this setting's value is true Kibana uses the hostname specified in the server.host # setting. When the value of this setting is false, Kibana uses the hostname of the host # that connects to this Kibana instance. #elasticsearch.preserveHost: true # Kibana uses an index in Elasticsearch to store saved searches, visualizations and # dashboards. Kibana creates a new index if the index doesn't already exist. #kibana.index: ".kibana" # The default application to load. #kibana.defaultAppId: "home" # If your Elasticsearch is protected with basic authentication, these settings provide # index at startup. Your Kibana users still need to authenticate with Elasticsearch, which # is proxied through the Kibana server. #This is my note->the below user is the user that connect to elasticsearch from kibana. You should use search guard or xpack for #user management in Elasticsearch. Otherwise, anyone who has access to the master node through #the corresponding port can access to elasticsearch. you should read the article named "How To #Install Searchguard For Elasticsearch and Kibana(Managing Multiple Indice In Elasticsearch #Seperately and Password Protection on Elasticsearch)" # If you add the below two line and do not install search guard plugin for kibana, you may receive an error when #you try to start the kibana. That's why if you want to add below two lines, install search guard plugin for kibana. elasticsearch.username: "kibanaserver" elasticsearch.password: "kibanaserver" # These settings enable SSL for outgoing requests from the Kibana server to the browser. #server.ssl.enabled: false #server.ssl.certificate: /path/to/your/server.crt #server.ssl.key: /path/to/your/server.key #This is my note->If you are not going to use xpack, you should set it to false as follows. xpack.security.enabled: false xpack.spaces.enabled: false |
Start the Kibana
Then, we start the kibana service and check the status.
1 | systemctl start kibana |
Check the service status
1 | systemctl status kibana |
When you check the status of the service, you may encounter an error as follows.
FATAL Error: EACCES: permission denied, rmdir ‘/usr/share/kibana/optimize/bundles/src/ui’

In this case, run the following commands to restart the kibana service.
1 2 3 | rmdir /usr/share/kibana/optimize/bundles/src/ui chown -R kibana:kibana /etc/kibana/ chown -R kibana:kibana /usr/share/kibana/ |
Then, you may encounter another error as follows.
Browserslist: caniuse-lite is outdated. Please run next command npm update caniuse-lite browserslist
We’re running the following command as it tells us, and then we execute the command below and restart it.
1 | npm update caniuse-lite browserslist |
1 | npm update autoprefixer |
1 | systemctl restart kibana |
![]()
Open Kibana
After Kibana installation is completed, you can open a browser and connect as follows.
IP:Port

![]()