In this article, we will install logstash on Ubuntu Server 19.10 server with 10.250.2.222 ip address. Then we will send a dummy data from logstash to elasticsearch running on the server with the IP address 10.250.2.221, which we have previously installed. Finally, we will check that this data has been successfully indexed on elasticsearch.
The installation of Logstash is quite simple, which is very similar to the elasticsearch installation steps we installed earlier. Let’s start the installation of logstash right away.
Preparations
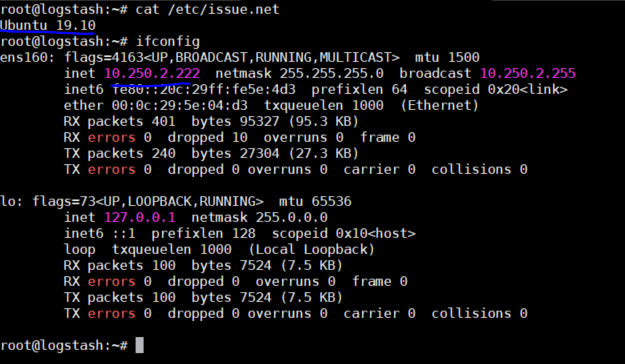
First of all, let’s check the version and ip address of the server we are on;
1 2 | root@logstash:~# cat /etc/issue.net root@logstash:~# ifconfig |

We need java for Logstash to work. Let’s install java jdk now.
1 | root@logstash:~# apt-get install openjdk-8-jre-headless -y |

Let’s add ELK repo. (Since we made our installations according to 6 versions, pay attention whether you add the correct repo or not.)
1 2 | root@logstash:~# wget -qO – https://artifacts.elastic.co/GPG-KEY-elasticsearch | sudo apt-key add – root@logstash:~# echo “deb https://artifacts.elastic.co/packages/6.x/apt stable main” | sudo tee -a /etc/apt/sources.list.d/elastic-6.x.list |

Install Logstash on Ubuntu
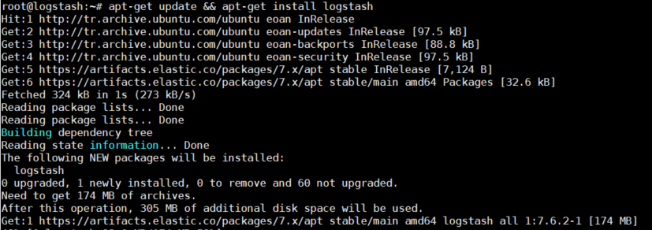
Now we can install logstash.
1 | root@logstash:~# apt-get update && apt-get install logstash |

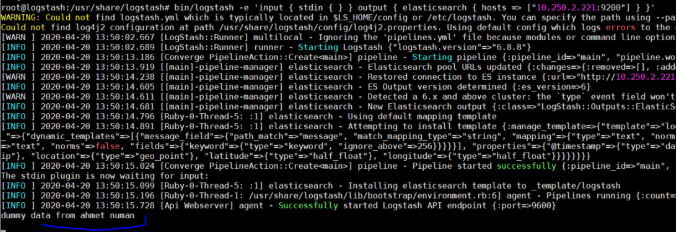
Before starting logstash service, let’s manually send a dummy data from logstash to elasticsearch running on port 9200 of 10.250.2221 ip address and observe that this data is indexed in elasticsearch.
Logstash was installed under the logstash /usr/share/logstash directory. Let’s go here manually and check our dummy data send to elasticsearch.
1 2 | root@logstash:~# cd /usr/share/logstash/ root@logstash:/usr/share/logstash# bin/logstash -e ‘input { stdin { } } output { elasticsearch { hosts => [“10.250.2.221:9200”] } }’ |

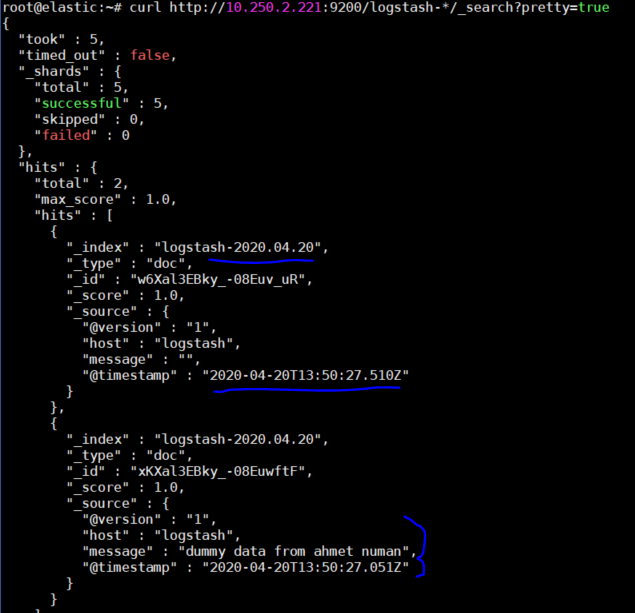
Let’s run the following command by connecting to elasticsearch to see dummy data we sent over logstash is indexed in the logstash index on elasticsearch.
1 | root@elastic:~# curl http://10.250.2.221:9200/logstash-*/_search?pretty=true |

We successfully sent data to elastcisearch manually via logstash. Now we can enable and start logstash services.
1 2 | root@logstash:/usr/share/logstash# systemctl start logstash.service root@logstash:/usr/share/logstash# systemctl enable logstash.service |

In the next article, I will install kibana on ubuntu server and I will show you step by step how to present this dummy data from the web interface to the end user.
You can read our other articles in this serie from the links below.
Install Elasticsearch on ubuntu server 19.10
Install Logstash on Ubuntu Server 19.10
Install Kibana on Ubuntu Server 19.10
Install Winlogbeat on Windows Server 2019
Configure Logstash to Read log files Windows
Create Kibana Dashboards For Windows Event Logs
![]()
 Database Tutorials MSSQL, Oracle, PostgreSQL, MySQL, MariaDB, DB2, Sybase, Teradata, Big Data, NOSQL, MongoDB, Couchbase, Cassandra, Windows, Linux